How to Restore Missing Stereo Mix on Windows?
The ‘Stereo Mix‘ option, used for recording sound directly from your computer, sometimes disappears from Windows recording devices, causing recording issues. This usually means the feature is either hidden or turned off in your sound settings. The most common reason for this is ‘Stereo Mix’ being turned off by default.
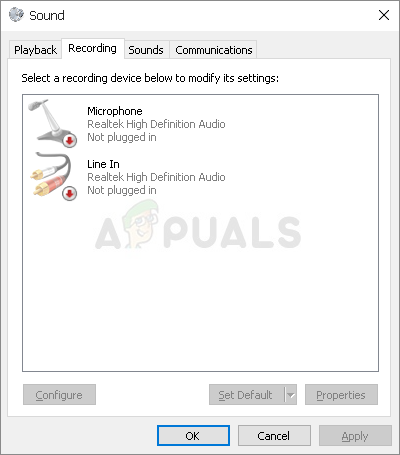
Other reasons could include outdated or incompatible audio drivers, hardware limitations, or restrictions in settings.
In this article, we will discuss different ways to solve this error.
1. Make Sure Your Microphone is Available for Access
Allowing apps and system settings to access the microphone can reveal hidden audio features. When microphone permissions are turned on, Windows enables more functions, which can include displaying extra recording options in your sound settings.
- Open the Settings app by clicking the cog icon in the Start menu or search for it.
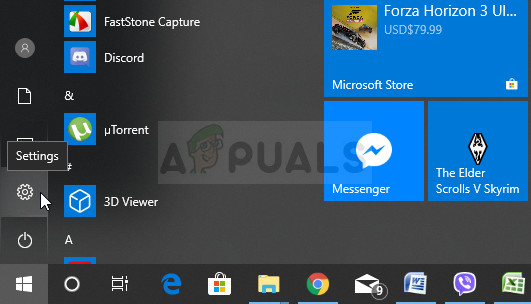
Opening Settings from the Start menu - Go to the Privacy section. On the left, find App permissions, then click Microphone.
- Ensure Microphone access for this device is enabled. If not, click Change and enable it.
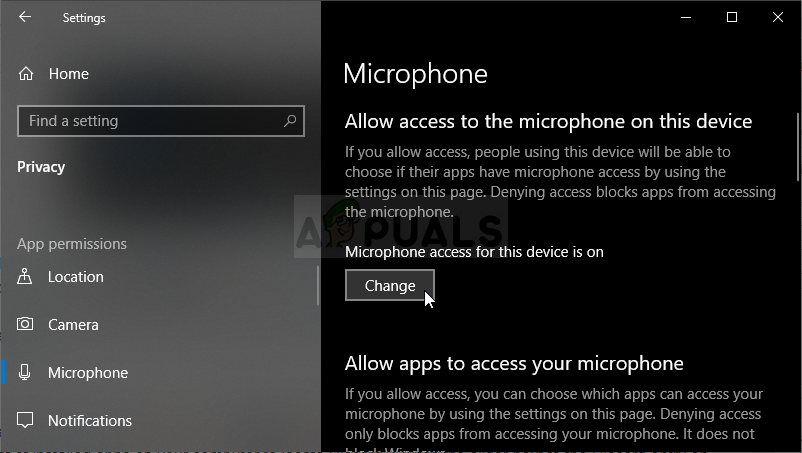
Providing microphone access - Turn on “Allow apps to access your microphone.” Scroll through the app list and enable access for desired apps.
- Restart your computer to check if the issue is resolved.
2. Show Disabled Devices
Sometimes, key audio features like ‘Stereo Mix’ are hidden instead of missing, especially when they’re turned off by default. Making these hidden devices visible can help you check if ‘Stereo Mix’ is on your system. This way, you can see if it’s just turned off rather than missing because of hardware or driver problems.
- Press the Windows key and type Sound settings. Select Sound settings from the results.
- In the Sound settings window, scroll to the Input section and click on Manage sound devices.
- Under the Disabled section, find Stereo Mix and click Enable.
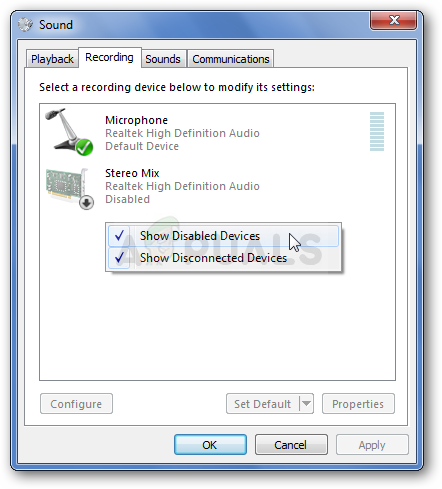
Stereo Mix showing up as disabled - Test it to confirm functionality!
3. Update Your Audio Driver
Updating your audio driver can restore missing features like ‘Stereo Mix’ by ensuring it works with the latest system updates. An old or incompatible driver might hide or disable some audio functions, so updating it can bring back missing options and improve audio performance.
- Click the Start menu at the lower-left corner of the screen, type “Device Manager“, and select it from the list by clicking the first result.
- Alternatively, press the Windows Key + R to open the Run dialog box. Type “devmgmt.msc” and click OK to run Device Manager.

Running Device Manager - To update the driver for your headphones, expand the Sound, video and game controllers section. Right-click on your headphones and select Update driver.
- Choose “Search automatically for updated driver software” and wait to see if newer drivers are found.
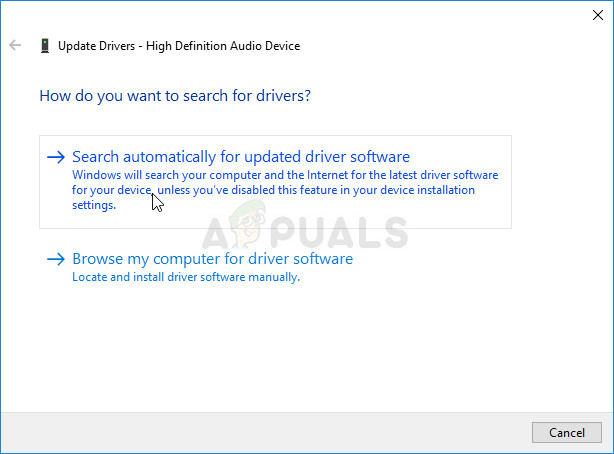
Search automatically for updated driver software - Check if your headphones appear under Playback devices in sound settings!
4. Enable Stereo Mix for Conexant HD Audio
For Conexant HD Audio users, turning on ‘Stereo Mix’ can help you record system audio. Conexant drivers might hide this option by default, but enabling ‘Stereo Mix’ in the sound settings will show it as a recording device, allowing you to easily capture audio directly from the system.
Note: If you cannot follow the steps below because you cannot find the file “CALCC2WA.inf_amd64_07118bd8a2180658,” then it may be that the file has a slightly different name on your PC. To find the file, please download the portable version of PSPad from (here) and execute the PSPad.exe file. It should look like this:
- Click Search.
- Select “Search / Replace in Files”.
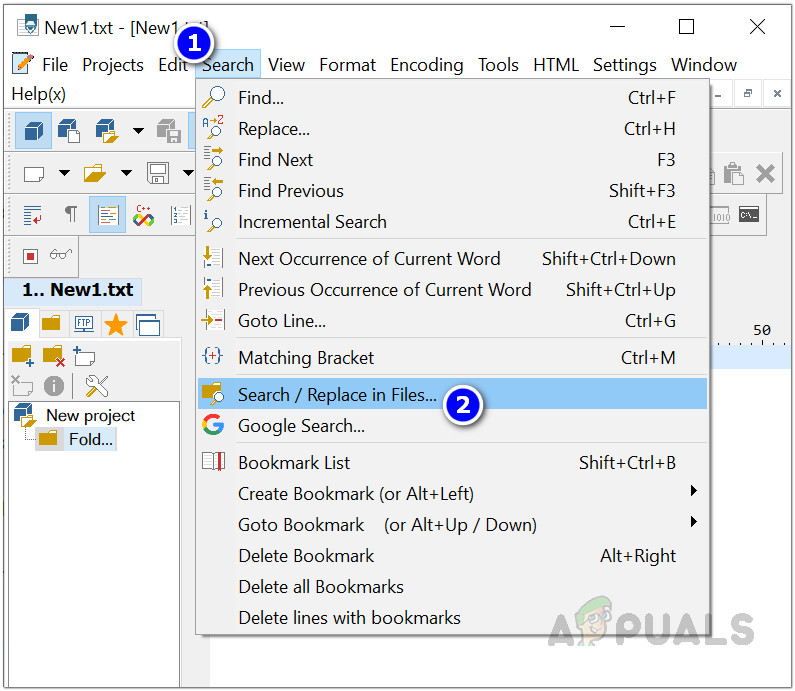
- In Text to Find, enter:
;HKR,%EPattributePath%\EpSettings\StereoMixEnable,Enable,1,01
- In Selected Directory, enter:
C:/Windows/System32/DriverStore/FileRepository/
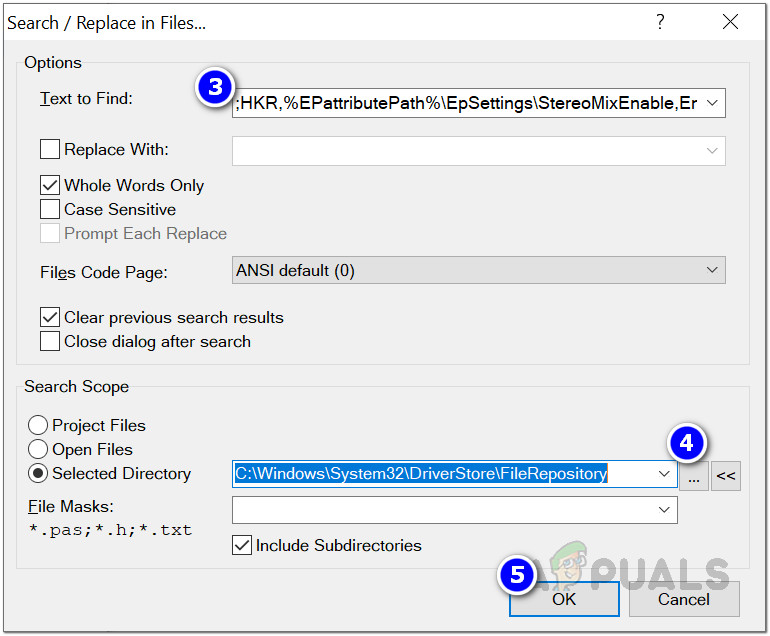
- Click OK to view the files with the specified string in the “Search in File Results” tab.
5. Enable Stereo Mix by Modifying Conexant HD Audio Configuration
Accessing the hidden Stereo Mix feature in Conexant HD Audio is a simple and effective task. By taking control and editing specific lines in the driver file, you’re turning on a setting that is normally switched off. This manual change directly enables Stereo Mix, adding it to the list of recording devices and letting you easily record system audio.
- Open any folder and click This PC from the left menu.
- Go to:
C:\Windows\System32\DriverStore\FileRepository\CALCC2WA.inf_amd64_07118bd8a2180658
- Right-click ‘CALCC2WA.inf’, select Properties, go to the Security tab, and click Advanced.
- In “Advanced Security Settings,” click Change next to the “Owner:” label.
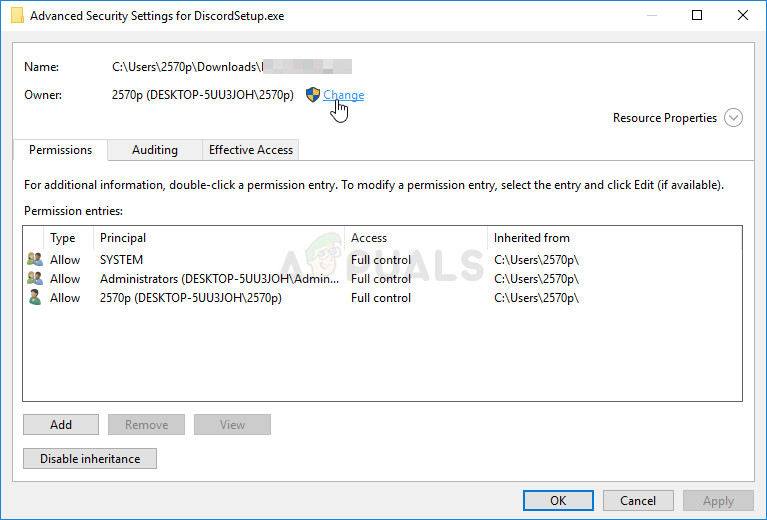
Changing the owner of the file - Select your user account using the Advanced button or type it into ‘Enter the object name to select’, and click OK. Add Everyone.
- Click Add, then Select a principal, choose your account or type it in, and click OK. Add Everyone.
- Under Basic permissions, select Full control.
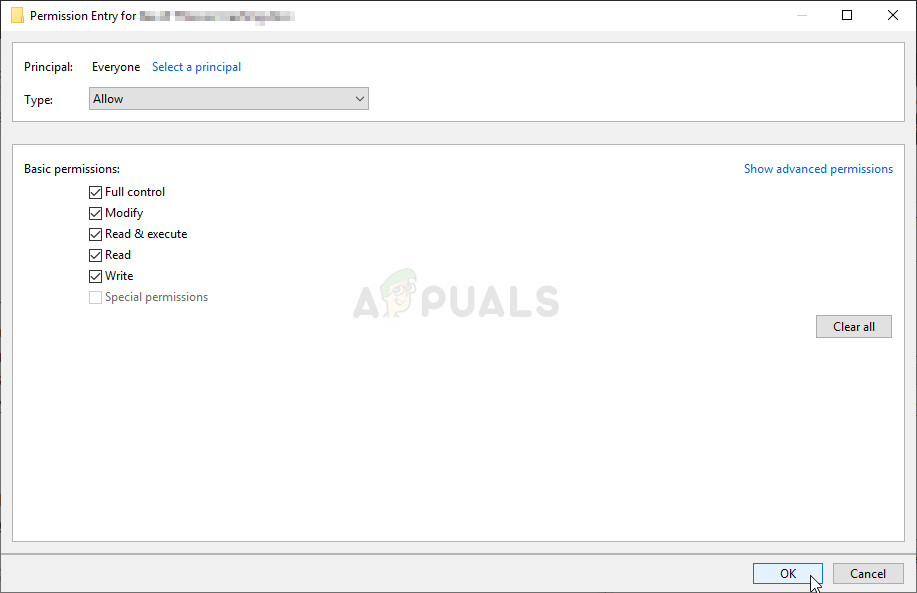
Providing full access - After changing ownership and permissions, right-click ‘CALCC2WA.inf’, open with Notepad, and use Ctrl + F to find ‘stereo’.
- Locate these lines and delete the semi-colons:
;HKR,%EPattributePath%\EpSettings\StereoMixEnable,Enable,1,01
;HKR,%EPattributePath%\EpSettings\StereoMixEnable,MixAssocSeq,1,E0,E0
;HKR,%EPattributePath%\EpSettings\StereoMixEnable,MuteGainSettings,1,00,00
- Save with Ctrl + S and exit Notepad.
- Open Device Manager by typing “Device Manager” in the Start menu.
- Alternatively, use Windows Key + R, type “devmgmt.msc”, and click OK.

Running Device Manager - Expand Sound, video and game controllers, right-click Conexant HD Audio, and select Uninstall device.
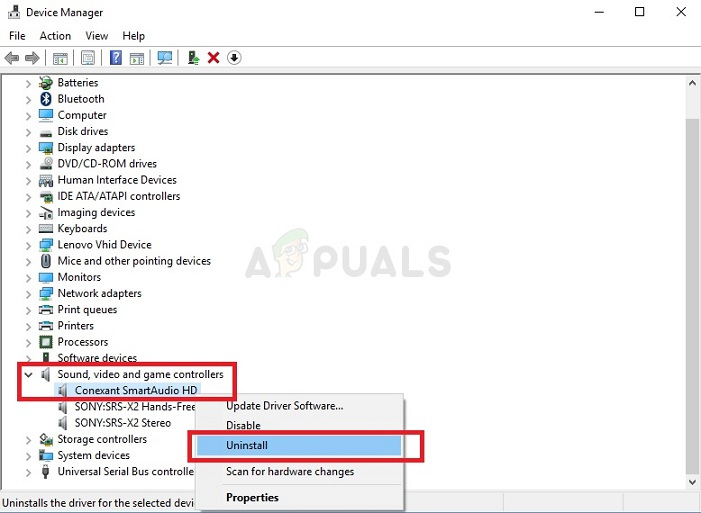
Uninstalling Conexant Audio - Confirm the uninstallation but don’t check “Delete the driver software for this device.”
- Restart your computer and check if the Stereo Mix feature is available.


