How to Remove DNS Unlocker
DNS Unlocker is an adware program that has spread rapidly due to the manufacturer’s intelligent integrations with third-party software that allow this adware to be installed automatically without the user’s consent, and intricate maneuvers designed to deceive people by misleading them.
What this basically does is generate revenue and bring in money for the ‘creators’ by showing unwanted ads and pop-ups, and redirecting the user to the site that fits the manufacturer’s interest.
The reason I am telling you this is to let you know how the internet is misused. You may encounter things targeted at you that will prompt you to download programs. For instance, you might visit a video site where the video claims it needs a plugin or codec to play, or other sites that lock content, requiring you to take action before they will display the content.
Thus, when you see such sites, or ads, immediately close the site because it’s of no use and will only harm the PC.
On a side note, for these types of malware, “Malwarebytes” works best. They offer two variations: one is free, and the other is paid. If you spend money on antivirus software, you should consider sparing $25 on this program as well because it can protect you in real-time. This means that when malware/adware is injecting itself into your system, you will be notified immediately.
Click here to get it. If you’re not interested, simply proceed with the following steps.
In this guide, I am listing the steps I have taken to successfully remove DNS Unlocker from a couple of computers.
I am uninstalling DNS Unlocker.
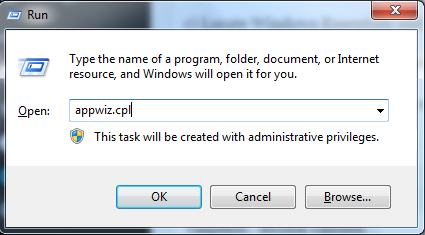
1. Hold the Windows key and press ‘R’ to open the run dialog.
2. Type appwiz.cpl and Click OK.
3. From the list of programs, locate DNS Unlocker.
4. Double click on it to uninstall it.
1. Right click the Windows Start button from the bottom left corner and choose Control Panel
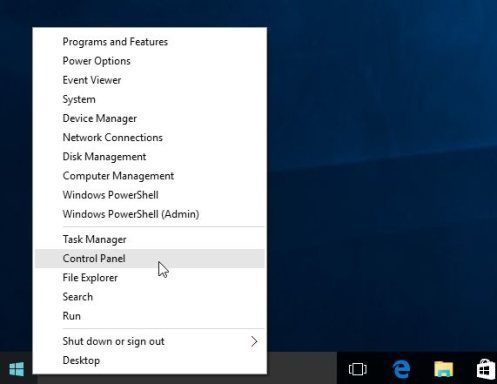
2. Select ‘Programs,‘ then ‘Uninstall a Program,‘ find DNS Unlocker, and double-click on it to uninstall.
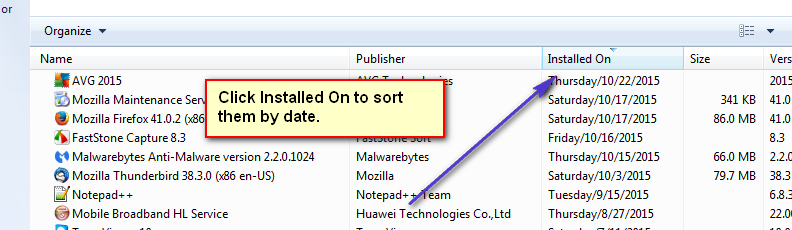
DNS Unlocker might be installed under a different name. If that’s the case, inspect the list of recently installed programs and uninstall any you don’t recognize. Here’s how to do it: when you’re in the Control Panel, click on ‘Installed On’ to sort programs by date.
If you are unable to remove DNS Unlocker or any other recently installed program, then use RevoUninstaller (trial) to completely remove it. You will also have the option to remove it forcefully. You can download it from this link.
Run AdwCleaner to remove DNS Unlocker’s registry values, traces, and browser infections.
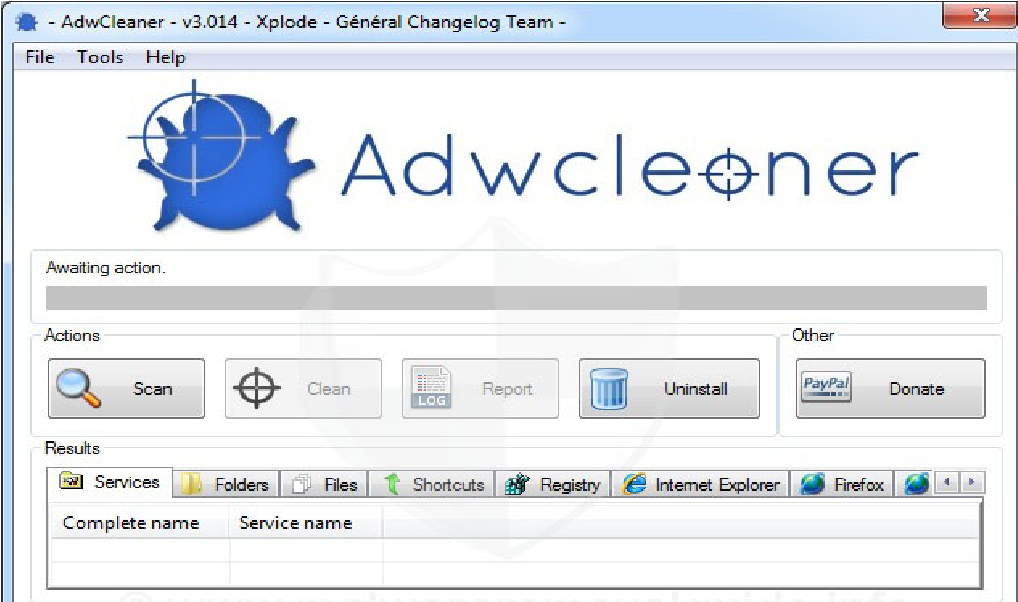
Now, assuming that the program you’ve identified is uninstalled, go to this site and download AdwCleaner. Once it has been downloaded, run and open it. You will see its control panel (as seen in the image below).
Bookmark this page because you will have to come back to it after the reboot (needed) by the AdwCleaner program.
First, click the ‘Scan’ button, then wait a few minutes until the ‘Clean’ button becomes clickable. Once it is clickable, click on it and wait for it to clean up the files it has found. Then, proceed with the instructions from AdwCleaner displayed on the screen to reboot. After the reboot finishes, we will reset the browsers.
Reset your web browsers
If you are using Windows 10 and Edge, then follow the steps here to reset Edge; otherwise, select the tab for the browser you are using.
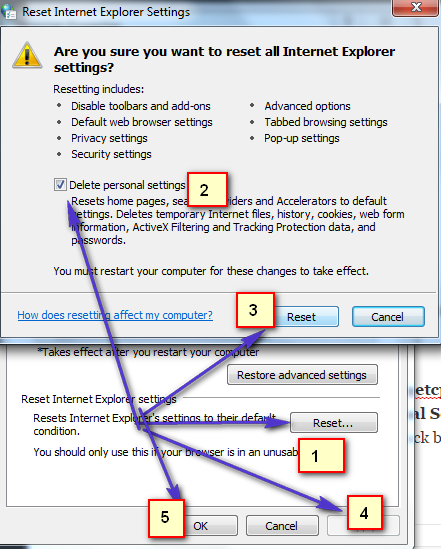
To reset Internet Explorer, hold the Windows key and press R.
This will open the run dialog. In the run dialog, type ‘inetcpl.cpl’ and proceed to the Advanced Tab. From the Advanced Tab, choose ‘Reset’, and select ‘Delete Personal Settings‘, then hit the ‘Reset’ button again. This won’t delete your bookmarks. However, you’ll need to retrieve them either by pressing CTRL + SHIFT + B or by navigating to the bookmarks menu.
Exit Google Chrome completely.
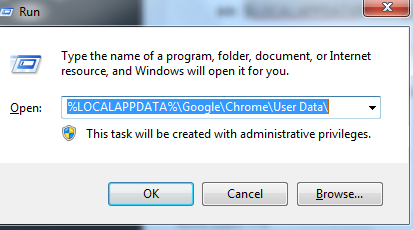
Press the Windows key + R to open the Run dialog box.
In the Run Dialog window that appears, enter the following in the address bar.
Windows Vista/ Windows 7/ Windows 8/ Windows 10/ Windows 10:
%LOCALAPPDATA%\Google\Chrome\User Data\
Locate the folder called “Default” in the directory window that opens and rename it as “Backup default.”
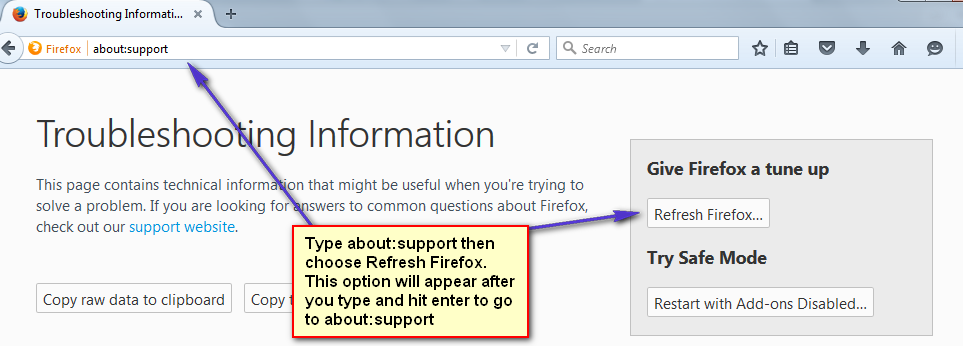
Try opening Google Chrome again. A new “Default” folder is automatically created as you start using the browser.[/tab] In the Firefox address bar, type ‘about:support’ and choose ‘Refresh Firefox,’ then select ‘Refresh Firefox’ again.”
After the reset has been done, we will now switch back to the correct DNS settings.
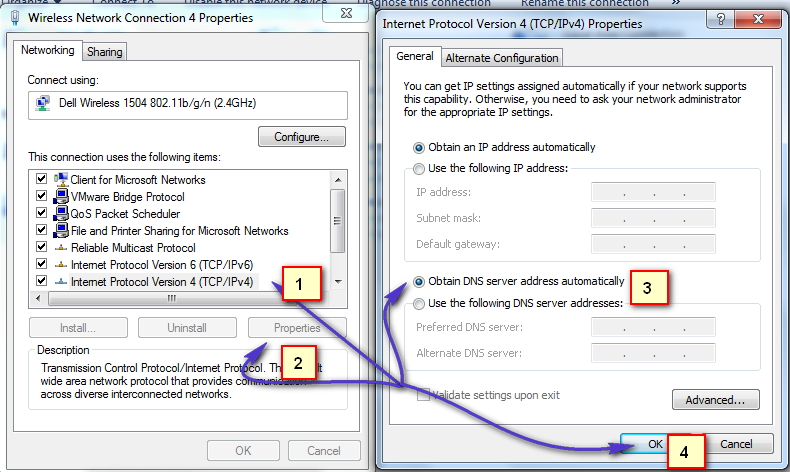
Restore your DNS Settings
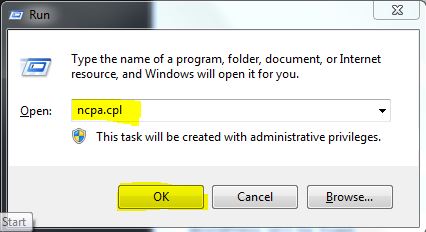
Hold Windows Key and Press R. Type ncpa.cpl and Click OK
Right-click on your network adapter and select Properties. Highlight ‘Internet Protocol Version 4 (TCP/IPv4)’ and choose Properties. Check the box for ‘Obtain DNS Server Address Automatically’. Click OK/Apply and Exit. This action will uninstall DNS Unlocker.