Fix: Personalized Settings not Responding
Task Manager is a part of the Windows that comes pre-installed with all versions of Windows. It was previously known as the Windows Task Manager. Task Manager, as its name implies, is a tool that provides an overview of all the tasks and processes running on your system. Task Manager also provides an overview of the background tasks which includes both Window’s own background services and third-party application services. It gives a piece of detailed information about the processes and applications. This information includes the CPU and RAM utilization, Network usage, Disk usage (read/write), number of process instances, and a lot more. You can also use the Task Manager to start and stop services or applications. The ability to stop services comes in very handy in situations where a service or application stops responding. You can use the Task Manager to forcibly terminate a service.
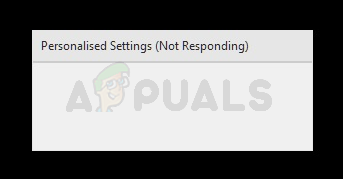
This issue presents itself after a Windows Update. Installing a Windows Update triggers a reboot. This reboot is important for the complete installation of Windows Update. Once you reboot the system after a Windows Update, Windows will ask you to enter the login credentials and you’ll see a white or black screen afterward with a personalized settings (not responding) message at the top.
There are a couple of things that can cause this issue. The first and the most common thing that causes this issue is your File Explorer not being able to start. This is obviously caused by the Windows Update. That is the reason this is happening right after a Windows Update. The second thing that can cause this issue is your peripheral drivers. The latest Windows Update cannot start your device’s drivers (because of a bug) which leads to this issue. So, disconnecting your devices before the reboot or force starting the File explorer usually resolves this issue.
Tip
- It is obvious that you won’t be able to perform any of the steps given below until you reach the Desktop. This issue will obviously prevent you from getting to the Desktop of your system. If you are in this situation then reboot. The number of reboots it takes to get to the desktop isn’t fixed but some users had to reboot 4 or 5 times until they were able to get to their Desktop. So, if 1 reboot doesn’t do the job then keep rebooting and you’ll eventually get to the Desktop screen without having to experience the personalized settings screen.
- Press “Windows” + “Ctrl” + “Shift” + “B” to refresh the GPU and check if that fixes this issue.
- If you are using a PIN to log in, try using your password instead of the PIN.
- If you are experiencing the issue after every update and you have to reboot multiple times in order to get to the Desktop then try to disable the network connection before rebooting or shutting down after an update. If you don’t know how to disable the network connection then follow the steps given below.
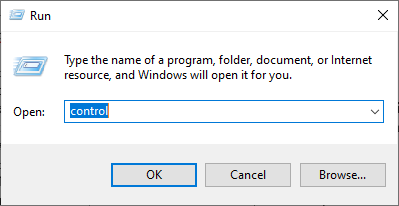
- Hold Windows key and press R
- Type control panel and press Enter
Accessing the Classic Control Panel interface - Click Network and Internet
- Select View network computers and devices. This should be under Network and Sharing Center
- Click your network connection
- Select Disable
Method 1: Delete the Registry Key
Deleting the Windows Update Key has resolved the issue for the majority of the users. Once the Windows Update key is deleted, the key will be rebuilt again which will most likely solve the issue. So, follow the steps given below to locate and delete the Windows Update Key.
- Hold Windows key and press R. Note: If you can’t get into the Windows Desktop then you won’t be able to perform these steps. You can follow the steps given in the Tips section or follow the steps given under this to open the registry editor via the Task Manager.
- Hold CTRL, SHIFT, and Esc keys simultaneously (CTRL + SHIFT + ESC) to open the Task Manager
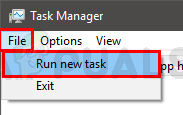
- Click File
- Select Run new task
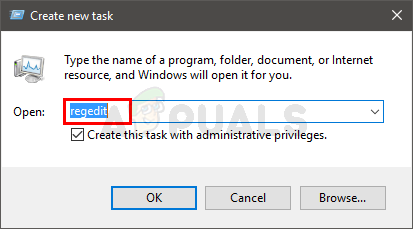
- Check the box Create this task with admin privileges
- Type Regedit and press Enter
- Navigate to this location Computer\HKEY_LOCAL_MACHINE\SOFTWARE\Microsoft\Active Setup\Installed Components\{89820200-ECBD-11cf-8B85-00AA005B4340}. If you don’t know how to navigate to this location then follow the steps given below
- Locate and double click HKEY_LOCAL_MACHINE from the left pane
- Locate and double click SOFTWARE from the left pane
- Locate and double click Microsoft from the left pane
- Locate and double click Active Setup from the left pane
- Locate and double click Installed Components from the left pane
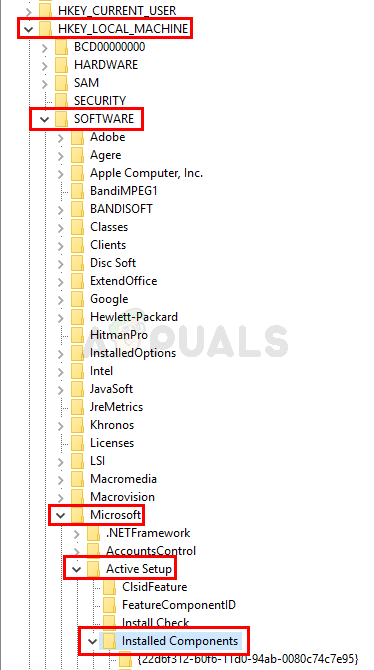
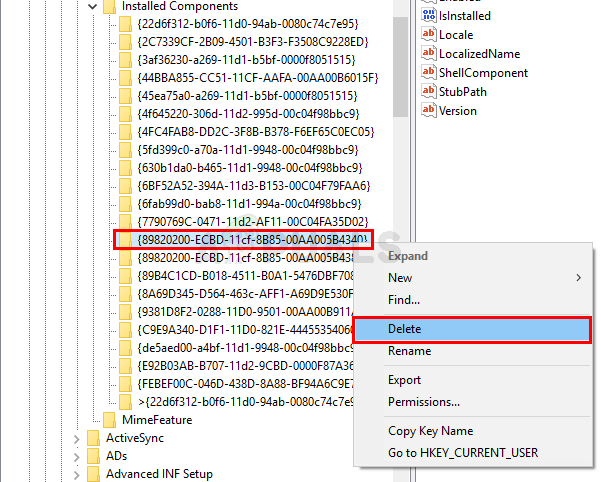
- Locate and right-click {89820200-ECBD-11cf-8B85-00AA005B4340} from the left pane and select Delete. Follow any additional on-screen instructions. Note: Just to be on the safe side, you should right-click and select Export before deleting the registry key. This is to make sure you have a backup in case something goes wrong or you accidentally delete the wrong key.
This should resolve the issue for you.
Method 2: Open File Explorer/Windows Explorer
This problem can be related to the File Explorer not starting up properly. So, one of the solutions to get rid of this issue is to simply start the File Explorer. One of the ways to open File Explorer is to open Task Manager and run a new task from there. You should be able to do this from the Personalized settings (not responding) screen as well. Simply follow the steps given below to open a File Explorer via Task Manager
- Hold CTRL, SHIFT, and Esc keys simultaneously (CTRL + SHIFT + ESC) to open the Task Manager
- Click File
- Select Run new task

- Type explorer and press Enter

This should let you get to the Desktop. Once you are on the desktop, wait a few minutes and then reboot and you should be able to get to the Desktop without any problem.
Note: If this doesn’t resolve the issue or you can’t start the File Explorer then open the Task Manager again. Right-click the File Explorer from the Process tab and select End Task. You might notice that there is a (Not responding) message beside the File Explorer. Once done, follow the steps given above and check the box Create this task with admin privileges in step 4.
Method 3: Open File Explorer/Windows Explorer (Alternative)
This is just an alternative way of opening File Explorer via the Task Manager. You can either follow this or method 2. Both methods will yield the same results.
- Hold CTRL, SHIFT, and Esc keys simultaneously (CTRL + SHIFT + ESC) to open the Task Manager
- Locate the File Explorer from the list of processes
- Right-Click File Explorer and select Restart
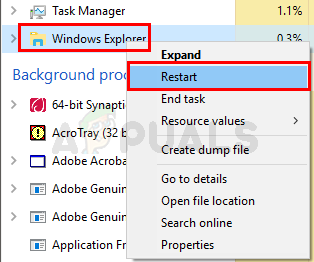
This should start the File Explorer and the problem should resolve afterward.
Method 4: Disconnect your Devices
If the first 3 methods didn’t solve the issue then the issue might be because of your device drivers. In some cases, your Windows Update will have a bug that will prevent your Windows to load the device drivers. So, the solution here is to reboot the system without any devices. Follow the steps given below for a proper step-by-step guide on how to disconnect and when to connect your devices after the Windows Update
- Once the update is installed, disconnect all the devices before rebooting. You should disconnect every device including the keyboard and mouse
- Once done, reboot
- Plugin your keyboard and mouse once the system is done booting
- Sign in to your account and you should be good to go. Plug in other devices once you are signed in and you are on the Windows Desktop
Method 5: Uninstall Updates
For some users, the issue was being triggered due to corrupt updates being installed but they weren’t just caused by Quality updates, reports suggest that removing only both the Feature and Quality updates got their computer working. Therefore, in this step, we will be doing just that.
- Press the “Shift” key on your computer and restart it.
- This should take you to a “Choose an Option” screen after the computer finishes booting up.
- Select the “Troubleshoot” option from the list of options presented on the next screen.
- Click on the “Advanced Options” and there should be an option to Uninstall Updates or to Go back to the previous version up ahead.
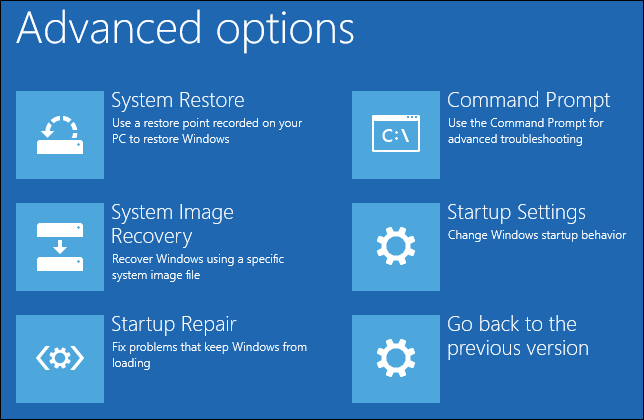
Advanced Recovery Options - Click on it and on the next screen select the “Uninstall Latest Quality Update“.
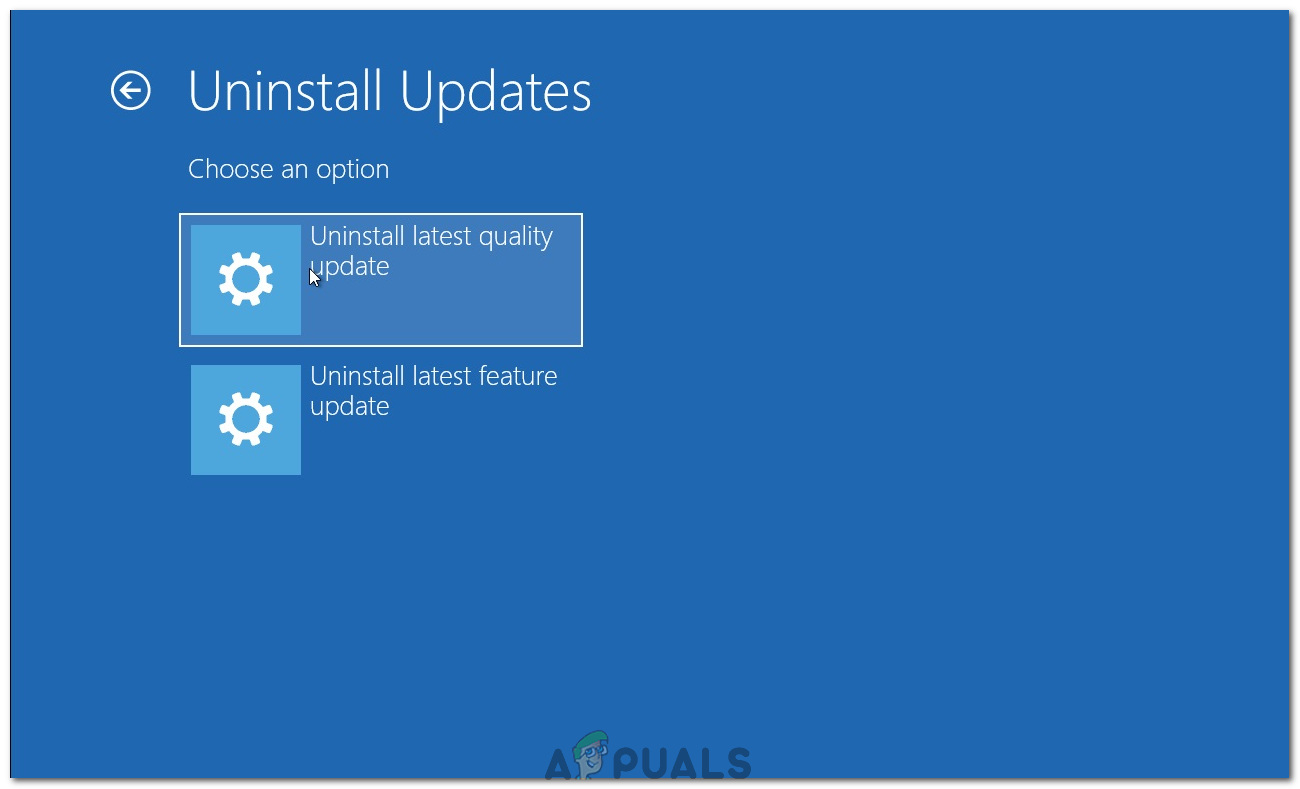
Clicking on the “Uninstall Latest Quality Update” option - Follow the on-screen prompts and check to see if the issue persists after uninstalling this update. After uninstalling, if the issue persists follow the guide again till the fifth step and select the “Uninstall Latest Feature Update” option this time.
- Check again to see if the issue comes back.
Note: If even this doesn’t help, roll back the Windows updates in safe mode.


