How to Remap Bixy Button on Samsung Galaxy S8 and Note 8
If you were to choose a pocket assistant, I’m willing to bet you won’t go for Bixby. Samsung was so committed to forcing Bixby upon its users that it even included a hardware button on Galaxy S8, Galaxy S8 Plus and Galaxy Note 8. But the reality is, Bixby is an inferior product when compared to most of the other virtual assistants like Google Assistant or Alexa.
In the first few months after the S8 model launched, users had no way of disabling Bixby, let alone changing the functionality of the Bixby button. Looking back, I think Bixby’s adoption would have been better if Samsung didn’t decide to wage war against 3rd party applications that allowed users to remap the Bixby button. Luckily, Samsung is showing signs of backtracking after releasing a quiet update that allows users to deactivate the Bixby key, along with Bixby Home and Bixby Voice. So far there’s no official way remapping the Bixby button. There are some rumors that it’s going to happen, but until then, we can turn to the community for valuable workarounds.
Fortunately for us, Google Play Store is filling with apps capable of hijacking the Bixby button and make it initiate a different action. You can make the Bixby button launch your camera, Google Assitant, Facebook, etc. Keep in mind that Samsung doesn’t really approve of you repurposing the Bixby button. With that being said, you can expect for some of the guides below to stop working by the time you read the article. If the first method is a no-go, just make your way downwards until you find a fix that works for you.
In the event that you’re rooted, skip right down to the very last method (Method 5) where we showcase a method of remapping Bixby without the use of a 3rd party app.
Note: Before you continue, it’s important to realize that remapping the Bixby button will disable Bixby completely. If you enjoy using Bixby (I doubt it), you shouldn’t go with any of the guides below.
Method 1: Remapping the Bixby button with Bixby Button Remapper (No-Root)
In this method, we are going to use a 3rd party app called Bixby Button Remapper. It could be that the exact steps will change in the future if Samsung decides to release another anti-consumer patch.
Keep in mind that you should not use this app if you have another Bixby remapper app installed on your Samsung device. This will cause conflicts between the two 3rd party apps. With this in mind, here’s what you need to do:
- Download Bixby Button Remapper from Google Play Store.
- Open the app and go through with the initial setup.
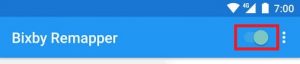
- Make sure the toggle for Bixby Button Remapper (top left corner) is enabled.
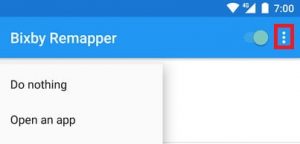
- Tap the three dots icon (top left corner), scroll down and select Go to Accessibility.
- Scroll down to the Services tab and tap on Bixby Remapper (Less Delay) and turned it on.
Note: Keep in mind that the methods under the Services tab might change over time. - Once you’re back to the home screen of the app, tap on Bixby Button Action.

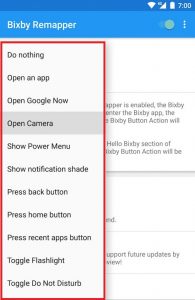
- Choose the new functionality of the Bixby button from the following list.
 Note: In the event that the Bixby button doesn’t work, return to the Configuration window and select Switch to More Stable Mode.
Method 2: Remapping the Bixby button with BixRemap (No-Root)
This fix was developed by the popular redditor Dave Bennett, in the middle of Samsung’s quest of stopping the Bixby button from being repurposed. BixRemap is a simple app that manages to launch Google Assistant on top of Bixby when the Bixby button is being pressed.
Sure, the app is not perfect, as you’ll still catch a glimpse of Bixby before Google Assistant takes over your screen. But even though this solution is somewhat rudimentary, you can apply this fix fairly easily. You won’t need to sideload the app or use any ADB commands. The instructions are as simple as they get:
- Download and install BixRemap from Google Play Store.
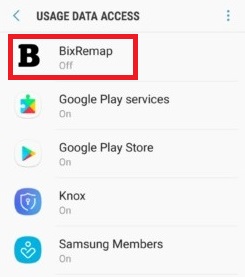
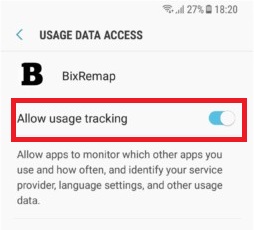
- Open the app and navigate to the Usage Data Access panel and tap on BixRemap.
Note: While you’re here, make sure all the other entries are turned ON. If they are not, tap on each entry and enable it.
- Flip the switch next to Allow usage tracking.
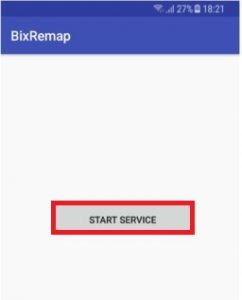
- Now return to the home screen of BixRemap and tap on Start Service.
 Update: It seems like the latest Samsung update prevents the Bixby button from opening up Google Assistant using a single press. If that’s the case, double press instead.
Method 3: Remapping the Bixby button with bxActions (No-Root)
Now let’s move up to a more elegant solution. Aside from the solid design, bxActions give you access to a lot of different actions of the Bixby button. You can use the app to select from 10 better alternatives, including remapping to Camera, Google Assistant or even your flashlight. If you’re looking for a quick fix, this isn’t the app for you as the whole process is quite tedious.
If you decide to go through with it, you should know that bxActions has two versions – free and paid ($2). At this point, I should mention that regardless of the version you get, you’ll still see a quick glimpse of Bixby before the custom action takes over. Regardless of the app version, here are the steps you need to take.
- Download and install bxActions from Google Play Store.
- Open the app and go through with the initial screens.
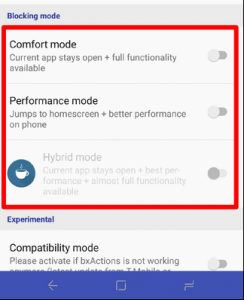
- Now you will be prompted to select from a list of blocking modes. If you bought the paid version, you should use Hybrid mode. If not, experiment with each mode and see which one suits you better.
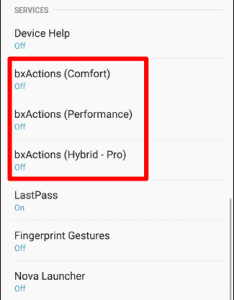
- Regardless of what mode you pick, you will be taken to the Accessibility settings. From there you should enable the service associated with the mode you previously selected.
- Now we need to set a custom action for the Bixby button. Return to the root directory of Settings and tap on Standard action.
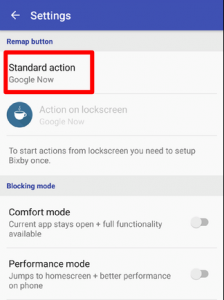
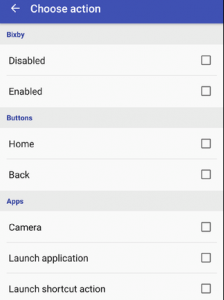
- Choose an action from the list. Aside from the custom actions, you can also choose to disable Bixby without assigning a custom action to the button.
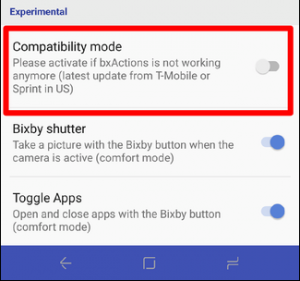
- In the event that the Bixby button refuses to be remapped after you choose an Action, go back to the Settings menu. From there, scroll down to the Experimental tap and enable Compatibility Mode, then try again.
Method 4: Remapping the Bixby button with BixBye (No-Root)
This next app has even more custom actions than bxActions, but the interface is something to forget. On the plus side, BixBye will allow you to launch any individual app when tapping the Bixby button.
If you can ignore the ugly design, you’re left with great functionality. There’s another thing that might turn you off though. The app isn’t capable of getting past the lock screen by itself. So even if you set a custom app to open when you press the Bixby button, you’ll still have to unlock your phone first.
If you decide to use BixBye, the initial set up is minimal. Here’s what you need to do:
- Download and install BixBye from Google Play Store.
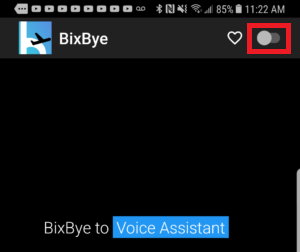
- Open the app and enable the toggle in the top-left corner of the screen.
- You might be prompted to enable some things from the Accessibility menu. Follow the on-screen instructions.
- Now tap the counter-intuitive blue button next to BixBye and choose a custom action.
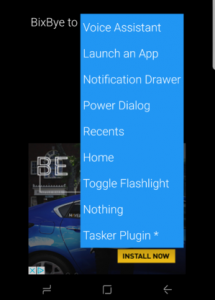
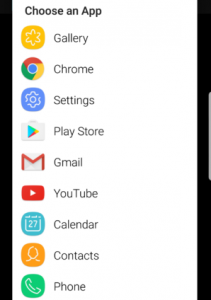
- If you choose to Open an app, you will be presented with a list of your apps. Select an app from the list and confirm.
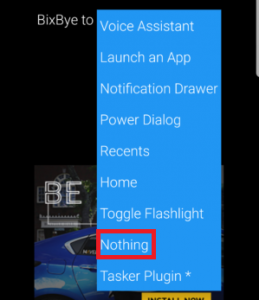
That’s it! If you decide to get rid of BixBye, you need to change BixBye to Nothing, otherwise it will remain set to the custom action.
Method 5: Remap Bixby without an app (Root Required)
If you’re already rooted, this is the best method for you. The XDA community has released a tutorial that will allow you to remap the Bixby button to a wide variety of custom actions. These options include launching Google Assistant, the camera or your flashlight.
The following procedure involves using root explorer, and it’s definitely not for casual Android users. If you haven’t done any root exploration on your own, I suggest you stay away from this method. In the event that you’re up for it, here’s what you need to do:
- Download and install Root Explorer or equivalent app capable of exploring root directories.
- Open the app and navigate to / > System > usr > keylayout.
- Rename the Generic.kl file to Generic.txt.
- Open the file you just renamed with a text editor.
- Use the quick search function of the text editor to search for “703“. You should land on a line showing:
“input_fw Intelligent Key for Dream key 703 WAKE” - Change Wake to one of the codes below so it will look like this:
“input_fw Intelligent Key for Dream key 703 MUSIC”
Confirmed to be working assignments:- VOLUME_DOWN – Sets volume down
- VOLUME_UP – Sets volume up
- HOME – Home button
- POWER – Power menu
- MUSIC – Starts your favorite music player
- CAMERA – Starts camera app
- APP_SWITCH – Recent apps button
- VOICE_ASSIST – Google Assistant
- Rename Generic.txt back to Generic.kl. If you skip this step, you won’t be able to use the hardware buttons after the restart.
- Make sure that you have the appropriate permissions.
- Restart your device and see if it’s working.