How to Reduce the Size of a JPEG on Mac
If you want to reduce the size of photos (JPEGs) on your Mac, you can do it with the built-in Preview app. Here you can find the actual steps.
Note: This method will help you reduces the size of the entire image. It does NOT crop the image.
- Go to Applications and launch the Preview app (you may also start it from the dock if Preview is there).
- While in the Preview app, click on File menu and choose Open.
- Navigate to the photo you want to reduce, and click Open.
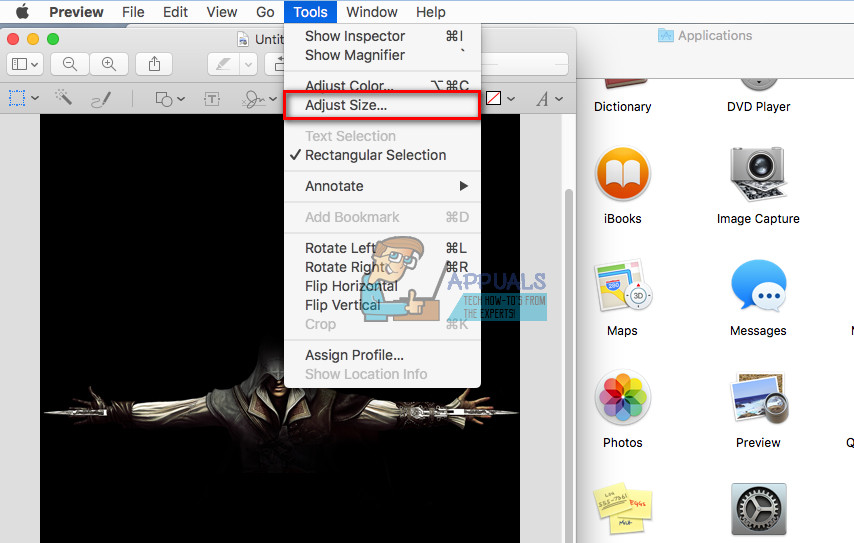
- Once the image loads up in Preview, click Tools on the menu bar and choose Adjust Size.

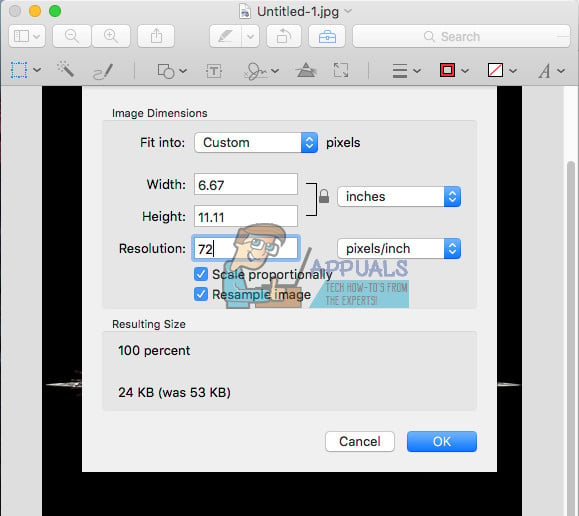
- Now a pop-up window will open up where you can set the Resolution, Width, and Height of your image, as well as the measurement units for its size (pixels, millimeters). Change the Resolution first – that will significantly reduce the image size.
- If you know what exactly dimensions you need for Height and Width, set them accordingly as well, and click OK.

Note: Take a look at the Resulting Size section. The actual image of the size will change as you are setting lower or higher values in the Image Dimensions section. If the file size is still large for your needs, pick a smaller resolution or smaller dimensions.
- Now, click File on the menu bar and select Save As.
- Type the image name of your choice, and click the Save button (or COMMAND + S on the keyboard).
Revert Image Changes after Saving
If you want to revert image changes to a previous version after you save it:
- Click File and choose Revert To.
- Now, select Browse All Versions.
- Here you choose an older version of the image.


