How to Recover a Damaged Memory Card in Ubuntu
Memory cards are an excellent way to transfer information between mobile devices, digital cameras and PCs. If you receive a “Damaged Memory Card – Please Format” or similar error from a Google Android or Apple iOS device, then there might still be some hope for data recovery as long as you declined to format the card. Properly eject it, and then make sure that its in good shape. Sometimes full-sized SD, SDHC and SDXC cards become loose in their cases, and can be gently pushed back together. Most microSD, microSDHC and microSDXC cards don’t have this problem, but it’s still possible to clean off the contacts and such.
When you attach your card to your PC, you’ll want to make sure that you do so firmly, but gently. Ensure you don’t bend the card, and make sure that it’s attached correctly to ensure a good connection. This might seem like a minor detail, but it will help quite a bit when it comes to using Ubuntu’s tools to recover data from damaged Secure Digital file systems.
Method 1: Repairing the Memory Card with Ubuntu’s Standard Tools
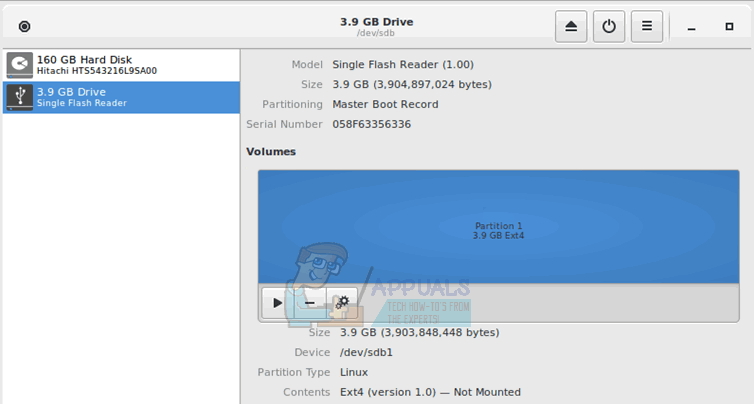
Open the GNOME Disks Utility from the Dash, KDE or Whisker menu and locate the device file name for your particular flash reader. It will generally call it “Single Flash Reader,” and if given the option underneath the storage graph, click on the right-facing arrow to attempt to mount it. If it mounts, then you might be able to copy files off it.
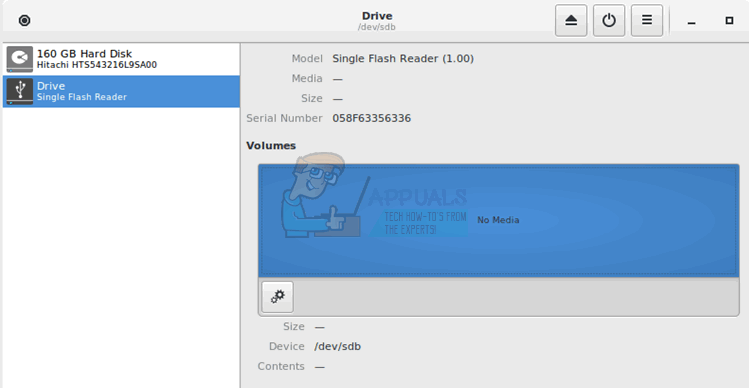
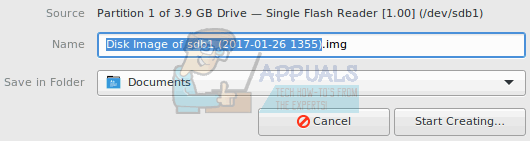
If it reads “No Media,” even if there is a card in the slot, then attempt to disconnect and reconnect the card, then see if anything has changed. If you’re able to, then you might want to try clicking on the gear icon, selecting “Create Disk Image” and then saving it as an .img file.
Eject then insert a different blank memory card of the same size after it concludes, and then write this disk image to the new card with the gear menu. You may be able to mount the new file system, but keep in mind you’ll loose whatever was on the new card, so ensure that it’s completely blank before proceeding.
When the partition is unmounted but Ubuntu detects the drive, you can run a consistency check to attempt recovery of the file system. Assuming you have an FAT12, FAT16 or FAT32 formatted card, then run sudo fsck.msdos -r /dev/sdd1 from the command line to attempt recovery. Replace the sdd1 portion with the name of the partition given in the disks utility. You could instead try using fsck.ext# if you formatted the card to work with one of the Linux file systems. Replace # with the ext number of the system if you can remember it.
Method 2: Repairing a Memory Card on a Dual-Boot Ubuntu System
If you run Ubuntu alongside Microsoft Windows, then you might have luck using the chkdsk command in a Windows command prompt. While Ubuntu has debatably superior support for recovering FAT devices, Windows can sometimes help recover NTFS devices. Reboot the computer, and when GRUB comes up, prompt it to start your installation of Microsoft Windows with the keyboard. Open a File Explorer window by holding down the Windows key and pushing E. Locate the drive letter that Windows assigned to your memory card, but do not format it if Windows asks.
Open a command prompt from the Start Menu, and then type chkdsk /f E:, replacing E: with whatever drive letter it gave. If you get an error returned, however, then Windows hasn’t had any more luck recovering your memory card than Ubuntu had.
Ubuntu does provide two useful programs for working with damaged NTFS-formatted memory cards if you don’t have access to Microsoft Windows. You could try sudo ntfsfix -d /dev/sdd1, replacing the device file with the name of your device. While this isn’t a Linux version of chkdsk, it can repair some NTFS inconsistencies. You might also try using ntfsclone -so dsk.img /dev/sdd1 to take a disk image of an NTFS memory card even if Disks Utility failed to do so. You can then restore it to a blank memory card with sudo ntfsclone -r dsk.img /dev/sdd1. Replace the device files with the correct names in both examples, and keep in mind that restoring a disk image will destroy everything on the device in question. Add the -f switch if Ubuntu complains that the file system is marked dirty.
Method 3: Using the Testdisk Program
Should neither the normal Ubuntu nor Windows programs aided you in recovering your files from your memory card, then you might have more luck with a program called Testdisk. More than likely you don’t have it installed, so from the Ubuntu CLI prompt type sudo apt-get install testdisk to install it. Once it’s installed, run testdisk /log /dev/sdd, replacing /dev/sdd with the actual device name. Depending on how your installation is installed, you might need to use sudo in front of it since it does require direct access to a device file.
While most mobile phones, tablets and digital cameras use the FAT16 or FAT32 file systems, testdisk will also check for HFS and HFS+ from the Macintosh platform as well as NTFS. Once the program is done, head back to Disks Utility from the Ubuntu Dash or KDE menu and see if you can click on the device. Click on the right-pointing arrow to mount it. You might now be able to copy files over in your file manager.
Method 4: Using PhotoRec to Restore Files Without a File System
If Linux can view your memory card as a mass storage device, but it can’t actually detect a file system, then you can use PhotoRec to recover files from it. Users who don’t already have it installed can download it from the Ubuntu or Debian repositories with the sudo apt-get install photorec command.
PhotoRec doesn’t attempt to write to the device, so it’s safe to use. Navigate to an area in your PC’s file system that you don’t mind having files copied to. Assuming Linux calls your memory card /dev/sdd, then run photorec /log /dev/sdd, though you should replace the /dev/sdd line with whatever your memory card is actually called. This command will write the results of the operation to a photorec.log file in the same directory. You can also use the /debug switch to receive additional information.
I endorse this publication. This solved my problem. Thanks