How to Open Firewall Ports in Windows?
The Windows’ Firewall is designed to protect the computer from potential cyber risks and malware. It does so by blocking certain applications from using the internet that might be a threat to the computer’s integrity. All applications use specific “ports” to communicate with their servers and the internet, these ports need to be opened for the applications.
In some cases, the ports are opened automatically by the application and it has instant access to the internet. However, in some cases, the ports need to be opened manually and the application is blocked from using the internet until the ports are opened. In this article, we will discuss the complete method to open specific Firewall ports in Windows 10.

Types of Ports
There are two major types of communications used by ports and it is important to know the difference between them before we move on towards opening ports. Ports are classified into two types depending upon the type of protocol they use. There are two types of protocols and they have been explained as follows.
TCP Protocol: The Transmission Control Protocol (TCP) is one of the most used forms of protocol and it provides a reliable and ordered delivery of data. This type of communication is used by applications which need a secure form of delivery and it is often slower than other protocols.
UDP Protocol: The User Datagram Protocol (UDP) is used to send messages in the form of Datagrams to other hosts on an IP network. This form of communication provides much less latency but it is also much less secure and the sent message can easily be intercepted.
Now that you have a basic understanding of the two major types of protocols that are used by ports, we will move on towards the method to open a specific port.
How to Open a Firewall Port in Windows 10?
The method to open a Firewall Port is very easy and can be implemented by anyone, however, it is important that you know the exact range of ports that you want to open and are also aware of the protocol that is used by the application for which you want to open the port.
- Press “Windows” + “I” to open settings and click on “Update & Security”.
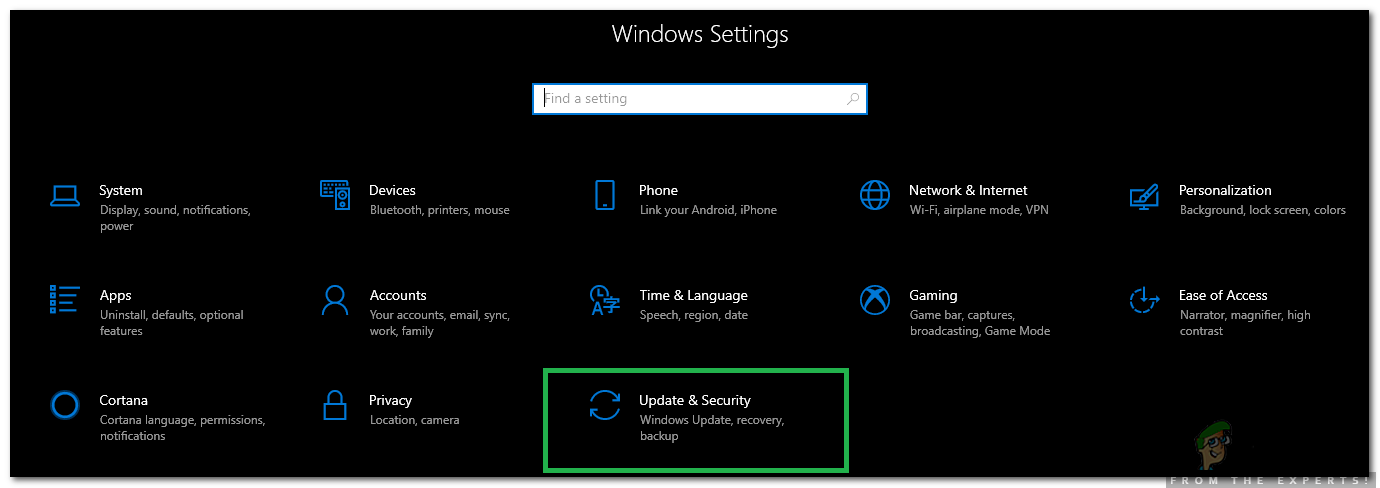
Selecting the Update & Security Option - Select the “Windows Security” tab from the left pane and click on “Firewall and Network Protection” option.
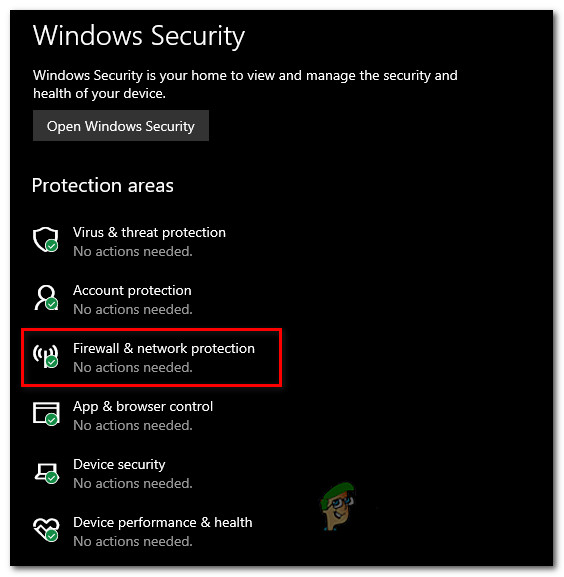
Accessing the Firewall & network protection settings - Select the “Advanced Settings” button from the list.
- A new window will open up, Click on the “Inbound Rules” option and select “New Rule“.

Clicking on “Inbound Rule” and select “New Rule” - Select “Port” and click on “Next”.
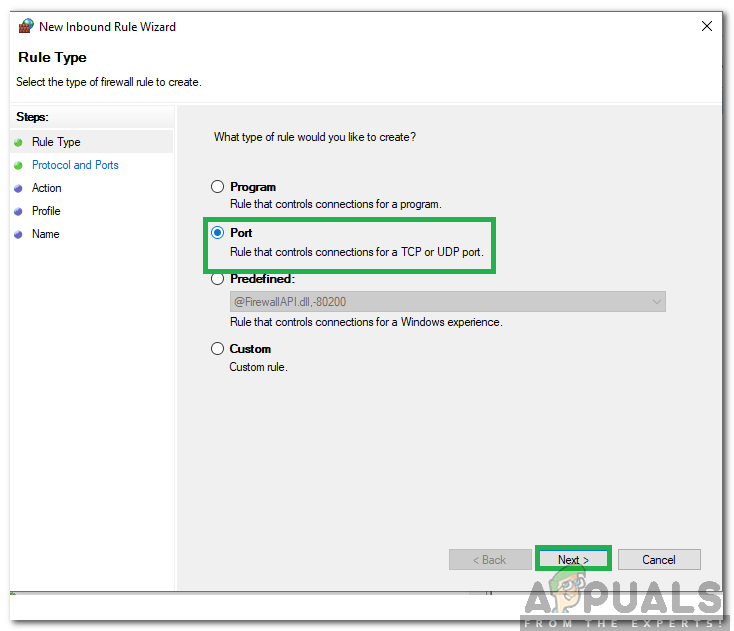
Selecting Port and clicking on Next - Check the “TCP” or “UDP” option depending upon the application and select “Specified Local Ports” option.
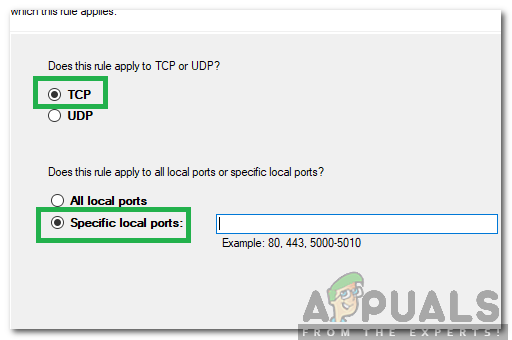
Clicking on “TCP” and checking the “Specified Local Ports” option - Enter the ports that you want to open, if you are entering multiple ports enter them with a “,” in between. Also, if you are opening a range of ports, enter them with a “–” in between.
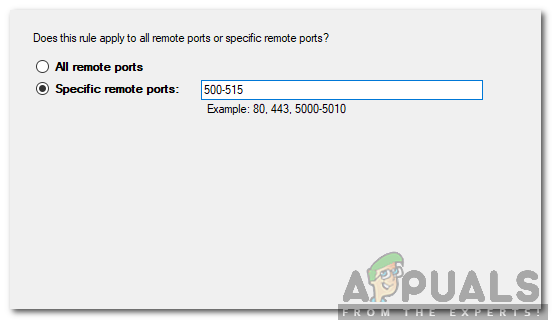
Entering a Range of ports - Click on “Next” and select “Allow the Connection“.
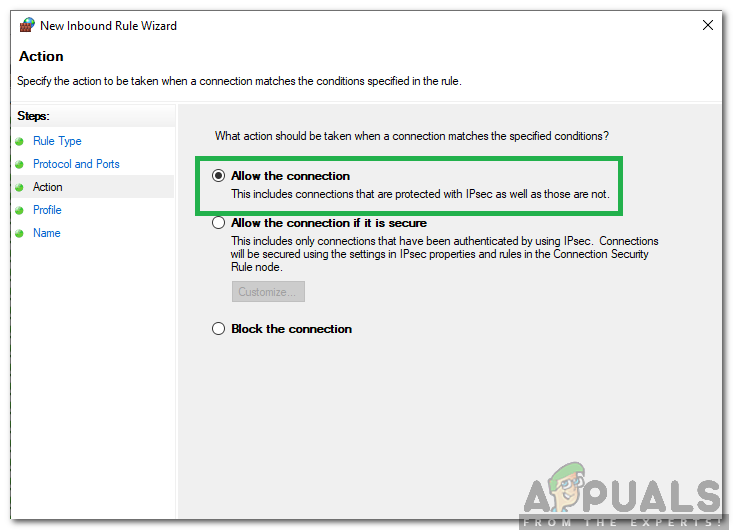
Selecting the “Allow the connection” option - Select “Next” and make sure all three options are checked.
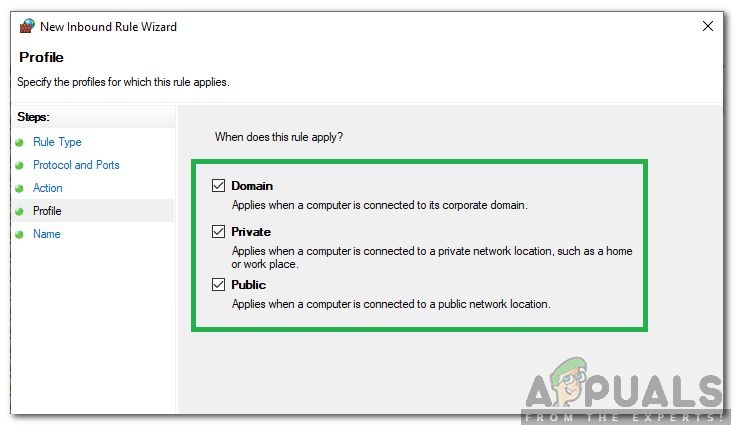
Checking All options - Again, click on “Next” and write a “Name” for the new rule.
- Select “Next” after writing a name and click on “Finish“.
- Now, click on “Outbound Rule” and repeat the above process in the same manner.
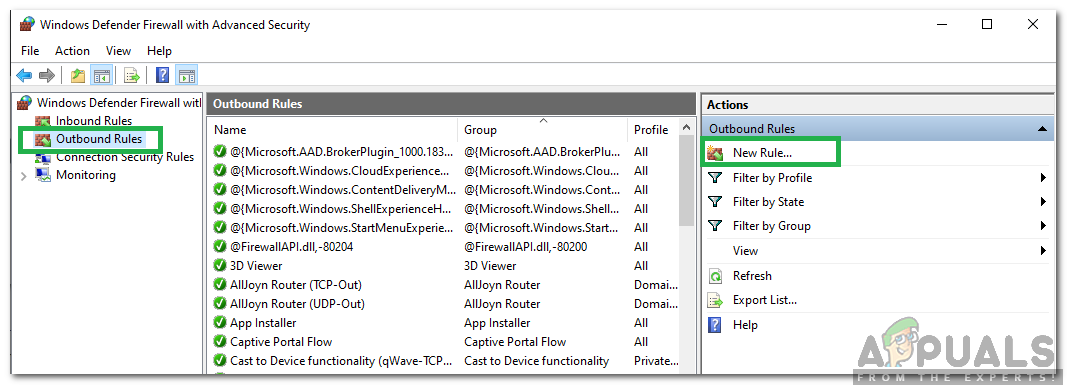
Clicking on “Outbound Rule” and select “New Rule” - After setting up the Outbound Rule, the ports have been opened up for both sending and receiving data packets.


