How to: Install Hyperterminal On Windows 7
Unfortunately, Hyperterminal is not included with Windows 7; however, you can still control your serial devices using alternate methods. In this guide, I will discuss several alternatives. By the end, you will know how to set one up and which one to use. The reason for its exclusion from Windows 7 is a question for Microsoft, and they provide an answer HERE.
Alternative #1: PuTTY.
PuTTY is an awesome, free, and open-source emulator that has been around for 16 years. You can download PuTTY from https://www.chiark.greenend.org.uk/~sgtatham/putty/latest.html.
How to use Putty as a Hyperterminal.
You will need to have a COM port on your machine, whether a laptop or desktop, in order to connect your console cable first. If you do not have one, then a USB port is essentially available on almost all computers, so you would need a DB9 to USB converter. Assuming you now have the converter/port, you will connect one end to your device and the other end to the DB9, which goes into the USB port on your computer. Alternatively, if you have a COM port, then connect directly.
You now need to have the COM port number, which you can obtain from the Device Manager -> Ports (COM & LPT).
Once you have it, you will then begin to configure PuTTY with your console settings.
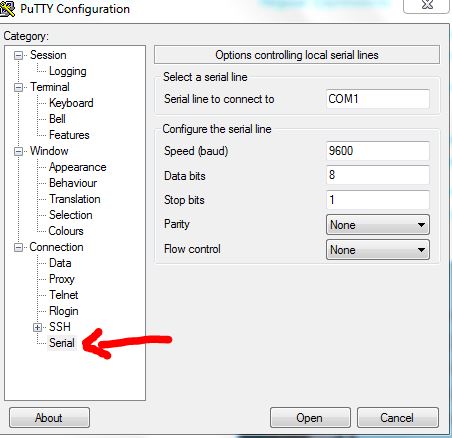
Open PuTTY and click ‘Serial’ from the left pane, which is the last option. This is where you will configure your terminal settings. For example, for a Cisco router, the settings will appear like this:
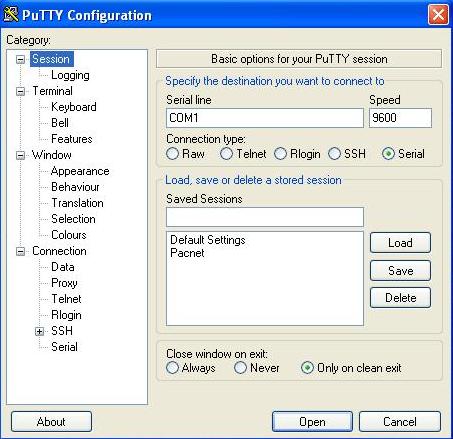
Now, click the ‘Session’ button in the left pane, select the first option, and choose ‘Open.’
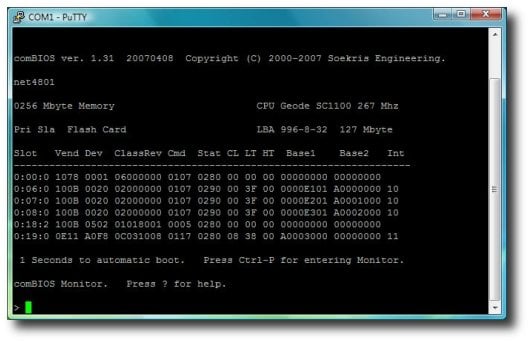
This will connect you to your device, and you will be using PuTTY as your Hyperterminal.
Installing HyperTerminal on Windows 7.
Now, if you still do not want to use PuTTY and prefer to have Hyperterminal back, here is what you will need to do.
In order to do this, you will need to have access to a Windows XP computer from which you can copy the three files we need.
C:\Program Files\Windows NT\hypertrm.exe
C:\WINDOWS\system32\hypertrm.dll
C:\WINDOWS\Help\hypertrm.chm
Once you have copied the files mentioned above, create the following folders on your Windows 7 and copy the three files into them.
For a 32-bit Windows 7 create a folder
C:\Program Files\HyperTerminal
For a 64-bit Windows 7 create a folder
C:\Program Files (x86)\HyperTerminal
Now, from the folders, you can create a shortcut for hypertrm.exe and run it to get HyperTerminal back, or if you wish to have HyperTerminal on the Start Menu, put the hypertrm.exe file in C:\ProgramData\Microsoft\Windows\Start Menu\Programs.
I installed hyper terminal using the above, on my windows 7 machine. It worked great! But the part about adding it to the start menu failed. It gave an error message about the dll not being installed, and asked me to reinstall the program.