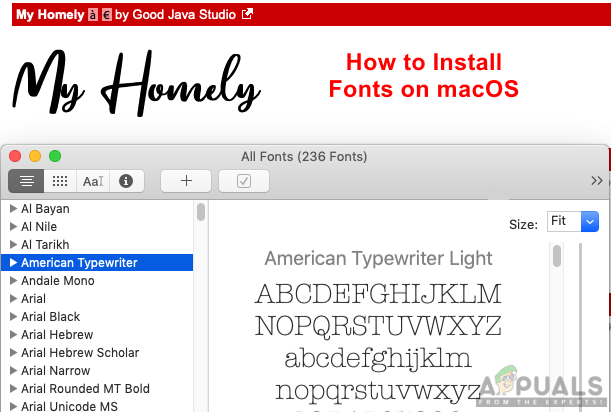
How to Install Fonts on macOS
Fonts are printable and displayable text characters that include different typeface, point size, weight, color or design. Every operating system contains some of the default fonts for the text. However, users will need some different kind of fonts to use for their work other than the default ones. In this article, we will teach you about how to install fonts on your macOS with different methods.
How to Install Fonts on macOS
Installing fonts is an easy task to do on macOS. However, it comes with different methods and different options. Each method has its own benefit related to that situation. You can use the method that matches your situation for installing the font on your computer. For downloading fonts we recommend you to use dafont.com or 1001fonts.com.
Note: If you were using an application during the installation of fonts, make sure you restart it; to find the font for that specific application.
Method 1: Installing Fonts through Installer
If you are installing a single font for your system, then this method is a better choice. Installing a single font will just require a simple installation process.
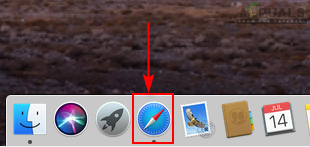
- Click on Safari icon in the Dock to open it.
Opening safari from Dock - Search for the sites from where you want to download fonts or use our recommended sites as mentioned above.
- Search for the font and click the Download button to download the font.
Note: Make sure you read the copyright license text above the fonts. If it says ‘Free for personal use‘ only, then that means you can’t use it for commercial or business use. If it says ‘100% free‘, then you can use it for anything.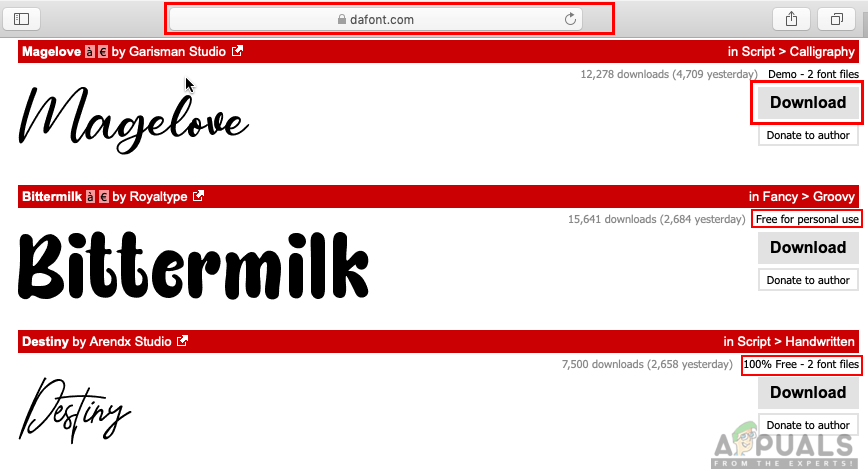
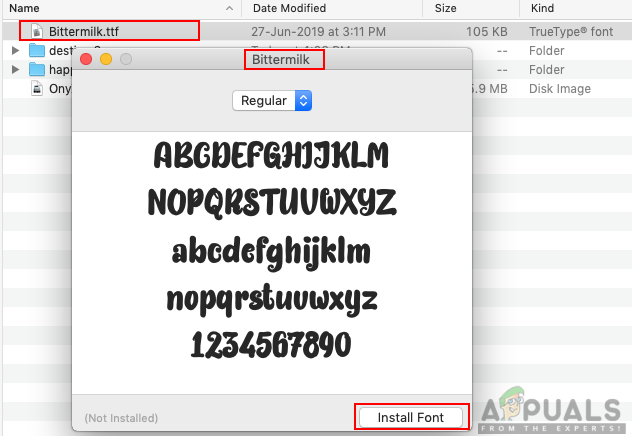
Downloading fonts - Open the Download folder from Dock or Finder, now find the font you downloaded and double-click on it.
- Font Book will open a window for installation, click on Install font button and you will see your font in the User folder.
Installing font
Method 2: Installing Fonts through Copying
If you are downloading multiple fonts for your system, then it is better to use the copy method rather than installing each file one by one. Installing one by one will take a lot of time but this will just take a second to copy the files from one folder to another. This will work the same as the installation method.
- Click on Safari icon in the Dock to open it.
Opening safari from Dock - Open the font website in Safari from where you want to download fonts.
- Search for the font and click the Download button to download the font.
Note: Make sure you read the copyright license text above the fonts. - Open the Download folder and unzip the zip files so it will be easy to copy.
- Now open another window with the following path:
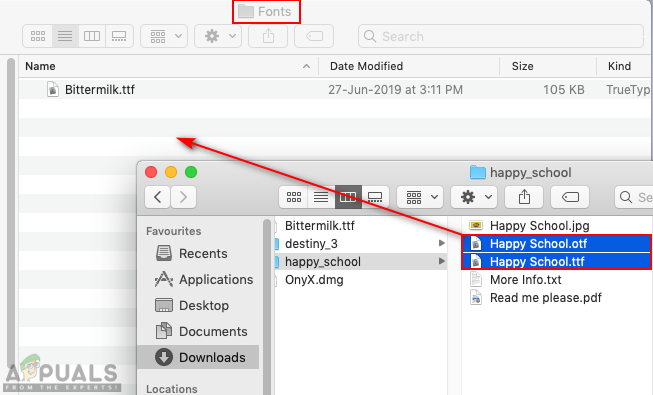
Users/Your_Username/Library/Fonts
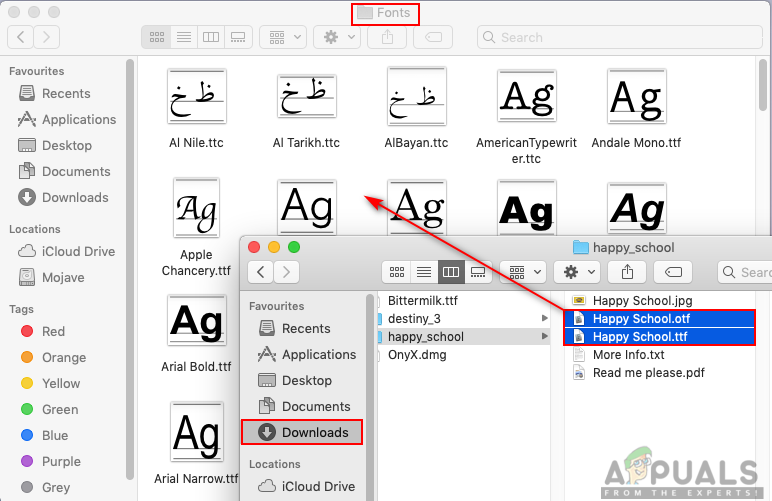
- Now drag all the files from Download folder that has an extension of .tff or .otf and drop/paste them in Fonts folder and that’s it.
Copying fonts from the download folder to fonts
Font Book Preferences
Most of the time the above methods will install the font for only the current user that is used during installing fonts. However, users will want some of the fonts for all accounts available on a computer. You can simply do that by the following methods below:
Method 1: Installing Fonts for All Users
- Open the Download folder and double-click the font you downloaded from the site.
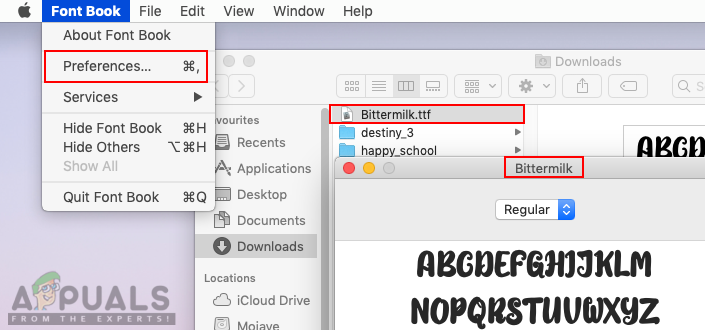
- Font Book windows will appear with the install button, click on the Font Book in the menu bar at the top and choose the Preferences option.
Opening Font Book Preferences - Now change the Default Install Location option from User to Computer.
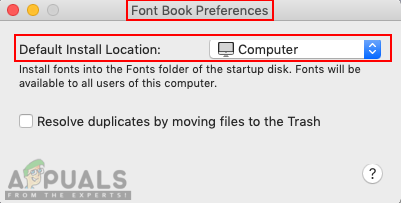
Changing the default location - This will install the font for all users on the computer rather than just a single user.
Method 2: Copying Fonts for All Users
- Open Finder, click on Go in the menu bar at the top and choose Go to Folder.
- Type the following path and click the Go button.
Library/Fonts/
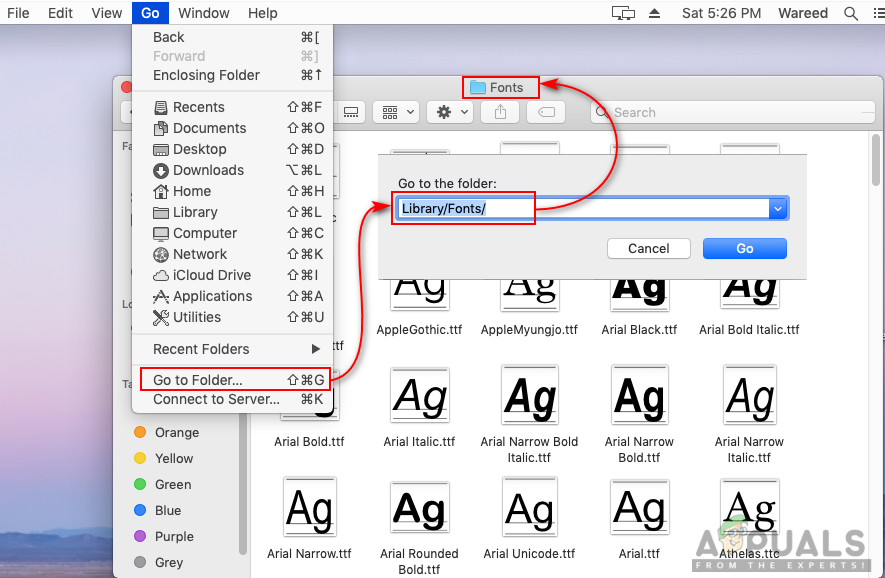
Go to the fonts folder - Now copy the fonts from Download folder to this Fonts folder.
Copy fonts for all users - This will add fonts for all the users on a computer.
How to Remove or Disable Fonts on macOS
Sometimes, the user will want to remove or disable the font that they are not using or installed by mistake. Just like installing a font, it is also easy to disable or remove it. You can simply remove/disable any font in the Font Book application. You can remove/disable the fonts by following the below steps:
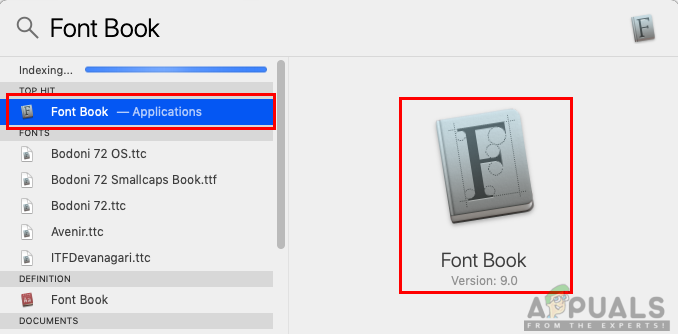
- Hold Command key and press Space to open Spotlight, then type Font Book and Enter.
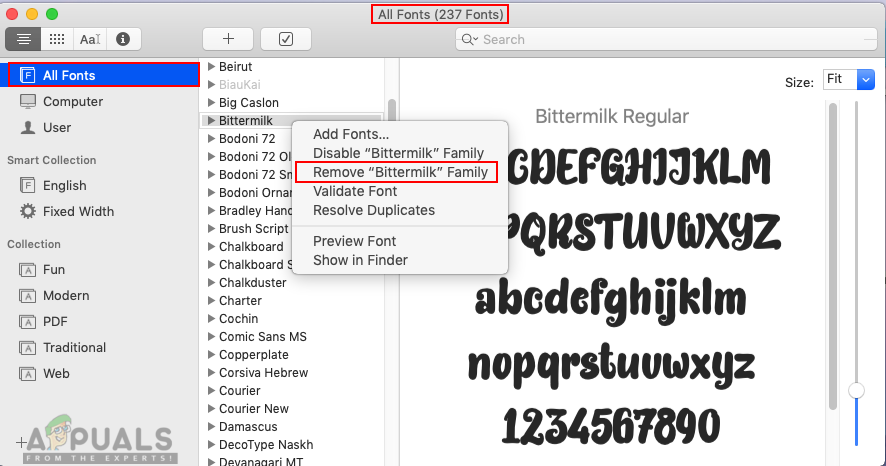
Opening Font Book through Spotlight - You can choose the option on the left panel depending on where your font is located.
Note: All Fonts will show all the fonts that are available on the computer. - Search for the font in the list, then right-click on it and choose the Remove “Font_name” Family option. You can also choose the disable option for disabling it temporarily.
Removing font from the computer - Confirm the action window by clicking on Remove button and this will remove the font from your computer.