How to Flash Project Treble ROMs on Android Phones
Project Treble, introduced in Android Oreo, was Google’s effort to helping phone developers integrate core Android updates into their customized firmware, and push the updates out faster to their users. This was necessary because for a long time, many companies were behind on adapting the latest security updates from Google, leaving consumers at risk.
This wasn’t entirely phone developers’ fault, because software updates go through a tier of processes. When Google releases an update, it actually has to be sent to the chipset makers first (Qualcomm, Mediatek, Samsung / Exynos). The updates must be applied to all the code related to the internal hardware of the phones. After that, the phone developers could begin integrating Google’s updates into their own software, tweaking it to their liking, etc.
So, Project Treble was all about making it much easier for phone developers to provide users with the latest Android updates directly from Google. Of course, it actually has made pretty much zero impact on the industry – it turns out most phone companies don’t actually care all that much about providing users with the latest Android updates. Post-sale updates are barely a priority.
However, Project Treble had significant benefits for the custom ROM and Android modding community. Because users of Project Treble enabled devices can flash ROMs without touching the /vendor partition, which means custom ROM developers don’t need to mess around with the device’s proprietary drivers and Hardware Abstraction Layers. To put it simply, developing and flashing custom ROMs became much simpler with Project Treble introduced.
If you’d like to flash a GSI Project Treble ROM on your Android device, read this guide carefully! It’s really quite simple, but there are certain things to be aware of.
Requirements:
- Unlocked bootloader
- Project Treble compatible device
- Stock boot/ramdisk (no Xposed, SuperSU, or Magisk installed). You can re-install these later.
For devices that are officially Project Treble compatible
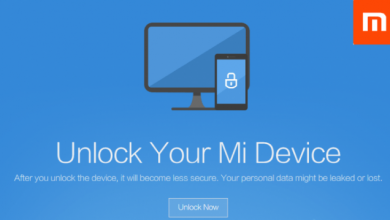
- First you need to unlock your device’s bootloader, if it isn’t already. You can search Appuals for a how-to guide, we have many unlock and root guides for many popular Android devices.
- Next you can download your chosen GSI on your Pc. You can pretty much flash a pure AOSP ROM, or GSI versions of popular custom ROMs, like LineageOS or Resurrection Remix. Just make sure the ROM you download is GSI ready.
- You also need to make sure you’re downloading the correct ROM for your device architecture type, and also the partition type. For example, if your device has seamless update support, you should download the A/B compatible image. Otherwise, download an A-only image.
For devices that can be unofficially Project Treble compatible
- Unlock your device’s bootloader.
- See the list of unofficially supported Project Treble devices. If your device is on the list, click the corresponding (Source) link and follow the instructions for that device.
- Download the GSI ROM of your choice to your PC.
Flashing a GSI Image with TWRP
We recommend using TWRP as the easiest method for flashing a GSI image. If you do not have TWRP on your device, we recommend searching Appuals for a root guide for your device.
- Transfer the GSI image from your PC to your device.
- Reboot your device into TWRP and tap ‘Install’ from the main menu.
- If you don’t see the file you transferred, change the type from “zip” to “image”.
- Choose to flash the image to your system partition. When it’s finished, reboot your device.
- Your device will take a few minutes to organize itself, and then it should boot into your new ROM.
Flashing a GSI Image without TWRP
You need to factory reset your device before proceeding. You can typically do it under the Settings menu in the Android system (usually Settings > Backup). Alternatively, you can do it from your device’s stock recovery (button combinations to boot into stock recovery vary by manufacturer / device). You could also use ADB (adb reboot recovery).
- After you’ve factory reset your device, reboot into the bootloader using either your device’s button combinations, or with adb reboot bootloader.
- Once you’re in bootloader mode, connect your Android device to your PC via USB, and launch an ADB terminal on your PC. Also place the GSI image you’re going to flash in your main ADB pathway.
- Enter the command: fastboot erase system
- Next you can use: fastboot -u flash system name_of_system.img
- Replace “name_of_system.img” with the filename of your GSI image.
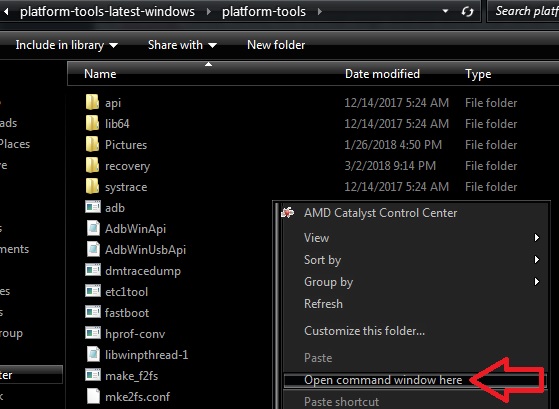
- With your device connected to your PC, open up a command prompt or terminal window in the same directory where you downloaded your GSI of choice.
- Enter the following command: fastboot erase system
- Enter a command in the following format: fastboot -u flash system name_of_system.img
- Once it has successfully flashed, you can reboot your device with the command ‘fastboot reboot’. Your device should boot into the Android system.
Troubleshooting
- On devices such as the Google Pixel 2 / 2 XL, you need to disable Android Verified Boot. This can be done by flashing this image using the ADB command: fastboot flash vbmeta name_of_vbmeta.img
- For certain phones, DM-Verity may prevent your device from booting the GSI image. You may be able to get it to boot by flashing Magisk after flashing the GSI image – this is required for the Razer Phone, for example.
- Finally, you might need to try a total format of the data partition by entering ‘fastboot -w’ from an ADB window, while your device is in Bootloader Mode.


Please why my Tecno kf6i always boot to fastboot after I flashed the GSI and even flashing Magisk. The phone was even rooted with magisk.
So why can’t it boot to home screen?