How to Fix Windows VPN Connecting Only after a Restart
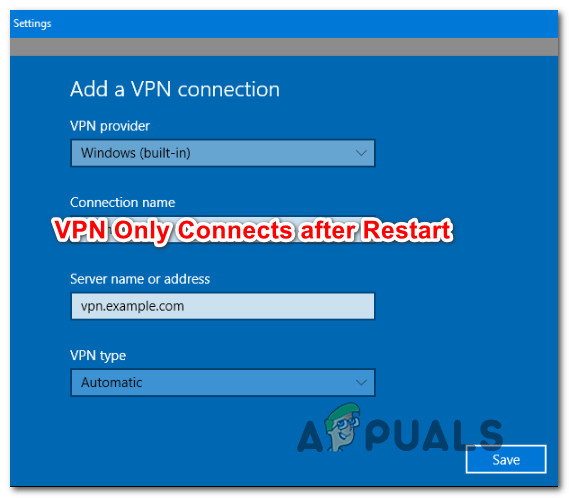
Some Windows seems to have a recurring issue where the VPN connection (made through built-in setup) cannot reconnect after it’s disconnected. However, the connection is successful if the user performs a system restart. The issue is mostly encountered on Windows 10 with PPTP connection. In most cases, the error that comes up is ‘Can’t connect to xxxxxxxx’.
What is causing Windows VPN to only Connect after Restart?
We investigated this particular issue by looking at various user reports and the repair strategies that are commonly being used to fix this particular problem. As it turns out, this particular issue can be caused by a number of different culprits:
- Inconsistent TCP/IP values – It’s possible that the issues with your built-in VPN are actually caused by your TCP/IP configuration. This is typically common with ISPs that offer dynamic IPs. In this case, you should be able to resolve the issue by doing a complete TCP/IP reset via an elevated Command Prompt.
- Tray-bar VPN menu bug – Windows 10 seems to have a weird recurring but that sometimes breaks the VPN functionality, but only from the tray-bar icon. If this scenario is applicable, you should be able to avoid the restart by connecting via the Settings App VPN menu.
- Glitched VPN Network connection – If you’re in the habit of disconnecting your built-in VPN network regularly, you run the risk of glitching the VPN Network connection that is being used. Several affected users have reported that they managed to resolve this issue by disabling and re-enabling the connections via the Network Connections tab.
- Corrupted WAN Miniport (PPTP) – It’s also possible that the issue is being caused by a Miniport PPTP adapter issues. What might happen is the Miniport PPTP adapter is not disconnecting from the VPN connection when the action is completed by the user. In this case, you should be able to resolve the issue by updating or reinstalling the WAN Miniport (PPTP).
- Corrupted VPN dependency – As it turns out, this particular issue can also occur due to a corrupted file that ends up causing the built-in Windows VPN to become unable to reconnect. In most cases, a bad Windows update is blamed for the apparition of this issue. If this scenario is applicable to you, the easiest way to fix it is to use a System Restore point to return your machine to a healthy state.
- PPTP and L2TP miniports are stuck in a limbo state – This issue is confirmed to occur on both Windows 7 and Windows 10. In this case, you should be able to resolve the issue by opening up an elevated CMD prompt and deploying a selection of commands capable of resetting both the PPTP and the L2TP mini ports.
If you’re looking for a fix that will allow you to re-connect to your VPN network without having to restart every time, we have managed to identify a couple of potential fixes that other users in a similar situation have successfully used. Each of the methods below is confirmed to work by at least one affected user.
For the best results, we advise you to follow the methods in the order that they are presented since they are ordered by efficiency and severity. One of them is bound to resolve the issue regardless of the culprit that is causing the issue.
Method 1: Doing a complete TCP/IP Reset
As it turns out, there seems to be a quick fix for this particular issue. You might be able to re-connect to your VPN by running a netsh reset ip command to recreate the connection. In most cases, users were successful in resolving the issue by running the series of commands necessary to perform a complete TCP/IP reset.
But keep in mind that even if this works, it shouldn’t be regarded as a proper fix. It’s more likely than not to encounter the same issue the next time you try to disconnect from the built-in VPN.
Here’s a quick guide on doing a complete netsh reset using an elevated Command Prompt:
- Press Windows key + R to open up a Run dialog box. then, type “cmd” inside the text box and press Ctrl + Shift + Enter to open up an elevated Command Prompt. When you’re prompted by the UAC (User Account Control), click Yes to grant administrative privileges.

Running administrative Command Prompt from Run dialog box - Inside the elevated CMD prompt, type the following commands (in the listed order) and press Enter after each one:
Type 'netsh winsock reset' and press Enter.
Type 'netsh int ip reset' and press Enter.
Type 'ipconfig /release' and press Enter.
Type 'ipconfig /renew' and press Enter.
Type 'ipconfig /flushdns' and press Enter
- Once the complete TCP/IP reset has been performed, close the elevated Command Prompt and check if the issue is still resolved.
If you’re still unable to re-connect with the built-in VPN after a disconnect, move down to the next method below.
Method 2: Connect via the VPN menu
As it turns out, you might also lose the ability to re-connect to your built-in Windows VPN due to a Windows 10 glitch that only affects the tray-bar connection. Several affected users are successfully using a workaround that involves using the VPN menu (of the Settings app) instead of the more intuitive Tray-bar menu.
Although this procedure will require some extra steps, it’s still better than having to restart every time you need to reconnect to your VPN. Here’s what you need to do:
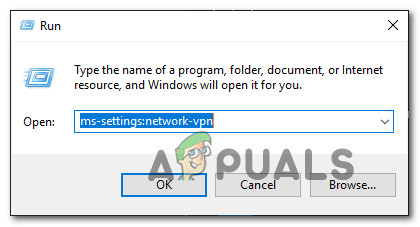
- Press Windows key + R to open up a Run dialog box. At the Run window, type “ms-settings:network-vpn” inside the text box and press Enter to open up the VPN menu of the Settings app.
Open the VPN menu from a Run command - Once you arrive at the VPN menu, select your network and click the Connect button associated with it.
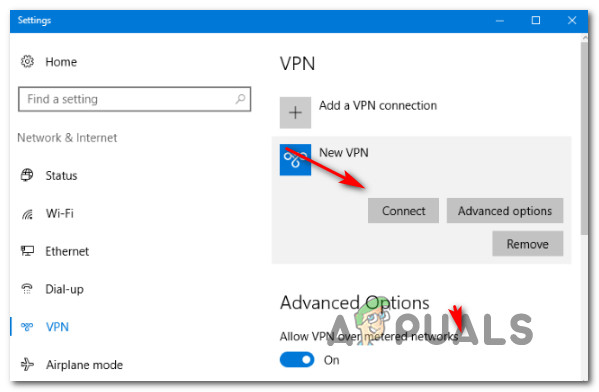
Connecting to the VPN via the Settings App - After a couple of your seconds, you should be able to re-connect to the VPN network without the need to restart.
If this method is not working for you (you’re still unable to re-connect to your VPN without restarting), move down to the next method below.
Method 3: Disabling / Re-enabling connection
Another temporary fix that is confirmed to allow certain users to reconnect to the built-in Windows VPN without the need to restart every time is to Disable and then Enable the VPN connection via the Network and Sharing center.
It’s still a temporary fix and it doesn’t treat the underlying cause of the issue, but it’s still better than having to restart every time. Here’s a quick guide on disabling and re-enabling the VPN connection via the Network Connections menu:
- Press Windows key + R to open up a Run dialog box. Then, type “ncpa.cpl” inside the text box and press Enter to open up the Network Connections tab.

Open network settings using Run dialog box - Once you’re inside the Network Connection menu, right-click on the network associated with the built-in VPN network and click on Disable from the context menu. If you’re prompted by the UAC (User Account Control) window, click Yes to grant admin access.
- Wait until the network changes its status to disabled, then right-click on it again and choose Enable to re-enable it again.
- Connect with your built-in Windows VPN and see if the issue has been resolved.
If you’re still encountering the same issue or you’re looking for a permanent fix, move down to the next method below.
Method 4: Updating or Reinstalling the WAN Miniport PPTP
It’s also possible that the issue is being caused due to a Miniport PPTP adapter issue. It’s not uncommon that the issue occurs because the Miniport PPTP adapter is not disconnecting from the VPN connection when the action is being completed by the user.
A couple of affected users that were in this exact scenario have reported that the issue was resolved after they reinstalled or updated the PPTP WAN Miniport device. Here’s a quick guide on how to update or reinstall the PPTP WAN Miniport:
Note: If this scenario is not applicable as you’re not encountering the issue with a PPTP connection, skip the steps below and move directly to the next method.
- Press Windows key + R to open up a Run dialog box. Then, type “devmgmt.msc” inside the text box and press Enter to open up Device Manager. If you’re prompted by the UAC (User Account Control), click Yes to grant administrative privileges.
- Once you get inside Device Manager, click on View from the ribbon at the top and click on Show Hidden devices from the context menu.
- Next, expand the Network adapters tab and right-click on Wan Miniport (PPTP).
- Then, from the context menu click on Properties.
- Once you’re inside the Update Driver screen of WAN Miniport (PPTP), select the Driver tab from the menu at the top of the screen.
- From the Driver tab, click on Update Driver.
- At the next screen, click on Search automatically for updated driver software and wait to see if a new driver version is being found. If a new driver version is available, follow the on-screen prompts to complete the installation.
- Once the procedure is complete, restart your computer and see if the issue has been resolved.
- If the same issue is still occurring, re-do steps 1 to 4, but click on Uninstall Driver instead.
- Restart again to let Windows update reinstall the Wan Miniport (PPTP) driver again and see if the issue has been resolved.
If the issue is still not resolved as you’re still unable to reconnect with the built-in VPN after the network is disconnected, move down to the next method below.
Method 5: Using System Restore to return back to a healthy state
If the issue only started to occur recently -the VPN connection used to reconnect normally-, you might be dealing with a corrupted file that is causing the built-in Windows VPN to become unable to reconnect. We managed to identify several reports where affected users said that the issue started occurring after a Windows update was installed.
If this scenario is applicable to you, it probably means that a botched Windows update ended up breaking the VPN feature. If you’re perfectly fine with resolving the issue without identifying the culprit, a quick fix would be to simply use System Restore to return your machine to a state where everything was functioning normally.
But keep in mind that going this route means that you’ll lose any application or update that you installed since the restore point was created. If you plan on using System Restore to fix the issue, here’s what you need to do:
- Press Windows key + R to open up a Run dialog box. Then, type “rstrui” inside the text box and press Enter to open up the System Restore tool. If you’re prompted by the UAC (User Account Control), click Yes at the pop-up to grant administrative privileges.

Opening the System Restore wizard via Run box - At the initial screen of System restore, click on Next.
- Once you see the next screen, start by checking the box associated with Show more restore points. Then, start looking for a restore point that has an older that than the date where believe the issue started occurring. Then, click Next once again to advance to the next menu.
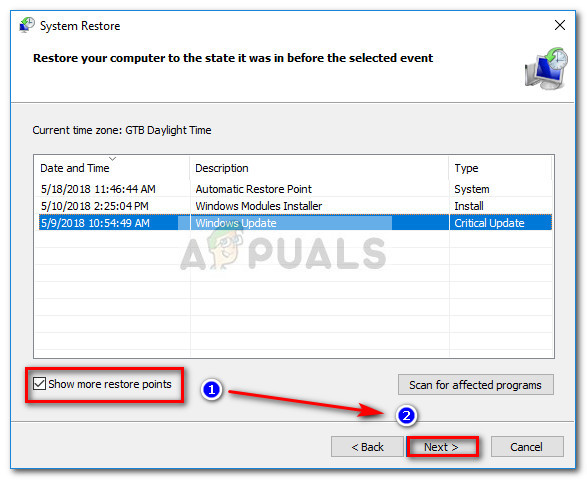
Enable Show more restore points box and click Next - Once you got this far, the Restore point is ready to be enforced. Just hit Finish to start the operation.
- After several seconds, your computer will restart and the older system state will be enforced.
- When the next startup sequence is complete, disconnect from your VPN and try to reconnect.
If the same issue is still occurring even after performing a System Restore, move down to the next method below.
Method 6: Creating a batch file using Rasdial.exe
If none of the methods above have worked for you, you might be able to resolve the issue by creating a batch file using the Rasdial.exe tool. This script will re-open your VPN connection without the need to restart as soon as you run it from an elevated Command Prompt.
Here’s what you need to do:
- Press Windows key + R to open up a Run dialog. Inside the text box, type “notepad” and press Ctrl + Shift + Enter to open up Notepad with admin rights. If prompted by the User Account Control (UAC), grant admin rights by clicking on Yes.
- Inside the empty notepad sheet, paste the following script:
Rasdial.exe "MY VPN" "USERNAME" "PASSWORD"
Note: Keep the quotes, but make sure to replace My VPN with the name of your VPN Connection and the two credential values (Username & Password) with your own.
- Use the ribbon bar at the top of the Notepad window and click on File > Save as.
- Next, choose a location for your file, name it whatever you want, but make sure to modify the extension from .txt to .bat. Then, click on Save to create the VPN starting script.
- Once the script is saved, right-click on it and choose Run as Administrator to automatically reconnect to your built-in VPN without the need to restart.
If the same issue is still occurring, move down to the next method below.
Method 7: Resetting PPTP and L2TP WAN Mini ports via CMD
Some affected users have reported that they managed to resolve the issue by resetting both the PPTP and L2TP mini ports from an elevated Command Prompt and restarting the computer. This procedure will reset any mini port that can be used by the Windows built-in VPN. This method is confirmed to work by several different Windows Users, on both Windows 10 and Windows 7.
Here’s a quick guide with what you need to do to reset the PPTP and L2TP WAN Miniport:
- Press Windows key + R to open up a Run dialog box. Then, type “cmd” and press Ctrl + Shift + Enter to open up an elevated Command Prompt. If the UAC (User Account Control Prompt) comes up, click Yes to grant admin access.
Running administrative Command Prompt from Run dialog box - Once you’re inside the elevated Command Prompt, run the following commands in order and press Enter after each one to reset both the PPTP and L2TP WAN mini ports:
Netcfg -u MS_L2TP
Netcfg -u MS_PPTP
Netcfg -l %windir%\inf\netrast.inf -c p -i MS_PPTP
Netcfg -l %windir%\inf\netrast.inf -c p -i MS_L2TP
- Once each command has been processed successfully, reboot your computer and see if the issue has been resolved after the next startup sequence is complete.


I had issue with Cisco Anyconnect app from Microsoft Store. From time to time connection just stuck in some falling state: connect, disconnect or even fail to connect because device busy.
I want to do Method 3, but there is no enable/disable in menu.
So, I went to Method 4 but instead of updating driver I disable/enable SSTP WAN miniport – this reset status of connection.
Thanks for the tips!