How to Fix the VAC Authentication Error
Valve Anti-Cheat is a software used by Valve games to check your setup to see if you are using any hack or third-party program which might make your gaming experience easier or give you an unfair advantage over other players. However, sometimes it’s this software which disconnects you from Valve games simply because of an “authentication error”.
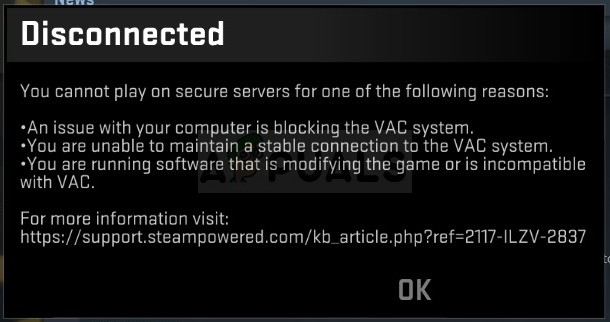
Plenty of users have had to deal with this problem and their gaming experience becomes pretty much ruined. The game will disconnect you and possibly ban you from servers because of this error so make sure you follow the article in order to solve the problem as soon as possible.
What Cases the Valve Authentication Error
There are many registered causes for the problem. Sometimes the error is caused by a broken or stopped Steam Client Service and the service either needs to be repaired or restarted. Also, your computer’s old network drivers may be preventing the VAC service from operating normally and you should consider updating them.
Other possible culprits include having disabled DEP (Data Execution Prevention) on your computer meaning you might need to enable it. Also, the problem is sometimes caused by Steam Download servers being down so consider switching to a new one.
Solution 1: Repair the Steam Service
Repairing the Steam service should help you solve this problem in the easiest way possible as it did for other users before you. Steam services are the core system behind various things related to Valve and the problem can be solved easily by running a command in Command Prompt which should repair the Steam service.
- Search for “Command Prompt” by typing this text either right in the Start menu or by pressing the search button right next to it. Right-click the first entry which will pop up from the search result and select the “Run as administrator” context menu entry.
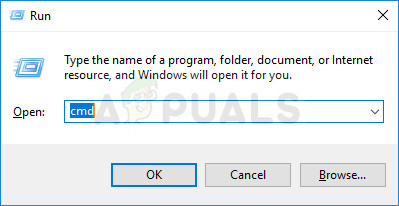
- Additionally, you can also use the Windows Logo Key + R key combination in order to bring up the Run dialog box. Type in “cmd” in the dialog box which appears and use the Ctrl + Shift + Enter key combination in order to run Command Prompt with admin privileges.
- Type in the following command in the CMD window and make sure you press Enter after typing it out correctly. Wait for the “Operation completed successfully” message or something similar to know that the method has worked and you haven’t made any mistakes.
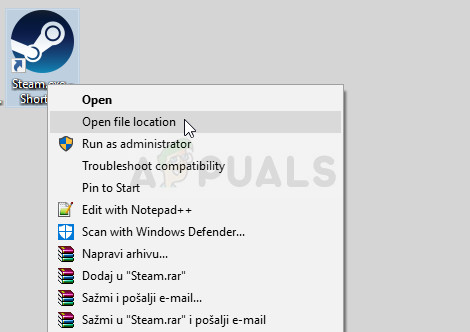
- Before you type command, you should also find out the root folder of your Steam installation which will be necessary to run the command. You can find a full path to the Steam installation folder by right-clicking its shortcut on the Desktop and choosing the Open file location option from the context menu.
- Click the address bar at the top of the folder which should display the path so use the Ctrl + C combination to copy it to the Clipboard. If you haven’t made any changes during the installation, the path should be “C:\Program Files (x86)\Steam\bin\SteamService.exe”. Let’s use the default path to run the command. Make sure you replace it with your own path when running the command:
"C:\Program Files (x86)\Steam\bin\SteamService.exe" /repair
- Reopen the problematic game either by double-clicking its icon on your computer or by launching it via Steam and check to see if the VAC error is gone.
Solution 2: Enable DEP on Your Computer
If you computer’s settings are not configured properly to run VAC, you may run into issues such as this one more often than you think, especially with Valve games. Unfortunately, the process of setting up your computer for these changes is not so easy and it even involved BIOS troubleshooting which people fear of the most. However, if you follow the steps below, you shouldn’t run into any problems.
- Turn on your computer and immediately press the BIOS Setup key on your keyboard several times in a row, about once every second, until the Computer Setup Utility or BIOS settings opens. This key will be indicated on your screen as Press _ to run Setup.
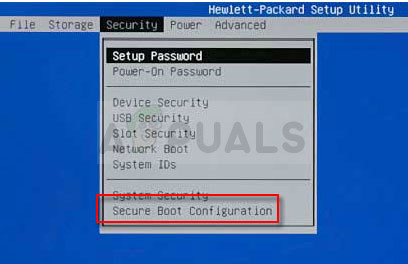
- Use the right arrow key to switch to the Security menu when the BIOS settings window opens, use the down arrow key to select the Secure Boot Configuration from the menu, and press Enter.
- Before you can use this option, a warning will appear. Press F10 to continue to the Secure Boot Configuration menu. Use the down arrow key to select Secure Boot and use the right arrow key to modify this setting to Disable.
- Use the down arrow key to select Legacy Support, and then use the right arrow key to switch it to Enable.
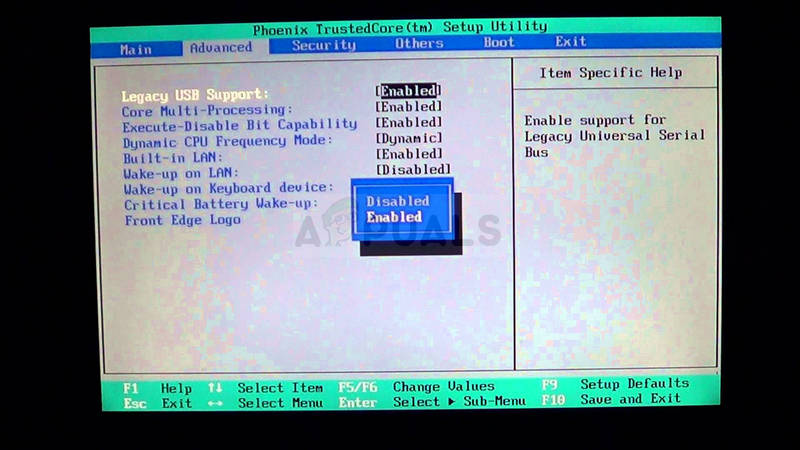
- Press F10 to save the changes. Use the left arrow key to navigate to the File menu, use the down arrow key to switch to Save Changes and Exit, then press Enter to select Yes.
- The Computer Setup Utility will now shut down and the computer should restart. When the computer has restarted, keep following the steps below to solve the VAC authentication error.
In order to solve the problem completely, you will now have to run a simple command in order to solve the problem properly. This command needs to be executed in an administrative Command Prompt window so make sure you are doing this using an account with admin privileges.
- Search for “Command Prompt” by typing this text either right in the Start menu or by pressing the search button right next to it. Right-click the first entry which will pop up from the search result and select the “Run as administrator” context menu entry.
- If you are running a version of Windows other than Windows 10, the Start menu search might or might not work properly but you can still navigate to C >> Windows >> System32, right-click on the “cmd.exe” entry and choose Run as administrator or type “cmd.exe” in a Run box and use the Ctrl + Shift + Enter key combo.
- Type in the following command in the CMD window and make sure you tap Enter after typing it out. Wait for the “Operation completed successfully” message or something similar to know that the method has worked and you haven’t made any mistakes.
bcdedit /deletevalue nx
or
bcdedit.exe /set {current} nx AlwaysOn - Either command should work properly. Make sure you restart your computer immediately and reopen the problematic game either by double-clicking its icon on your computer or by launching it via Steam. Check to see if the VAC authentication error is gone.
Note: If you are unsure whether the command above has worked and you don’t whether the command didn’t work or the method is simply not working for you, there is a way to check the current state of DEP on your computer. Use the following command in Command Prompt:
wmic OS Get DataExecutionPrevention_SupportPolicy
If you see that the result is 3, that means that DEP is enabled for all processes and that is the only number which is acceptable as a result.
Solution 3: Check Your Time and Date Settings
Improper time and date on your computer is not recommended at all and it’s not a thing anyone would do on purpose. However, some users restart BIOS or perform some changes which alter time and date and they forget to set it up properly again. This alone is enough to cause the issue so make sure you check to see if everything is okay.
- Open Date and Time settings on your computer by opening the Start menu, and opening the Settings app by clicking the gear icon above the Start menu button and the Power icon, choosing the Time & language option, and navigating to the Date & time tab.
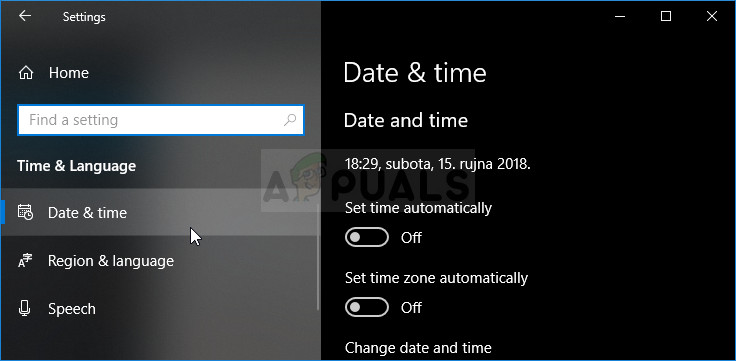
- In the Date and Time tab, make sure that your computer’s date and time settings are aligned with the location you are currently in. If the time is not correct, you can try turning the Set time automatically option on or off depending on previous settings.
- If the “Set time automatically” option is now off, choose the correct time zone from the dropdown list in order to finish the process. After you have finished, restart your computer and try opening Windows Store again.
Alternative: If this doesn’t work out for you or if you are using a version of Windows older than Windows 10, you can also use Control Panel to synchronize with an online time server to always have correct settings.
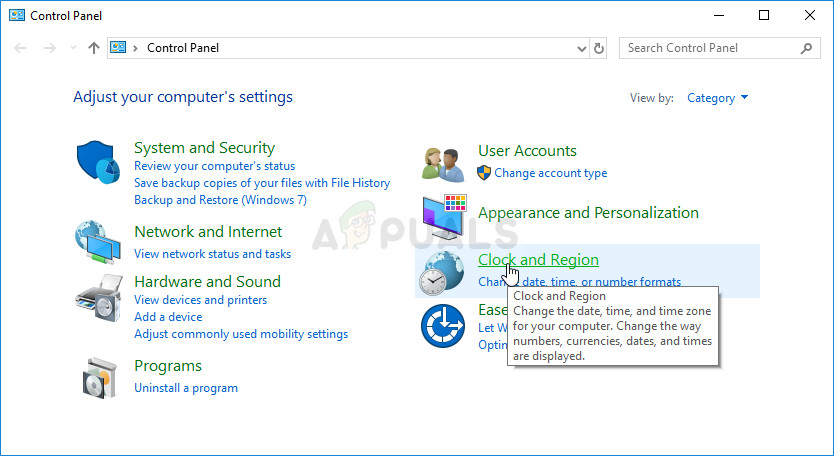
- Open Control Panel by searching for it in the Start menu or by using the Windows Key + R key combination, typing “control.exe” in the Run bar, and clicking OK in order to run Control Panel.
- In Control Panel, select to View as: Category at the top right corner and click on the Clock and Region button to open this section.
- Click on Set the time and date button under Date and Time in the Clock and Region section and navigate to the Internet Time tab immediately. Click the Change settings button.
- Check the box next to the “Synchronize with an Internet time server” option and choose the “time.windows.com” server before clicking on Update.
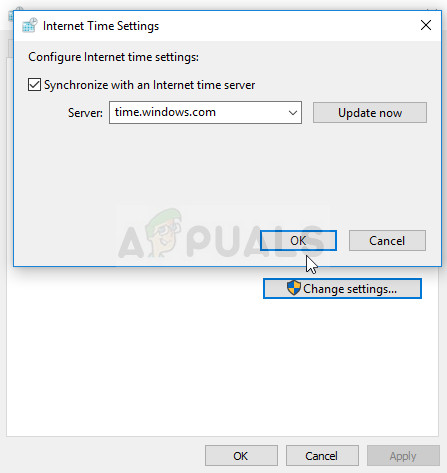
- Click the OK button to apply the changes and try running the problematic game to see if the problem with VAC authentication error is gone.
Solution 4: Delete the Steam Cache and Verify the Integrity of Game Files
This method is quite self-explanatory and it’s one of the most basic fixes you should try out when troubleshooting a Steam game. The first part depends on where you have installed Steam but you should have found out that location by now if you followed the solutions above.
- Navigate to the Steam’s root folder in the File Explorer which can be accessed by opening a folder and clicking This PC or My Computer at the left side pane. Make sure the Steam client is closed completely.
- If you haven’t made any changes during the installation of the Steam client regarding the required installation folder, it should be Local Disk >> Program Files or Program Files (x86) depending on your OS.
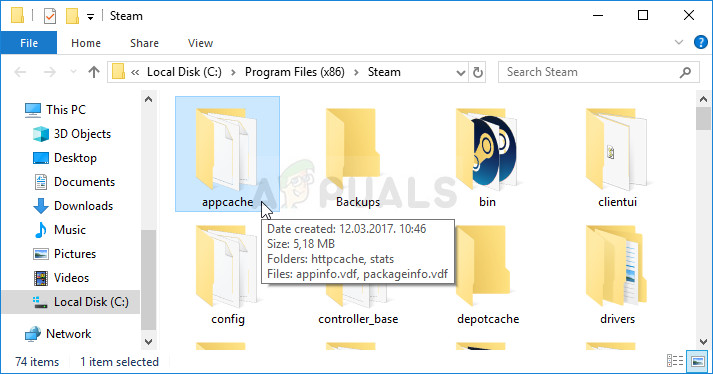
- The appcache folder should be available in this folder so make sure you right-click on it and choose the Delete option from the context menu. Confirm any dialogs and reopen Steam to proceed with the solution.
- After the Steam client opens, navigate to the Library tab, right-click the problematic game from your game list, and choose Properties from the menu. Navigate to the Local Files tab and click the Verify Integrity of Game Files button.
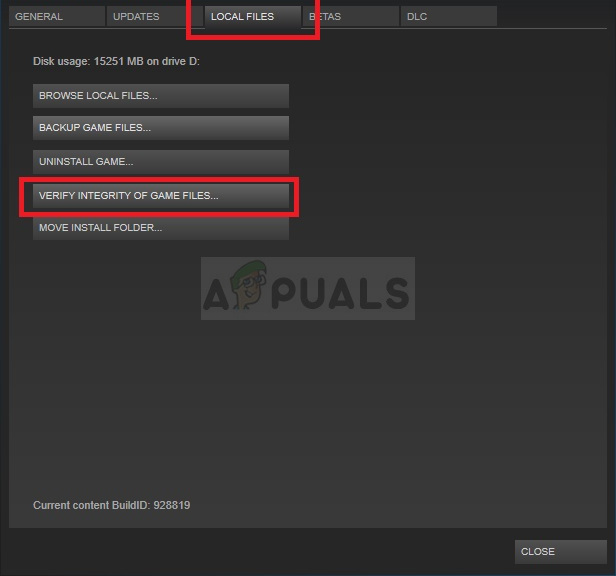
- Wait for the process to finish. It should download several missing files. Relaunch the game and check to see if you still receive the VAC authentication error.
Solution 5: Run Steam as an Administrator and Make Sure the Steam Client Service is Started
This method is a lengthy one and it’s composed from two different parts. However, then these parts are put together, you get a powerful method which can be used to solve this problem immediately. We will set Steam to run with administrator privileges and change the startup of the Steam Client Service to be running at all times.
- Locate the Steam shortcut or executable on your computer and open its properties it by right-clicking its entry either on the Desktop or the Start menu or the Search results window and choose Properties from the pop up context menu.
- Navigate to the Compatibility tab in the Properties window and check the box next to the Run this program as an administrator option before saving the changes by clicking OK or Apply.
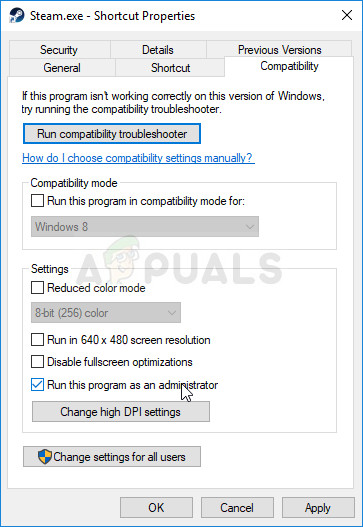
- Make sure you confirm any dialogs which may appear which should prompt you to confirm the choice with admin privileges and Steam should launch with admin privileges from the next startup. Open Steam by double-clicking its icon and try relaunching the game to see if the VAC authentication error still appears.
If this hasn’t resolved the problem, you may have issues with the Steam Client Service which also deals with when VAC should be launched. This can be solved by visiting this process in Services and configuring its startup type.
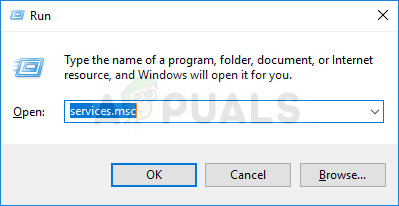
- Open the Run dialog box by tapping the Windows Key + R key combination on your keyboard. Type “services.msc” in the Run box without the quotation marks and click OK in order to open Services. You can also just search for Services in Start menu on Windows 10.
- Locate the Steam Client Service in the services list, right-click on it and select Properties from the context menu which will appear.
- If the service is started (you can check that just next to the Service status message), you should stop it by clicking the Stop button in the middle of the window. If it has already been stopped, leave it as it is (for now).
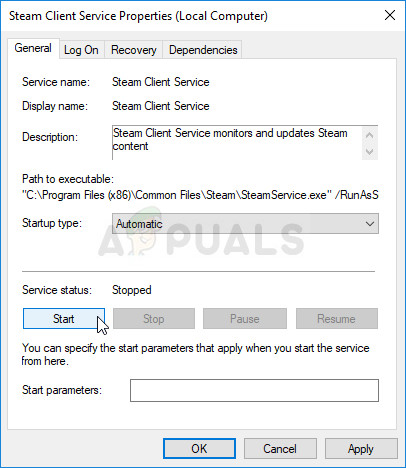
- Make sure that the option under the Startup type menu in the Steam Client Service’s properties is set to Automatic before you proceed with the instructions. Confirm any dialogue boxes which may appear when you set the startup type. Click on the Start button at the middle of the window before exiting.
You may receive the following error message when you click on Start:
“Windows could not start the Steam Client Service on Local Computer. Error 1079: The account specified for this service differs from the account specified for other services running in the same process.”
If this occurs, follow the instructions below to fix it.
- Follow the steps 1-3 from the instructions above in order to open Cryptographic Service’s properties. Navigate to the Log On tab and click on the Browse… button.
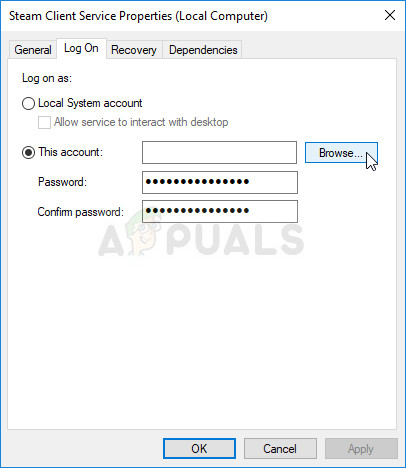
- Under the “Enter the object name to select” box, type in your account’s name, click on Check Names and wait for the name to become recognized.
- Click OK when you are finished and type in the password in the Password box when you are prompted with it, if you have setup a password. It should now start without issues!
Solution 6: Install the Latest Internet Connection Drivers
Even though most gaming problems are directly tied to the graphics card drivers, this is one of the problems which can be fixed by updating Network drivers on your computer. This can be done using a third-party tool or even better, using the built-in tool called Device Manager.
- First of all, you will need to uninstall the driver you currently have installed on your machine.
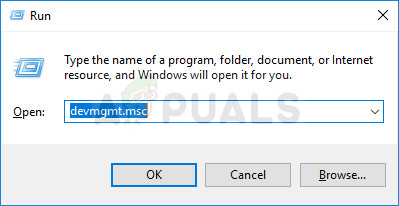
- Type “Device Manager” into the search field next to the Start menu button to open the device manager window. You can also use the Windows Key + R key combination in order to open the Run dialog box. Type devmgmt.msc in the box and click OK or Enter key.
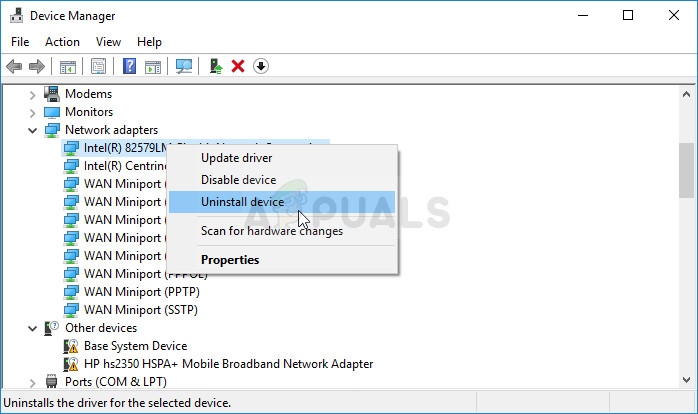
- Expand the “Network Adapters” section. This will display all network adapters that the machine has installed at the moment.
- Right click on the network adapter you want to uninstall and select “Uninstall device”. This will remove the adapter from the list and uninstall the networking device. Click “OK” when prompted to uninstall the device.
- Remove the adapter you are using from your computer and navigate to your manufacturer’s page in order to see the list of available drivers for your operating system. Choose the latest one, download it, and run it from the Downloads folder.
- Follow the instructions on-screen in order to install the driver. If the adapter is external such as a Wi-Fi dongle, make sure it stays disconnected until the wizard prompts you to reconnect it to your computer. Restart the computer and check to see if the problem has disappeared.
Solution 7: Change the Steam Server
If there are problems with the Steam servers at the moment, it might be impossible to solve the problem using any other method than by changing the Steam Download Region inside Steam Settings.
- Open your Steam PC client by double-clicking it on the Desktop or by searching for it in the Start menu and clicking on the first available result.
- After the Steam client opens, click the Steam button at the top right part of the window and choose Settings from the dropdown menu. Navigate to the Downloads tab in the Settings window and click the arrow next to the country under the Download Region section.
- Try several other server locations until you see that the error is resolved.


