How to Fix the CRITICAL_SERVICE_FAILED BSOD on Windows?
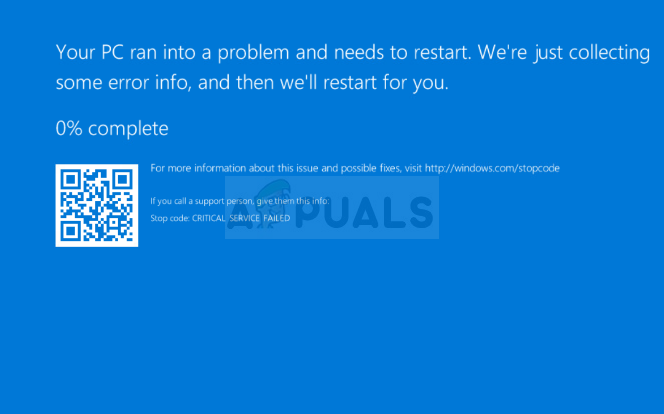
The CRITICAL_SERVICE_FAILED Blue Screen of Death is an error which usually appears on Windows 10. The BSOD appears randomly and it often interrupts users when trying to use their computers normally. The problem also starts appearing after installing the latest Windows updates or when performing some major changes to your operating system.
The worst-case scenario is when the BSOD appears in a loop and you have very little to no one time to act and try to resolve the problem. We have prepared some methods which have worked for other people so make sure you check them out below!
What Causes the CRITICAL_SERVICE_FAILED BSOD on Windows?
There aren’t many known causes to the CRITICAL_SERVICE_FAILED BSOD which can be studied but there are still several useful methods you can use to resolve the problem. However, there are still two distinct causes upon which the methods have been formed. Check them out below:
- Faulty drivers – If there is a driver which is related to some of the core devices attached to your computer is faulty, the system either crashes frequently or you are not able to access it at all due to BSOD occurring at boot. Disabling driver signature enforcement and updating all drivers can resolve the problem.
- Startup issues – It’s quite possible that some services or startup items which load during boot are faulty and it’s good to scan them using Startup Repair.
Preparation
If you are not able to access your operating system at all, you will have to use a Windows recovery media. It’s great if you already own one but it’s also very easy to create it using the Windows 10 Media Creation Tool. Follow the steps below to create it for some of the methods used below!
- Download the Media Creation Tool software from Microsoft’s website. Open the downloaded file called exe to open the start the installation. Tap Accept to agree on terms and conditions set by Microsoft.
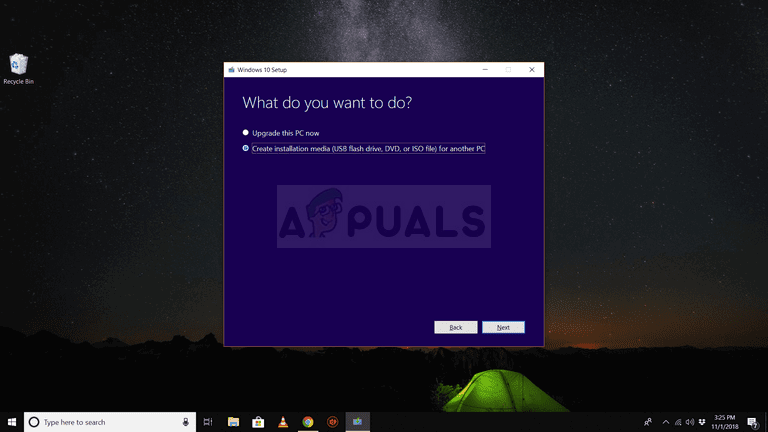
- Select the Create installation media (USB flash drive, DVD, or ISO file) for another PC option from the initial screen.
- The language, architecture, and edition of the bootable drive will be chosen based on your computer’s settings, but you should uncheck the Use the recommended options for this PC in order to select the correct settings for your PC which is encountering the error (if you are creating this on a different PC, of course).
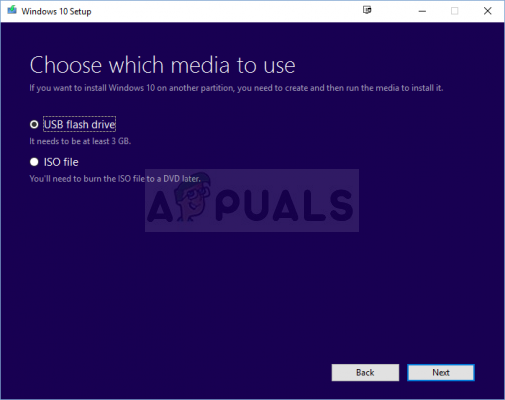
- Click Next and click on the USB drive or DVD option when prompted to choose between USB or DVD, depending on which device you want to use to store this image on.
- Click Next and choose the required drivers from the list which will show the storage devices connected to your computer at the moment.
- Click Next and the Media Creation Tool will proceed to download the files necessary to install create the installation device. Wait for the process to finish.
Solution 1: Disable Driver Signature Enforcement
This option disables the driver signature enforcement which may be one of the reasons for why your computer fails to boot properly as it’s stuck checking a single driver. This solution has helped plenty of folks so make sure you try it out.
- Click on the Start button and click the cog icon to open Settings. You can also search for “Settings” in the search bar or use the Windows Key + I key combination.
- Scroll down to the bottom of the Settings app and click on Update & security.
- Click on Recovery from the tabs located on the left side of the Update & security
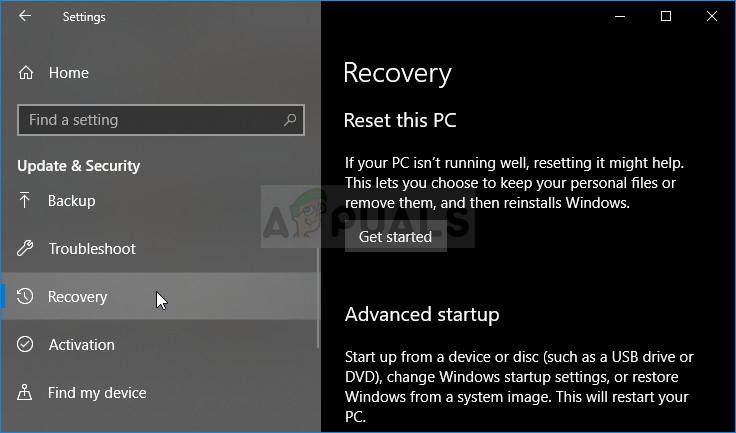
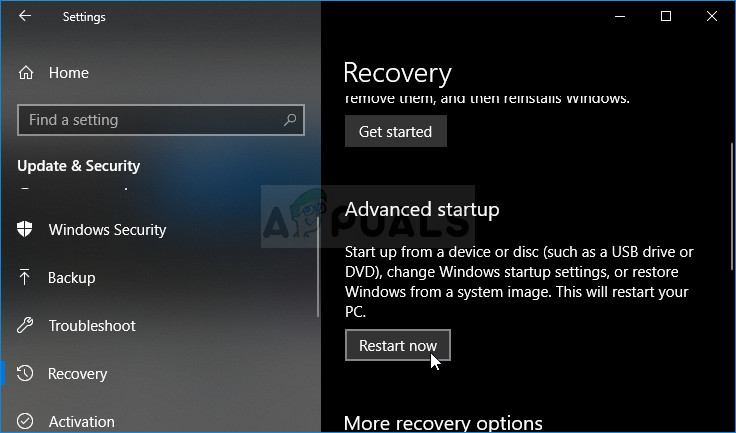
- Advanced startup section should be located in this option so locate it at the bottom of the Recovery tab. Click on Restart now. Advanced Startup Options should appear.
If you are not able to access your operating system at all, you will have to insert the installation drive you own or which you have just created and boot your computer.
After you have successfully accessed the Advanced Startup Options, you can now freely navigate to the Startup Settings option by following the instructions below.
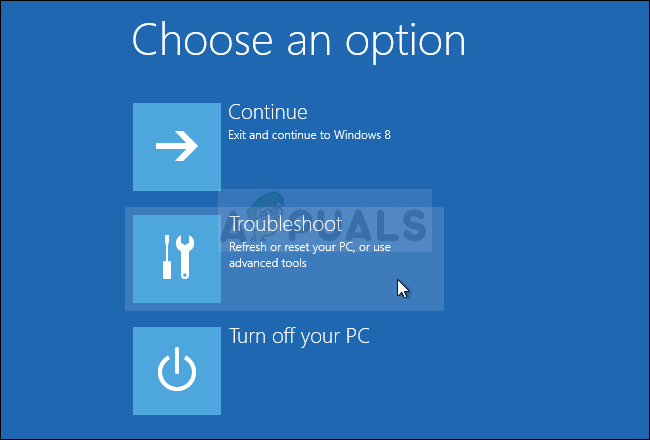
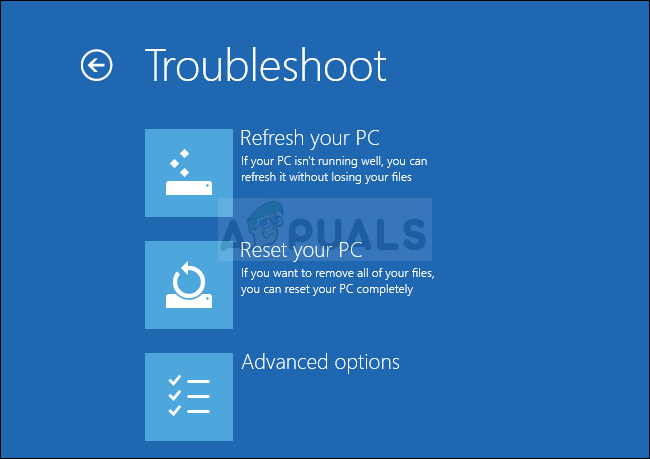
- Click on the Troubleshoot entry located just under the Continue button in the Choose an option
- You will be able to see three different options: Refresh your PC, Reset your PC, and Advanced options. Click on the Advanced options.
- Under the Advanced options screen, click on Startup Settings which will open a list of available startup options for you.
- Option number 7 should be named Disable driver signature enforcement. Click on the number 7 on your keyboard or use the F7 function key.
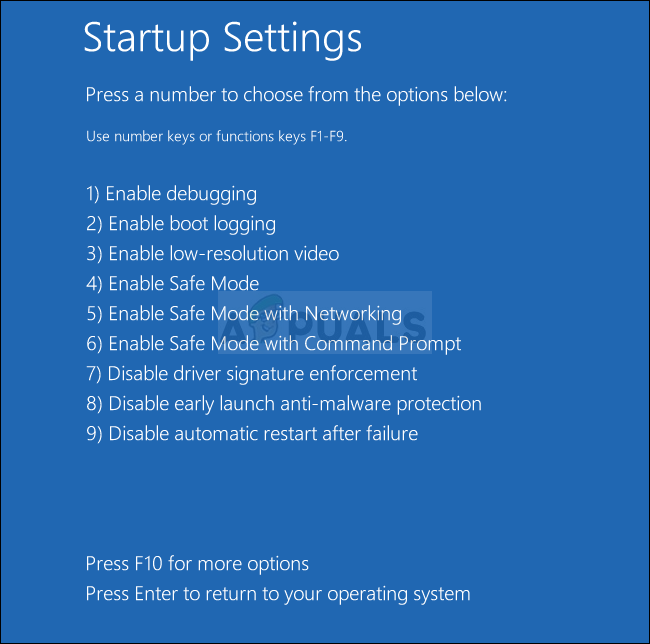
- Press Enter to return to your operating system and check to see if constant crashed and BSODs persist on your computer.
Solution 2: Perform a Startup Repair
This method is highly useful when the problem appears during startup and prevents Windows from loading properly at all. Startup Repair will scan all programs and services which load with Windows and it will try to resolve any problems it finds. Make sure you try this method out below.
- Follow any instructions from Solution 1 when it comes to accessing the Advanced Startup screen. If you can access Windows, you can do it via Settings and if not, you can use the recovery media you created.
- Click on the Troubleshoot entry located just under the Continue button in the Choose an option.
- You will be able to see three different options: Refresh your PC, Reset your PC, and Advanced options. Click on the Advanced options
- Under the Advanced options screen, click on Startup Repair and make sure you follow the instructions on screen while waiting for the process to finish. Check to see if you are now able to go without seeing the CRITICAL_SERVICE_FAILED BSOD!
Solution 3: Update All Drivers
This problem often occurs because of a single driver which is misbehaving and crashing your entire computer. That is why it’s important to update all drivers on your computer to keep them up to date and prevent similar problems from occurring again. Follow the steps below to update all drivers on your computer.
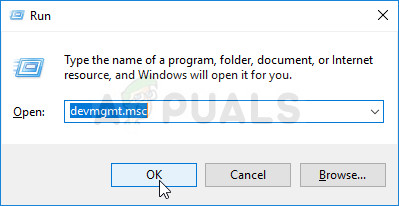
- Select the Start button, type in Device Manager, and select it from the list of results at the top. You can also use the Windows Key + R key combination to bring up the Run dialog box. Type in “devmgmt.msc” in the box and click OK.
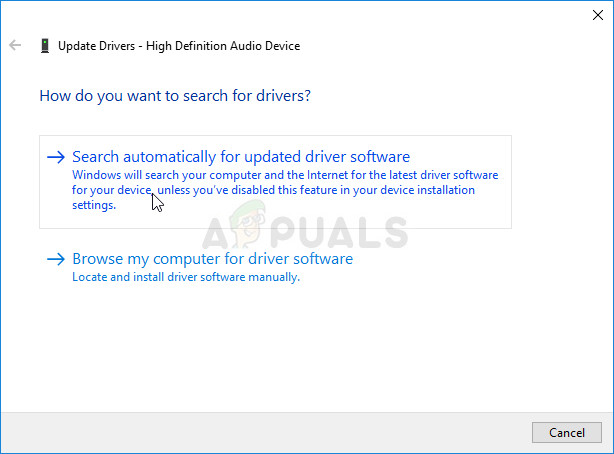
- Expand one of the categories to find the name of the device you want to update, then right-click on it, and select Update Driver. For graphics cards, expand the Display adapters category, right-click your graphics card and select Update Driver. Graphics cards are the most common culprit.
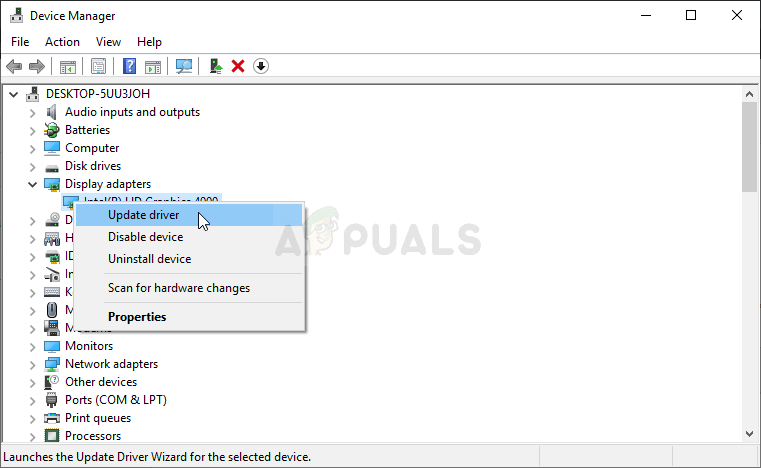
- Select Search automatically for updated driver software to conduct an online search for the newest driver.
- If Windows doesn’t find a new driver, you can try looking for it on the device manufacturer’s website and follow their instructions. You will need to repeat the same process for all devices you consider suspicious or you can use an automated tool to do this for you.