How to Fix Remote Desktop Error Code 0x104?
Remote Desktop Error Code 0x104 usually shows the message: “We couldn’t connect to the remote PC because the PC can’t be found.” This means that the Remote Desktop client cannot find the target computer, stopping the remote connection from being set up.

The main reason is often that the Remote Desktop feature is turned off on the host computer. Other possible reasons include wrong firewall settings, Network Discovery being turned off, or incorrect DNS server settings.
In this article, we will discuss different ways to solve this error.
1. Turn On Network Discovery
When devices on a network can’t “see” each other, remote connections aren’t possible. Turning on Network Discovery lets your computer find and connect to other devices on the same network. This ensures that the Remote Desktop client can find and connect with the target PC.
- Press Windows Key + R to open the Run dialog.
- Type control and press Enter to open the Control Panel.
- Navigate to Network and Internet > Network and Sharing Center.
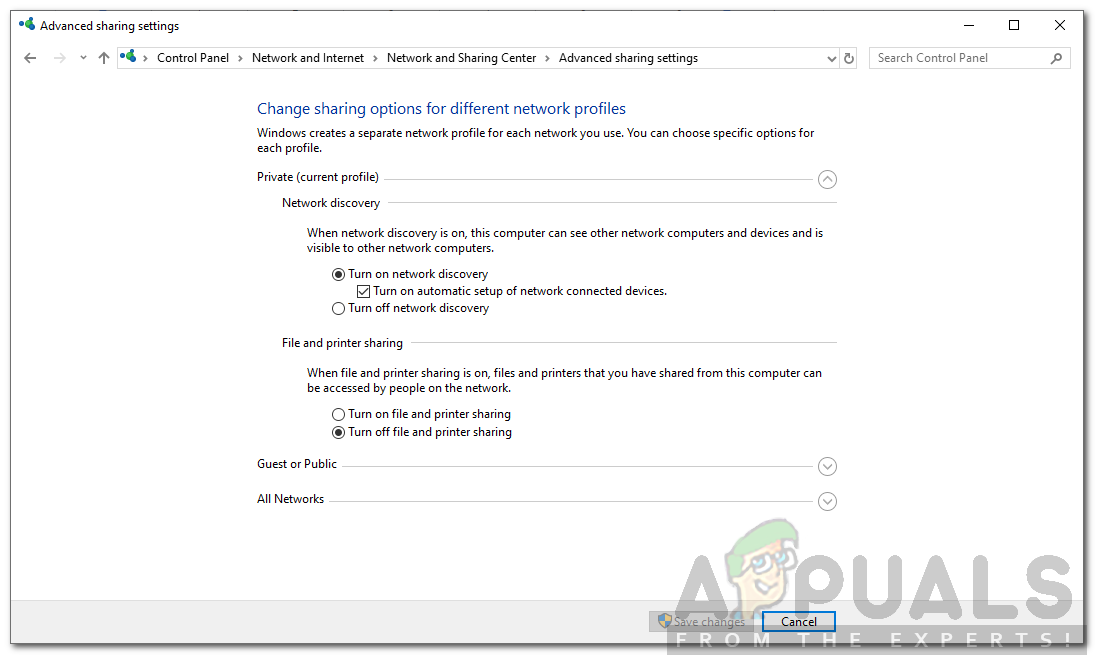
- In the left panel, click ‘Change advanced sharing settings’.
- Expand the network profile you are using and select ‘Turn on network discovery’.

Turning on Network Discovery - Click Save Changes.
2. Allow Port 3389 Through Firewall
Opening Port 3389 in the firewall ensures that Remote Desktop can work properly, as this port is specifically used for RDP connections. If the firewall blocks this port, connection requests will not work, even if Remote Desktop is set up correctly. Allowing this port removes the block, allowing the system to accept incoming remote connection requests.
- Press Windows Key + R to open the Run dialog.
- Type sysdm.cpl and press Enter to open the System Properties window.
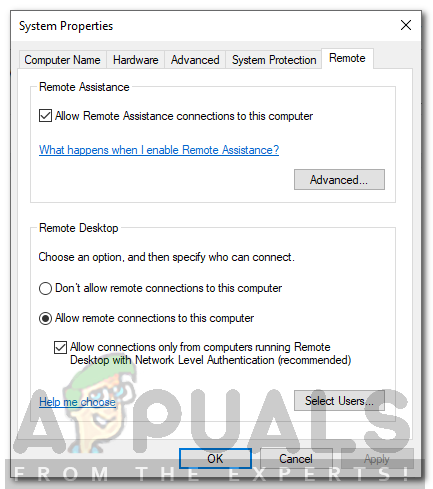
- Go to the Remote tab and ensure ‘Allow remote connections to this computer’ is selected.

Allowing Remote Connections - Press Windows Key + R again, type firewall.cpl, and press Enter to open Windows Defender Firewall.
- Click ‘Advanced settings’ on the left panel.
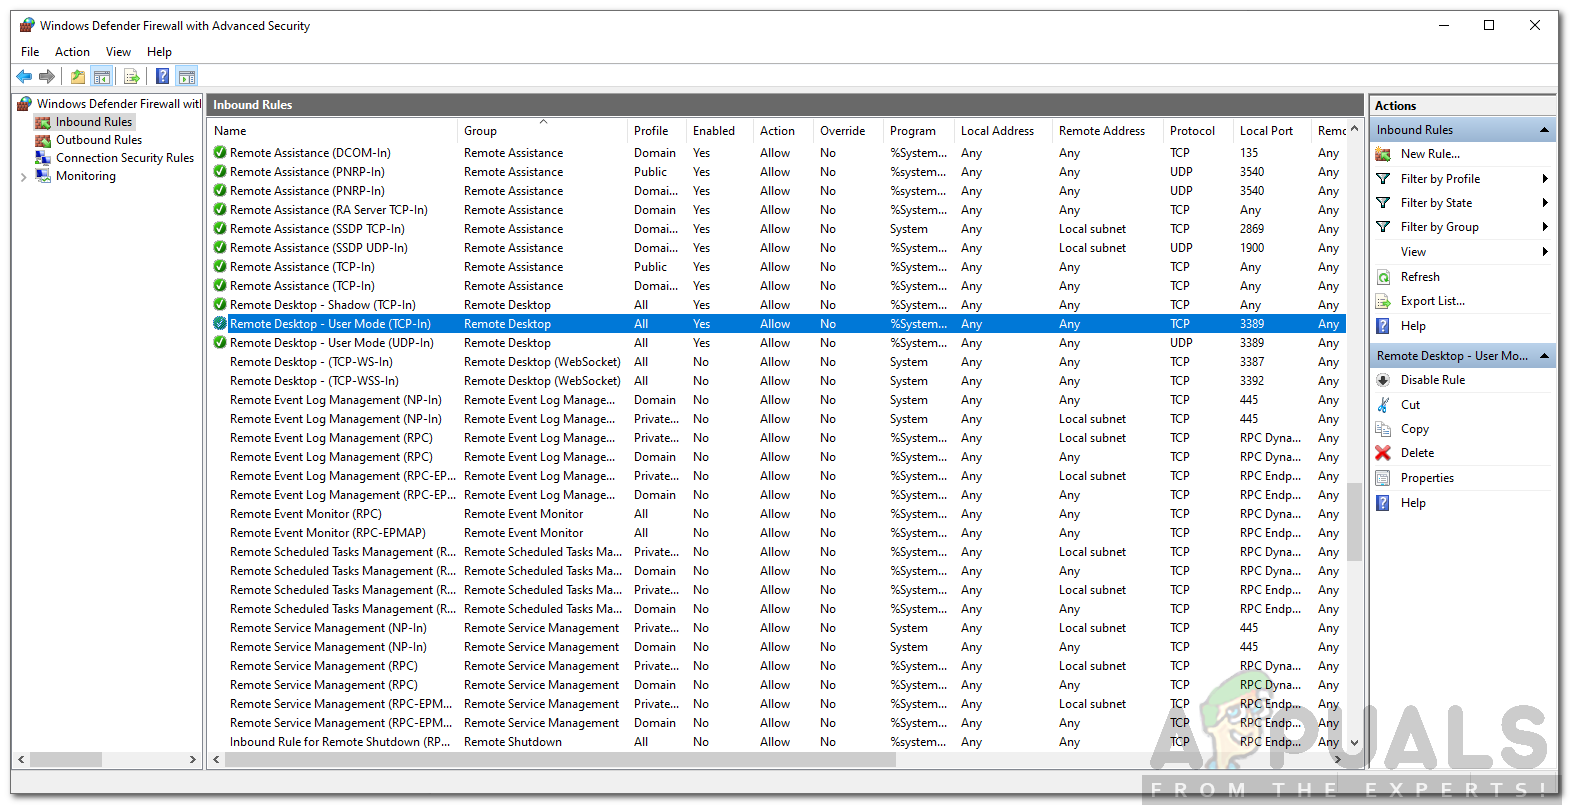
- Select Inbound Rules and search for Remote Assistance (RA Server TCP-In). Ensure it is enabled.
- Locate Remote Desktop – User Mode (TCP-In and UDP-In) and ensure they are enabled and 3389 is the port. Check the port by expanding the window to make the Local Port column visible.

Remote Desktop Firewall Rules - Try establishing a connection again.
3. Clear Custom DNS Servers
Custom DNS server settings can sometimes cause connection problems by incorrectly directing or failing to recognize the remote PC’s name. Clearing custom DNS servers and returning to the default settings will allow your system to correctly identify the remote PC’s name through your ISP’s DNS, which is usually more reliable for remote desktop connections.
- Press the Windows Key + R to open the Run dialog.
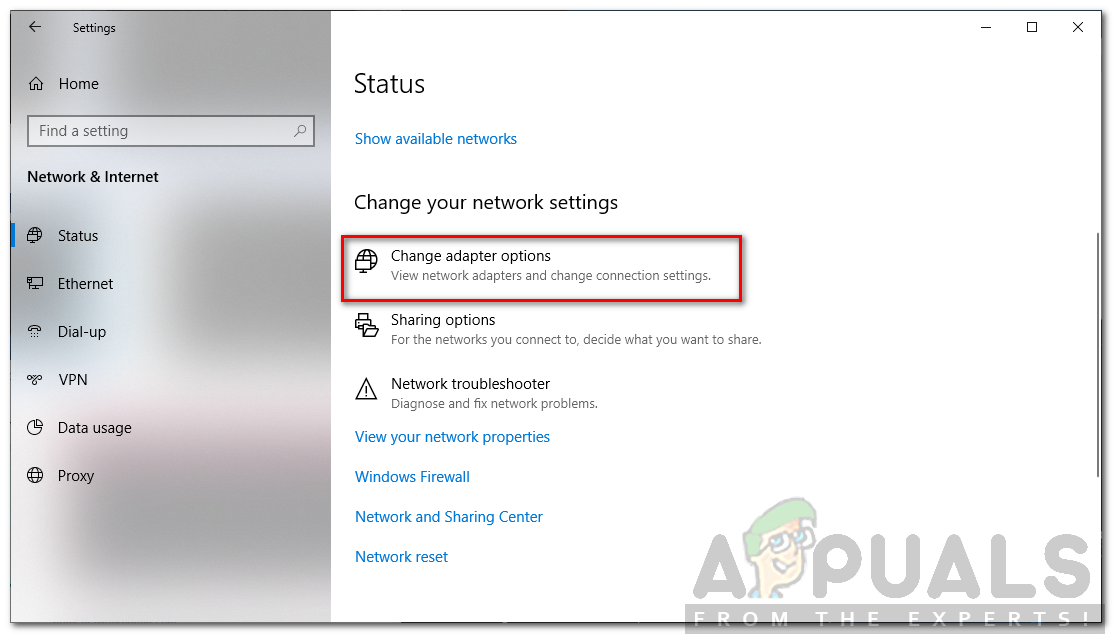
- Type ncpa.cpl and hit Enter to open Network Connections.
- Right-click on your network adapter and select Properties.
- Select Internet Protocol Version 4 (TCP/IPv4) and click Properties.
- Ensure ‘Obtain DNS server address automatically’ is selected.

Network Settings - Click OK to close the dialog.
- Try connecting again.


