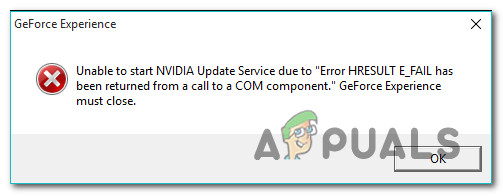
How to Fix GeForce Experience ‘Error HRESULT E_FAIL’
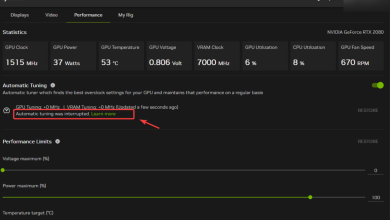
Some Windows users end up seeing the HRESULT E_FAIL error whenever they attempt to launch GeForce Experience from Nvidia. This issue is reported to occur on Windows 8.1 and Windows 10, with the message variation being a little different.
As it turns out, there are several different causes with the potential of producing this error code. Here’s a shortlist of potential culprits:
- Corrupted Nvidia GeForce Experience installation – One of the most common causes that will trigger this error is some type of file corruption present in your GeForce Experience installation. To fix it, all you need to do is reinstall the utility following the official channels.
- Botched GPU driver installation – If you started to see this issue occurring after a failed GPU installation or after an unexpected shutdown sequence while you were in the middle of updating, chances are you’re dealing with some corrupted GPU dependencies. In this case, you should be able to fix the problem by uninstalling every Nvidia driver conventionally. In most severe circumstances, you might need to use a dedicated utility in order to remove every corrupted file.
Now that you know all the potential culprits, here’s a list of potential fixes:
Method 1: Reinstalling GeForce Experience
As it turns out, one of the most common fixes for this particular issue is to reinstall the current Nvidia Experience installation along with every associated component and dependency.
We’ve managed to identify a lot of affected users confirming that reinstalling GeForce Experience allowed them to finally launch the app without encountering the same HRESULT E_FAIL error.
If you’re unsure on how to do this, follow the instructions below to reinstall every involved Nvidia component in order to fix the error message:
- Press Windows key + R to open up a Run dialog box. Next, type ‘appwiz.cpl’ and press Enter to open up the Programs and Features screen. When you see the UAC (User Account Control) prompt, click Yes to grant admin access.

Type appwiz.cpl and Press Enter to Open Installed Programs List - Once you’re finally inside the Programs and Features menu, the first thing you should do is click on the Publisher column in order to sort every app via their publisher.
- Once you manage to order the applications properly, right-click on Nvidia Experience and choose Uninstall from the context menu that just appeared.
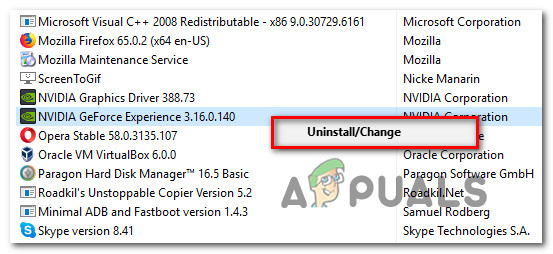
Uninstalling the current version of Nvidia Experience - Inside the uninstallation screen, follow the on-screen prompts to complete the uninstallation, then restart your computer and wait for the next startup to complete.
- Once your computer boots back up, access the official download page of Nvidia Experience and click on the Download button to get the latest version of the application.
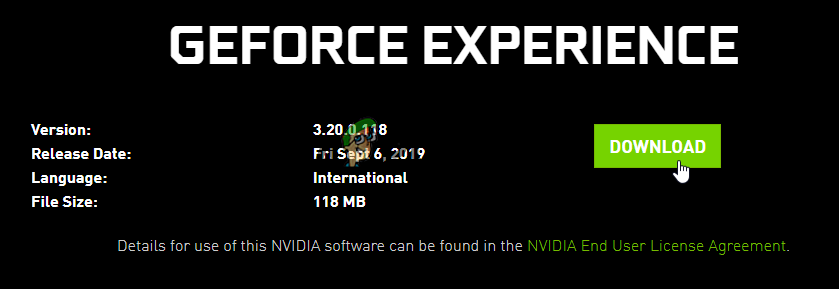
Downloading GeForce Experience - Once the download is complete, double-click on the installer and follow the on-screen prompts to complete the installation of the latest version of Nvidia Experience.
- Launch the application normally and see if the issue is now fixed.
If the launch of the app still fails with the same HRESULT E_FAIL error, move down to the next potential fix below.
Method 2: Reinstalling every Nvidia Driver
If reinstalling the GeForce Experience app wasn’t effective in your case, chances are you’re encountering this problem due to inconsistency with your GPU or physics drivers. This is even more probably if you only started to see the HRESULT E_FAIL error after a botched driver update or after an unexpected system interruption.
If this scenario is applicable, you should be able to fix the problem by uninstalling every Nvidia driver before clean installing them. You can do this by using Device Manager and Program and Features to uninstall anything related to your GPU before reinstalling them using the official channels.
If you’re unsure on how to do this, follow the instructions below:
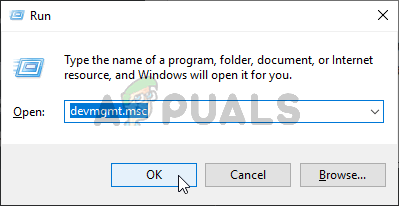
- Open up a Run dialog box and press Windows key + R. Next, type ‘devmgmt.msc’ inside the text box and press Enter to open up Device Manager. When you’re prompted by the User Account Control (UAC), click Yes to grant admin access.
Opening the Device Manager - Once you’re inside Device Manager, go ahead and cycle through the different categories of installed devices and expand the drop-down menu associated with Display Adapters. Next, go ahead and uninstall your graphics driver by right-clicking on it and choosing Uninstall. If you notice some screen flickering during this operation, this is because your OS is busy switching from the dedicated driver to the generic equivalent.

Uninstall every GPU driver Note: If you have both a dedicated and an integrated GPU, you should only uninstall the dedicated GPU driver from Nvidia.
- Next, you can safely close the Device Manager utility and press Windows key + R to open up another Run dialog box. This time, type ‘appwiz.cpl’ and press Enter to open up the Programs and Features screen.
Type appwiz.cpl and Press Enter to Open Installed Programs List - Once you’re inside the Programs and Features screen, start by clicking on the Publisher column at the top in order to order your installed programs by their publisher. Next, go ahead and uninstall every remaining utility related to Nvidia Corporation. Most likely, you still need to get rid of the physics module and a few other dependencies. Do so by right-clicking on each item and choosing Uninstall from the context menu.
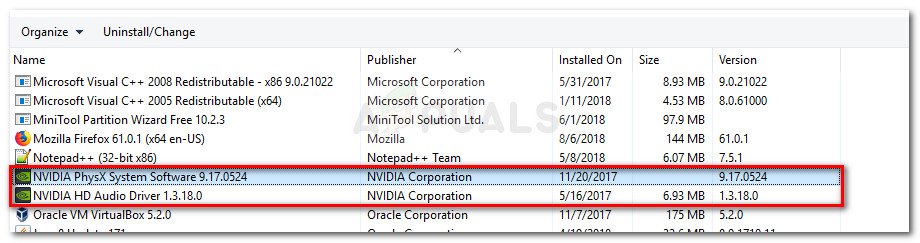
Uninstall all GPU related software - Next, follow the uninstallation prompts to complete the operation.
- Once the uninstallation of every remaining Nvidia tool is completed, reboot your computer and wait for the next startup to complete.
- After your computer boots back up, visit the official download page of Nvidia and download the latest driver version associated with your particular GPU model.
- Once the installer is successfully downloaded, double-click it and follow the on-screen prompts to install every Nvidia driver and associated dependency that’s required by your hardware.
If the same HRESULT E_FAIL error is still occurring, move down to the next potential fix below
Method 3: Using DDU to remove Corrupted Traces of your GPU Driver
If none of the methods above have worked for you, it’s very likely that you’re facing some kind of corruption issue that’s affecting your main GPU driver or associate dependencies.
Several affected users were also encountering the same HRESULT E_FAIL error have confirmed that they finally managed to fix the problem after using a 3rd party utility called Display Driver Uninstaller (DDU) to remove the current GPU driver version and every associated dependency.
The main advantage of going this route is that this utility will also remove corrupted files that would normally be left alone during a conventional uninstallation process.
DDU is a freeware utility that’s widely used in these scenarios. Here’s a quick guide on using it to fix the HRESULT E_FAIL error with the Nvidia GeForce Experience app:
- Open your default browser and visit the official download page of Display Driver Uninstaller.

Uninstalling the Display Driver Uninstaller Note: Unless you are prepared to wait for a while before the download is complete, select a mirror that’s closest to your physical location.
- After the download is complete, use an extraction utility like 7Zip or WinZip to extract the contents of the DDU archive.
- After you extract the contents of the utility, right-click on the installer and choose Run as administrator from the newly appeared context menu. When you’re prompted by the UAC (User Account Control), click Yes to grant admin access to this utility.
- Once you’re finally inside the Display Driver Uninstaller interface, choose GPU from the Select device type from the drop-down menu. Next, click on Clean and restart to begin the cleanup process.
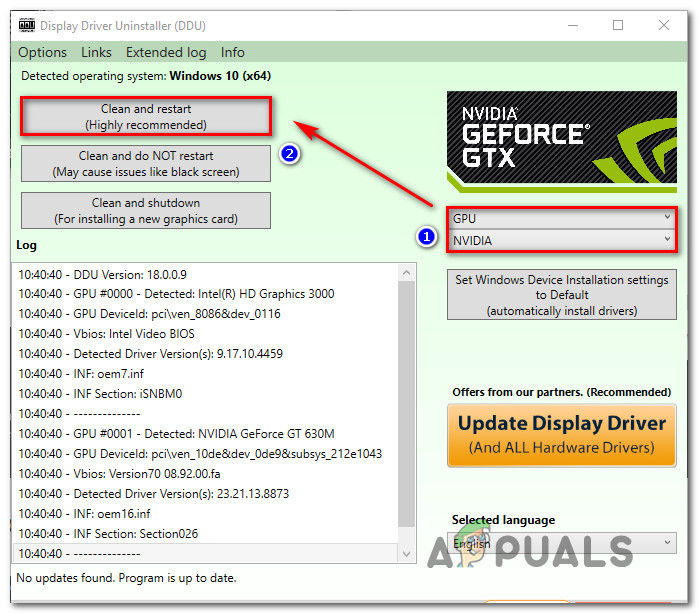
Cleaning up GeForce Experience & display drivers with DDU - Once the operation is complete, restart manually if the utility doesn’t force the restart automatically.
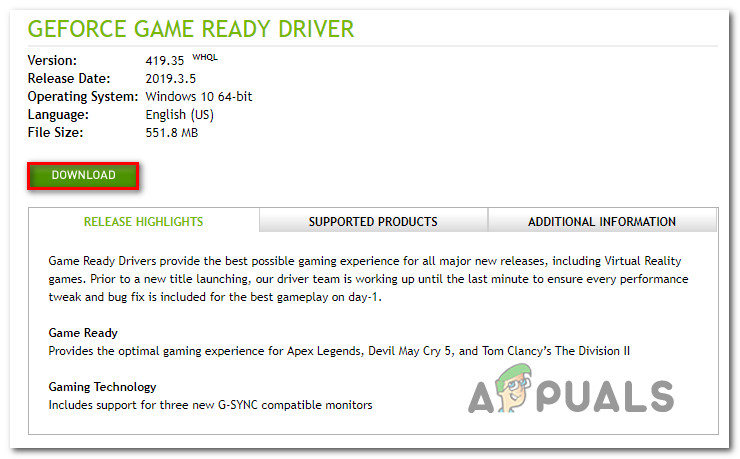
- After the next startup is complete, visit the official Nvidia download link and download the latest version of the GPU driver that’s compatible with your graphics card.
Downloading the latest GPU driver - Once the installer is downloaded, follow the on-screen prompts to complete the installation and see if the problem is now fixed.