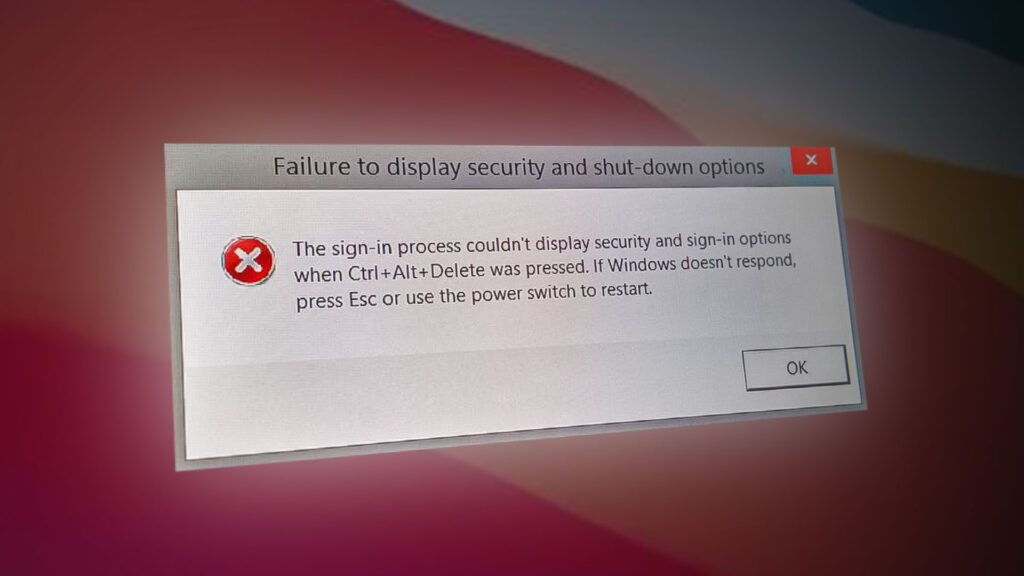
‘Failure to display security and shutdown options’ [Error Solved]
Several Windows users are reporting a weird problem that appears every time they try to press Ctrl + Alt + Delete or when they click on the shutdown icon in order to restart, shutdown or hibernate. Affected users get the following error message: “Failure to Display Security and shut down options”. The issue doesn’t seem to be specific to a certain Windows version since the error is confirmed to occur on Windows 7, Windows 8.1 and Windows 10.
What is causing the “Failure to Display Security and shut down options” issue?
We investigated this particular issue by looking at various user reports and the repair strategies that are commonly being used to fix this particular problem. As it turns out, there are several different potential culprits that might end up causing this particular error:
- System File Corruption – As it turns out, this particular issue can also be caused by system file corruption. There’s one particular file (NTUSER.dat) with the potential of becoming corrupted. Whenever this happens, the login process is effectively broken, which ends up triggering this issue. In this case, you should be able to resolve the issue by fixing the corrupted file with SFC and DISM.
- Network configuration inconsistency – This particular issue can also occur due to some kind of inconsistency with the current network configuration. Several affected users have reported that they’ve been able to resolve the issue by booting up in Safe mode and resetting the Winsock component.
- 3rd party conflict – Another potential culprit that might be causing this issue is some type of application or service conflict with the login process. If this particular scenario is applicable, you should be able to resolve the issue by performing a clean boot and take the necessary steps to identify the culprit.
- The security suite is conflicting with the login process – Vipre Internet Security and a few other 3rd party security scanners are known to trigger this particular error. As it turns out, they have a tendency of stopping access to the login service, which creates this issue. In this case, you should be able to resolve the problem by uninstalling the 3rd party security suite that is causing the issue.
- Underlying system component corruption – In some rare cases, the corruption is so deep that it cannot be resolved by Windows built-in utilities (SFC and DISM). If this scenario is applicable, the only way to resolve this issue is by performing a system restore or by performing a clean install/repair install.
If you’re currently struggling to resolve the very same “Failure to Display Security and shut down options” error, this article will provide you with several different troubleshooting guides. Down below, you’ll find a collection of methods that other users in a similar situation have successfully used to resolve this particular error message.
If you want to remain as efficient as possible, we advise you to follow the potential fixes in the order that they are presented since we ordered them by efficiency and severity. Eventually, you should stumble upon a method that resolves your problem regardless of the culprit that’s causing it.
Let’s begin!
Method 1: Doing an SFC and DISM scans
As it turns out, the most common problem that will cause the “Failure to Display Security and shut down options” error is system file corruption. In most cases, the error appears because a file (NTUSER.DAT) becomes corrupted and ends up breaking the login process, which in turn will trigger this error message.
Several affected users that found themselves in a similar situation have reported that they managed to resolve the issue by running scans with a series of built-in utilities capable of fixing system file corruption automatically. Both SFC (System File Checker) and DISM (Deployment Image Servicing and Management) are two built-in utilities that have features capable of fixing corrupted Windows files. However, their approach is different.
While SFC scans for corrupted files and replaces any corrupted file with fresh copies from a locally stored folder, DISM relies on WU (Windows Update) to download fresh copies for the corrupted files that are identified by the initial scan.
Since the two procedures somewhat complement each other, we advise you to perform both scans in order to ensure that any sort of system file corruption is resolved. Here’s a quick guide on running an SFC and DISM scan from an elevated Command Prompt:
- Start by pressing Windows key + R to open up a Run dialog box. Then, type “cmd” inside the text box and press Ctrl + Shift + Enter to open up an elevated Command Prompt. When you’re prompted by the UAC (User Account Control) window, click Yes to grant administrative privileges.
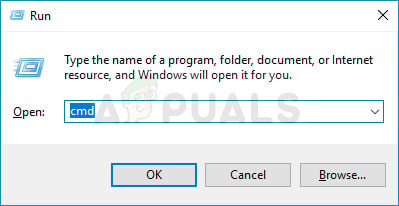
Running CMD as an administrator - Once you manage to open an elevated Command Prompt window, type the following command inside and press Enter to initiate an SFC (System FIle Checker scan):
sfc /scannow
Note: Keep in mind that once you start this process, stopping it forcibly is not recommended. Doing so runs the risk doing even more damage to your Windows system files, so avoid closing the elevated CMD window while the scan is running.
- Regardless of the results of this procedure, close the elevated CMD prompt once the scan is finished and restart your computer. SFC is notoriously known for not displaying fixed corruption entities even if they were fixed.
- Once the next startup sequence is complete, see if the same issue is still occurring once you press Ctrl + Alt + Delete. If the problem is still there, follow step 1 again to open another elevated CMD prompt. Then, type the following command and press Enter to perform a DISM scan:
DISM /Online /Cleanup-Image /RestoreHealth
Note: Keep in mind that DISM needs to rely on a stable internet connection in order to be able to download fresh copies of the files that are determined to have become corrupted. Make sure to not close the CMD window during this procedure and DO NOT disconnect your internet connection while the scan is active.
- Once the procedure is complete, restart your computer once again and see if the issue has been resolved at the next system startup.
If the same “Failure to Display Security and shut down options” error is still occurring, move down to the next method below.
Method 2: Doing a Winsock reset in Safe Mode
As it turns out, this particular issue can also occur due to some kind of inconsistency with your current network configuration. Several affected users have reported that they manage to resolve the issue by forcing the computer to boot up in Safe Mode (with Networking) and then resetting the Windows Sockets (Winsock) in order to fix any network issue that might be causing this issue.
This method has been confirmed to be effective on both Windows 7 and Windows 10 with users that have been encountering this problem. Here’s a quick guide on booting your computer up in Safe Mode (with Networking) and doing a Winsock reset from an elevated CMD window:
- Restart / Power your computer on and start pressing the F8 key repeatedly as soon as you see the initial screen to open up the Advanced Boot Options.
- When you see the Advanced Boot Options menu, use the arrow keys (or press the corresponding key) to select Safe Mode with Networking.

Starting your computer in Safe Mode with Networking - Wait until your computer restarts and reboots in Safe Mode with Networking.
- Once the startup sequence is completed and your PC is fully booted up in Safe Mode, press Windows key + R to open up a Run dialog box. Then, type ‘cmd’ inside the text box, then press Ctrl + Shift + Enter to open up an elevated Command Prompt.
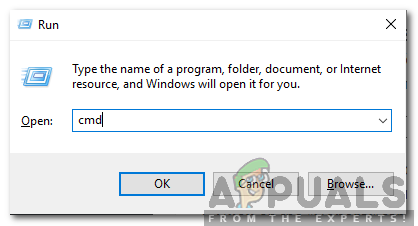
Typing cmd in the Run Prompt and pressing Shift + Alt + Enter to open an elevated Command Prompt Note: When you’re prompted by the UAC (User Account Control), click Yes to grant administrative privileges to the CMD prompt.
- Once you’re inside the elevated CMD prompt, type the following command and press Enter to initiate a Winsock reset:
netsh winsock reset
- When the procedure is completed, close the elevated CMD and restart your computer. When the next startup sequence is complete, see if the issue has been resolved.
If you’re still encountering the “Failure to Display Security and shut down options” error, move down to the next method below.
Method 3: Performing a Clean Boot
As it turns out, this particular issue can also occur due to some type of application conflict with the login service. several affected users have managed to successfully confirm their suspicions by performing a clean boot. If the issue doesn’t appear while the computer is started in a clean boot state, it’s clear that one of 3rd party application or service is causing the issue.
In this case, you’ll need to take the necessary steps to identify and isolate the service or application responsible for the issue. Here’s a quick guide on performing a clean boot in order to resolve the “Failure to Display Security and shut down options” error:
- First things first, make sure that you’re using a Windows account that has administrative privileges.
- Then, type Windows key + R to open up a Run dialog box. Then, type “msconfig” inside the text box and press Enter to open the System configuration window. When prompted by the UAC (User Account Control), click Yes to grant administrative privileges.
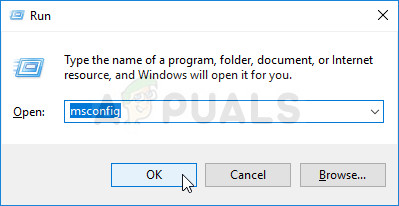
Running MSCONFIG - Once you’re inside the System Configuration window, click on the Services tab, then check the box associated with Hide all Microsoft services. This procedure ensures that you’re not disabling any critical services used by your operating system.
- When you see a list of all the remaining services, click on the Disable All button to prevent any 3rd party service or another non-essential built-in service from causing the “Failure to Display Security and shut down options”.
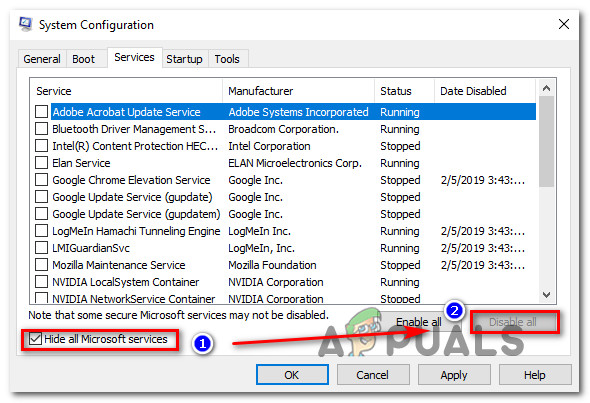
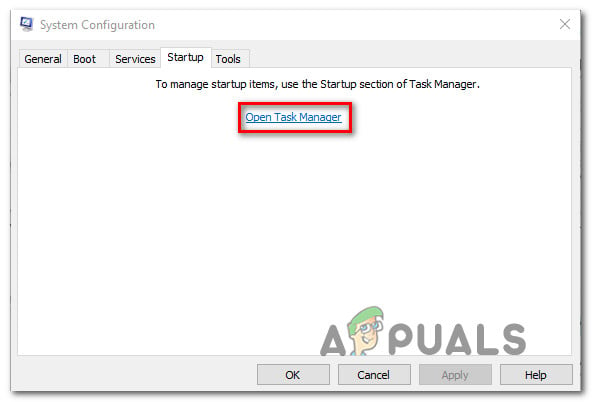
Disabling all Windows services - After you manage to disable all services, click on Apply changes, then select the Startup tab from the horizontal menu at the top and click on Open Task Manager.
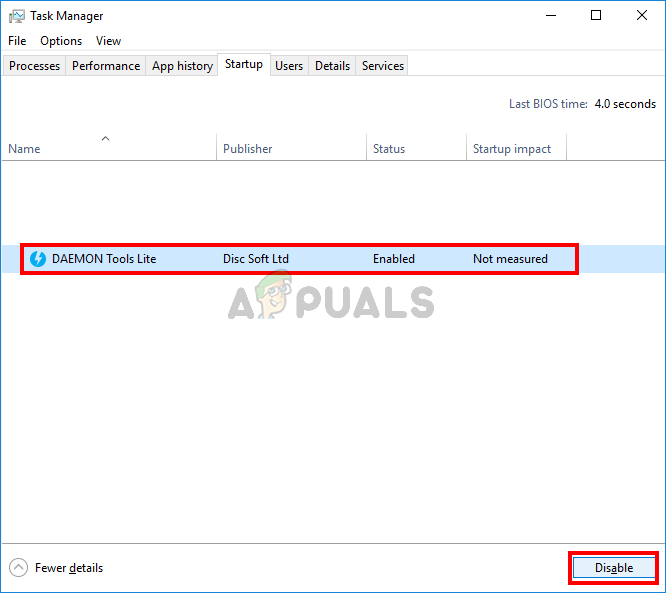
Opening the Task Manager via System Configuration - When you’re inside the Startup tab of Task Manager, select each startup service individually and click Disable to prevent it from running at the next startup.
Disabling Apps from Startup - Once you burn through the list of startup items, you will have achieved a clean boot state. To take advantage of it, close the Task Manager window and restart your computer.
- Once the next startup sequence is complete, repeat the action that was previously triggering the “Failure to Display Security and shut down options” error and see if the issue has been resolved.
- If the issue is not occurring while in a clean boot state, identify the culprit by systematically re-enabling each item that you previously disabled while doing regular restarts. Eventually, you should be able to identify the 3rd party culprit that was creating the issue.
If this scenario was not applicable to your situation or it didn’t allow to resolve the issue, move down to the next method below.
Method 4: Uninstalling Vipre Internet Security (or similar app)
As it turns out, an overprotective security suite can also be responsible for the “Failure to Display Security and shut down options” error. Vipre Internet Security is an application that is commonly reported for causing this error.
NOTE: We only managed to identify Vipre Internet Security as a potential cause for this issue, but there might be other similar security suites that will facilitate the same kind of conflict.
If this scenario is applicable and you’re using a security suite capable of creating this error, follow the steps below to resolve the conflict by uninstalling the application that is causing the issue:
- Press Windows key + R to open up a Run dialog box. Then, type ‘appwiz.cpl’ and hit Enter to open up to open up the Programs and Features window.

Type appwiz.cpl and Press Enter to Open Installed Programs List - Once you’re inside the Programs and Features screen, scroll down through the list of applications and locate the security application that you think might be causing the issue. Once you see it, right-click on it and choose Uninstall from the context menu.

Uninstalling Conflicting Applications - Follow the on-screen prompts to uninstall the conflicting security app and restart your computer once the process is complete.
- At the next startup sequence, repeat the action that was previously causing the “Failure to Display Security and shut down options” error and see if the issue has been resolved.
If the same error message is still appearing, move down to the next method below.
Method 5: Performing a system restore
If the issue only started to occur recently and you were previously able to press Ctrl + Alt + Delete without seeing the “Failure to Display Security and shut down options” error, it’s very likely that a recent system change ended up creating the problem.
In this case, the cleanest method of resolving the issue is to use a system restore point dated before the apparition of the issue to return your computer to a healthy state.
Here’s a quick guide on doing a system restore:
- Press Windows key + R to open up a Run dialog box. Next, type “rstrui” inside the text box and press Enter to open up the System Restore wizard.

Opening the System Restore wizard via Run box - Inside the System Restore wizard, click Next at the initial prompt.
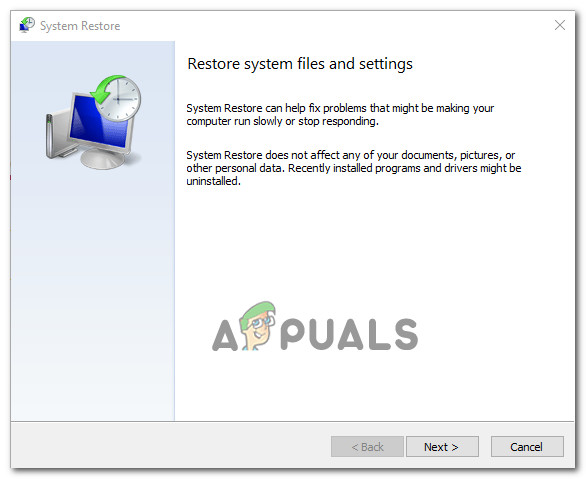
Getting past the initial screen of System Restore - From the next screen, start by clicking on Show more restore points. Then, select a restore point that is dated before you started experiencing the “Failure to Display Security and shut down options” error. Once the appropriate restore point is selected, click Next.
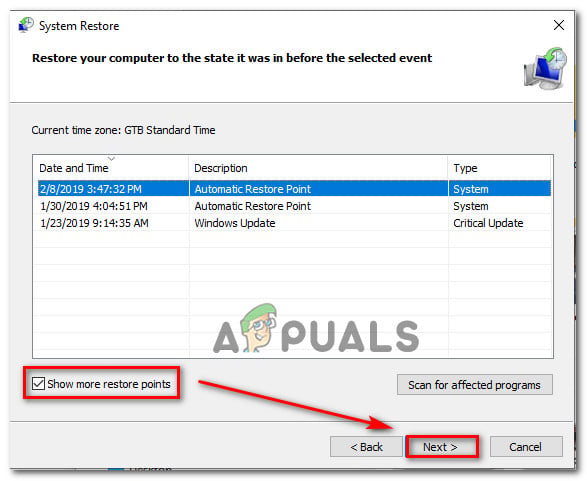
Restoring your system to a previous point in time - Click Finish, then Yes at the confirmation prompt to start the restoring process. Keep in mind that all changes made after the date in which the restore point was created will be lost – this includes installed applications, user preferences and everything else.
- At the end of this process, your computer will restart and the old state will be enforced. Once the startup sequence is complete, see if the issue has been resolved.
If you’re still encountering the same “Failure to Display Security and shut down options” error, move down to the next method below.
Method 6: Performing a repair install
If you’ve come this far and none of the potential fixes have helped you to resolve the “Failure to Display Security and shut down options” error, it’s almost clear that your PC is suffering from an underlying system corruption problem. In cases like this, replacing the whole suite of Windows components is the only viable option. There are two ways of refreshing all Windows components – a clean install or a repair install.
The first option (clean install) is more drastic since it means you’ll lose any personal data including applications, user preferences, media files, etc.
If you want to take the focused approach, the correct way to refresh the Windows components is by doing a repair install. This procedure will allow you to refresh all Windows files and folders (including booting-related processes) without losing any personal data. You’ll be able to keep your applications, games and media files. Here’s a quick guide on performing repair install (here).


