Fix: Hamachi Service Stopped on Windows
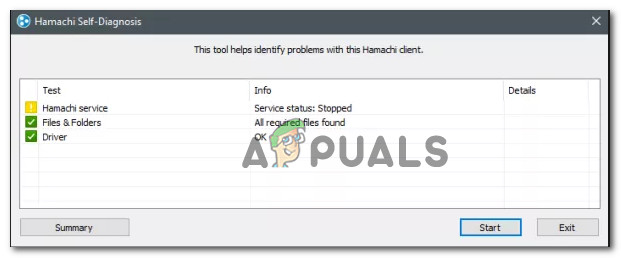
A lot of LogMeIn Hamachi users are reporting that they are unable to use the software. In most affected users cases, a self-diagnostic popup appears when the software is started where the error is identified as a stopped Hamachi service. The issue is mostly encountered to occur on Windows 10, but there are reports of it occurring on Windows 8.
What is causing the ‘Hamachi Service Stopped’ error on Windows 10?
We researched this particular error message by looking at a lot of user reports. We successfully managed to recreate the issue on our testing machines and analyzed the repair strategies that other affected users have deployed to resolve the issue.
Based on what we gathered, there are several common culprits that are known to trigger this particular error message:
- Hamachi app doesn’t have administrative privileges – The issue is often occurring because, for some reason or another, the Hamachi app doesn’t have administrative privileges. In this case, you can resolve the error by forcing the application to run with admin privileges.
- The Windows Management Service is disabled – Hamachi depends a lot on the Windows Management Instrumentation service (WMI). If this service is configured to stay disabled, this particular error will occur. In this case, starting the service should resolve the issue.
- Missing dependencies for Workstation – A couple of users have reported that the issue was resolved after they used an elevated Command Prompt to configure Hamachi’s dependencies to add Workstation. This is typically reported to occur if the user upgraded to Windows 10 from an older Windows version.
- The LogMeIn Hamachi Tunneling Engine is not configured properly – There are cases where the issue was confirmed to occur because the startup type of the service was not set to Automatic. This can be resolved quite easily by taking a trip to the Services screen.
- Third party security interference – There are a couple of overprotective AV/firewall suites that are known to conflict with LogMeIn Hamachi. Uninstalling the overprotective suite or establishing exceptions to Hamachi should resolve the issue in this case.
- Log-off or power-cycling is disabling the Hamachi service – This is a common scenario on computers that need to log-off or power-cycle frequently. You can get around this inconvenience by creating a startup task to safeguard against these scenarios.
If you’re currently looking for ways to resolve the ‘Hamachi Service Stopped’ error, this article will provide you with a collection of verified troubleshooting steps. In the next section, you’ll discover a list of potential fixes that other users in a similar situation have used to get the issue resolved.
To make the whole process as efficient as possible, follow the methods in the order that they are presented. You should eventually discover a fix that resolves the problem in your particular scenario.
Method 1: Running Hamachi as administrator
As simple as this fix might appear, a lot of users have been able to get around the ‘Hamachi Service Stopped’ error just by making sure that the executable is running with administrative privileges.
- To do this, simply right-click on the LogMeIn Hamachi executable and click on Run as Administrator.
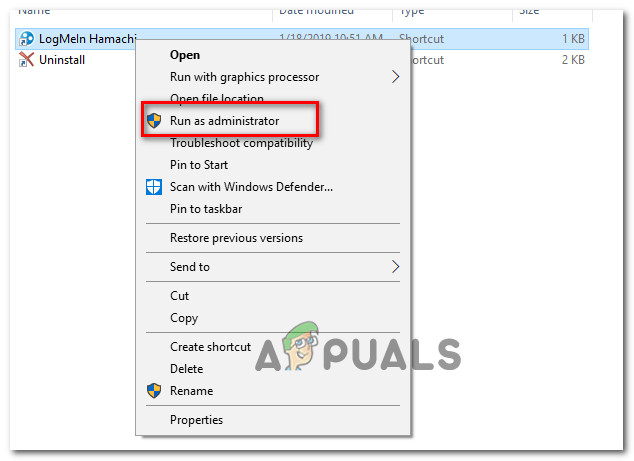
Running Hamachi as Administrator - To avoid doing this every time you need to launch it, you can right-click and go to Properties, then visit the Compatibility tab and check the box associated with Run this program as an administrator. Upon hitting Apply, your computer is configured to launch Hamachi with administrative privileges.
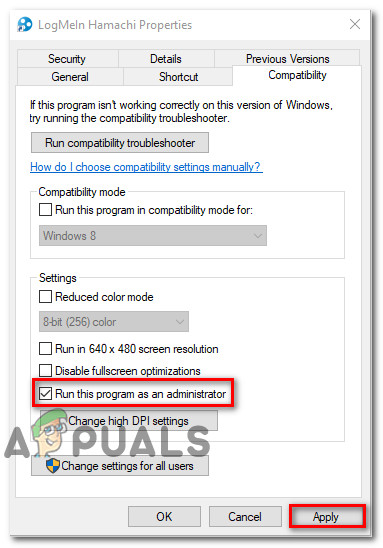
Configuring LogMeIn Hamachi to run as Administrator - See if this procedure manages to resolve the issue. If it didn’t, move down to the next method below.
Method 2: Enabling the WMI service
A couple of users encountering the ‘Hamachi Service Stopped’ error have reported that the error was resolved after they enabled the Windows Management Instrumentation service. Keep in mind that LogMeIn Hamachi depends on the Windows Management Instrumentation service (WMI) in order to function properly under Windows.
Here’s a quick guide on ensuring that the Windows Management Instrumentation service is enabled and the dependencies correctly configured:
- Press Windows key + R to open up a Run prompt. Then, type “services.msc” and press Enter to open up the Services screen. If prompted by the UAC (User Account Control), click Yes to grant admin privileges.
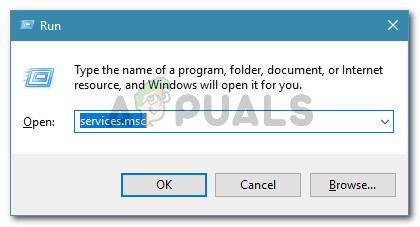
Run dialog: services.msc - Inside the Services screen, locate the Windows Management Instrumentation service from the right-hand pane. Once you see the WMI service, double-click on it to open the Properties screen.
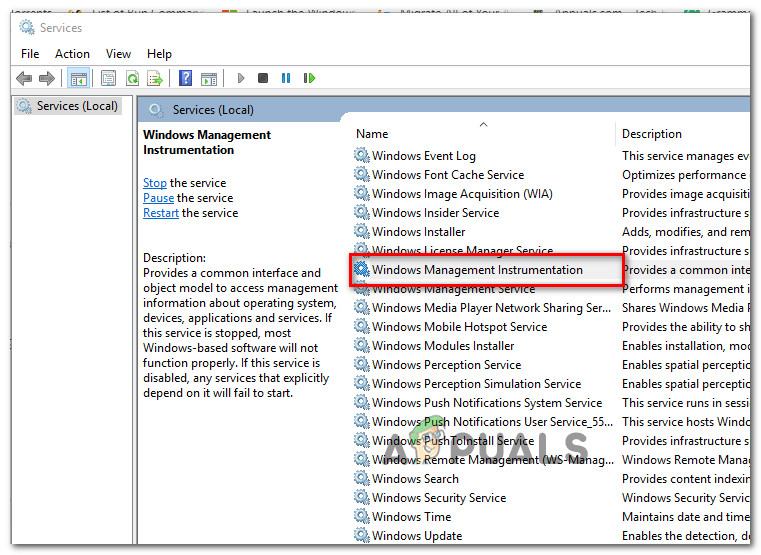
Accessing the Properties screen of the WMI service - Inside the Properties screen of the WMI service, go to the general tab and make sure that the Startup type is set to Automatic. If it isn’t, change it using the drop-down menu. Once the startup type has been modified, start the service (using the Start button) and click Apply to save the changes.
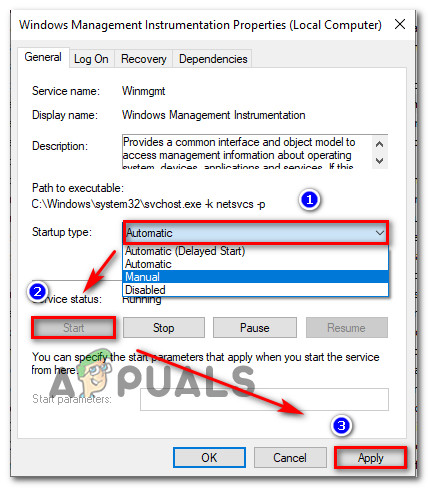
Enabling the Windows Management Instrumentation service - With the service enabled, start LogMeIn Hamachi again and see if the issue has been resolved. If the answer is no, continue with the next method below.
Method 3: Changing dependencies to add Workstation
The issue might also be occurring because the Windows Management Instrumentation (WMI) service does not have the required dependencies to function properly.
In those instances where the WMI service was enabled but LogMeIn Hamachi was still not working, some users have reported that the issue was resolved after they changed some dependencies to add Workstation from an elevated Command Prompt.
Here’s a quick guide on how to do this:
- Press Windows key + R to open up a Run dialog box. Then, type “cmd” and press Ctrl + Shift + Enter to open up an elevated Command Prompt window. When prompted by the UAC (User Account Control), choose Yes to grant administrative privileges.

Opening an elevated Command Prompt from a Run dialog box - Inside the elevated command prompt type or paste the following command and press Enter to configure the correct dependencies:
sc config Hamachi2Svc depend= Winmgmt/LanmanWorkstation
Note: If you decide to type the command, note that there’s a space after ‘=’, but no space before it.
- Restart your computer and see if the error has been resolved at the next startup.
If you’re still encountering the ‘Hamachi Service Stopped’ error, move down to the next method below.
Method 4: Configuring the LogMeIn Hamachi Tunneling service
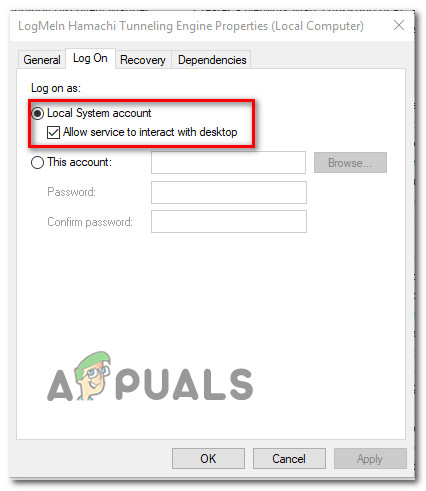
Some affected users have reported that they managed to resolve the issue by setting the startup type of LogMeIn Hamachi Tunneling Engine service to Automatic and allowing the service to log in as the local system account. Upon a restart, most affected users have reported that the issue was resolved.
Here’s a step-by-step guide on configuring the LogMeIn Hamachi tunneling service:
- Press Windows key + R to open up a Run dialog box. Then, type “services.msc” and press Enter to open up the Services screen.
Run dialog: services.msc - Inside the Services screen, scroll down through the list of services and locate the LogMeIn Hamachi Tunneling Engine service. Once you see it, double-click on it.|
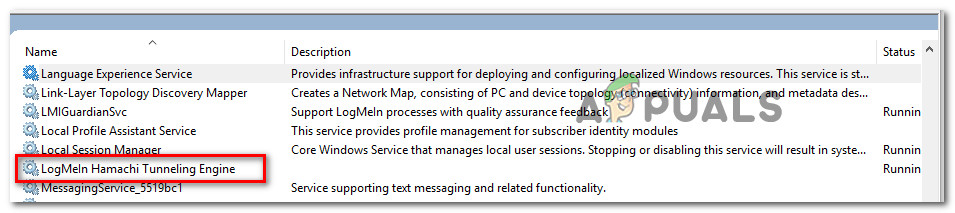
Locating the LogMeIn Hamachi Tunneling Engine - Inside the Properties screen of LogMeIn Hamachi Tunneling Engine Properties, go to the General tab and change the Startup type to Automatic by using the drop-down menu.
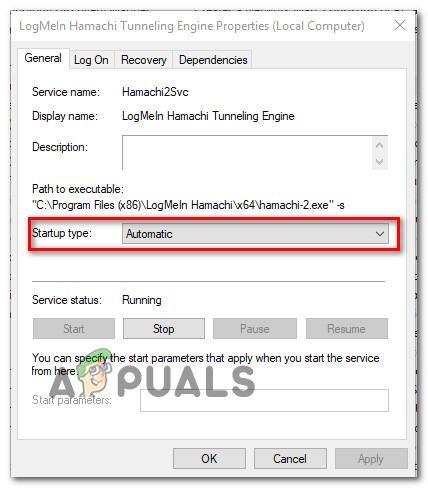
Setting the Startup type to Automatic - Go over to the Log On tab, enable the Local System account toggle and check the box associated with Allow service to interact with desktop. Hit Appy to save the changes.
Allowing the service to interact with desktop - Use File Explorer to navigate to the location of your LogMeIn Hamachi installation. By default, you should be able to find it in: C:\Program Files (x86)\LogMeIn Hamachi.
- Once you arrive inside the LogMeIn Hamachi folder, right-click on hamachi-2.exe and choose Properties.
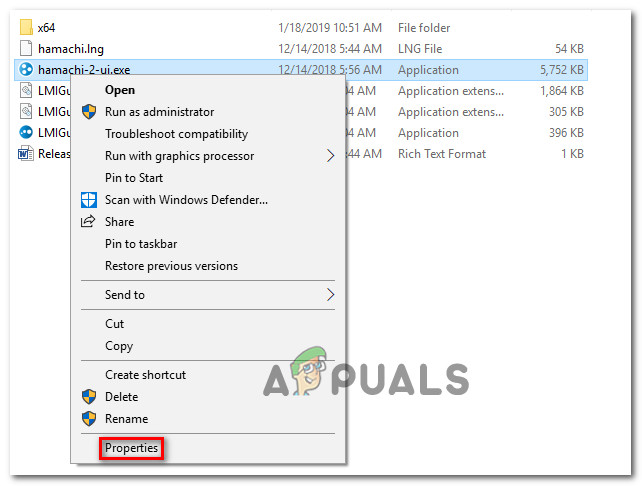
Accessing the Properties menu of the hamachi-2 executable Note: This executable is also acting as the LMI H Service.
- Then, go to the Security tab and select the Users group under Group or user names. Then ensure that the Read & Execute permissions are allowed. If they aren’t, click the Advanced button and modify the permissions accordingly.

Verifying for Read & Execute privileges - Start the LogMeIn Hamachi application again and see if it works without displaying the same error message.
If the issue is still occurring, move down to the next method below.
Method 5: Uninstall 3rd party security suite (if applicable)
As some users have suggested, the issue can also be caused by an overprotective 3rd party security suite. Several users encountering the same error have reported that the issue was no longer occurring after they uninstalled the 3rd party firewall/antivirus.
If you are fond of your security solution, you can probably resolve the conflict by establishing an exception in your Firewall/antivirus settings (excluding all Hamachi services from the scan). However, the steps of doing so will be different depending on the AV service that you’re using.
Once you’ve dealt with your third-party security software, restart your computer and see if the ‘Hamachi Service Stopped’ error is resolved at the next startup.
If you’re still encountering the issue, move down to the next method below.
Method 6: Creating a Startup task to safeguard against log-off or power-cycle
It’s a well-known fact that Hamachi (and dependent) services will stop if you log-off or power-cycle while the software is running. This might be annoying for some users since the quickest solution is to just restart and let the involved components to refresh again.
However, there’s one way to automate the whole process. You can establish a safeguard measure by adding an automatic repeating task that launches a .cmd file at every startup. This will spare you from the trouble doing constant restarts.
Here’s what you need to do:
- Press Windows key + R to open up a Run dialog box. Then type “notepad” and press Ctrl + Shift + Enter to open a new notepad window as Administrator. When prompted by the UAC (User Account Control), choose Yes to grant administrative privileges.
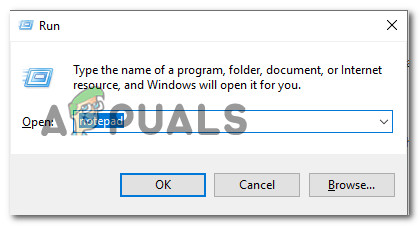
Opening a new Notepad window Note: Opening as an administrator is Important. The procedure will not work if you follow the instructions from a regular window.
- In the newly opened notepad window, type the following commands in this exact order:
net stop Hamachi2Svc
net start Hamachi2Svc
start "X:\Filepath\LogMeIn Hamachi\hamachi-2-ui.exe"
exit
Note: Keep in mind that the one line three, the first part (*X:\Filepath*) is simply a placeholder. Replace it with the appropriate drive letter and path. In the end, the command should look like this: start “C:\Program Files (x86)\Hamachi-2-ui.exe”
- Once the code is configured, go to File > Save As. Then, in the Save As window, set the name of the file as HamachiStart.cmd and change the Save as type to All Files. Then, navigate to C:\Windows\System32 and hit Save to store the newly created CMD file in the System 32 folder.
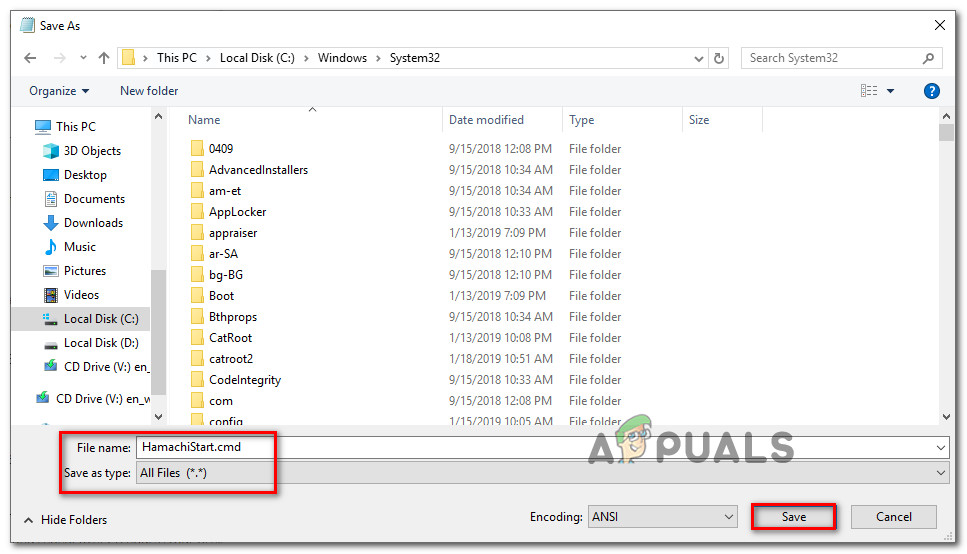
Saving the hamachi CMD Note: Saving the .cmd file inside the System32 will save us from the trouble of typing out the complete file path later own.
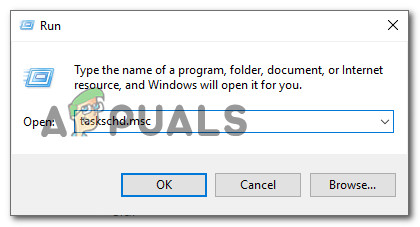
- Press Windows key + R to open up another Run dialog box. Then, type “taskschd.msc” and press Enter to open up the Task Scheduler.
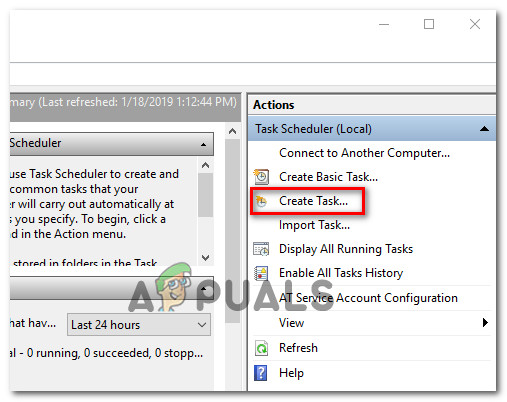
Running the Task Scheduler utility from the Run dialog box - Inside the Task Scheduler, click on Create task from the right-hand side menu.
Creating a new task with Task Scheduler - From the Create Task window, go to the General tab and set a name for your task. Use whatever name you want. Then, move over to Security Options, make sure that your user account is selected and check the toggle associated with Run only when the user is logged on. Finally, use the drop-down menu associated with Configure for and select Windows 10 from the list.
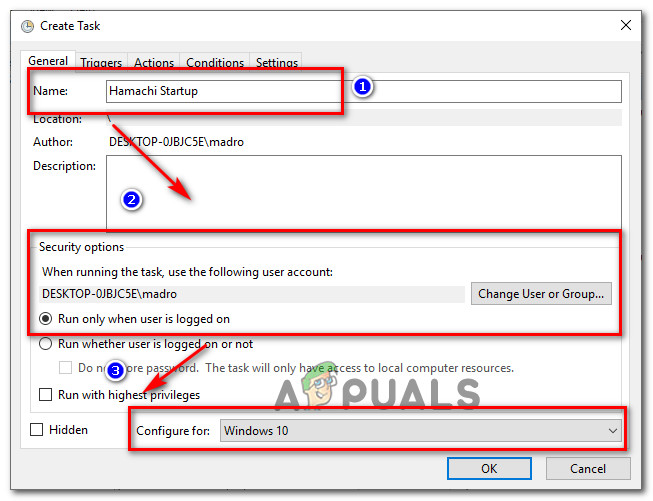
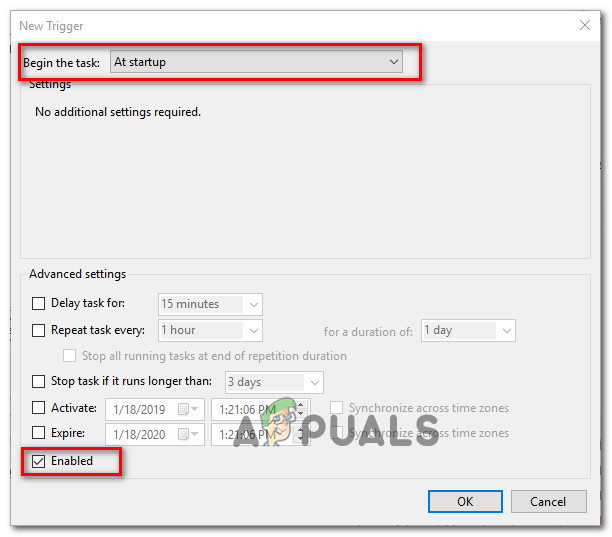
Configuring the Hamachi Startup task (General) - Next, move over to the Triggers tab and click on New… From the New trigger screen, set the drop-down menu associated with Begin the task to At Startup, then make sure the Enabled box at the bottom of the screen is checked. Finally, hit Ok to save the changes.
Configuring the Hamachi Startup Task (Triggers) - Next, move over to the Actions tab and click on the New… button. From the New Action screen, set the Action to Start a program (using the drop-down menu) and hit the Browse button associated with Program/script (under Settings). Then, browse to C:\Windows\System32, select HamachiStart.cmd and press Open. Finally, hit Ok to close the window.
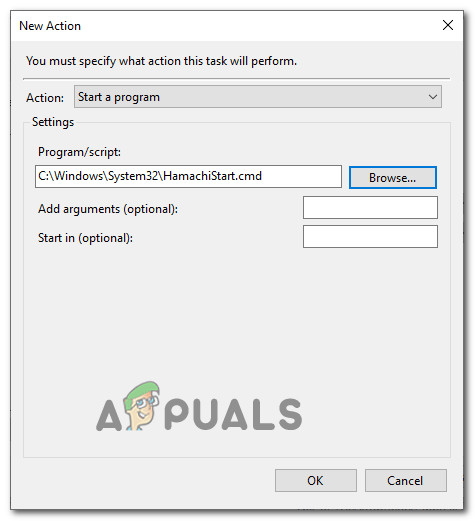
Configuring the Hamachi Startup task (Actions) - Next, go over to the Conditions tab and uncheck everything there. Now, hit Ok to save the changes.
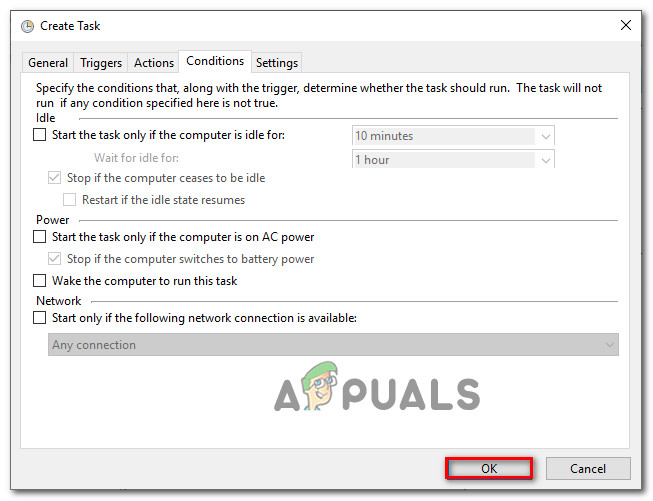
Configuring the Hamachi Startup task (Conditions) That’s it. Starting with the next startup, your computer is instructed to handle Hamachi in those instances where you need to log off or power cycle your pc.


Thank youu!!