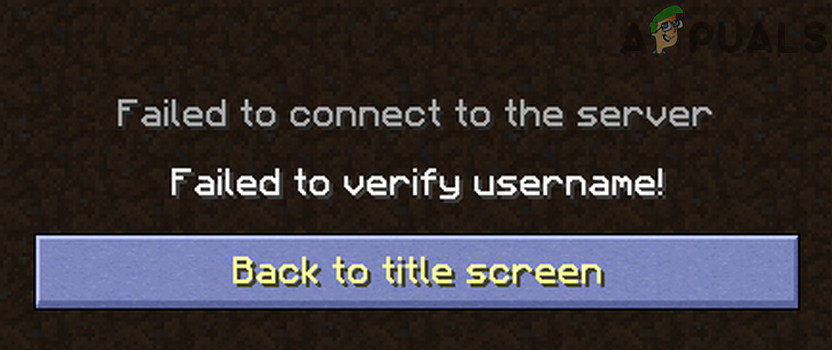
How to Fix ‘Failed to Verify Username’ in Minecraft
Minecraft launcher may show ‘failed to verify username’ if the launcher itself or the Java edition of your system is outdated. Moreover, hindrance from the antivirus/firewall or conflicting applications (like Hamachi) may also cause the issue at hand.
Before proceeding with the troubleshooting process, check the status of the Minecraft servers (especially, the auth server) if they are up and running. Moreover, performing a reboot of your PC/local server may do the trick for you. Additionally, make sure only one server instance is running on the machine. Also, it is worth mentioning that cracked versions cannot authenticate with the Minecraft server and thus show the ‘failed to verify username’ message.
Solution 1: Edit the Hosts File
You may encounter the failed to verify username issue if the Minecraft entries in the Hosts file of your system are not properly configured. In this context, removing the Minecraft entries from the Hosts file may solve the problem.
- Exit the Minecraft launcher and end the related processes in the Task Manager.
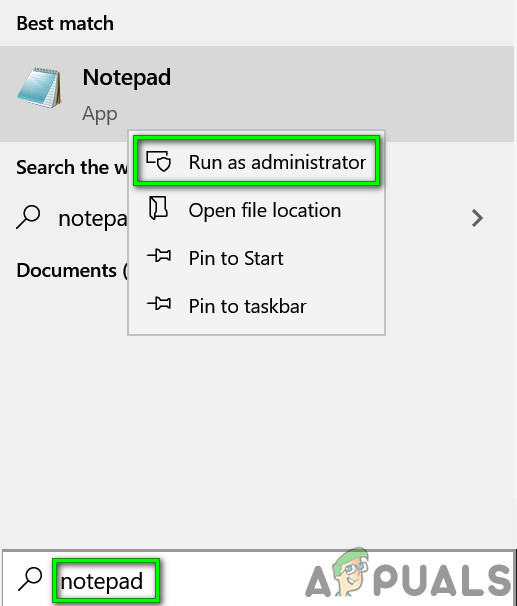
- Now click Windows, type: Notepad and right-click on Notepad. Then select Run as Administrator.
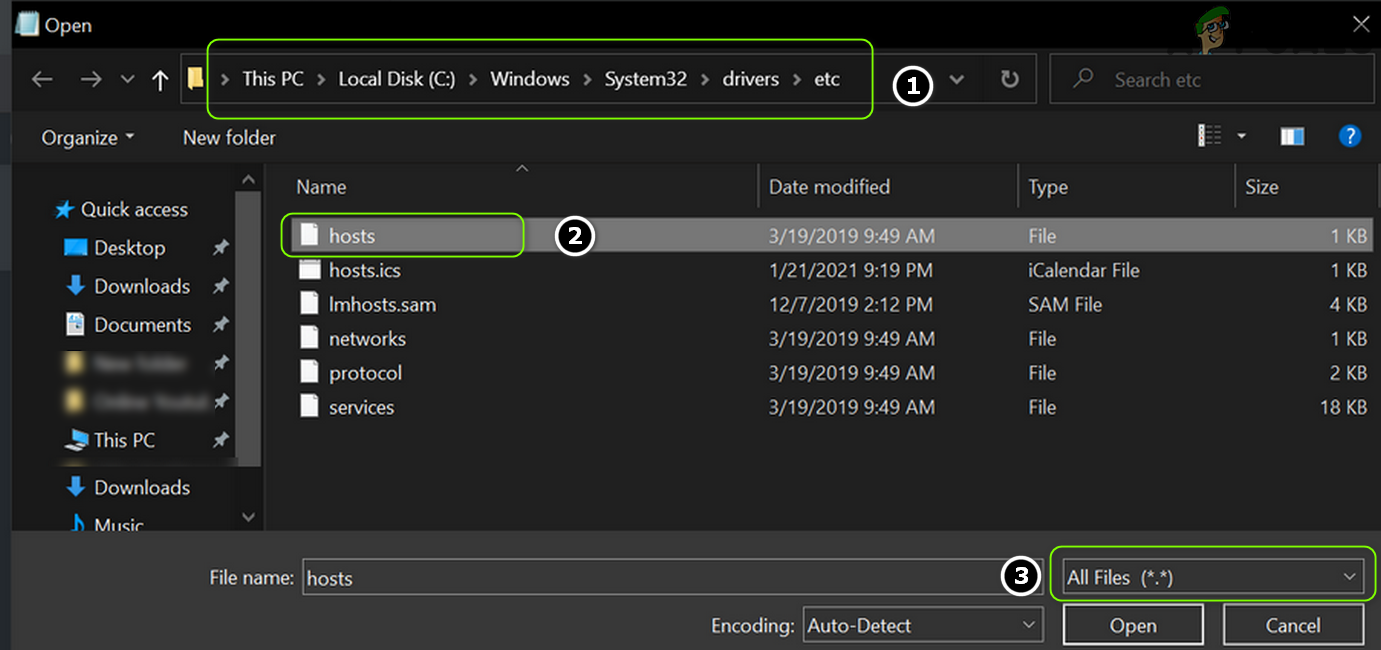
Open Notepad As Administrator - Then expand File and select Open.
- Now navigate to the following path (copy-paste the address):
\Windows\System32\drivers\etc
- Then change the file type dropdown to All Files and double-click on the Hosts file.
Open the Hosts File in the Notepad - Now expand the Edit menu and select Find.
- Then search for Minecraft (or Mojang) and delete all the entries related to it.
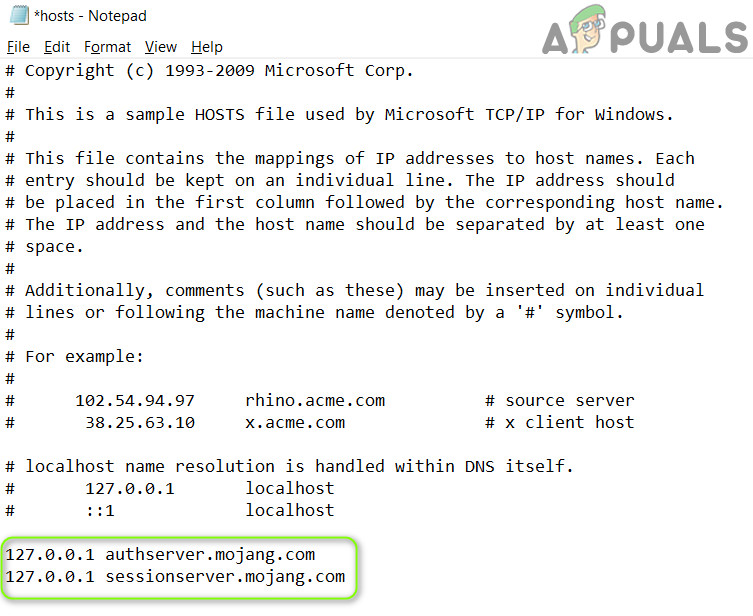
Delete Mojang Entries from the Hosts File - Now save the file and close it.
- Then open the Minecraft launcher and check if it is clear of the ‘failed to verify username’ issue.
Solution 2: Update the Minecraft Launcher and Java to their Latest Releases
You may encounter the failed to verify username issue in Minecraft if its launcher or the Java installation of your system is outdated. In this case, updating the launcher and the Java installation to their latest releases may solve the problem.
- Open the Minecraft launcher and near the username, click on the Options button.
- Then click on the Force Update button and let the update process complete (if it updates).
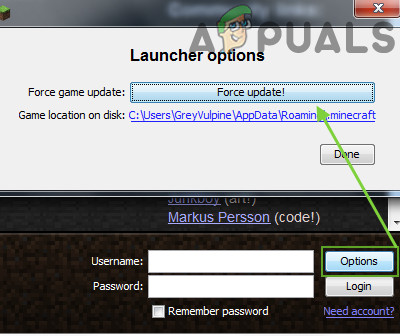
Force Update the Minecraft Launcher - Now reboot your PC and upon reboot, check if the username issue is resolved.
- If not, download the official Minecraft launcher and install it as an administrator (without removing the previous installation).
- Once installed, check if the username issue is resolved.
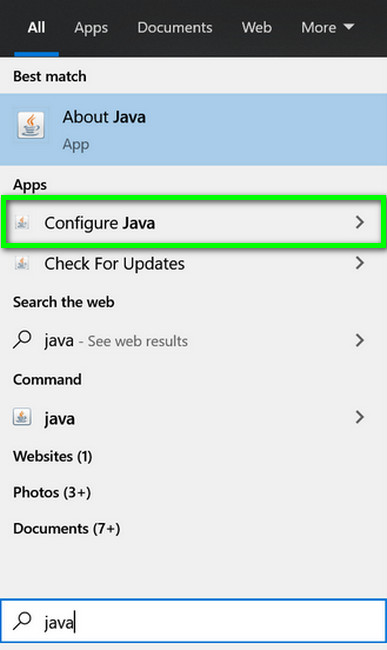
- If the issue persists, click Windows, type: Configure Java and launch Configure Java.
Open Configure Java - Now steer to the Update tab and click on the Update Now button (near the bottom corner of the window).
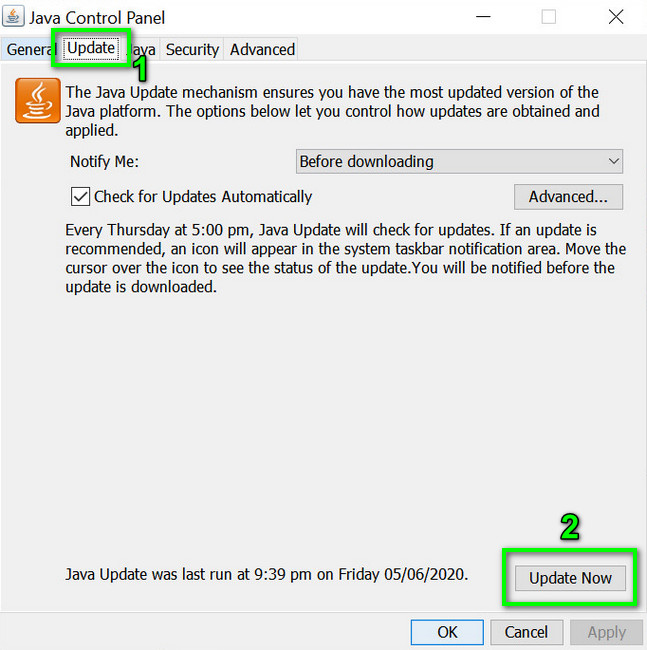
Click Update Java in the Update Tab - If an update is available, apply the Java update. Now repeat the same to the other versions of Java (if you have more than one installation of Java).
- After updating Java, check if the Minecraft is clear of the failed to verify username issue.
Solution 3: Create More Storage on the System Drive
The failed to verify username issue may emerge if the drive on which Minecraft is installed is nearly full (which may force the OS to prioritize different essential system operations over the Minecraft processes and thus cause the issue). In this scenario, deleting the temp/unnecessary files of the drive may solve the problem.
- Firstly, delete all the unnecessary files on the system drive (if its storage capacity is nearly full) and then perform a disk cleanup of the drive.
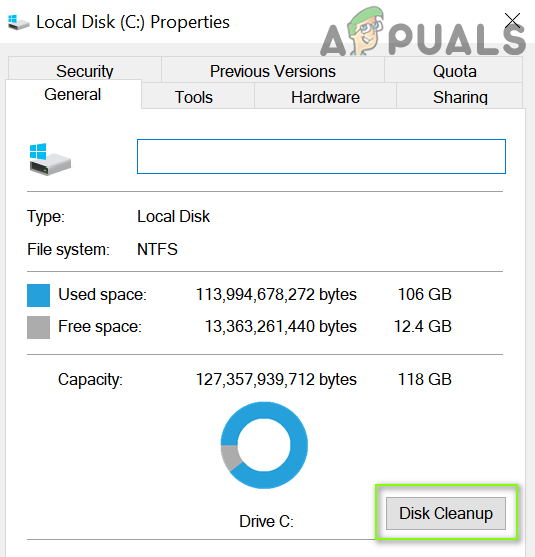
Click Disk Cleanup in the System Drive’s Properties - Now launch Minecraft and check if it is operating fine.
Solution 4: Log out and Log Back into the Minecraft Launcher
A temporary glitch between your Minecraft launcher and its server may cause the ‘failed to verify username’ issue. In this scenario, logging out and logging back into the launcher may solve the problem.
- Exit the Minecraft launcher (as well as any 3rd party launcher like Lunar client, if using) and make sure no process related to it is running in the Task Manager.
- Then open the Minecraft launcher and Quit Game (if applicable).
- Now click on the username (near the top right corner) and select Log out.

Log Out of the Minecraft Launcher - Then exit the Minecraft launcher and end the Minecraft-related processes in the Task Manager.
- Now launch a web browser and steer to the Minecraft website.
- Then log in using your Minecraft credentials and after that, open the Minecraft launcher.
- Now log in using your Minecraft credentials and check if the ‘failed to verify username’ issue is resolved. If so, then you may use the 3rd party launcher (if being used).
- If the issue persists, log out of the Minecraft (and any 3rd party client) and close any of the related processes in the Task Manager.
- Then launch a web browser and steer to the Minecraft website.
- Now click on Login and open the link of Forgot Password.

Click on the Forgot Your Password Link on the Mojang Website - Then, enter your email (registered with Minecraft) and click on Request Password Reset.
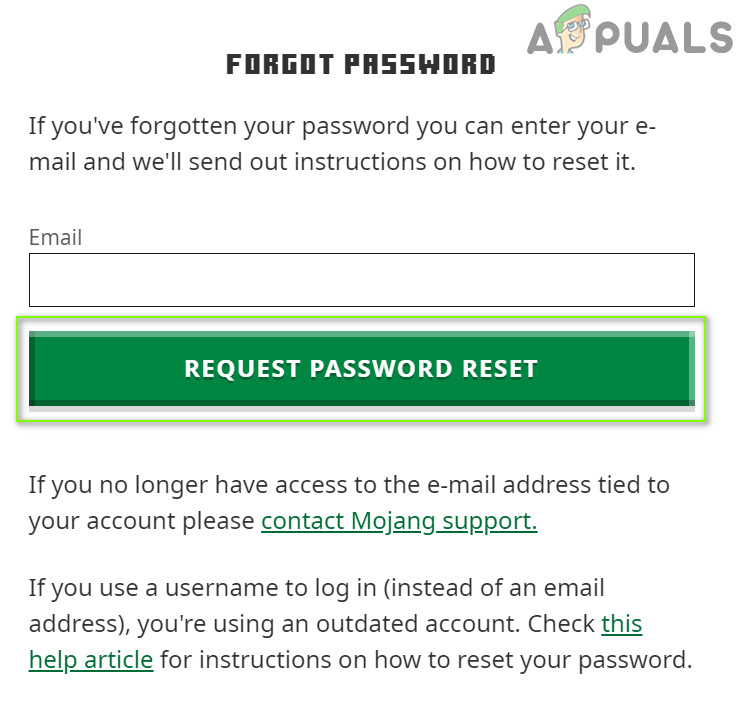
Request Password Reset on the Minecraft Website - Now follow the instructions in the email to reset your password and once the password reset is completed, open the Minecraft launcher.
- Then log in using your credentials and check if the username issue is resolved.
If the issue persists, then check if your username has space at the end (login to the Minecraft website, double-click on your user’s name, and check if space is highlighted with the name), if so, then you may have to contact the Minecraft support to remove the trailing space.
Solution 5: Allow the Connection to Minecraft in the Antivirus/Firewall Settings
You may fail to verify the username in Minecraft if the antivirus/firewall of your system (Kaspersky is reported to cause the issue at hand) is blocking access to a resource essential for the operation of Minecraft. In this context, allowing the Minecraft connection in the antivirus/Firewall settings may solve the problem. Before proceeding, check if you can access the Minecraft Session Server (a white page means it is OK).
Warning: Advance with extreme caution and at your own risk as editing the antivirus/Firewall settings is a proficient task and if not done properly, you may expose your system/data to threats.
- Temporarily disable antivirus and Firewall of your system.
- Then check if the username issue is resolved.
Add Minecraft to Trusted Applications of the Firewall
If the issue was resolved after temporarily disabling the antivirus/firewall, then you may add Minecraft in the trusted applications of the antivirus/firewall to allow the connection to Minecraft. For elucidation, we will go through the process for Kaspersky.
- Launch Kaspersky and open its settings.
- Now, in the left pane, steer to the Additional tab, and in the right pane, open Threats and Exclusions.
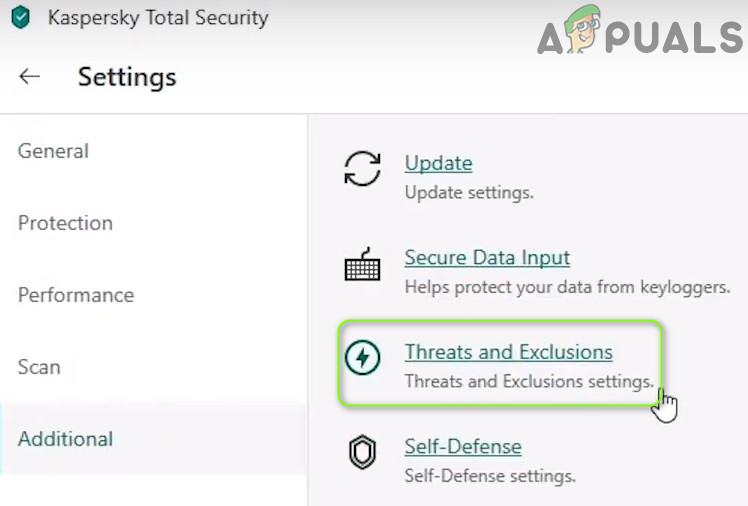
Open Threats and Exclusions in the Kaspersky Settings - Then click on Specify Trusted Applications (in the Exclusions section) and click on Add.
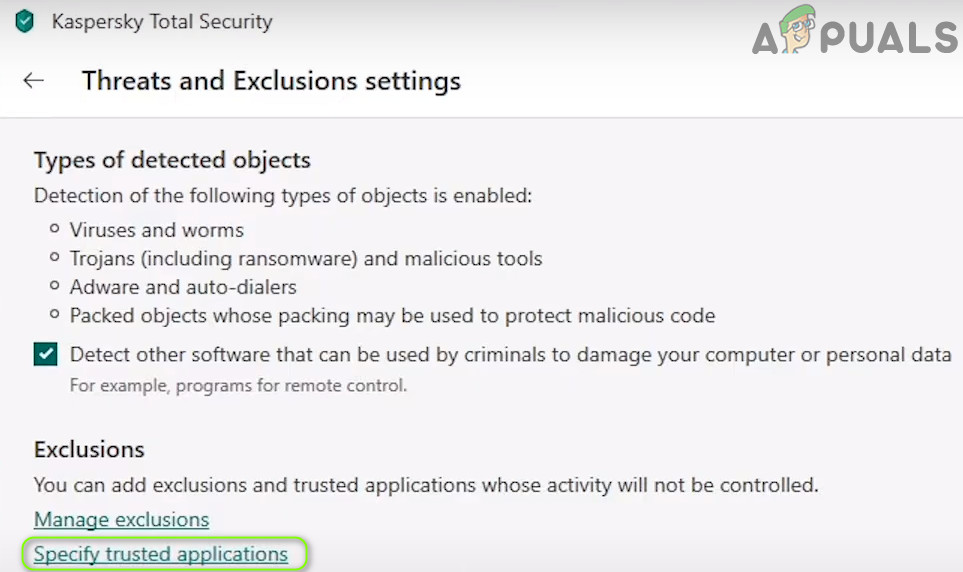
Open Specify Trusted Applications in Threats and Exclusions Settings of Kaspersky - Now select Minecraft in the applications’ list or click on Browse and select Minecraft (i.e., Minecraft.exe) in its installation directory.
- Then checkmark all the options (e.g., Do Not Scan Files Before Opening, etc.) and click on Add.
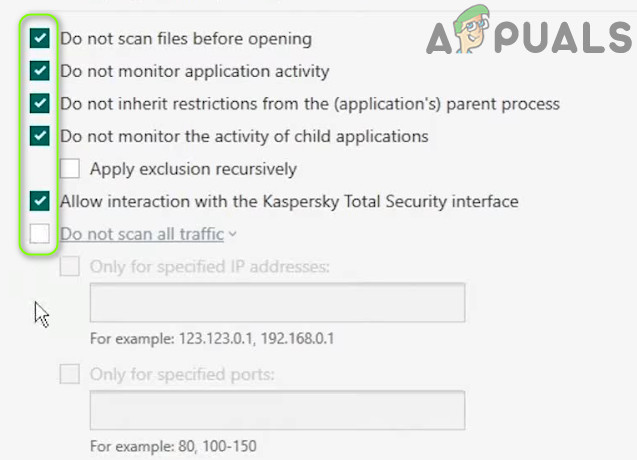
Enable All the Exclusions of the Application in Kaspersky - Now save your changes and repeat the same for the following applications (if applicable):
- java.web start launcher
- MinecraftServer.exe
- Java (TM) Platform SE binary (usually located at, c:\program files\java\jre7\bin\javaw.exe)
- Any other Java installation
- Then open the Minecraft launcher and check if it is clear of the verification issue.
Allow the Inbound / Outbound Connection
If the issue persists, you may have to create the inbound/outbound rules to allow the connection to the server. For illustration, we will discuss the process for the Windows Defender Firewall.
- Click Windows, type: Firewall, and select Windows Defender Firewall with Advanced Security.
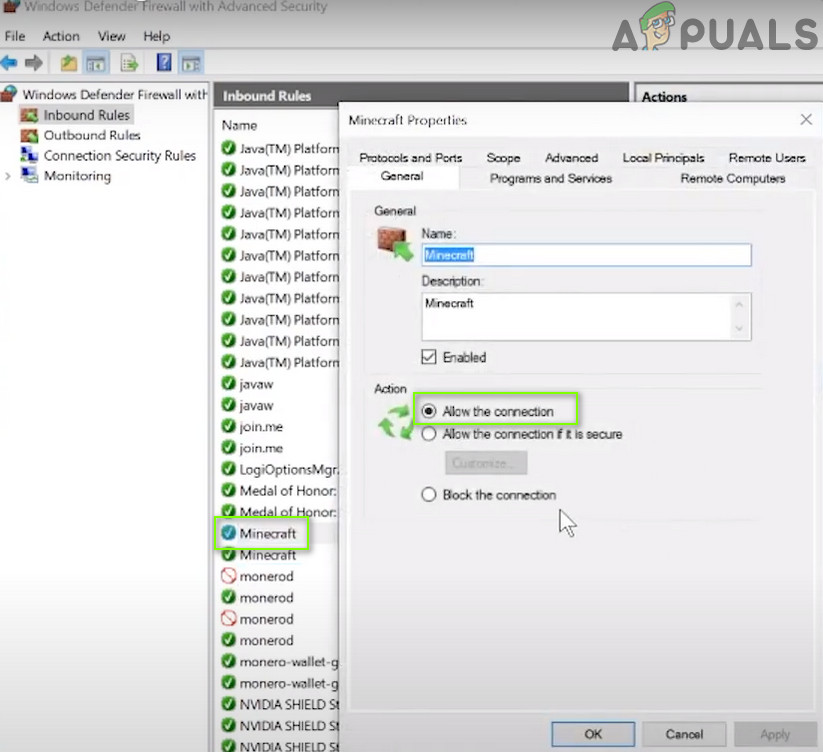
Open Windows Defender Firewall - Now make sure no inbound and outbound rule is blocking access to Minecraft (or your local server) and is set to Allow the Connection.
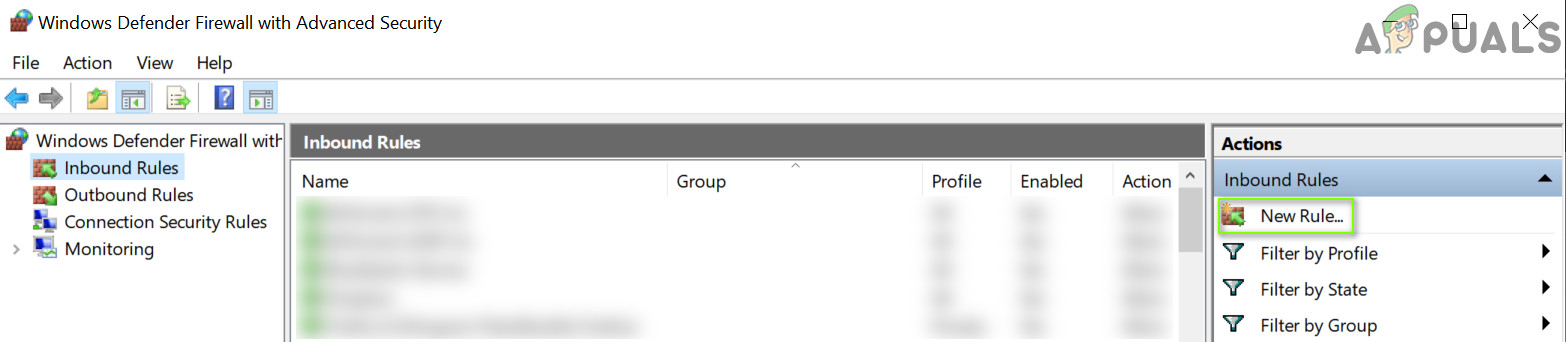
Allow the Minecraft Connection Through the Windows Defender Firewall - Then, in the Inbound tab, click on New Rule and select Program.
Create a New Inbound Rule - Now, click on Browse (in front of This Program Path) and steer to the installation directory of Minecraft.
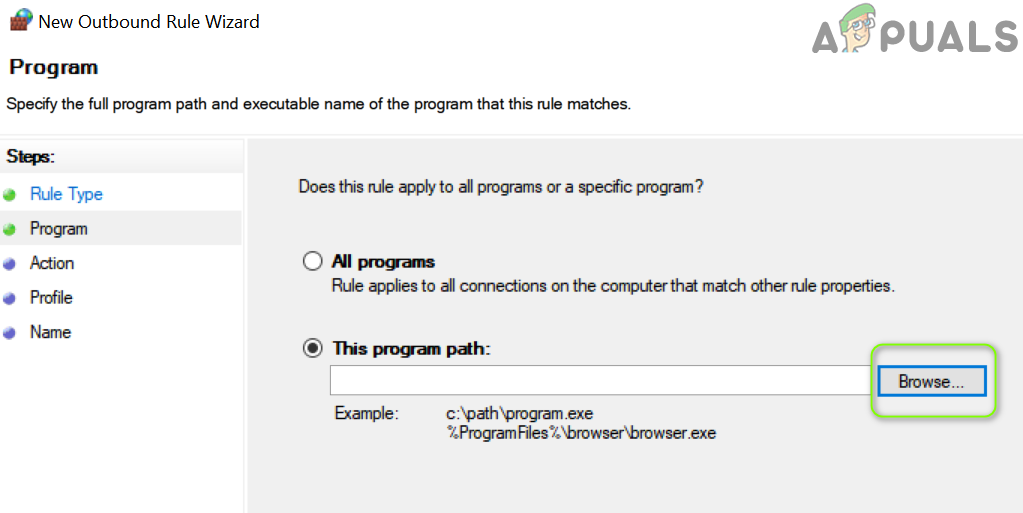
Open Browse and Steer to The Installation Directory of Minecraft - Then double-click on Minecraft.exe and click on Next.
- Now select Allow the Connection and choose all the three profiles (i.e., Domain, Private, and Public, etc.).
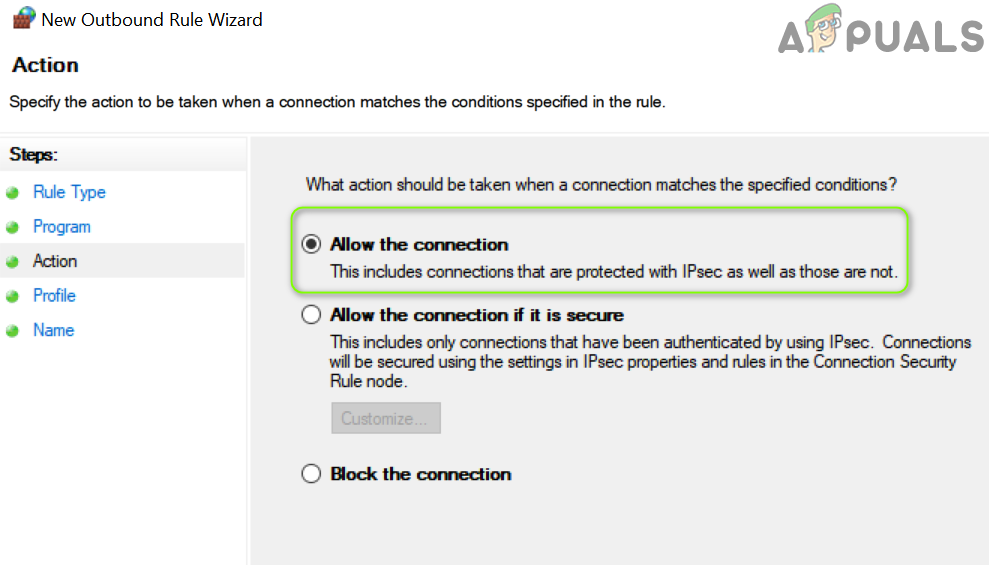
Select Allow The Connection in New Rule Window - Then name the rule as per your easiness and click on Next.
- Now repeat the same for the Minecraft server and Java installation.
- Then repeat the same steps to create the outbound rules for Minecraft.
- Now reboot your PC and check if the username issue is resolved.
If that did not do the trick, then make sure the required ports are properly forwarded in the (system and router) firewall. Also, it will be a good idea to check if the parental filters are not blocking the Minecraft connection and thus causing the issue.
Solution 6: Disable/Remove the Conflicting Applications
You may encounter the failed to verify username issue if the conflicting applications (Hamachi server and Relevant Knowledge are reported to create the issue) are hindering the operation of Minecraft. In this context, disabling/removing the conflicting applications may solve the problem.
- Clean boot your PC (do not disable Minecraft-related processes/services) and check if you can log in to Minecraft.
- If so, then enable the processes/services one by one till the problematic one is found.
- Once found, either disable that process/service at the system startup or completely remove it (if not essential).
Hamachi server and Relevant Knowledge are reported to cause the issue at hand. If you have Hamachi, then disable/enable it when using Minecraft (or uninstall it), whereas, it will be better to uninstall Relevant Knowledge in Apps & Features.
Solution 7: Change the Server Mode to Offline
If none of the solutions so far did the trick for you (and you are using a custom Minecraft server), then changing the server mode to offline may solve the problem. But before proceeding, make sure the server application (e.g., Craftbukkit) is updated to its latest version. Also, if a whitelist is active on the server, then check if whitelisting (or pardoning yourself) solves the problem.
Warning: Proceed at your own risk as setting the server mode as offline may expose your server to hacked accounts and hacking attempts. Also, switching into the offline mode may reset everyone’s progress to defaults.
- Firstly, make sure to stop the Minecraft server (execute “/stop” in the server console) and then completely exit it.
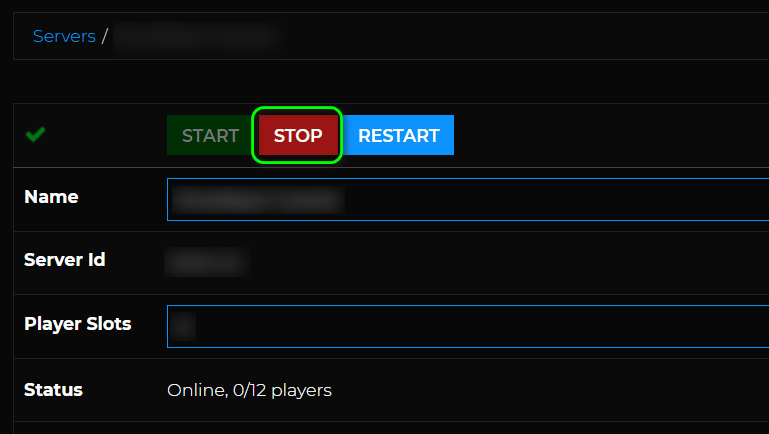
Stop the Minecraft Server - Then right-click Windows and open File Explorer.
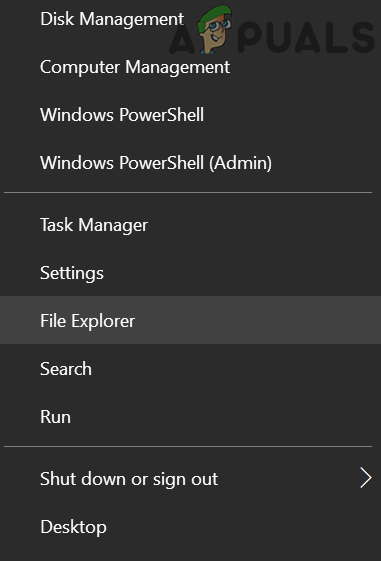
Open the File Explorer - Now navigate to the installation directory of the server (the folder where the Server.jar file is located), usually, Documents/Minecraft.
- Then right-click on Server.Properties file and select Open With>> Notepad.
- Now expand Edit and click Find.
- Then search for online-mode and change its value to false (so it looks like online-mode=false).
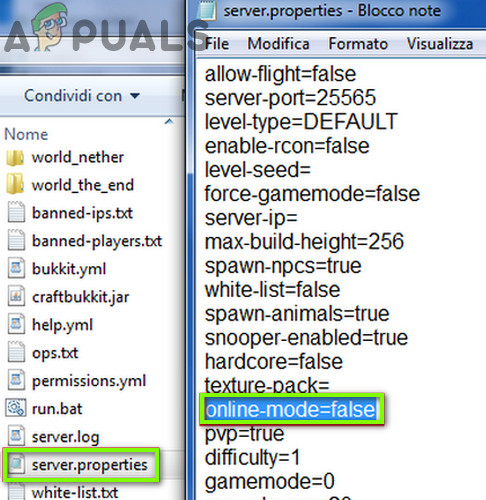
Set Online-Mode to False in Server.Properties of Minecraft - Now save your changes and launch/start the server to check if it is clear of the failed to verify username issue. If so, then you may set up a whitelist on the server (to avoid security concerns).
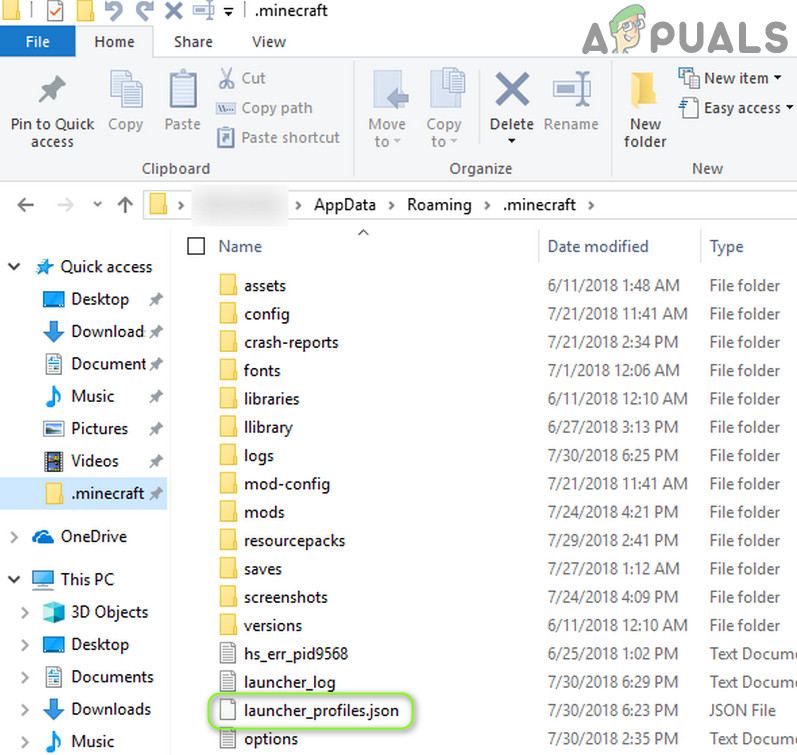
If the issue persists, then check if disabling IPv6 (or setting the IPv4 in the startup batch of your server) on all the network adapters resolves the issue. If the issue persists and you are using a Lunar client, then setting the “displayName” in the launcher_profiles.json (open with Notepad) in the Lunar folder of %appdata% directory file to your username resolves the issue. If not, check if deleting the mentioned launcher_profiles.json resolves the issue.