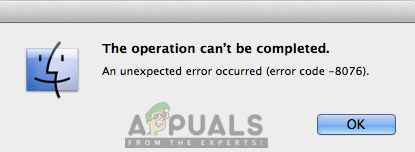
How to Fix ‘Error Code – 8076’ on macOS
Several macOS users are encountering the “Error Code -8076” error every time they try to rename, copy, move or delete files/folders. This can happen to both the external and the system drives due to not having authorized permission or corrupt data. Many cases will have different reasons but most of the time users will be prevented from completing the task.
What causes the Error code 8076 in macOS?
We investigated this particular issue by analyzing various user reports and the repair strategies that are commonly being used to fix this problem. Based on our investigations, there are several different repair strategies that are known to trigger this error code:
- Permission is not allowed – As it turns out, the permission for the files that the user is trying to access can be disabled by system or administrator. If this scenario is applicable, you can resolve the issue by checking and changing the permissions for that specific file/folder.
- Files are corrupt – In some cases, system and user file corruption can be responsible for this particular error. Since both the system and the file that the user is trying to modify are being used in the process.
- Files are interrupted by other Application – Another potential case in which this error occurs is when files are used by the system or other application. You will be unable to move or delete any file that is already in use by other application.
If you’re looking for a solution to resolve this exact error message that is keeping you from doing changes to files/folder on macOS, then this article will provide you with a list of quality troubleshooting steps. Down below, you’ll discover a collection of methods that have been confirmed to work by at least one user that was affected by the same issue.
Follow the methods in the order they are presented since they are ordered by efficiency and severity. One of the methods below is bound to fix the problem, regardless of the culprit that is triggering it.
Method 1: Checking Permission of Shared Files
Some affected users have managed to resolve the issue by changing the permissions for the file/folder. This option requires an administrator password before any changes. Administrators to keep the files read-only for standard users also use this option.
- Right-click on file/folder and choose the Get Info.
- Expand the option “Sharing & Permissions” at the bottom of the window and click the lock icon to provide the administrator password.
- Now check the permissions of users or everyone and change it to Read & Write.
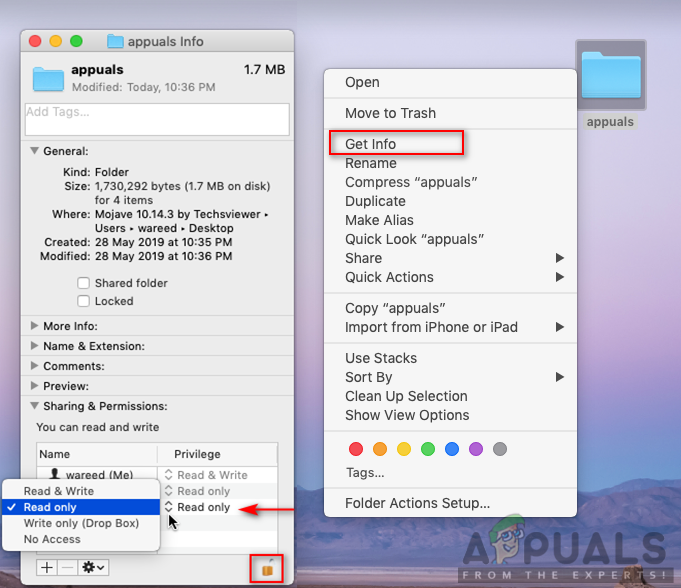
Changing permission of the folder - Now try to modify the file/folder.
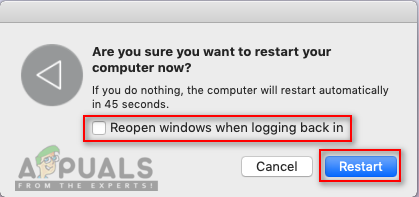
Method 2: Log Out or Restart the Computer
We all have experienced a situation where we move or remove files but they still show in the same folder. Sometimes when you move or delete, you will be unable to complete the process because of files being used by another program. A simple log out or restart will close the applications and usage of backhand files. After you restart the PC, try doing changes to the file/folder.
Note: Make sure you untick the option “Reopen windows when logging back in” as shown below:
Method 3: Using Terminal to Modify a File or Folder
If you are unable to do the changes directly by using the contextual menu or keyboard shortcuts, you can try doing them through Terminal. Also, you can use sudo command before executing these commands to apply the changes as an administrator, which will also take care of the permission problem.
Note: You can also use the drag and drop option for file/folder directory in Terminal.
To Remove a File or Folder:
- First, change the directory to the location where files exist:
cd documents
(documents can be changed to your location)
- Type the following command in Terminal to remove any file or folder
sudo rm –f filename
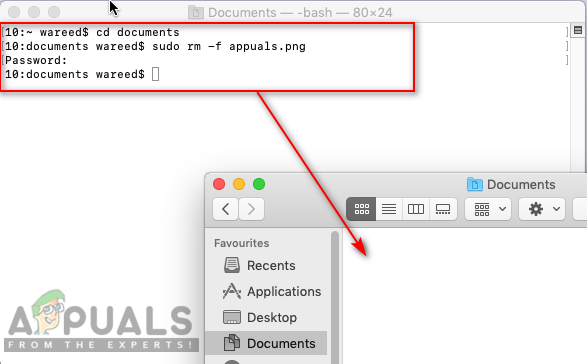
Removing a file through Terminal (filename can be your file or folder name)
To Move and Rename a File or Folder:
- Change the directory to the location where files exist:
cd documents
(put your location name in place of the documents)
- Type the following command in Terminal to move and rename files:
sudo mv desktop.png appuals.png
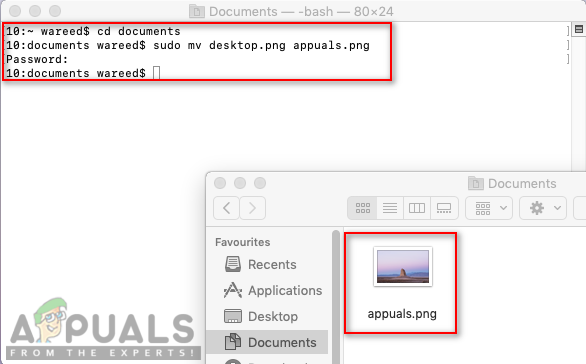
Changing the name of the file (desktop is the old name and appuals will be a new name, and a new location can also be provided with the new name)
Note: You can keep the file/folder name same and only change the location for it.
To Copy and Rename a File or Folder:
- You need to change the directory to the location where files exist:
cd documents
- Type the following command in Terminal to copy and rename files:
sudo cp appuals.png ~/desktop
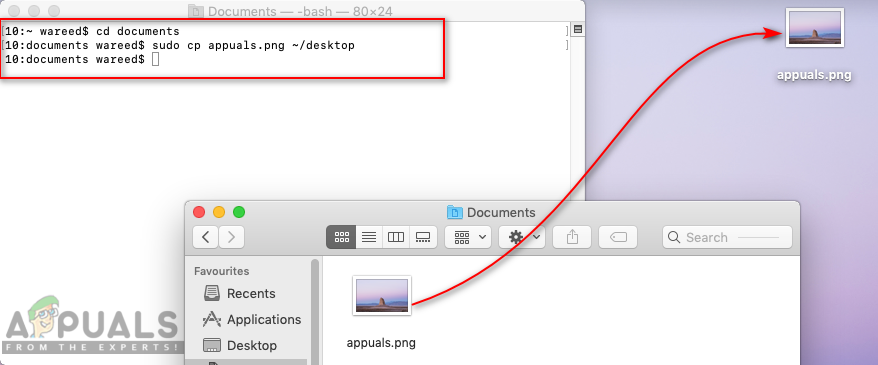
Copying file from one location to another Note: To copy directories, use “cp –R ~/existing_directory/folder ~/new_directory” command.
Method 4: Using OnyX Cache Cleaning Application
Some affected users were unable to clean their Trash files and getting this error code. This method can also be used to fix your corrupt system files that are causing the problem. OnyX is a multifunction utility for maintenance and cleaning junk files from the system. OnyX is third-party software that has a well-established reputation within the Mac community and you can feel safe installing and running it on your machine.
You can download the latest OnyX application free from here: OnyX
Note: Before you use OnyX, make sure all your work is saved because it will close all the application and restart pc after maintenance.
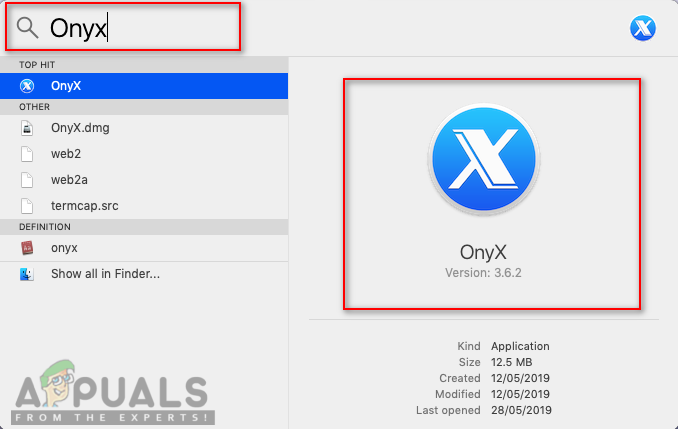
- Hold Command key and Press Space to open Spotlight, then type Onyx and Enter
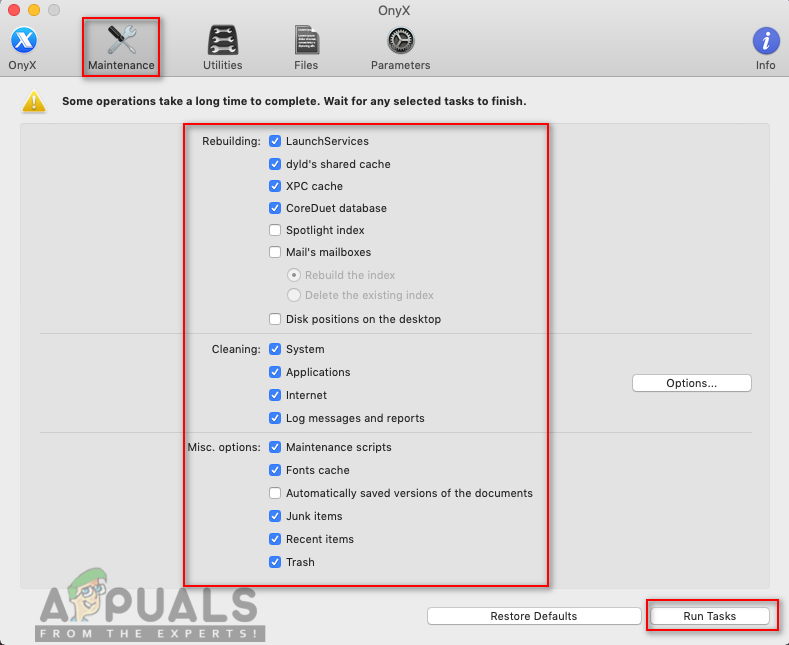
Opening OnyX through Spotlight - Click on the Maintenance option and then you can choose the options that you want to maintain and clean according to your system.
- Once you select options, click on Run Tasks
Choosing options and running tasks - A notification window will appear for asking to restart and close all application. Click on Continue for both

Notification and warning windows - After the PC is restarted, the selected tasks will be resolved.


