How to Fix ‘Error Checking for Updates’ on Google Play Store
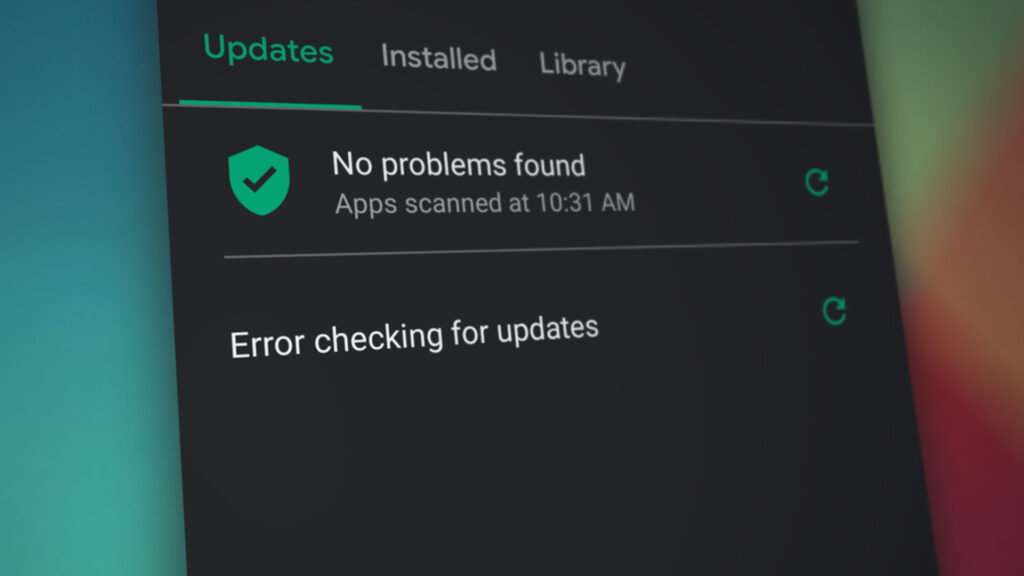
The “Error checking for updates” message in the Google Play Store means the app can’t get the latest updates for your installed apps. This error usually happens because of problems with the Play Store’s cached data or its connection to the server. The main cause is often corrupted cache or data in the Play Store or Google Play Services.
Incorrect device settings or connection issues can also play a role.
In this article, we will discuss different ways to solve this error.
1. Clear Data and Cache
Corrupted cache or data in the Play Store can stop it from accessing updates properly. Clearing this cache and data fixes these problems, allowing the app to reconnect to Google’s servers and start checking for and downloading updates smoothly.
- Pull down the notifications panel and tap the settings icon.
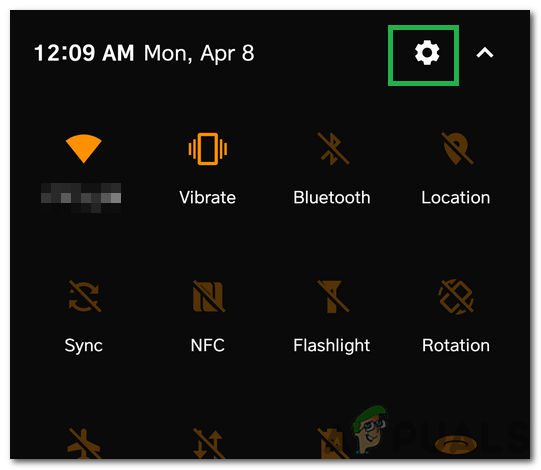
Clicking on the Settings Cog - Scroll down and tap Applications.
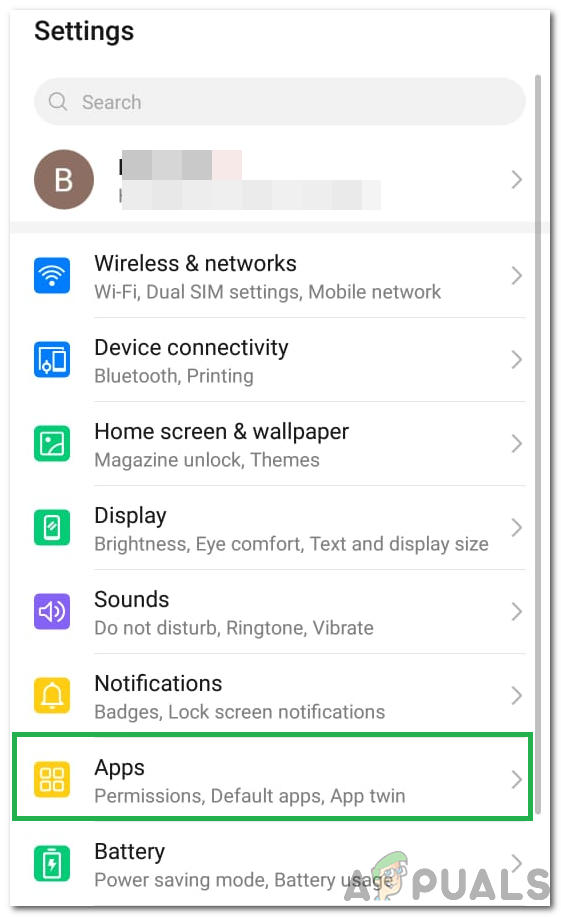
Clicking on the “Applications” option - Select Apps and find Google Play Store in the list.
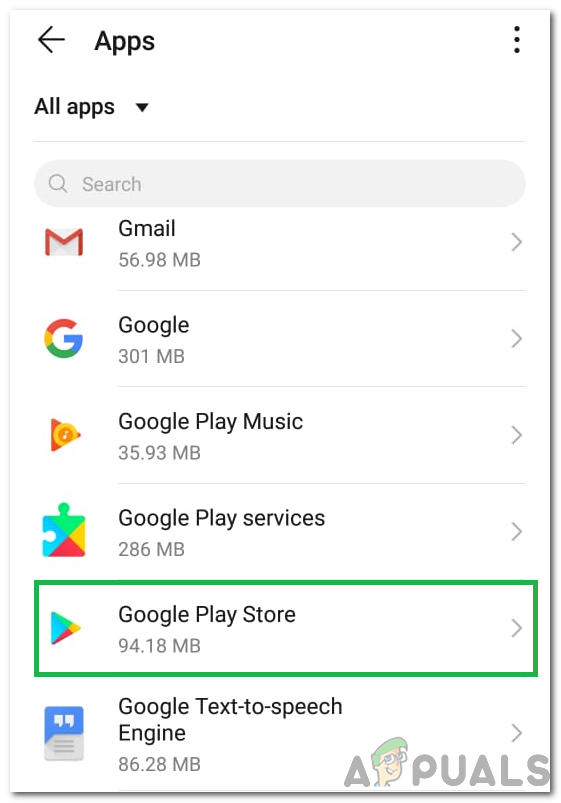
Selecting Google Play Store from the list Note: If the Google Play Store isn’t visible, tap the three dots in the top-right corner and choose “Show System Apps”.
- Tap Storage and select “Clear Cache” and “Clear Data“.
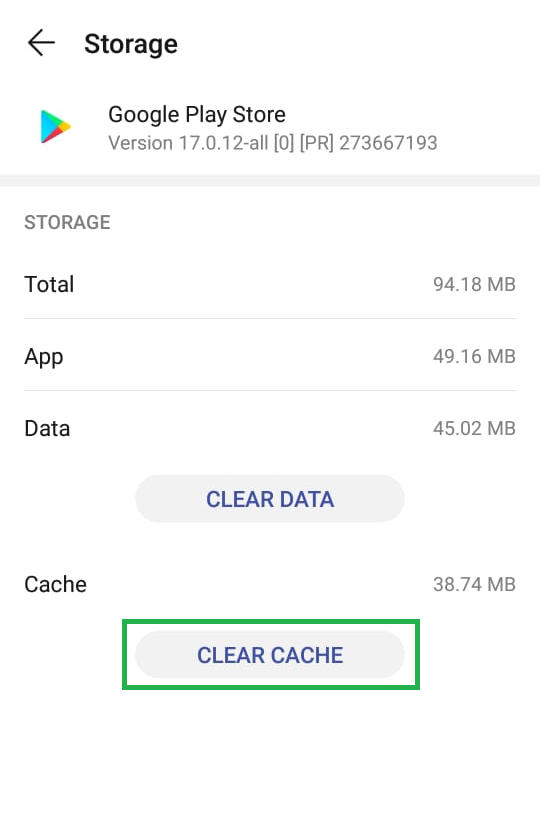
Clicking on the “Clear Cache” button - Wait for the cache to be cleared and check if the issue persists.
2. Uninstall Updates
Returning the Play Store to its original version can fix recent issues. This step removes bad data, helping the app work properly again.
- Pull down the notifications panel and tap the settings icon.
- Scroll down and tap Applications.
- Select Apps and find Google Play Store in the list.

Selecting Google Play Store from the list Note: If Google Play Store isn’t visible, tap the three dots in the top-right corner and select “Show System Apps”.
- Tap the three dots in the top-right corner and choose “Uninstall Updates”.
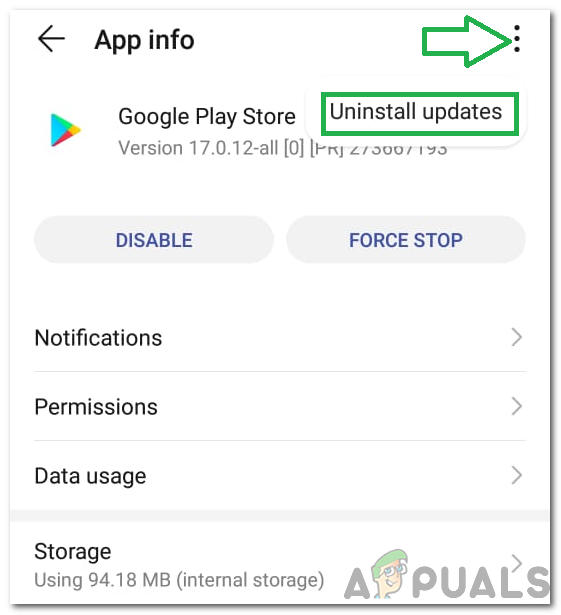
Clicking on the three dots in the top-right corner and selecting “Uninstall Updates” - Check if the issue still exists.
3. Update the OS of Your Device to the Latest Build
Updating your device with the latest OS version improves compatibility with Google Play services and fixes bugs. An updated OS ensures smoother app interactions, prevents conflicts, and enhances app performance.
- Open Settings on your phone and go to About Phone.
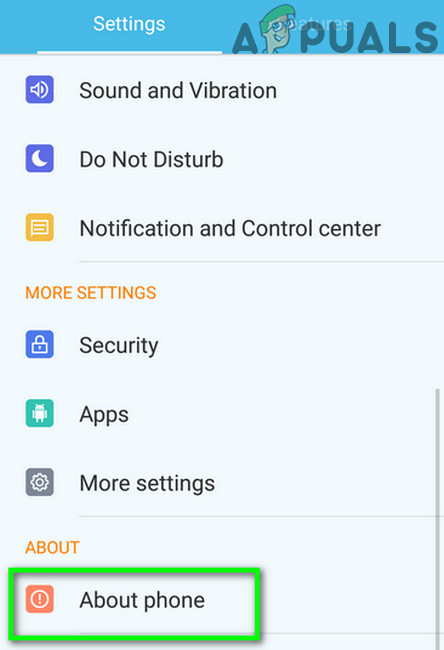
Tap on About Phone in Settings - Select System Update and tap Check for Updates.
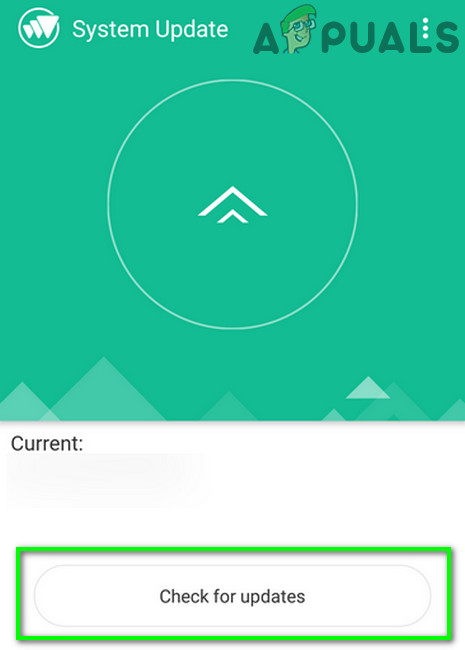
Check for Updates of Your Android Phone - If an OS update is available, apply it and reboot your phone.
- After rebooting, check if the Google Play update issue is resolved.
4. Allow Google Play Store to Update on Any Network
Allowing the Play Store to update over any network, not just Wi-Fi, can help when Wi-Fi is unstable or unavailable. This lets updates happen over mobile data, ensuring the Play Store can check for updates smoothly and reducing connectivity errors.
- Open the Google Play Store and tap the menu icon (hamburger menu) in the top left corner.
- Scroll to the bottom, open Settings, and select Auto-Update Apps.
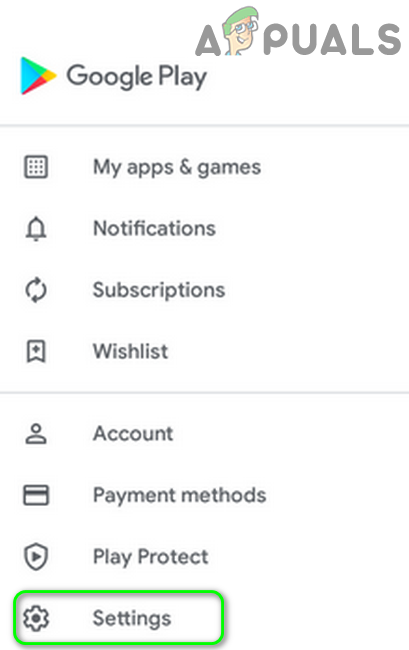
Open Settings of the Google Play Store - Select Over Any Network and tap Done.
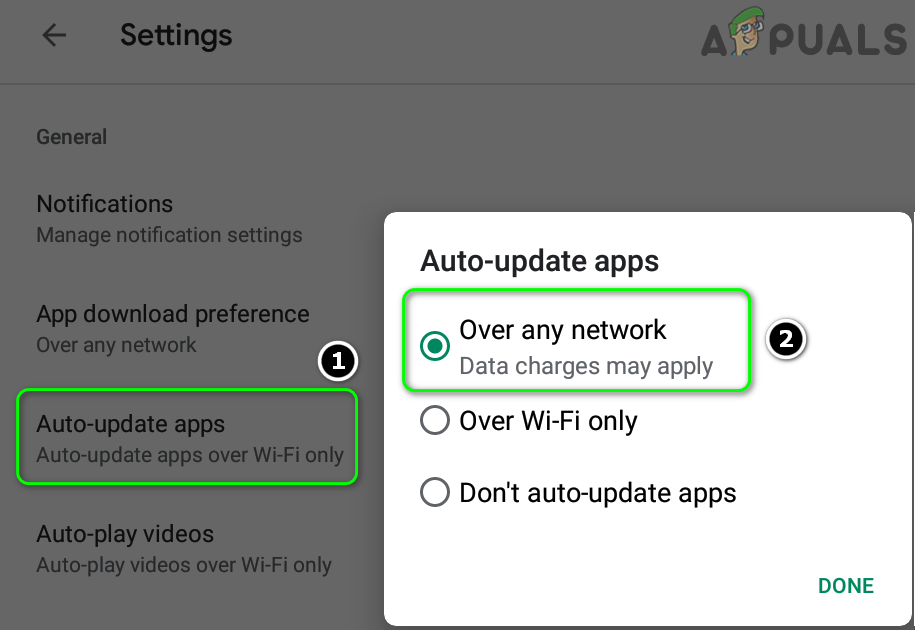
Set Google Play to Update Apps Over Any Network - See if this resolves the Google Play update error.
5. Adjust the Date/Time of Your Device
Setting your device’s date and time correctly helps the Play Store sync with Google’s servers. Incorrect settings can cause connection errors and update problems. Fixing these settings lets the Play Store check for updates smoothly.
- Open your phone’s Settings and go to Date & Time.
- Enable Automatic Date & Time and Automatic Time Zone.
- Disable the 24-Hour Format option and then reboot your phone.
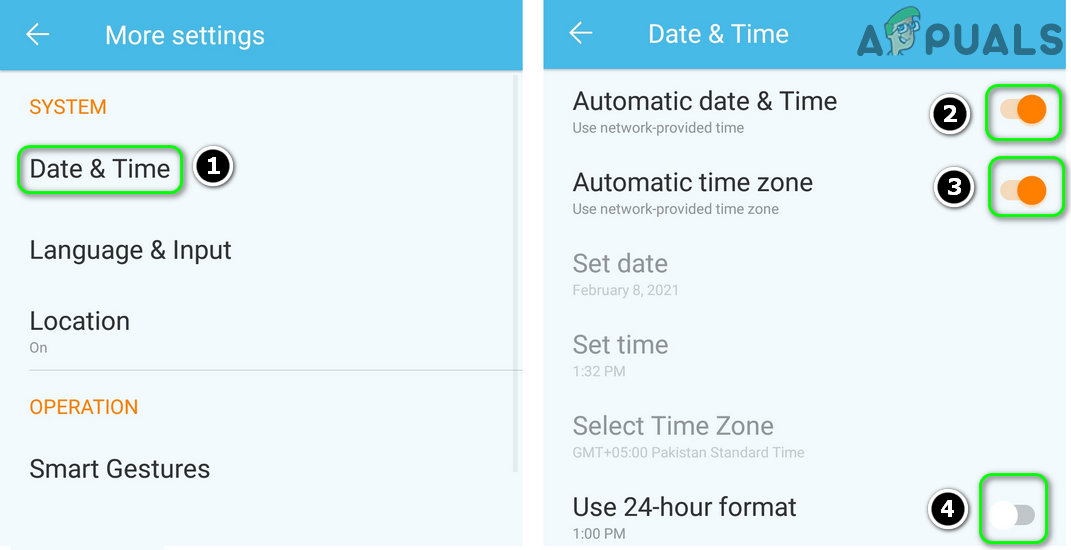
Enable Automatic Time and Time Zone and Disable 24-hour Format - After rebooting, check if Google Play is updating apps successfully.
6. Grant All the Required Permissions to Google Play Store and Services
Making sure Google Play Store and Google Play Services have all needed permissions lets them use important resources like network data and storage for updates. Without these permissions, the Play Store might have trouble connecting to servers or saving files, causing update errors. Allowing these permissions helps updates go smoothly.
- Clear the Cache and Data of both the Google Play Store and Google Play Services (found in Manage Space), along with Google Services Framework and Google App.
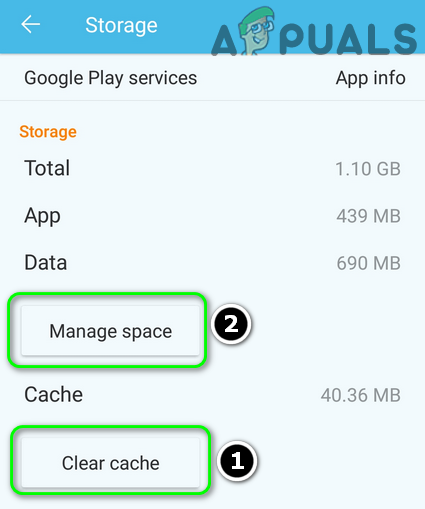
Clear Cache and Data of the Google Play Services - Reboot your device. Afterward, go to Settings and open Apps.
- Select Google Play Store, choose Permissions, and ensure all are enabled.
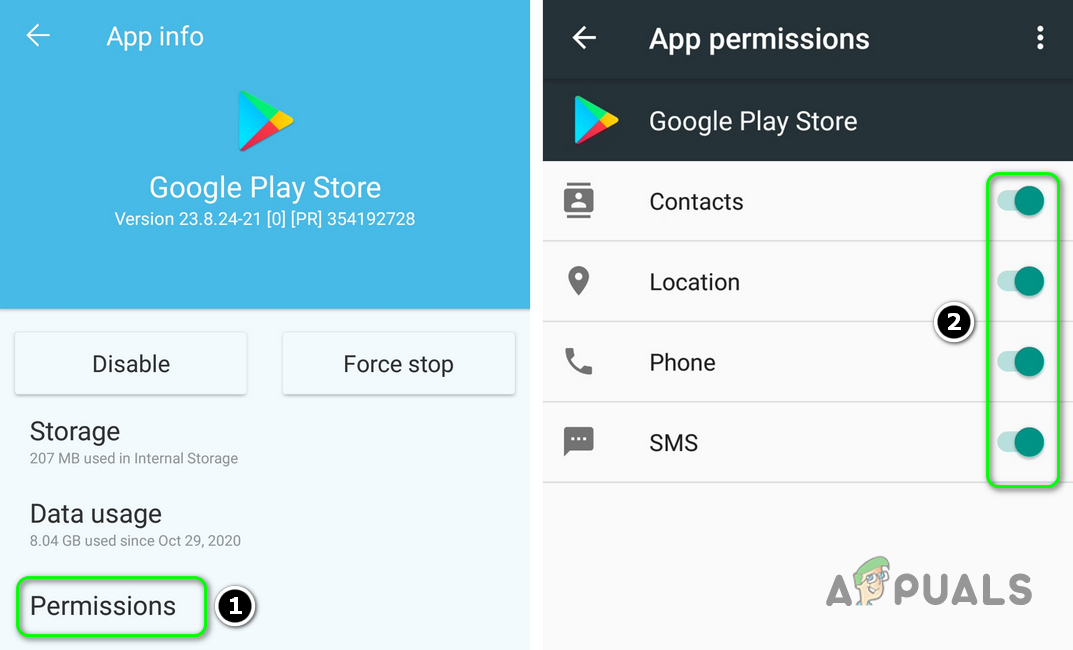
Enable Permissions of the Google Play Store - Do the same for Google Play Services.
- Open the Google Play Store and configure if needed.
- Install a new app like Zoom or Skype and check if the update issue is resolved.
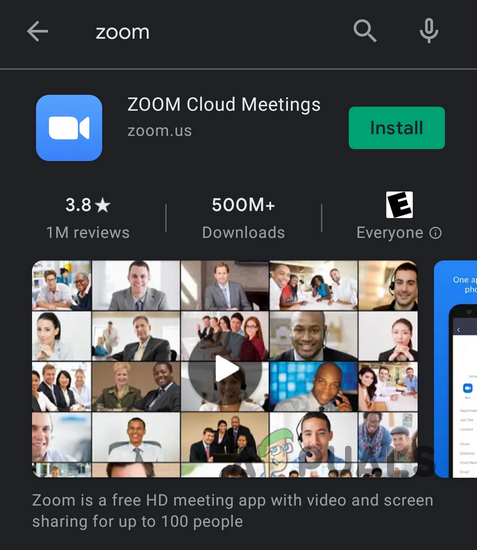
Install Zoom from the Play Store
7. Manually Update Some Apps in the Play Store
Manually updating specific apps can refresh the Play Store’s update process and clear any stalled updates. This method focuses on individual apps, avoiding issues with automatic updates and allowing new updates to install smoothly.
- Open the Play Store and search for an installed app, like Chrome, using the search bar.
- Update the app if available, and repeat for other apps, especially Google apps. You can update alphabetically or use a third-party app like Update Software Fast Update for All Android.
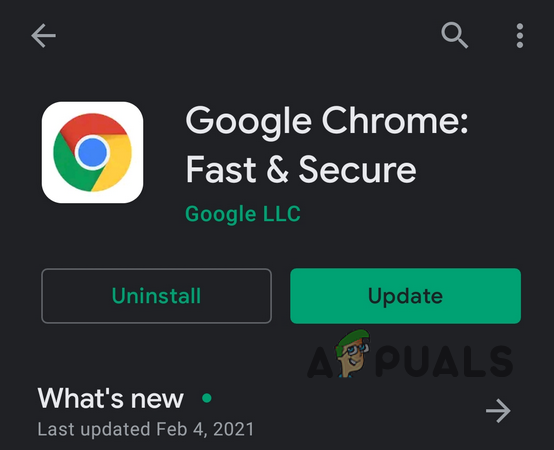
Update Google Chrome from the Play Store - After updating the apps, check if the Play Store’s update issue is resolved.
8. Remove Some of the Apps from the Device
Uninstalling unnecessary apps can fix Play Store errors because limited storage can disrupt updates. When storage is nearly full, the Play Store might have trouble downloading or verifying updates, causing errors. Removing unused apps makes space for updates, improving Play Store performance and reducing errors.
8.1. Remove the Problematic Apps
- Open the Google Play Store and access its menu.
- Go to My Apps & Games and select the Installed tab.
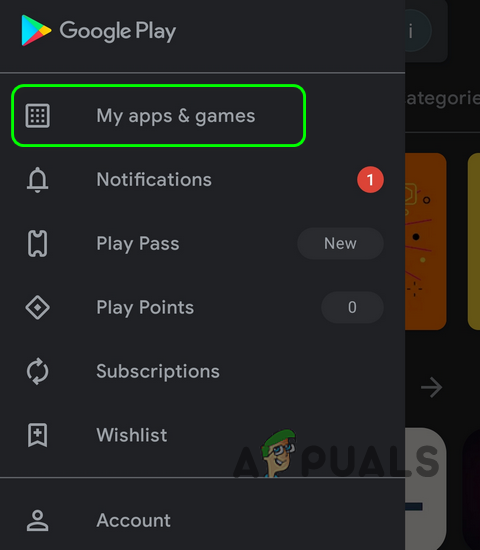
Open My Apps & Games - Select Reviews and uninstall non-essential apps (like Alexa, OnePlus Notes, or AdClear) to resolve the issue.
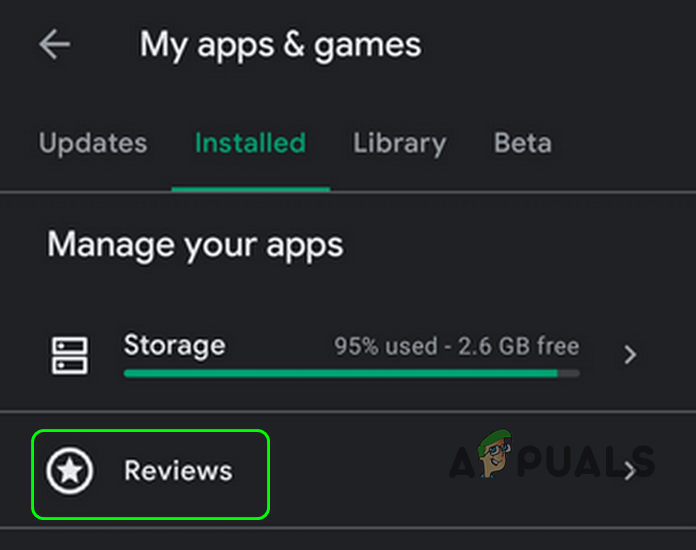
Open Reviews in the Installed tab - Check if the update issue is resolved.
8.2. Uninstall the Apps That Have Not Been Updated for a Long Time
- If the issue persists, go to the Installed tab of My Apps & Games in the Play Store.
- Sort by ‘Last Updated‘ and scroll to the bottom.
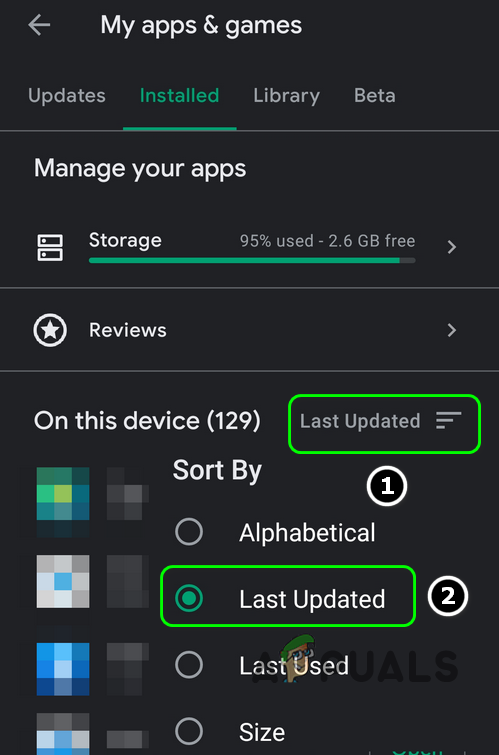
Sort Installed Applications by Last Updated - Remove apps that haven’t been updated for a long time and check if the issue is resolved.
8.3 Remove the Incompatible Apps
- If the issue is still there, open all the installed apps one by one (you can try a 3rd party app like Update Software List or List My Apps and export the apps list with the hyperlinks to their Play Store page as HTML. Then you can use that HTML in the Chrome browser on your phone to check the apps one by one) in the Play Store and check if the app shows Open, Update, Enable, or No Longer Compatible With The Device.
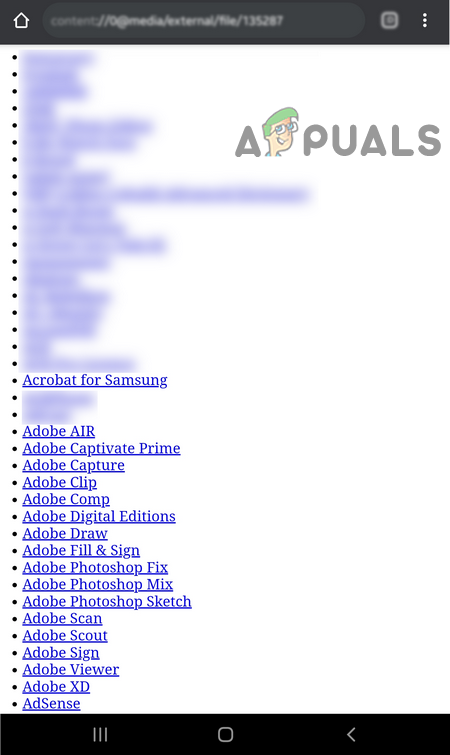
Open HTML Exported File of Your Apps in Chrome - If Enable is shown, enable the app. If No Longer Compatible with The Device is shown, remove the app and then check if the updates issue is resolved.
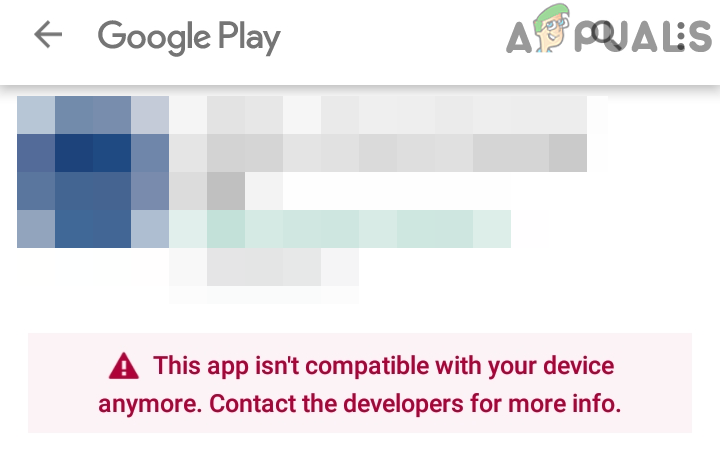
This Device isn’t Compatible With Your Device Anymore
8.4. Uninstall the Apps that Have Been Removed from the Play Store
- If the issue persists, open Settings and go to Apps.
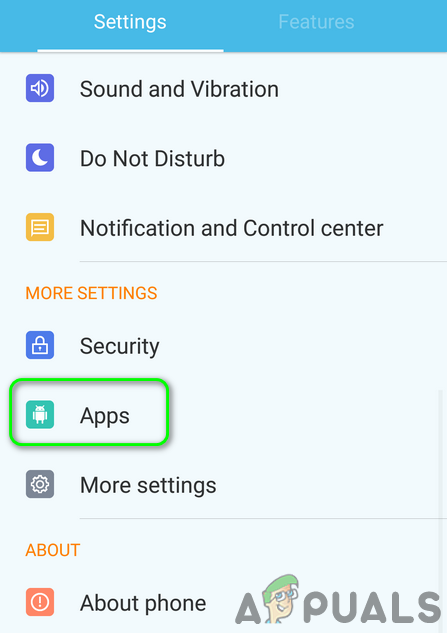
Open Apps in the Settings of Your Phone - Go through the installed apps and tap on App Details to open the app’s Play Store page. If the app has been removed from the Play Store, uninstall it and see if this fixes the update issue.
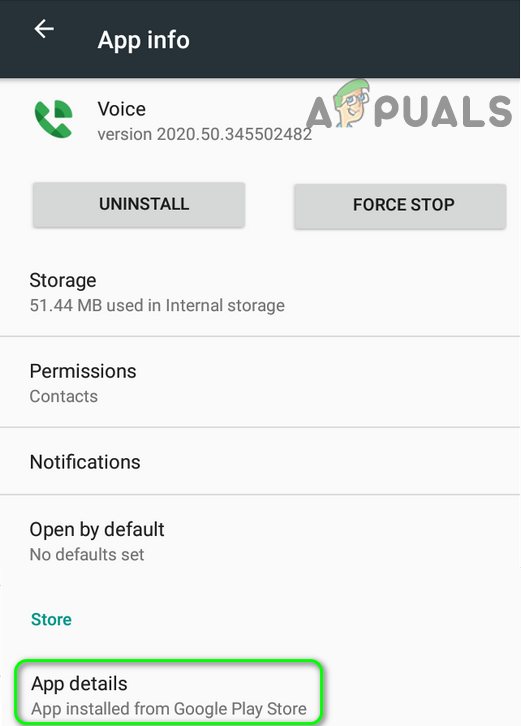
Open App Details in the App’s Settings
9. Remove Some of the Google Accounts from the Phone
If you have multiple Google accounts on your device, they can sometimes conflict and cause Play Store update issues. Removing one or more accounts can reduce sync errors and network conflicts, helping the Play Store check for updates smoothly. This action simplifies account management and often quickly resolves update errors.
9.1. Enable the Sync for the Google Play Store
- Open Settings and go to Accounts (you may need to check More Settings).
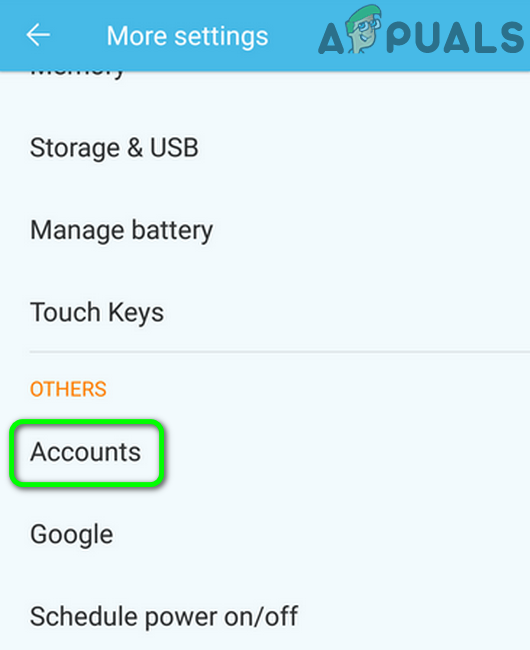
Open Accounts in the Phone’s Settings - Select Google and ensure all accounts are properly syncing.
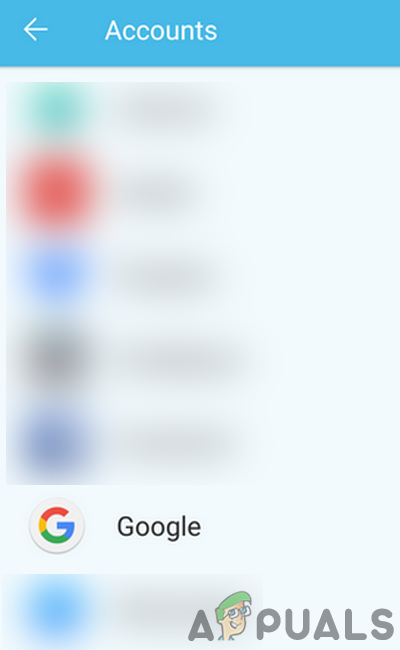
Open Google in the Accounts of Phone’s Settings - If an account is not syncing, tap on it.
- Check and enable Sync options, especially for Google Play, to see if it fixes the update issue.
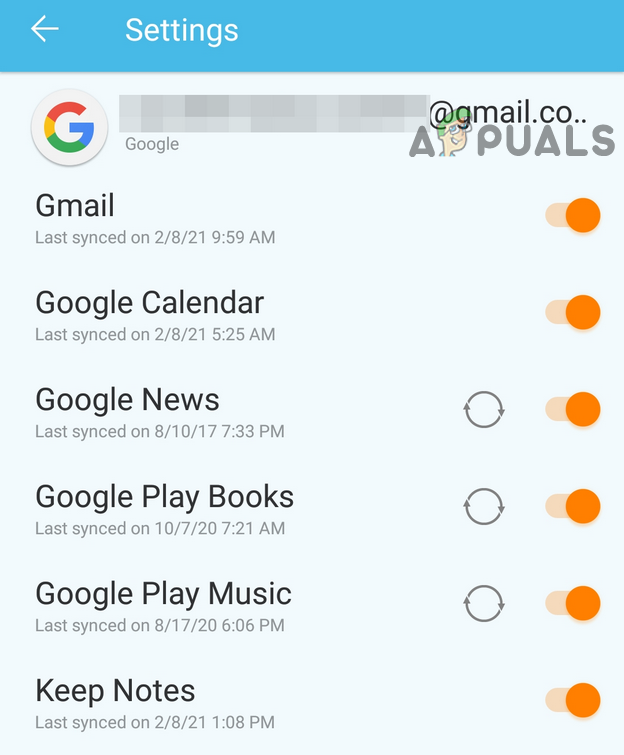
Enable Sync for Google Play in Accounts
9.2. Remove Some of the Accounts
- If needed, tap on the Google account in Settings > Accounts > Google and tap More.
- Select Remove Account and confirm.
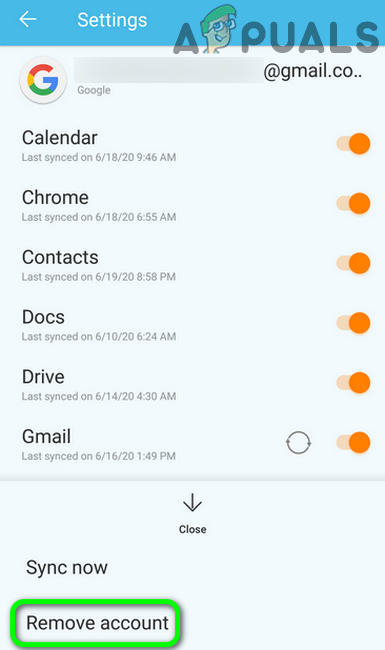
Remove the Problematic Google - Reboot your device and see if the update issue is fixed.
9.3. Remove All the Google Accounts
- Remove all Google Accounts and reboot your device.
- Upon reboot, create a new Gmail account on the device and sign in with it to check if the issue is resolved. If you prefer to use your old accounts, update their passwords before adding them back to the device.
If the issue persists, you may need to perform a full factory reset of your device.


