How to Fix ERR_NAME_RESOLUTION_FAILED in Google Chrome
Google Chrome, being one of the prominent web browsers, has a large user base. It was first introduced in 2008 and quickly gained popularity for its complete dominance over the rest browsers. This was due to the speed and better user-interface that it provided its users. While using the browser, you might stumble upon the error ERR_NAME_RESOLUTION_FAILED which is followed by the ‘The webpage at XXX might be temporarily down or it may have moved permanently to a new web address’ error message. This message appears when you are trying to access a site using the browser.
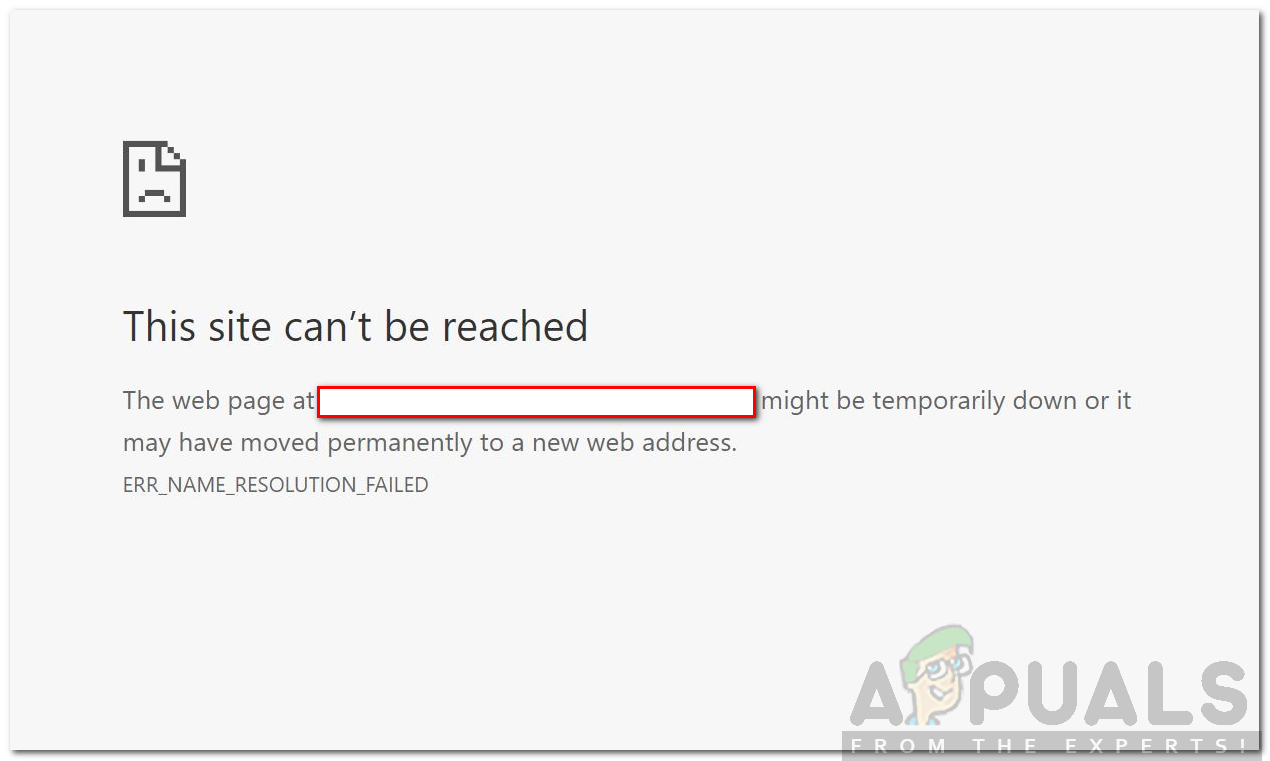
Even with a working internet connection, you get the error message which means that it can be due to DNS or Winsock configuration. If you try to access the site using a different device or an alternative browser, the website loads just fine. This implies that the issue is restricted to your computer system (or whichever device you receive the message on) only. To help you get through the issue, we will be first looking at the causes of the issue and then providing solutions that you can implement quite easily.
What causes the ERR_NAME_RESOLUTION_FAILED in Google Chrome?
As we know, the error message pops up while you are trying to access a certain website even with a working internet connection. This can occur due to one of the following reasons —
- Winsock Settings: The first possible cause can be your system’s Winsock settings. These settings are used to tell the system how to communicate with other network services.
- DNS Configuration: The website that you are trying to access might be blocked by your Internet Service Provider as you use their DNS configuration by default. This can be easily dealt with.
- Google Chrome Settings: Sometimes, your browser config might also trigger some issues due to which you are unable to visit certain websites. In such a case, you will have to reset the config to factory defaults.
To get rid of the issue, please follow the given solutions in the order as provided to ensure an early fix to the issue.
Solution 1: Reset Winsock
Windows uses a set of configuration to communicate with other network services. These settings are referred to as Winsock. Sometimes an issue with this configuration can result in some web servers not responding. Thus, you will have to reset it using the command prompt. Here’s how to do it:
- Press Windows Key to open up the Start Menu. Type in cmd, right-click on it and select Run as an administrator.
- Hit Yes when the UAC dialog box appears.
- Afterward, type ipconfig /release and press Enter.
- Then, type ipconfig /flushdns and press Enter.
- Once done, type in ipconfig /renew and press the Enter key again.
- Finally, type netsh winsock reset and then hit Enter.
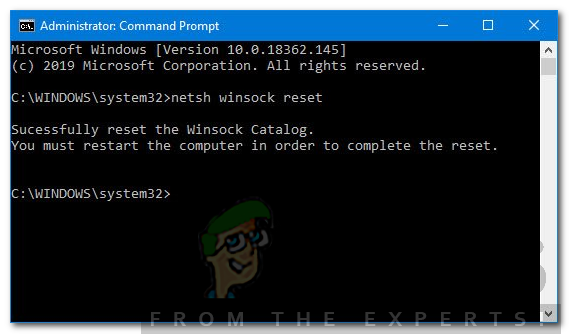
Resetting Winsock - Wait for it to finish and then launch Google Chrome.
- See if it resolves the issue.
Solution 2: Change DNS
Another thing that you can do to fix your issue is changing the DNS. Your ISP blocks certain websites according to its terms and service policy. Hence, upon trying to access such sites, you will not be able to do so. In such a case, you can change your DNS to the ones provided by Google itself. Here’s how to do it:
- Right-click on the Network icon on the bottom-right of the taskbar.
- Choose Open Network & Internet Settings.
- Click Change adapter options on the window that pops up.
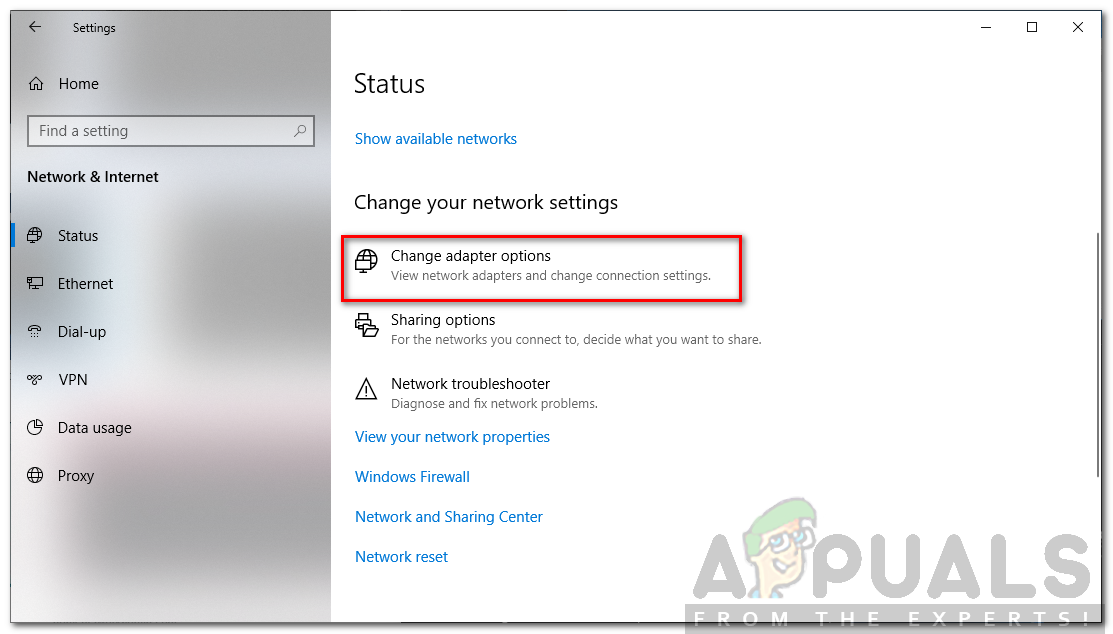
Network Settings - Right-click your network adapter and select Properties.
- Locate Internet Protocol Version 4 (TCP/IPv4), highlight it and click Properties.
- Select the ‘Use the following DNS Server addresses’ box.
- Afterward, type 8.8.8.8 in the Preferred DNS Server box and 8.8.4.4 in the Alternate DNS Server box.

Changing DNS - Click OK.
- Close the windows and launch Google Chrome to see if it resolves the issue.
Solution 3: Reset Google Chrome
Finally, if the above two solutions do not work for you, then it means your browser configuration is causing the issue. This can be due to Google Chrome flags configuration or anything like that. Therefore, you will have to reset it to factory defaults. Here’s how to do it:
- Launch Google Chrome.
- On the top right corner, click the More icon (3-dots).
- From the list, select Settings.
- Scroll to the bottom and click Advanced.
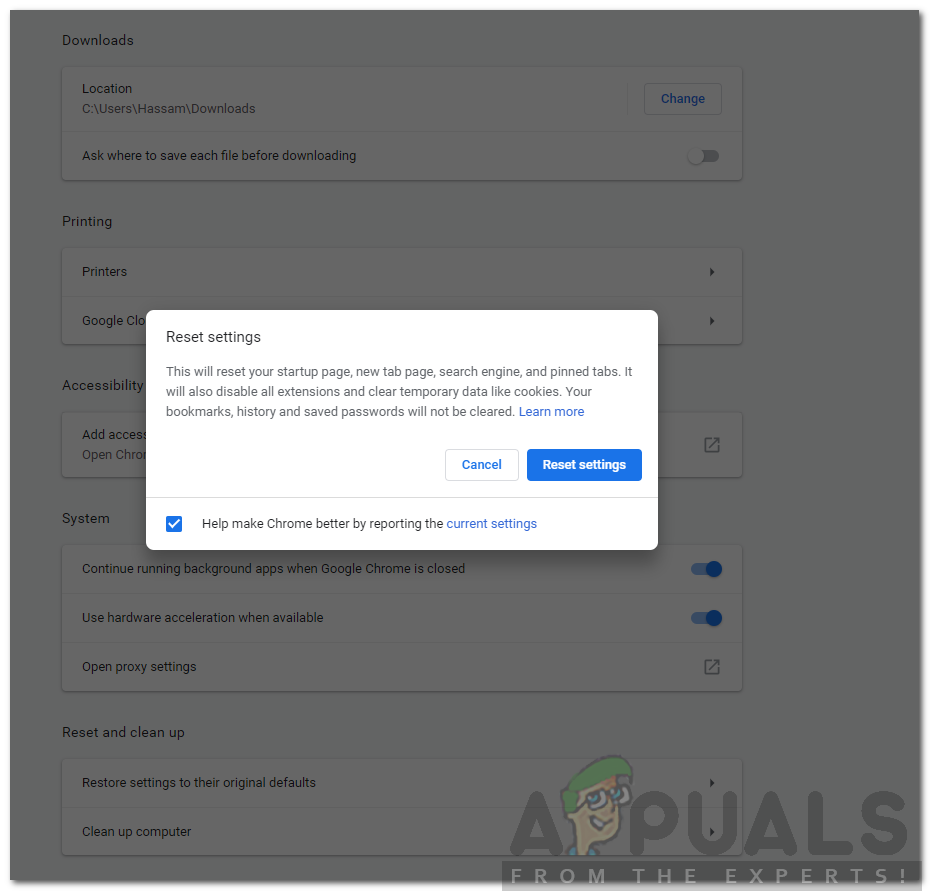
- Then, once again, scroll to the bottom until you locate Reset and clean up.
- Click the Reset settings to their original defaults and then click Reset Settings.
- Wait for it to complete. Google Chrome will relaunch.
- See if the issue is solved.