‘Dolby Digital Plus errors after upgrading to Windows 10’ [Fix]
Dolby audio applications – such as the Dolby Digital Plus Home Theater program – are completely compatible with Windows 10. However, it is not unheard of for Dolby to stop working on a computer following a Windows 10 upgrade. In fact, a fair amount of Dolby users run into an issue where every single time they try to launch a Dolby audio application, the application does not open and they receive an error message even though the same application worked perfectly fine before the Windows 10 upgrade. This specific error message reads:
“The current Dolby Digital Plus audio driver version is x.x.x. and the software application expects driver version x.x.x. Please install a valid driver and software application combination.”
This issue basically occurs because upgrading to Windows 10 caused the drivers for the computer’s dedicated audio device (such as the Realtek High Definition Audio device) or the Dolby Digital Plus audio drivers (or both) to be upgraded, and now the two drivers can’t seem to work with each other. The Dolby Digital Plus audio drivers being incompatible with the drivers for the computer’s dedicated audio device (or vice versa) is what causes Dolby audio applications to stop working after a Windows 10 upgrade in most cases.
Thankfully for anyone and everyone affected by this issue, it is entirely fixable. The following are the two most effective solutions that you can use to try and resolve this problem:
Solution 1: Uninstall and then reinstall the computer’s dedicated audio device
- Press Windows Logo key + R to open a Run
- Type hdwwiz.cpl into the Run dialog and press Enter to launch the Device Manager.
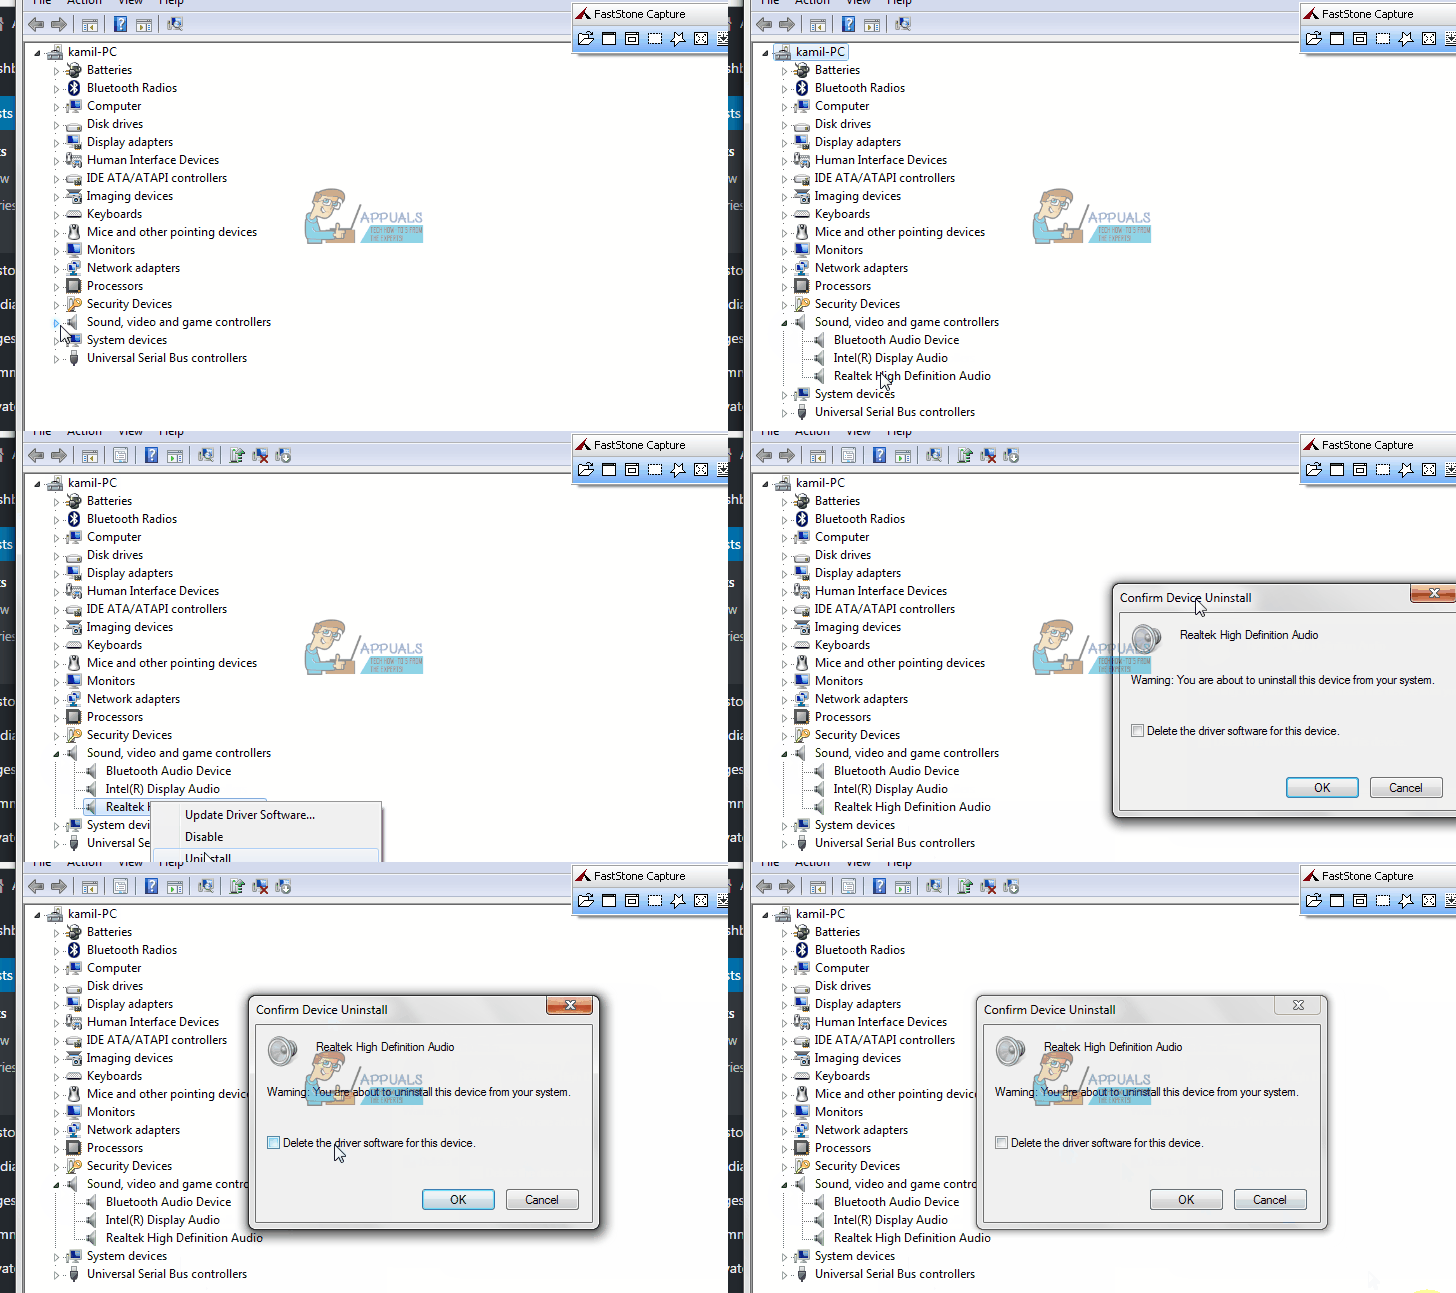
- In the Device Manager, double click on the Sound, video and game controllers section to expand it.
- Right-click on the computer’s dedicated audio device (the Realtek High Definition Audio device or the Conexant HD Audio device – for example) and click on Uninstall in the context menu.
- Enable the Delete the driver software for this device option by checking the checkbox beside it.
- Click on OK.
- Wait for the dedicated audio device and its drivers to be uninstalled.
- Restart the computer.

Once the computer boots up and you log in to it, both the dedicated audio device and its drivers will be automatically reinstalled. After the dedicated audio device and its drivers have been reinstalled, check to see if the issue has been resolved.
Solution 2: Roll back to an older version of the dedicated audio drivers
Seeing as though the Dolby applications that aren’t working after the Windows 10 upgrade worked fine before the upgrade, you can be certain that the older version of the drivers for the affected computer’s dedicated audio device was compatible with the Dolby Digital Plus audio drivers. Since that is the case, uninstalling the affected computer’s current dedicated audio drivers and then installing an older version of the drivers may just be exactly what you need to do in order to get rid of this problem. In order to apply this solution, you need to:
- Press Windows Logo key + R to open a Run
- Type hdwwiz.cpl into the Run dialog and press Enter to launch the Device Manager.
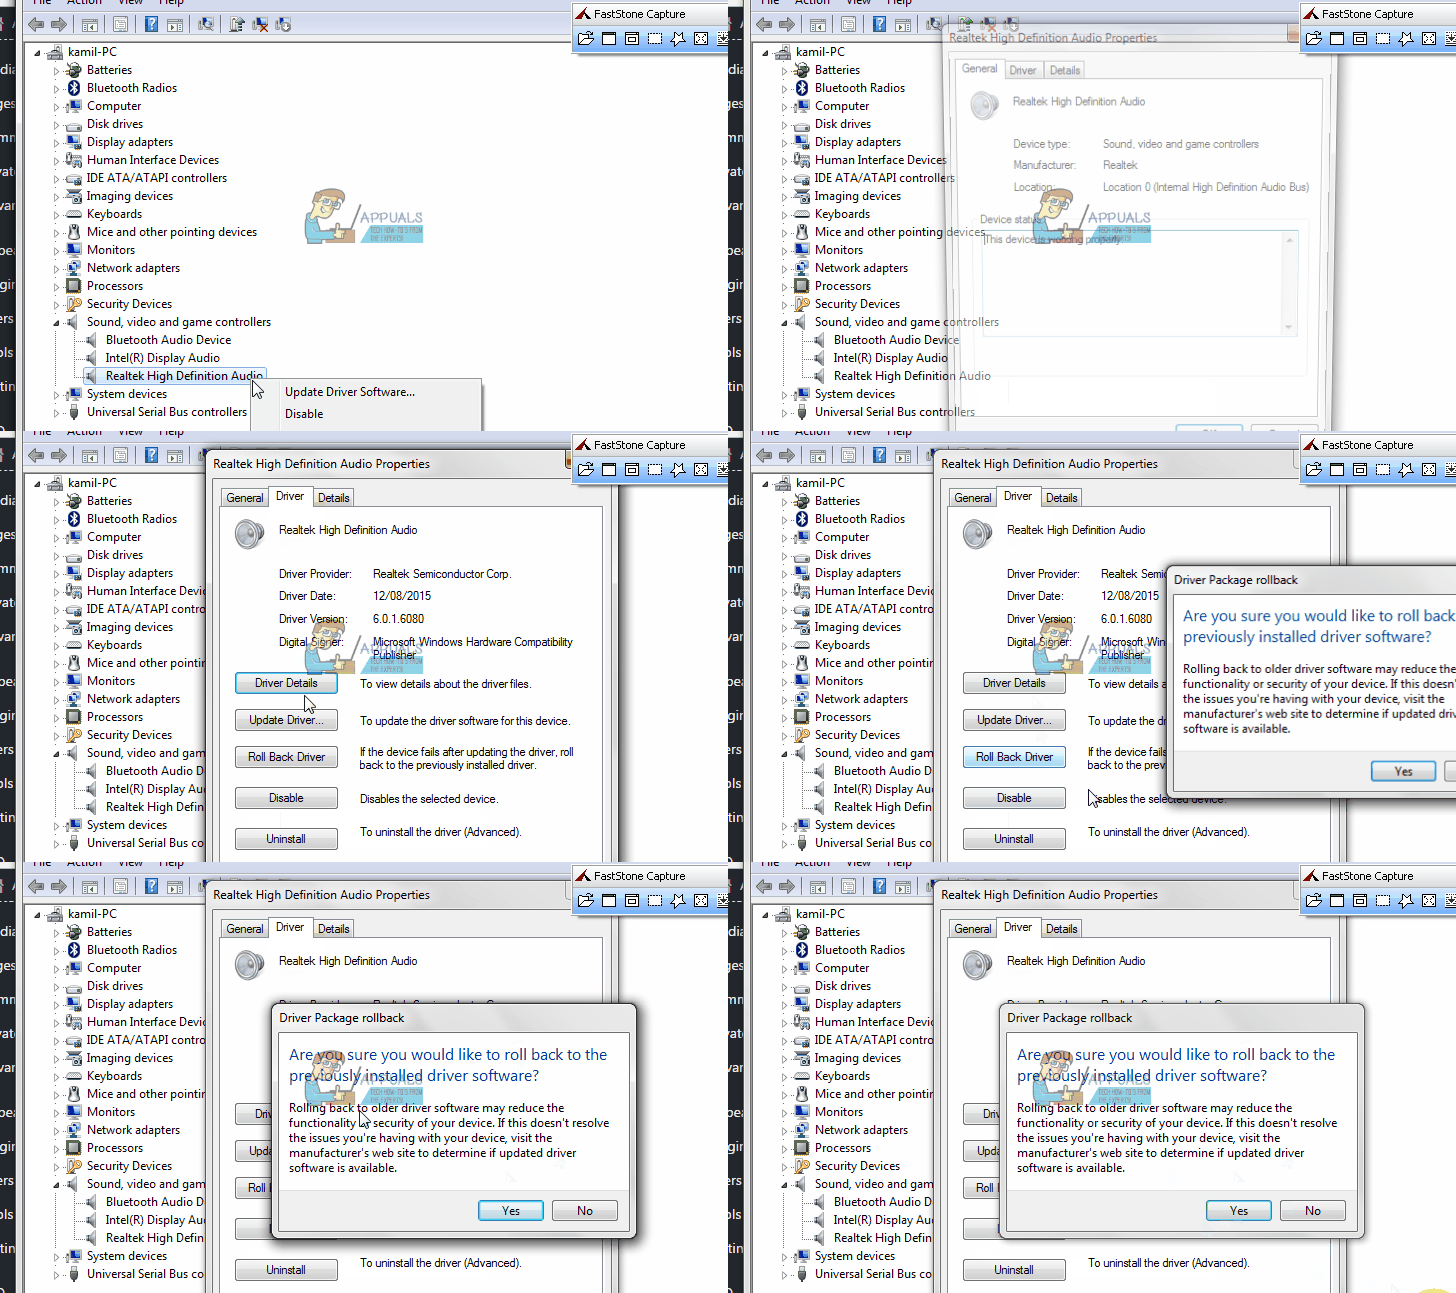
- In the Device Manager, double click on the Sound, video and game controllers section to expand it.
- Right-click on the computer’s dedicated audio device (the Realtek High Definition Audio device or the Conexant HD Audio device – for example) and click on Properties in the context menu.
- Navigate to the Driver
Note: Be sure to jot down the Driver Version of the audio device’s drivers, just in case you need it later on.
- Click on Roll Back Driver and go through the wizard to switch back to the version of audio drivers that was previously installed on the computer.

If the Roll Back Driver option is grayed out and unavailable, however, click on Uninstall, check the Delete the driver software for this device option, click on OK, wait for the device and drivers to be uninstalled and then install an older version of the drivers. In order to do so, go to the official Support website of either the manufacturer of the affected computer or the manufacturer of the affected computer’s dedicated audio device, search for drivers for the dedicated audio device and download and install a version of the drivers that is older than the one you uninstalled from the affected computer.