How to Fix ‘DifxFrontend failed!’ Startup error on Windows?
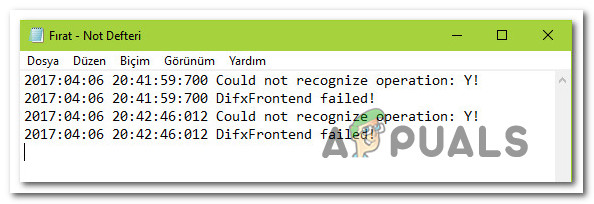
Several users have been reaching us with questions after getting a recurring error (at every startup): Could not recognize operation: A! “DifxFrontend failed!”. Other users are reportedly seeing this error when they try to open a certain application (most commonly Spotify) – And after they open the file and see the error, they can use the app normally. In most cases, the pop-up is wanting to open up a file tame in which this error message id displayed. Although the issue is much more common on Windows 10, there are also occurrences on Windows 7 and Windows 8.1.
What’s causing the ‘DifxFrontend failed’ error?
We investigated this particular issue by looking at various user reports and the repair strategies that are commonly being used to fix this particular startup error. As it turns out, several scenarios will trigger this error message. Here’s a shortlist with potential culprits:
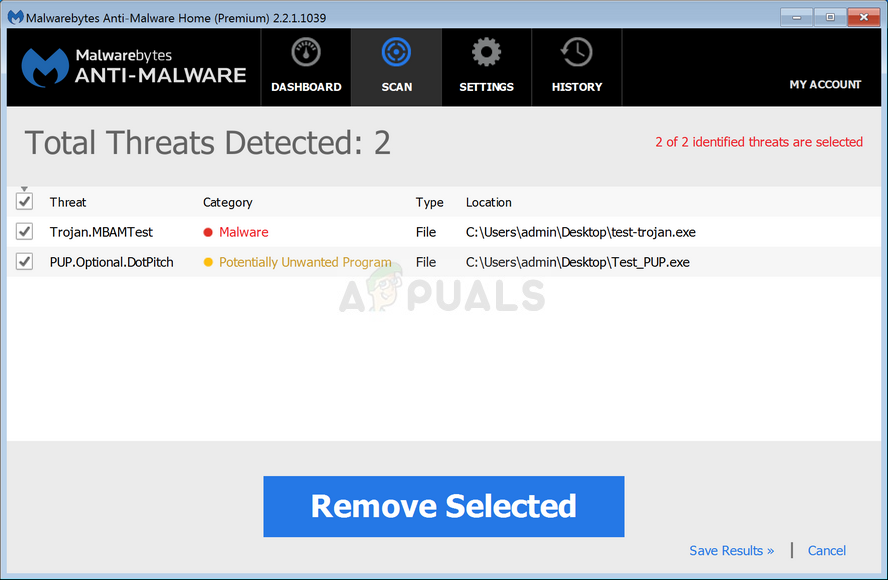
- Malware posing as “Support file” – As it turns out, this behavior can be caused by a virus infection that poses as a support file (most commonly as Dell Support file). If this scenario is applicable, you should be able to resolve the issue by removing the security threat with a competent security scanner. Several affected users have reported that the issue was resolved after they performed a Deep scan with Malwarebytes.
- Corrupted InstallShield installation – Another potential culprit is a corrupted InstallShield installation that is overusing the system resources by continuously trying to complete the installing operation. If you’re dealing with a glitched instance of InstallShield, you will be able to resolve it by using Task Manager to identify the culprit application and removing it by visiting its location.
- 3rd party interference – 3rd party app interference can also cause this particular issue. Certain applications are known to cause this issue, but the culprit can be divers. Since there’s no definitive list that will contain all possible apps that will cause this behavior, the best way to go around identifying the app responsible is to boot your machine in clean boot mode.
- System file corruption – System file corruption can also be responsible for the apparition of this startup screen error. If certain Windows file has become affected by corruption, certain UWP or regular Windows applications might also exhibit this behavior when their main service is attempted to be started. In this case, an SFC or DISM scan should resolve the issue.
If you’re currently looking for ways to resolve this problem and get rid of the annoying startup popup, this article will provide you with several repair strategies that other affected users have successfully used to fix this behavior. Each of the potential repair strategies features below is confirmed to work by at least one affected user.
For the best results, we advise you to follow the methods in the same order that we arranged them in since we ordered them by efficiency and severity. Regardless of the culprit that’s causing the problem, you should eventually find a viable repair strategy that will resolve the issue.
Let’s begin!
Method 1: Running a security scan
As it turns out, this particular issue can also be caused by a virus infection. Several malware executables will camouflage themselves as support files and will try to infiltrate the System file folder and the Registry.
The most commonly reported file that will cause the Could not recognize operation: A! “DifxFrontend failed!” is a Dell Support file. This fairly common adware will end up causing startup errors if the security suite only removed part of the virus infection.
If this scenario is applicable, you should be able to resolve the issue by running a security scan with a competent virus removal scanner like Malwarebytes. Several affected users have reported that the issue was resolved after they ran a deep scan with Malwarebytes – After doing this and restarting their computer, most affected users have reported that the issue has been resolved.
If you’re not exactly sure how to run a deep Malwarebytes scan, follow this step by step article (here) for step-by-step instructions on doing this.
If the issue is persisting even after you clean your computer of viruses or this method wasn’t applicable, move down to the next potential fix below.
Method 2: Dealing with the corrupted InstallShield installation
As it turns out, this error message can also occur if your InstallShield installation is incomplete or crippled by file corruption. InstallShield uses DIFx (Driver Install Framework) to install drivers and later versions of InstallShield and add them to the Device Driver wizard.
But under certain circumstances, InstallShield might overuse your system resources by continuously trying to complete installations. This behavior can be visible inside Task Manager – If you see one or more applications named after your First Windows account name, you’re dealing with a glitched instance of InstallShield.
If this scenario is applicable, you should be able to resolve the issue by accessing Task Manager, discovering the location of the application and deleting them completely. This procedure has been confirmed to be effective by several users struggling to resolve the Could not recognize operation: A! “DifxFrontend failed!” error.
Here’s a quick guide on taking care of the issue:
- Press Ctrl + Shift + Esc to open up Task Manager. Once you’re inside Task Manager, select the Processes tab from the horizontal ribbon menu.
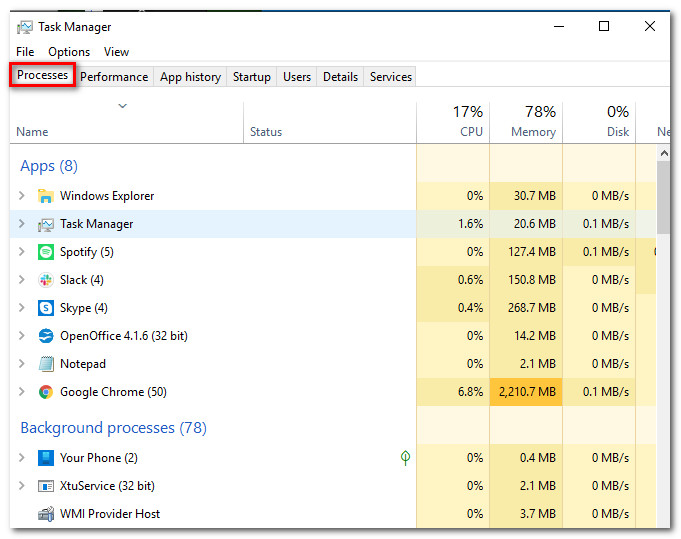
Accessing the processes tab - Once you’re inside Task Manager, scroll down through the list of active processes. right-click on the application that contains your First Name and choose Open File Location from the newly appeared context menu.
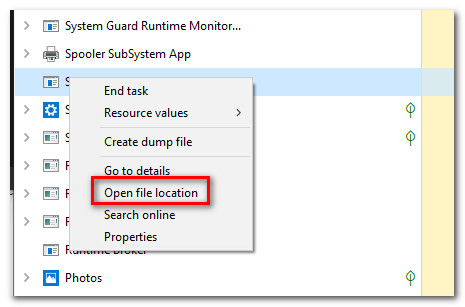
Discovering the location of the application - Once you get to the location, back up one path to view the whole folder, then right-click on it and choose Delete from the context menu. If the folder is in a system location, you might be prompted to provide admin access to complete the deletion.
- After the folder has been deleted, restart your computer and see if the issue has been resolved at the next startup.
If you’re still seeing the startup error Could not recognize operation: A! “DifxFrontend failed!”, move down to the next method below.
Method 3: Starting in clean boot
If the first two methods above have worked for you, a 3rd party application likely is what’s causing the constant startup error. Since we can’t possibly compile a definitive list that will contain all possible culprits, the best scenario is to provide you with the means so you can identify the culprit in your particular situation.
And the easiest way of doing this is by achieving a clean boot state where there’s no 3rd party interference. If the Could not recognize operation: A! “DifxFrontend failed!” error doesn’t occur while your computer boots clean, you can safely assume that you’re dealing with a system component.
Here’s a quick guide on configuring your machine to start in clean boot:
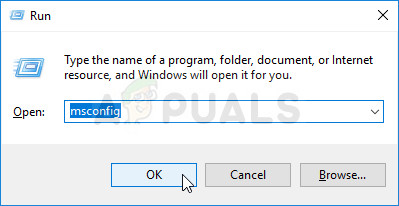
- Press Windows key + R to open up a Run dialog box. Next, type ‘msconfig’ and press Enter to open up the System Configuration menu. If you see the User Account Control (UAC) prompt, click Yes to grant admin access.
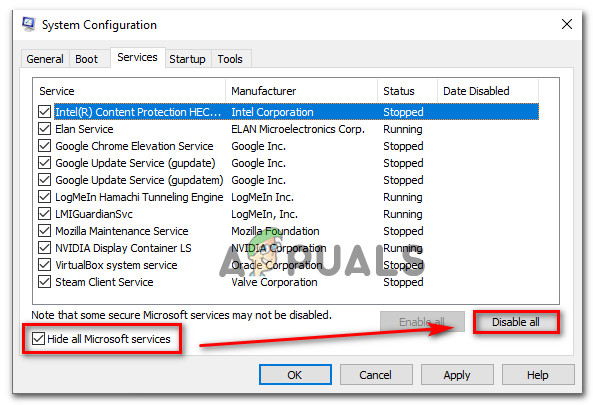
Running MSCONFIG - Once you manage to get inside the System configuration menu, select the Services tab from the top of the menu, then check the box associated with Hide all Microsoft services. This will remove all Windows services from the list, so you don’t run the risk of disabling them by mistake.
- After al unnecessary services have been excluded, click on the Disable all button to prevent all 3rd party services from being started the next time your system boots up.
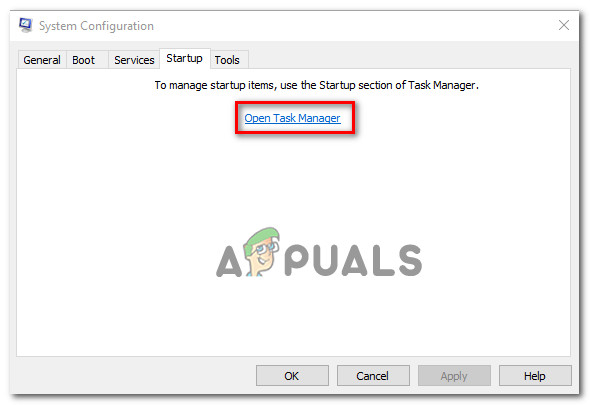
Disabling all non-Microsoft startup items - Once the services have been taken care of, select the Startup tab from the horizontal version and then click on Open Task Manager.
Opening the Startup items window via Task Manager - Once you manage to get inside the newly opened Task Manager tab, select each startup item individually and then click on Disable. After you complete this operation with each service in that list, you will have effectively disabled every startup item from running at the next booting sequence.
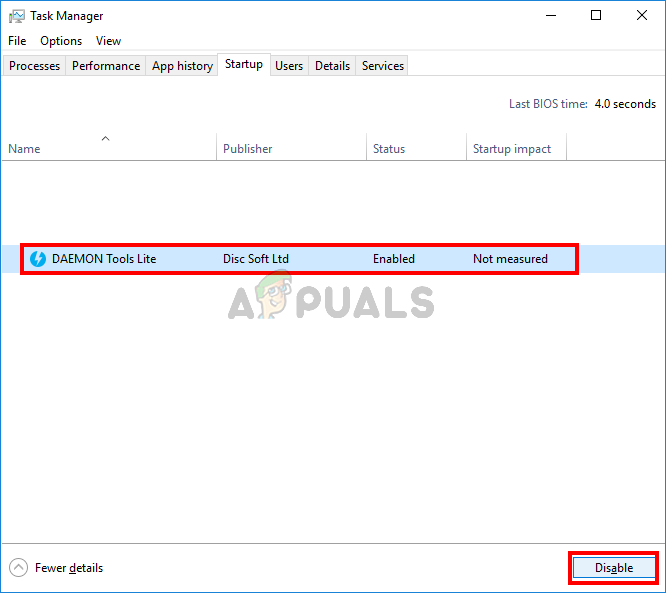
Disabling Apps from Startup - Now that you got this far, you have effectively achieved a clean boot state. To use it, simply restart your computer and wait for the next system startup to complete.
- Pay attention during the next startup sequence to see if the issue is now resolved. If the error is now removed, you can now begin to reverse engineer the step above and systematically re-enable the previously disabled services and startup items until you manage to identify your culprit.
If the same Could not recognize operation: A! “DifxFrontend failed!” error is still occurring, move down to the next method below.
Method 4: Running SFC and DISM scans
If you’ve already booted your machine in clean boot mode and the Could not recognize operation: A! “DifxFrontend failed!” error is still occurring, you can safely assume that the issue is being caused by a system component.
In situations like this, the best possible fix is to rely on a series of built-in utilities that are designed to take care of both corrupted system file and logical errors. DISM (Deployment Image Servicing and Management) and SFC (System File Checker) are two utilities capable of doing this.
While SFC uses a locally stored archive to replace corrupted files with healthy copies, DISM relies on WU (Windows Update) to download fresh copies of the corrupted instances that need to be replaced. But since both utilities have their strong points (DISM is better with GUI issues while SFC does a much better of fixing logical errors) the ideal scenario is to run both utilities (one after another) to ensure that any corrupted issue is fixed.
Here’s a quick guide on running DISM and SFC scans from an elevated Command Prompt window:
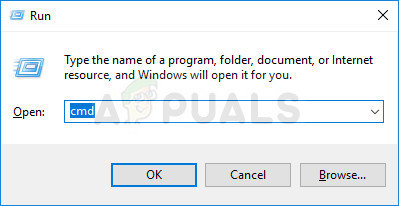
- Open up a Run dialog box by pressing Windows key + R. Once you’re inside the run box, type “cmd” and press Ctrl + Shift + Enter to open up an elevated Command Prompt. If you’re prompted by the User Account Control (UAC), click Yes to grant administrative privileges.
Running an Elevated Command Prompt - Once you’re inside the elevated Command prompt, type the following commands and press Enter after each one to initiate a DISM scan capable of identifying and resolving system file errors:
Dism.exe /online /cleanup-image /scanhealth
Dism.exe /online /cleanup-image /restorehealth
Note: It’s important to make sure that you have a stable internet connection before you initiate the scan so that DISM has the requirements to download healthy copies to replace the corrupted ones. While the first command will make the utility start scanning for inconsistency, the other will start the repairing process.
- Regardless of the outcome of the first scan, restart your computer. At the next startup sequence, follow step 1 again to open another elevated Command Prompt. But this time, type the following command and press Enter to initiate an SFC scan:
sfc /scannow
Note: Do not close the CMD prompt or restart your computer until the process is complete! Doing this might facilitate the apparition of further logical errors that might create additional errors.
- Once the second repair scan is complete, restart your computer and see if the issue is resolved at the next system startup.
Note: Some users have noticed that this issue is caused due to an issue with some third party applications installed on the computer. One such application is discord, so, if you have discord installed, try uninstalling it and then check if the error still persists.


Got the same problem, after doing some research i figured it was the discord desktop app
Uninstalled discord and popup is gone now