How to Fix Could Not Create a Preboot Volume for APFS install Error
When trying to install macOS, the error “Could not create a preboot volume for APFS install” usually shows up after selecting a target disk, stopping the installation. This error means the installer couldn’t set up the necessary APFS preboot volume on the disk.
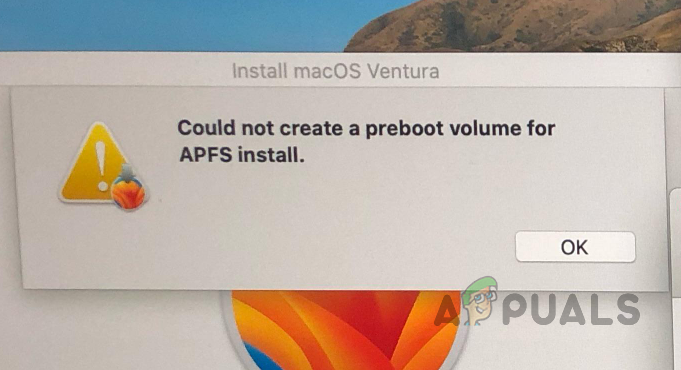
The most common reason is a corrupted or wrongly formatted partition, but it can also be due to outdated firmware or disk permission issues.
In this article, we will discuss different ways to solve this error.
1. Format Disk to APFS
Formatting the disk to APFS makes it compatible with macOS installation, as APFS allows for a preboot volume needed to boot. This step erases all data and fixes partition errors, giving a fresh start for the installer to run smoothly.
Note: Formatting your disk will erase all data on it, so we recommend backing up any important data before proceeding.
- First, boot into the macOS Recovery menu.
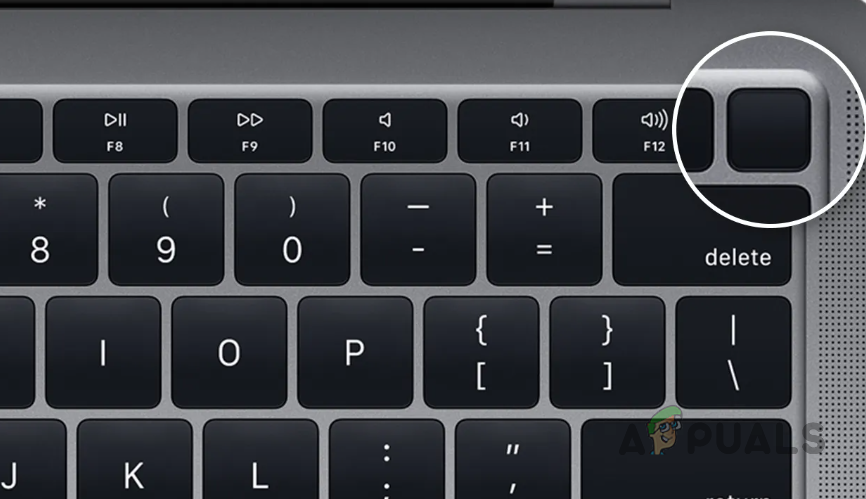
- For Macs with Apple silicon, press and hold the Power button until the Startup Options screen appears.
- Select Options and click Continue.

- For Macs with older chips, restart while holding the Command + R keys.
- This will boot your device into recovery mode.
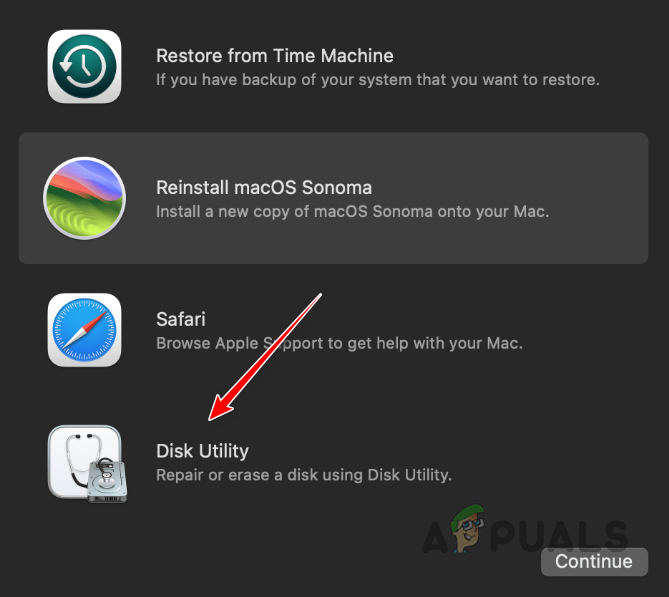
- From the menu, open Disk Utility.
- In Disk Utility, click Show All Devices.
- Select your disk and click Erase.
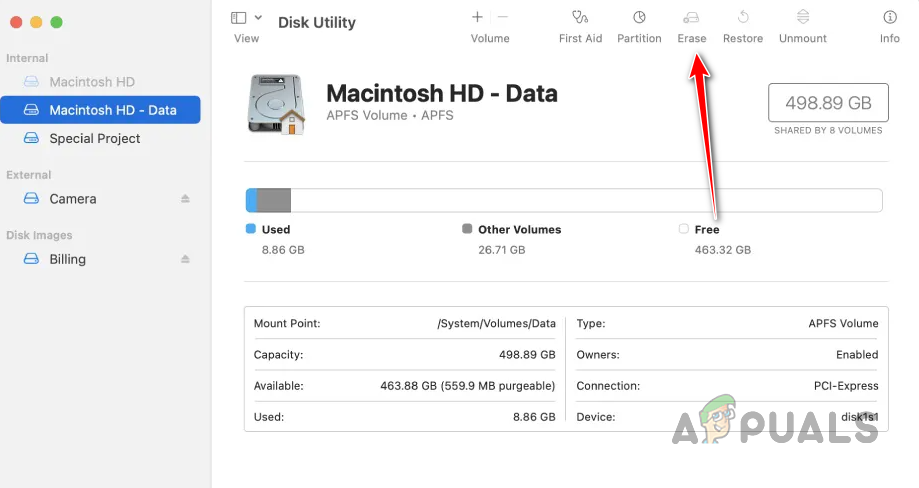
- Select APFS from the Format menu.
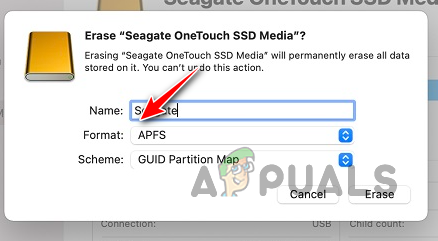
- Click Erase again to proceed.
- Wait for it to finish and check if the error message reappears.
2. Mount Existing Preboot and Recovery Volumes
Fixing the problem often begins by checking system volumes that were missed. Mounting the existing Preboot and Recovery volumes lets the installer access important files needed for APFS settings. This step links the macOS installer to the current setup, which might avoid creating new volumes and solve the issue quickly.
- Open a Terminal window in macOS.
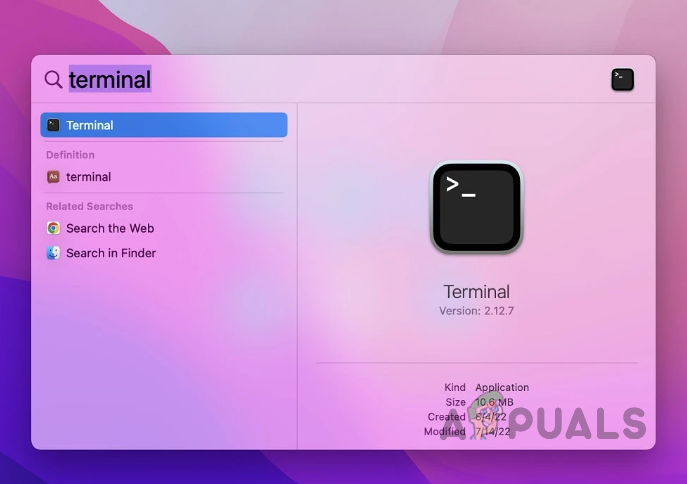
- Type the following commands one by one in the Terminal:
diskutil mount Preboot
diskutil mount Recovery
sudo mount -uw /Volumes/Preboot
sudo mount -uw /Volumes/Recovery
- If you see the “sudo: command not found” error, you’re in recovery mode. Enter the commands without “sudo.”
3. Format Disk to MacOS Extended
Changing the disk format to MacOS Extended (Journaled) wipes away the troublesome APFS setup that often causes errors. This lets the installer correctly switch the disk to APFS during installation, fixing any issues with partitioning or preboot volume setup.
- For older Macs, restart while holding Command + R.
- For Apple silicon Macs, turn off, then hold the Power button until the Startup Options screen appears.
- Select Options and click Continue.
- In the recovery menu, open Disk Utility.
- Select your disk and click Erase.
- Choose MacOS Extended (Journaled) as the Format option.
- Click Erase to format the disk.
- After completing, run the installer to check if the issue persists.
4. Reinstall MacOS in Recovery
Reinstalling macOS through Recovery mode guarantees the system can rebuild the needed APFS preboot volume without issues from previous errors or corruption. This approach skips problematic settings, letting the installer correctly format the drive and set up the needed system files.
- Boot into the macOS Recovery menu.
- For Macs with Apple silicon, power off, hold the Power button until startup options appear, then select Options and click Continue.
- For older Macs, restart while holding Command + R.
- In the recovery menu, choose Reinstall macOS.
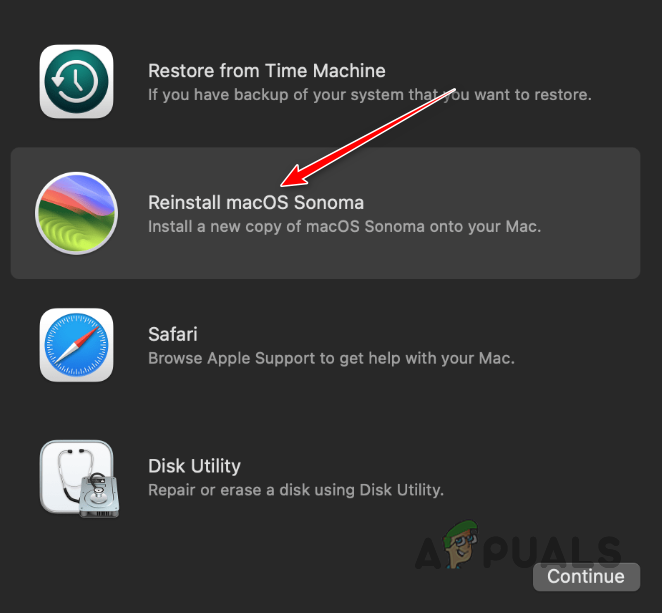
- Follow the instructions to finish the installation.
- Check if the issue persists during installation.


For this to work I had to boot into internet recovery mode first (option + command R). Otherwise I couldn’t delete the disk. After that, there was no need to restart the computer. I was able to create a new partition and install MacOS just fine.