How to Fix Bluetooth not Detecting Devices on Windows?
The problem manifests itself when you try scanning for nearby Bluetooth devices but you fail to detect a single one. It usually appears after a Windows update is installed or after you perform some driver updates. You should definitely check to see if the device you are trying to connect with is working properly before carrying on with the rest of this article.
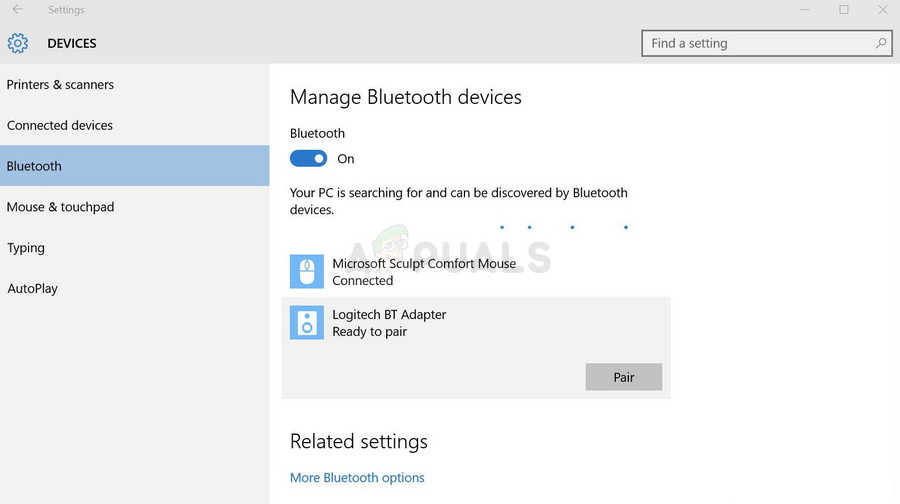
Microsoft has suggested several methods which can be used to fix this problem and the remaining methods have been discovered by other users who struggled with the same issue. Follow the methods below in order to hopefully resolve this problem!
What Causes Bluetooth to Stop Detecting Devices Windows 10?
There are quite a few different things which can cause this problem to appear on Windows 10. We have decided to include the most common causes which can help you identify the correct way to resolve the problem. It can save you some time and your nerves so make sure you check you check out the list below!
- Bluetooth services not running – In the best-case scenario, your Bluetooth services may have been stopped for some unknown reason. Also, their startup type should be set to Automatic in order to start the services each time Windows boots.
- Bluetooth drivers are faulty – Old or mismatching Bluetooth drivers are the biggest cause of the problem. Sometimes Bluetooth devices require drivers from the manufacturer and sometimes you can use the one provided by Windows. Either way, your driver needs to be replaced.
Solution 1: Make Sure the Bluetooth Service is Running
It’s quite possible that an error regarding the main Bluetooth service is causing the detection problems. Services can be restarted rather easily and this method is definitely an easy one to perform by anyone! Make sure you follow the instructions below carefully in order to restart the Bluetooth service!
- Open the Run utility by using the Windows Key + R key combination on your keyboard (press these keys at the same time. Type “services.msc” in the newly opened box without the quotation marks and click OK in order to open the Services tool.

- The alternative way is to open the Control Panel by locating it in the Start menu. You can also search for it using the Start menu’s search button.
- After the Control Panel window opens, change the “View by” option at the top right part of the window to “Large Icons” and scroll down until you locate the Administrative Tools Click on it and locate the Services shortcut at the bottom. Click on it to open it as well.
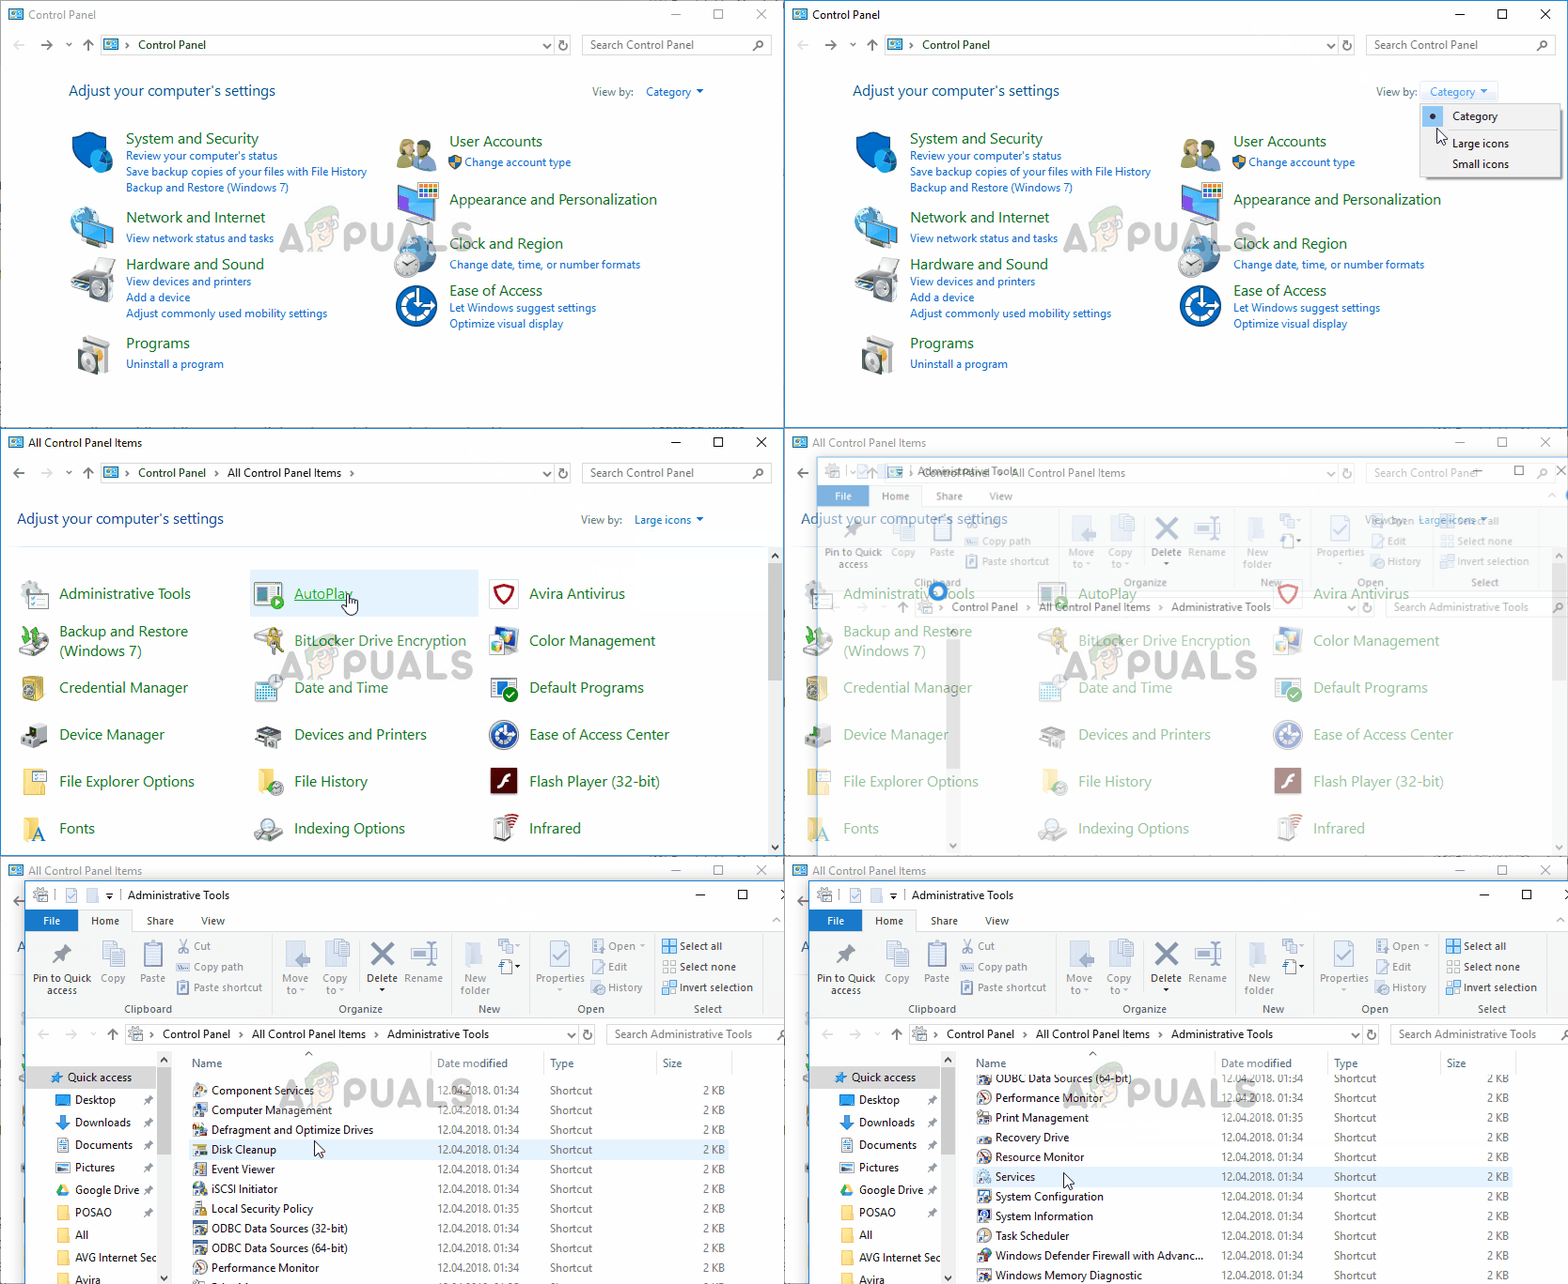
- Locate the Bluetooth service on the list, right-click on it and select Properties from the context menu which appears.
- If the service is started (you can check that just next to the Service status message), you should stop it for now by clicking the Stop button in the middle of the window. If it is stopped, leave it stopped until we proceed.
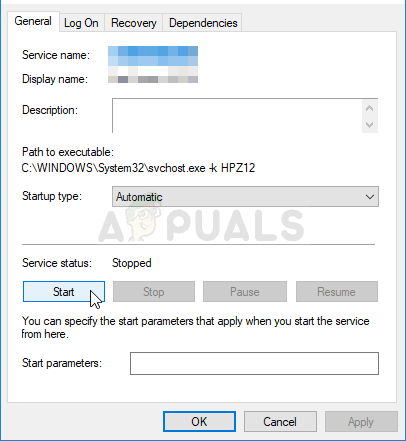
- Make sure that the option under the Startup type menu in the service’s properties window is set to Automatic before you proceed with other steps. Confirm any dialogue boxes which may appear when changing the startup type. Click on the Start button in the middle of the window before exiting. You may receive the following error message when you click on Start:
Windows could not start the Bluetooth service on Local Computer. Error 1079: The account specified for this service differs from the account specified for other services running in the same process.
If this happens, follow the instructions below to fix it.
- Follow the steps 1-3 from the instructions above in order to open the service’s properties window. Navigate to the Log On tab and click on the Browse…
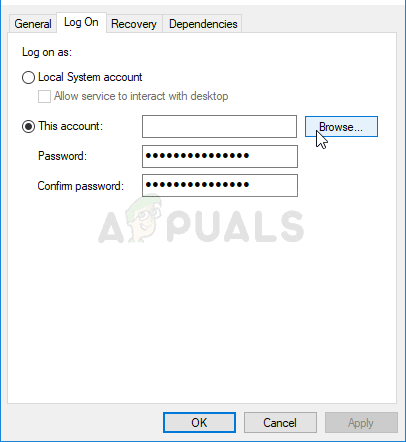
- Under the “Enter the object name to select” entry box, type in your account’s name, click on Check Names and wait for the name to become available.
- Click OK when you are finished and type in the password in the Password box when you are prompted with it if you have set up a password. You should be able to detect Bluetooth devices now.
Note: If the problem still appears, repeat the same process for other Bluetooth services such as the Bluetooth Support Service or the Bluetooth GATT service.
Solution 2: Update Bluetooth Device Drivers
This problem often appears after updating Windows to the latest version; especially if a large-scale update has been launched. This often installs different drivers for some devices and many users complained that Bluetooth connectivity has been broken after installing the latest updates. This can be resolved by updating or reinstalling the Bluetooth device drivers in Device Manager!
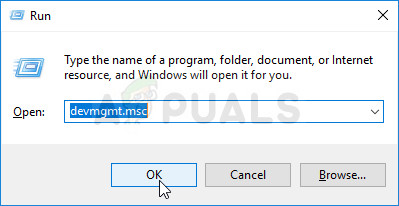
- Click the Start menu button, type in “Device Manager”, and select it from the list of available results by simply clicking the first one. You can also tap the Windows Key + R key combo in order to bring up the Run dialog box. Type in “devmgmt.msc” in the dialog box and click OK in order to run it.
- The section you need to visit is named Bluetooth. Inside the Bluetooth section, you can choose all entries. Perform the following steps for all devices. Right-click on each selected entry and choose the Uninstall Device
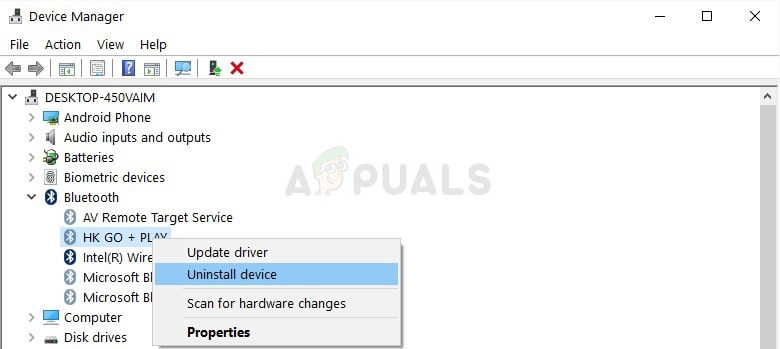
- Confirm any dialogues or prompts which may ask you to confirm the uninstallation of the current driver and wait for the process to complete.
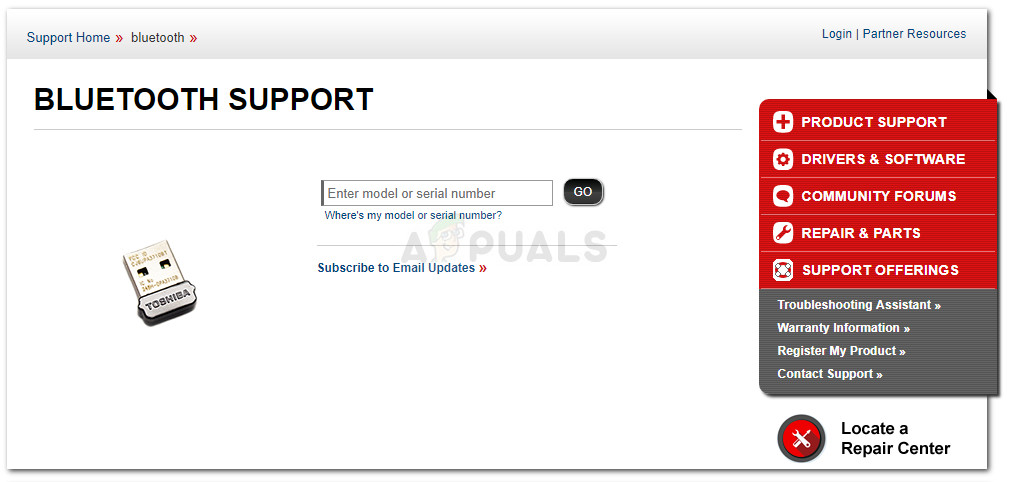
- Google ‘your device’s name + manufacturer’ and look for a link to their official website. Find your device’s latest driver and download.
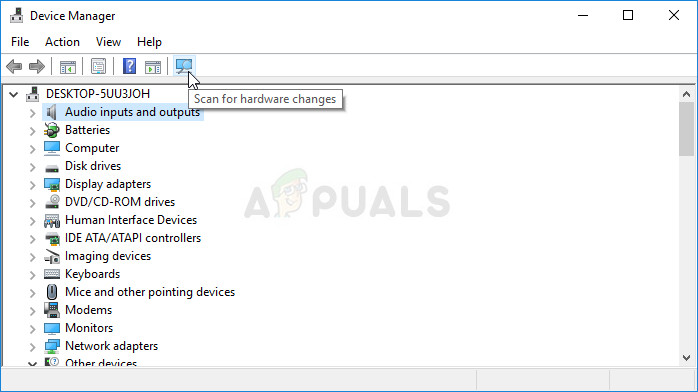
- Make sure you run the file you have just downloaded and follow the instructions which will appear on-screen in order to install the latest drivers. Alternatively, you can go back to Device Manager and click Action from the top menu. Click the Scan for hardware changes option and it will check for devices without drivers and reinstall them automatically.
- Check to see if the problem has been resolved and if Bluetooth connectivity problems still occur!
Solution 3: Install the Latest Windows Updates
The latest versions of Windows 10 seem to have resolved this problem for good as long as it wasn’t caused by third-party programs. Even though the problem was often caused by a Windows Update, Windows has released patches afterward in order to get rid of the problem. Updating your operating system to the latest version is always helpful when it comes to dealing with similar errors and users have reported that the latest Windows 10 versions actually deal with this problem in specific.
- Use the Windows Key + I key combination in order to open Settings on your Windows PC. Alternatively, you can search for “Settings” by using the search bar located at the taskbar.
- Locate and open the “Update & security” section in the Settings Stay in the Windows Update tab and click on the Check for updates button under the Update status in order to check whether there is a new version of Windows available.
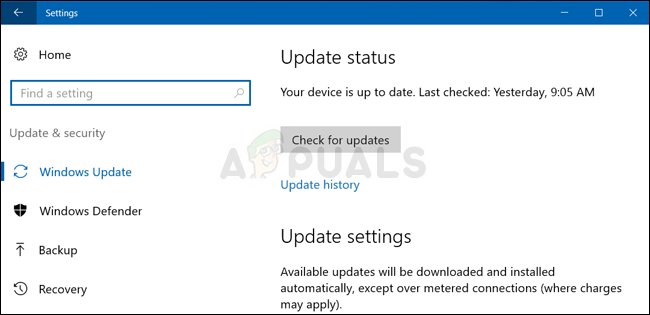
- If there is one, Windows should install the update immediately and you will be prompted to restart your computer afterward.
Solution 4: Run the Hardware & Device Troubleshooter
Even though troubleshooters are rarely able to resolve the problem correctly, many users have reported that running the troubleshooter managed to resolve the problem easily. It’s probably the easiest method you can try out so make sure you start out with this method!
Windows 10 Users:
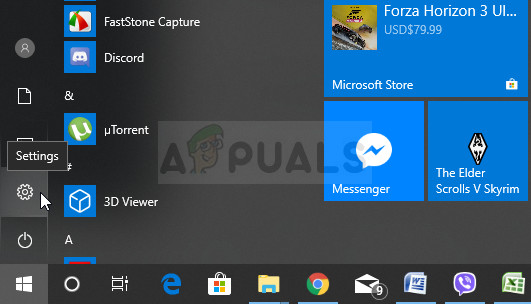
- Search for Settings in the Start menu and click on the first result which pops up. You can also click directly on the cog button at the lower left part of the Start menu or you can use the Windows Key + I key combination.
- Locate the Update & security section at the bottom part of the Settings window and click on it.
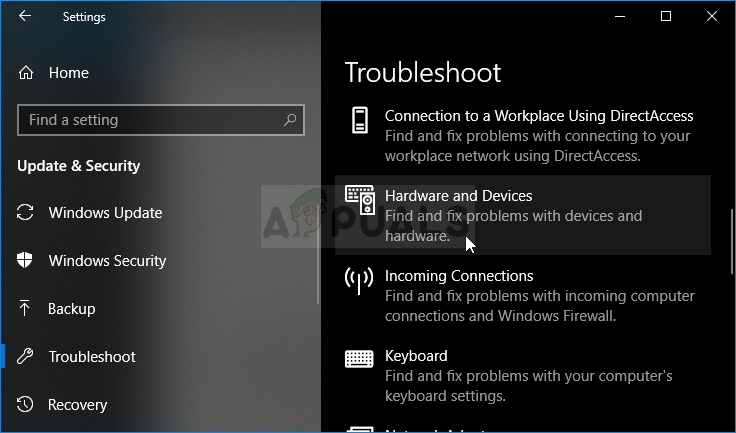
- Navigate to the Troubleshoot tab and check under the Find and fix other problems
- Hardware and devices troubleshooter should be right there at the bottom so make sure you click on it and follow the instructions on the screen.
- Check to see if the problem has been resolved!
Other versions of Windows:
- Open Control Panel by searching for the utility in the Start button or by clicking the Search button (Cortana) button at the left part of your taskbar (bottom left part of your screen.
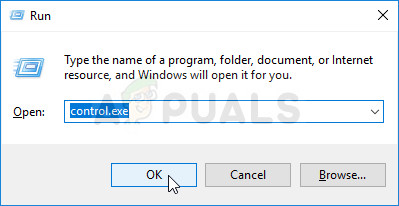
- You can also use the Windows Key + R key combo where you should type “control.exe” and click Run which will also open Control Panel directly.
- After Control Panel opens, change the view to Category and click on View devices and printers under Hardware and Sound in order to open this section.
- Head over to the Devices section, right-click on your PC’s icon and choose the Troubleshoot You might also be able to see a yellow triangle next to the PC icon and the Troubleshoot entry in the context menu.
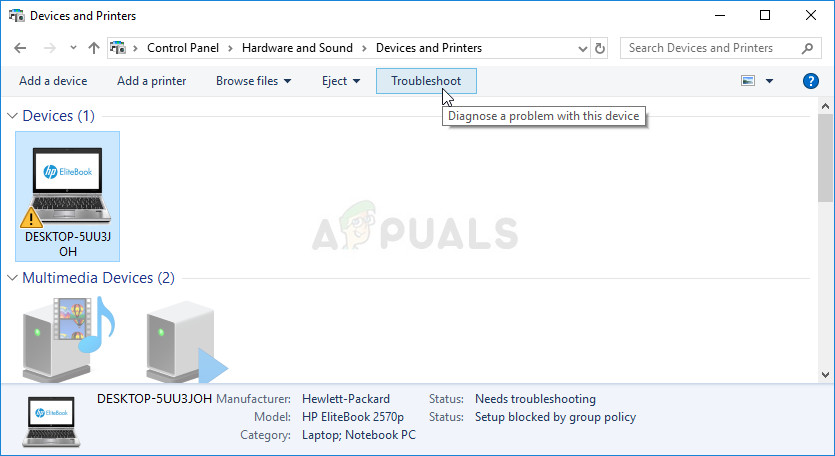
- Confirm any dialog options which may pop up and follow the instructions which will appear on-screen.


