How to Fix Avast Turning off by itself
Avast is one of the most popular options among free antivirus tools as it’s good and easy to use. It also does not consume plenty of resources. However, it has some bugs which need to be taken care of as soon as possible. Some of them include this error where Avast or some of its most important shields simply turn off by themselves.
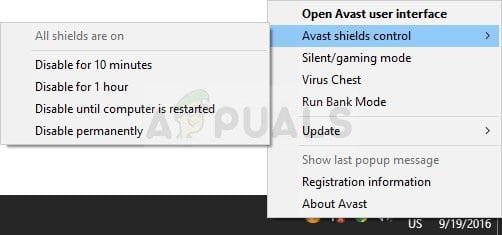
This shouldn’t happen at all since it leaves your computer unprotected and it’s important that you take care of the problem as soon as you can, preferably by following the instructions in this article!
Solution 1: Update Avast to the Latest Version
It’s true that most errors can be fixed simply by updating and this is not just the basic troubleshooting step before you try to do anything. Avast developers noticed the error where the shields turned off by themselves and they tried to fix that in the latest version. That is why you should update and check to see if the error still appears. Updating Avast is easy and it’s simple to follow in the steps presented below.
- Open the Avast user interface by clicking its icon at the system tray or by locating it in your Start menu.
- Navigate to the Update tab and you will notice that there are two buttons with the Update text on them.. One of these buttons is related to the update of the virus definitions database and the other one is related to updating the program itself.
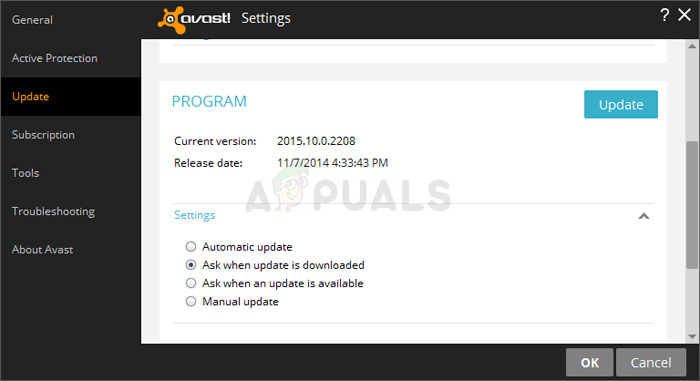
- Most users have reported that updating the program has resolved the problem but it’s for the best to update both the database and the program by clicking on both of these update buttons, being patient while Avast checks for updates and follow the instructions on-screen in order to navigate through the install process.
- Check to see if the shields still turn off by themselves.
Solution 2: Tweak the aswbIDSAgent Service on Your Computer
If a service has gone under some changes or errors, it will reflect on the tool itself and it won’t be able to function properly. That is why the second method related to the problem of not being able to keep the shield on by changing certain settings related to a service called aswbIDSAgent.
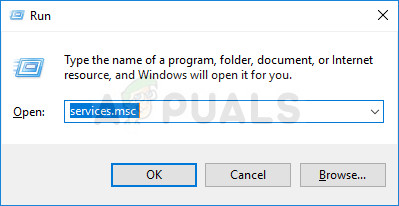
- Open the Run dialog box by clicking the Windows Key + R key combination. Type “services.msc” without the quotation marks in the Run dialog box and click OK in order to open the services-related settings.
- Locate the aswbIDSAgent Service, right-click on it and select Properties from the context menu which will appear.
- If the service is stopped (you can check that just next to the Service status section), you should leave it stopped. If it is running, click the Stop button and wait for the service to stop before proceeding with the next step.
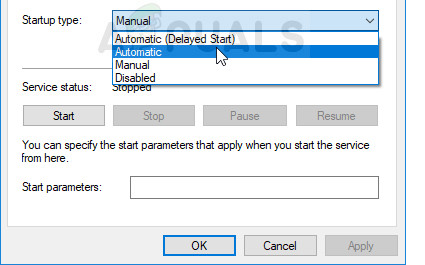
- Make sure that the option under the Startup type section in aswbIDSAgent Service’s Properties is set to Automatic before you click the Start button in order to start the service again. Check to see if the problem is solved.
You may receive the following error message when you click on Start:
“Windows could not start the aswbIDSAgent Service on Local Computer. Error 1079: The account specified for this service differs from the account specified for other services running in the same process.”
If this occurs, follow the instructions below in order to fix it.
- Follow steps 1-3 from the instructions above in order to open aswbIDSAgent Service’s properties. Navigate to the Log On tab and click on the Browse… button.
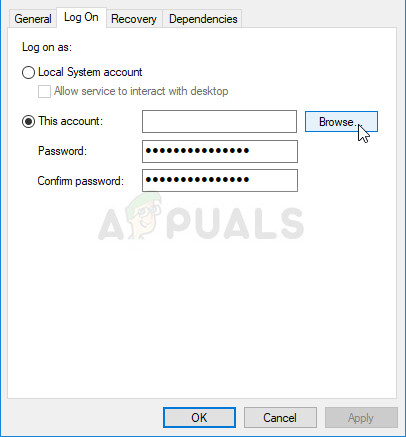
- Under the “Enter the object name to select” box, type in your computer’s user name, click on Check Names and wait for the name to become authenticated.
- Click OK when you are done and type in the administrator password in the Password box when you are prompted to do so.
Solution 3: Perform a Repair and then a Clean Install
Repairing the tool from the Control Panel should be an obvious step if the solutions above failed to work at all. Users have reported that it was able to solve their problem is certain cases when updating couldn’t cut it. Follow the steps below!
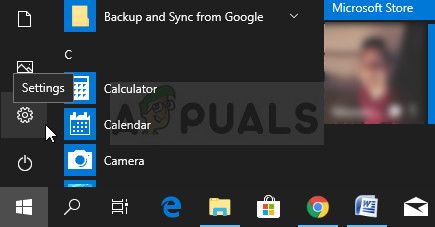
- Click on the Start menu and open Control Panel by searching for it simply by typing with the Start menu window showing. Alternatively, you can click the gear-looking icon in the lower-left part of the Start menu in order to open the Settings app if you are using Windows 10.
- In Control Panel, select to “View as: Category” option at the top right corner of the Control Panel window and click the Uninstall a Program button under the Programs section.
- If you are using the Settings app, clicking on Apps should immediately open a list of all installed applications and tools on your PC so wait for a while in order for it to load
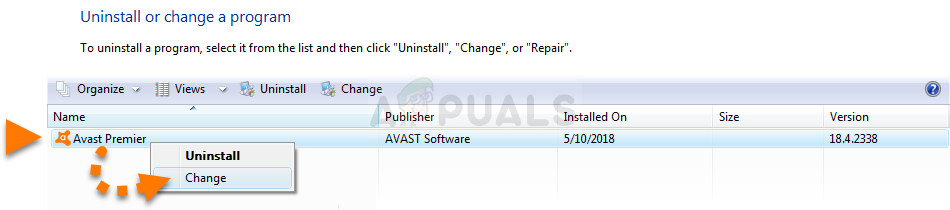
- Locate Avast in Control Panel or Settings and click on Change. Follow any instructions which may appear afterward in order to repair it completely.
- After the process is over, check to see if the same problem with Avast shield still appears.
If the program itself has become buggy due to programs conflicting and similar, you may have to perform a clean reinstall which will setup Avast from the very start. The process is quite easy to follow and this is a solution you shouldn’t skip, especially if you used another antivirus tool before Avast.
- Download the latest version of the Avast installation by navigating to this link and clicking the Download Free Antivirus button in the middle of the website.
- Also, you will need to download the Avast Uninstall Utility from this link so save it to your computer as well.

- Disconnect from the Internet after you have downloaded these files and boot into Safe Mode.
- Run the Avast Uninstall Utility and browse for the folder where you have installed Avast. If you installed it in the default folder, you can leave it. Be careful to choose the correct folder since the contents of any folder you choose will be deleted. Navigate through File Explorer until you find the right folder.
- Click the remove option and restart your computer by booting into a normal startup. Check to see if the problem is gone.
Solution 4: Perform a Virus Scan
There might be certain situations where a Rootkit or a virus has established itself on your computer and is now taking over the control of the Avast Antivirus. Therefore, we recommend you to use Malwarebytes to scan and fix your computer.


