How to Enable Blue Light Filter on Windows?
You might be having some trouble in sleeping if you continuously use your smartphone or laptop especially at night. This is all due to blue light that is emitted from various technology resources like LEDs, smartphones, laptops etc.
What is Blue Light and How it Effects Vision/ Sleep?
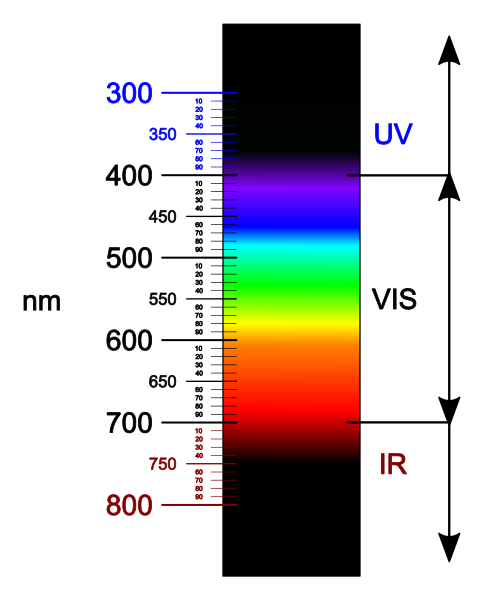
If you haven’t heard of adverse effects of blue light, then you might be wondering what the heck this is. Blue Light is in the range of visible spectrum that a human eye can see and retrieve. As compared to other lights, blue light has the shortest wavelength i.e. 400 to 495 nanometers. Below this wavelength is the spectrum of UV light (Ultraviolet) that cannot be seen with the naked eye. Having the lowest wavelength means that blue light exerts more energy on the subject hence causing drastic effects on photo-receptor cells resulting in loss of vision/ sleep.
Note: Using smartphone/ laptop/ Tv or any source at night that emits blue light is seriously injurious to your vision.
If you are using any Windows 10 build equal to/ greater than build #15002, then you might be pleased to know that Microsoft has provided a built-in blue light filter with the name of Blue Light or Night Light (In Latest Builds) that prevents your eyes from blue light. If you don’t have the latest build, then we have a detailed guide on getting a free version of Windows 10 offline installer. Go ahead and check it out.
How to Enable Blue Light/ Night Light Filter in Windows 10?
Enabling blue light filter is damn simple. Follow the steps below.
- Navigate to the lower right side of your taskbar and click on Action Center Alternatively, you can also press Win + A keys on your keyboard to launch Action Center.
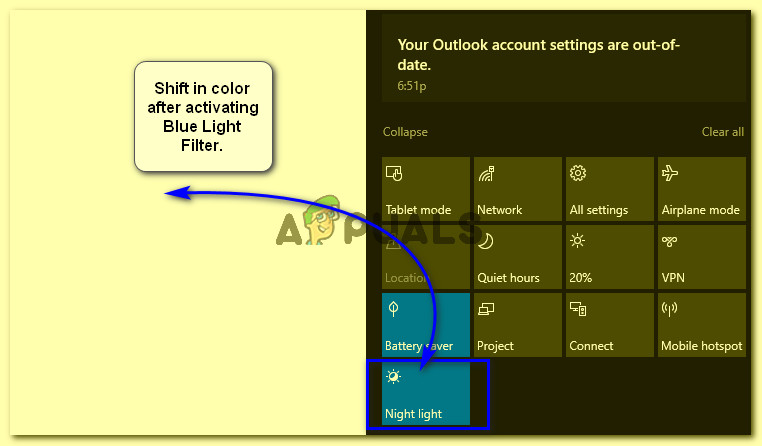
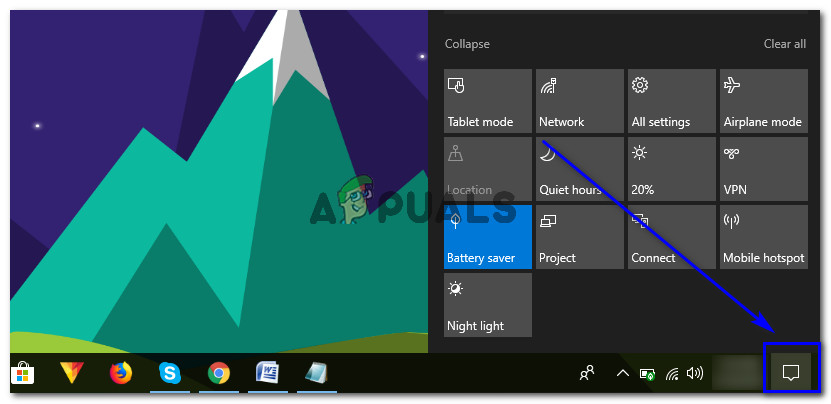 2. Inside the action center, expand the toggle buttons if they are collapsed and it would come up with a toggle by the name of Night Light or Blue Light. Click it to enable blue light filter. You would see a shift in colors of your screen from white to red.
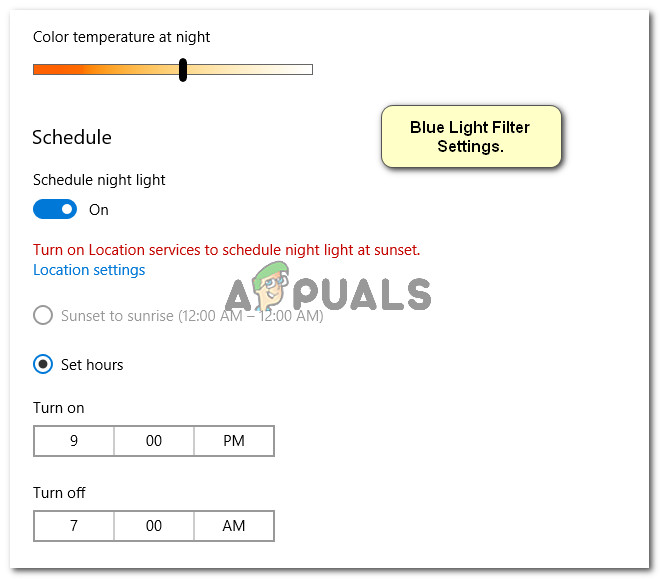
How to Configure Blue Light Filter Settings?
If you don’t like the default settings of blue light filter or you want to your Windows 10 to automatically launch the filter after a specified time, then follow these steps.
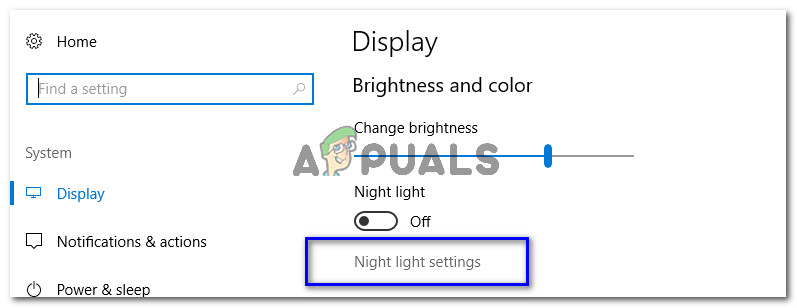
- Open your Settings by searching for it inside Cortana and click on System
- Inside System Display settings, you will see a toggle to enable Night Light/ Blue Light filter along with a link to configure its settings.
 3. Inside its settings, you can configure Color Temperature from warm to cold colors according to your likings. You can also schedule your blue light filter to turn on and off at a specified time or you can let it automatically enable this filter at night based on your location.


More people should know about this