How to Disable Microsoft Edge Browser
Microsoft had bad luck with its Internet Explorer in the past, and it is still available in Windows 10. Microsoft took a step ahead and began working to develop a competitor to other famous browsers out there. Therefore, it introduced Microsoft Edge, which is definitely an improved version of IE, but it is still far behind market giants like Chrome, Firefox, etc. Consequently, people are not satisfied with this release, as there are so many bugs causing Edge to lose its audience.
So, people are asking how to disable or delete Microsoft Edge within their Windows 10. Truly speaking, there is no conventional way to delete Microsoft Edge, but you can disable it from opening web pages automatically. Microsoft Edge is an integral part of Windows 10, and it cannot be deleted like Internet Explorer, which also cannot be removed conventionally.
Before we proceed with disabling Edge, we should clearly differentiate what we mean by setting another browser as the default. Microsoft Edge is an integral part of the operating system and, although workarounds are available, it is not guaranteed that they will work since Microsoft aims to fix these loopholes in each update. Making another browser your default doesn’t necessarily mean that Microsoft Edge will be uninstalled completely. It simply means that web pages will be opened in another browser instead of Edge.
So, here is the guide to disabling Microsoft Edge and preventing it from automatically opening websites.
Solution 1: How to Disable Edge by Using File Renaming.
A solution that has worked for many users involves renaming the core file of Microsoft Edge. Whenever Edge needs to run, it must access its installation files to obtain the necessary launch instructions. Once these files are fetched, the program starts. Since deleting the entire folder can be problematic due to Microsoft Edge being an integral part of the OS, an alternative is to try renaming the directory. Please note that an administrator account is required to perform this operation.
- Press Windows + I to launch File Explorer. Click on ‘This PC‘ in the left navigation pane and navigate to the following file path:
C:\Windows\SystemApps
- Once in the directory, look for the following folder: “MicrosoftEdge_8wekyb3d8bbwe.
- Right-click on the folder and select Properties.

- Once in the properties, follow this tutorial to take ownership of the folder
- Once you have ownership, right-click on the folder again and select “Rename.” Please note that you need an administrative account to carry out this operation.
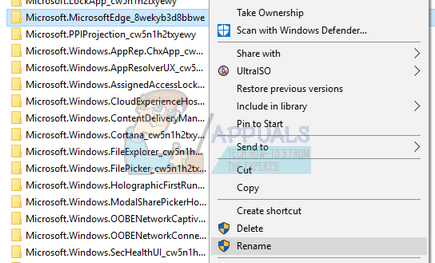
- Rename the folder to “MicrosoftEdge_8wekyb3d8bbwe_OLD”. You can rename it to anything, but make sure to add text after the original folder name in case you want to activate Edge again.
- Restart your computer and check if Edge is still enabled.
Solution 2: Change the Default Browser.
The only convenient and recommended way to disable Microsoft Edge is by changing the default browser inside Settings. As mentioned before, there is no straightforward way to delete or permanently disable Edge. Thus, you can follow these steps in order to prevent your Edge browser from opening web content.
1. Go to Settings by clicking on the Start menu icon and selecting Settings from the list.

2. Within the settings, click on ‘System‘ and select the ‘Default apps‘ option from the left pane, located at the second-to-last position in the list.
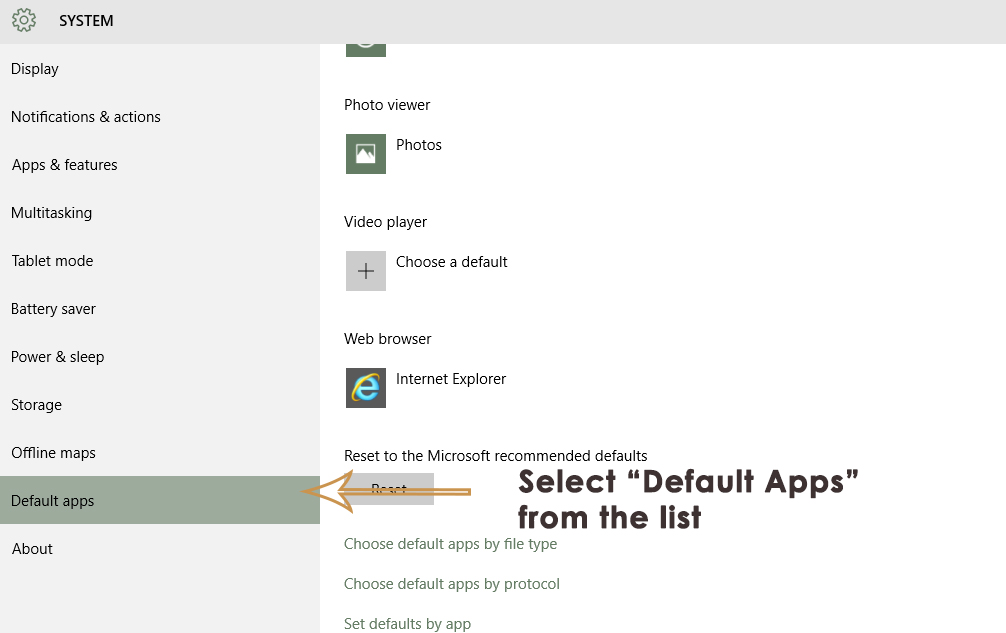
3. In the right pane, select Internet Explorer (set as default browser) and click on it. If you have any other browser installed on your PC, then it will show up in the list. All you need to do is select a different default browser from the list. In my case, I have chosen Firefox as my default browser. Additionally, it would be better to unpin the Edge browser from your taskbar and the Start menu.

Solution 3: Remove Microsoft Edge Using the Registry.
The method above technically changes the default browser to avoid Edge interference. However, if you would like to completely delete Edge (which we do not recommend) the reason being that Edge is a trusted User-Interface app and a core part of Windows 10. Therefore, it cannot be removed by traditional methods. Since you’ve changed your default browser, it won’t interfere anyway. But if you would still like to continue, proceed with the steps below.
Open the command prompt as an administrator, and type ‘powershell’, followed by the Enter key to switch from CMD to PS. Once done, type.
Get-AppxPackage
This should list all the installed apps and core features of Windows 10. Scroll down and look for the one with Microsoft.MicrosoftEdge, copy it (you can use your mouse to highlight the full name and then press Ctrl + C to copy it), or write down the PackageFullName. This will change depending on the build of Windows 10 you are using. For the RTM version released in July, it is:
Get-AppxPackage Microsoft.MicrosoftEdge_20.10240.16384.0_neutral__8wekyb3d8bbwe | Remove-AppxPackage
OR
Get-AppxPackage *edge* | Remove-AppxPackage
This should remove the app. Alternatively, you can navigate to the Windows Apps installation location.
C:\Windows\SystemApps\
Right-click the Microsoft Edge folder, Microsoft.MicrosoftEdge_8wekyb3d8bbwe, and select Properties. There, you can set the folder and all its contents to Read-Only (ensure the checkbox displays a checkmark, not a square). This will prevent Windows from making changes to the folder.
Next, you can open the folder, and rename the Microsoft Edge executables (MicrosoftEdge.exe and MicrosoftEdgeCP.exe), and/or delete them.
Solution 4: Disable Edge from Launching Upon Restart.
We will make use of the Registry Editor to prevent Edge from launching upon the start of your computer. Please note that the Registry Editor is a powerful tool, and changing keys without proper knowledge can introduce discrepancies in your operating system.
- Press Windows + R to launch the Run application. Type “regedit” in the dialog box and press Enter.
- Once in the Registry Editor, navigate to the following file path:
Computer\HKEY_LOCAL_MACHINE\SYSTEM\CurrentControlSet\Services\NlaSvc\Parameters\Internet
- Now, look at the right side of the screen where different keys are listed. Search through them until you find “EnableActiveProbing.” Double-click it to open its properties.
- Set the current value to zero (0). Press OK to save changes and exit.

- Now, reboot your computer properly and check if Edge still pops up when you restart.
Solution 5: Unpin from Taskbar.
Some users were able to remove the browser by simply unpinning it from their taskbar; however, it first needs to be stopped from the task manager as well in order to unpin it. To accomplish this:
- Press “Windows” + “X” to open the menu and select “Task Manager” from the list.
- In the Task Manager, click on the “Processes” list, and then select Microsoft Edge from the currently running processes.
- After clicking on Microsoft Edge, click the “End Task” button to stop it from running in the background.
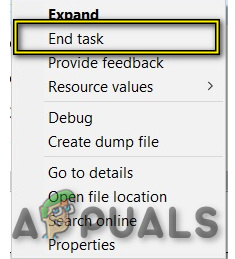
End Task in Task Manager - After this, close out the Task Manager and press “Windows” + “E” to launch Windows Explorer.
- Navigate to the following location to access the Microsoft Edge browser.
C:\ProgramData\Microsoft\Windows\Start Menu\Programs
- Right-click on the “Microsoft Edge” option from the list and select the “Unpin from Taskbar” button.
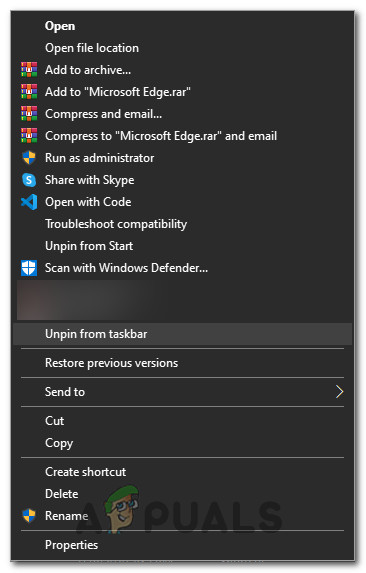
Clicking on the “Unpin from Taskbar” button - You can also do this by searching for Microsoft Edge in the Windows search bar and right-clicking on the Microsoft Edge icon there.
- After removing Edge from the taskbar, check to see if the browser still runs in the background.
Changing Cortana’s Default Browser
Windows 10 is packed with a virtual assistant named Cortana. It is very helpful and assists in organizing and accomplishing your daily routine tasks effectively. However, like all other Microsoft products, Cortana also uses Microsoft Edge as the default browser for carrying out its tasks, but you can make it use Chrome instead of Microsoft Edge.
That does not disable Edge, it simply makes Firefox the default browser, which is not the same thing. Furthermore, it does not even prevent Edge from running. I have always used Firefox as my default browser, and made sure that it still is the default (version 41.0.2). Nonetheless, when i do a scan with Ccleaner, it shows accumulated files belonging to Edge, and informs me that Edge must be shutdown before cleaning can continue, and offers to shut it down automatically. So, having Firefox as the default or making Firefox the default browser does nothing to prevent Edge from running in the background. Hitman Pro found 128 tracking cookies and traces, all associated with Edge, this despite the fact that I do not use it! Finally, did not the US Government sue Microsoft over the inability for users to disable Internet Explorer? Would this not also be applicable to Edge?