Create a new Standard and Administrator macOS account [Guide]
Multiple users on a single system will require their own accounts for personal usage of that system. Operating systems will always install with a single user for the first time. However, sometimes family, friends, or co-workers who are using the same system will require a different account. You can create a standard account with limited privileges or an administrator account with full admin rights.

How to Create a Standard User Account on macOS
A standard account is created for users with limited possibilities. An administrator can limit the usage of the system for the standard user account by only allowing the applications or files that the standard user requires. Parents can also create an extra standard account for their children to use with parental control. There are many uses of having more than one user account on a single system and this is easy to do on macOS.
- Click on the Apple logo in the menu bar at the top and choose System Preferences in the contextual menu, then click on Users & Groups.
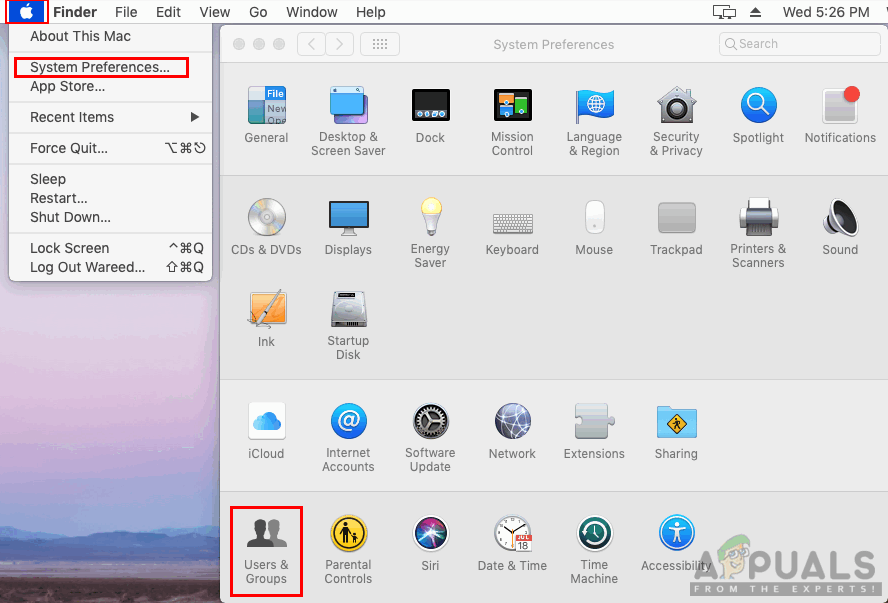
Opening System Preferences then Users and Groups - Click the lock icon in the left corner and provide the administrator password to enable the preferences.
- Now click on the Plus sign above the lock icon, add the information for the new account, and click Create.
Note: You can also choose new account type from the list as shown below.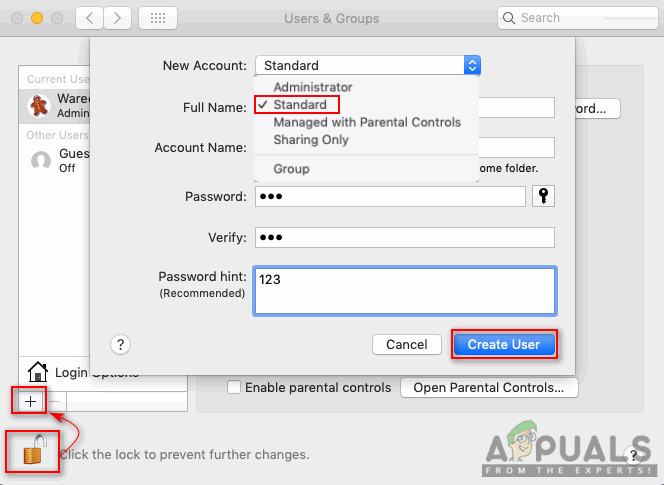
Creating a Standard User account - A new standard account will be created for your system.
How to Create an Administrator Account on macOS
There are two methods for creating the administrator account on macOS. The first method is when you already have an administrator account and want to create another one. The second method is when you don’t have access to your administrator account or you don’t have an administrator account on macOS.
Method 1: Creating an Administrator Account through Existing Administrator Account
- Click on the Apple logo in the menu bar at the top and choose System Preferences in the contextual menu, then click on Users & Groups.

Opening System Preferences then Users and Groups - Click on the lock icon and provide an administrator password to unlock the buttons to add and remove accounts.
- Now you can click the Add/Plus sign to add the new user account for the system.
- Add user information, then you can change the account type to Administrator and click Create.

Creating an administrator account - The new administrator account will be created.
Method 2: Creating an Administrator Account through Single User Mode
Note: This will force macOS to redo the initial first account creation, and doing so will not affect the current user profiles (they will remain intact).
- Shut down your system if it is ON.
- Press the power button and quickly hold Command + S keys on your keyboard.
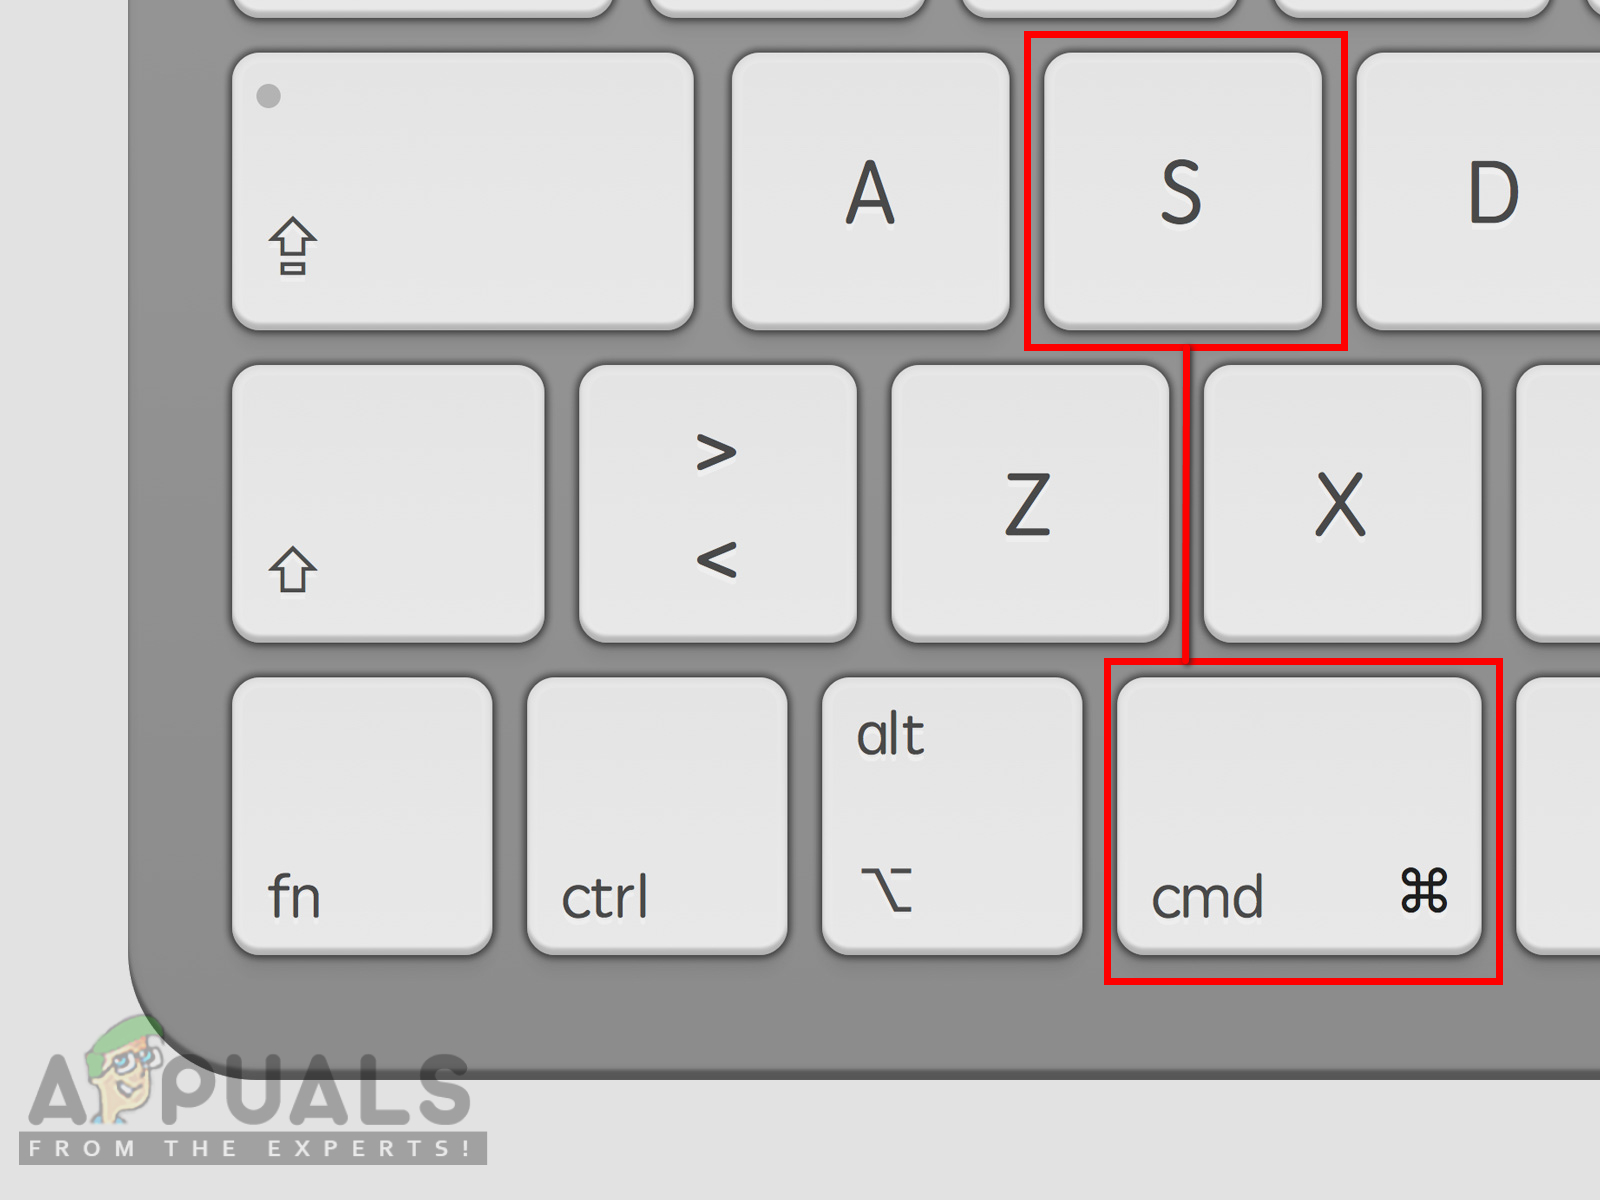
Hold Command and S keys until you see a black screen - The system will start in a Single User Mode that will be a black screen with only command applicable.
- Type the following command to mount and hit Enter key.
mount –uw /
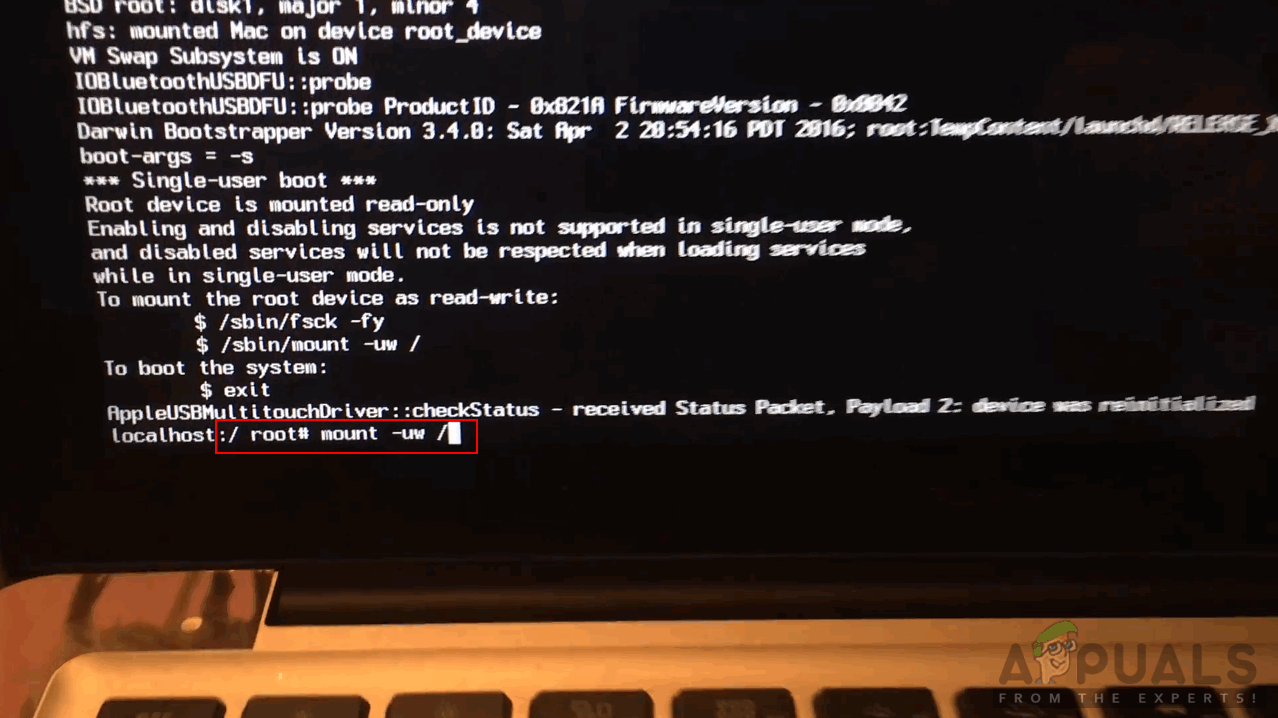
Mount the drive as read-write - Then type this command to remove Applesetupdone and hit Enter key.
rm /var/db/.Applesetupdone
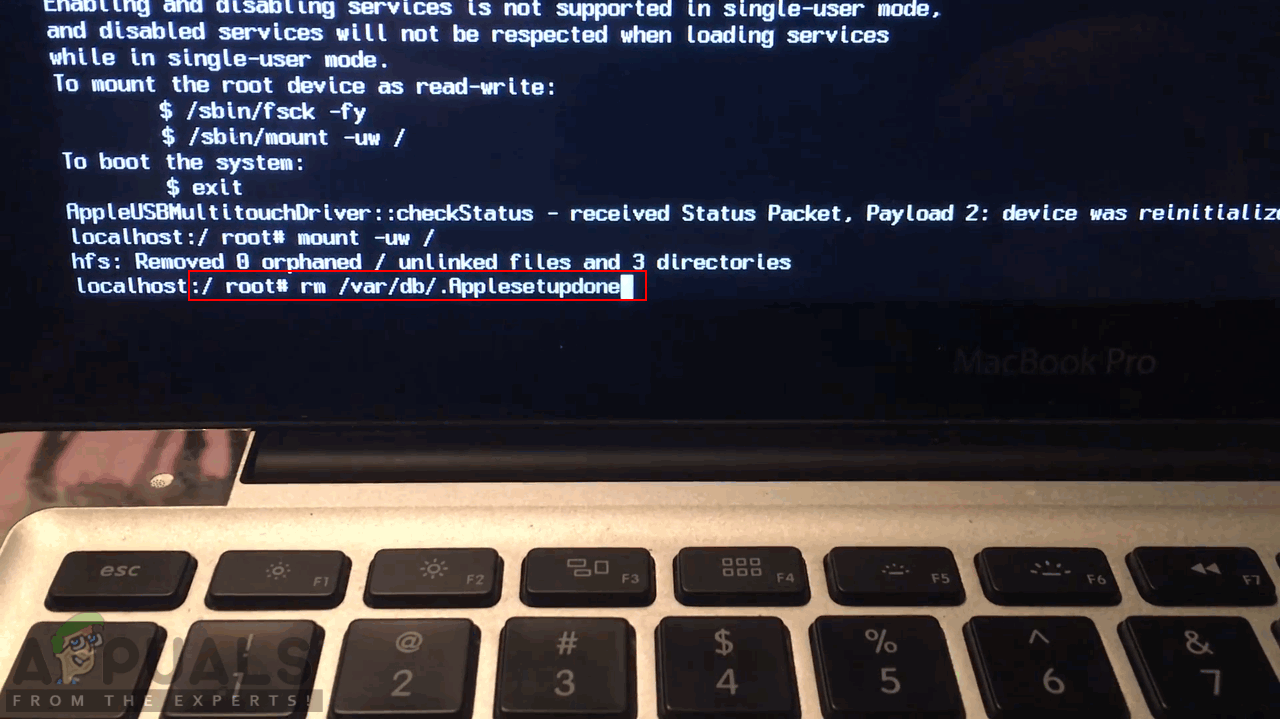
Remove the Apple Setup Done file - Finally, type the following command to reboot your system.
reboot
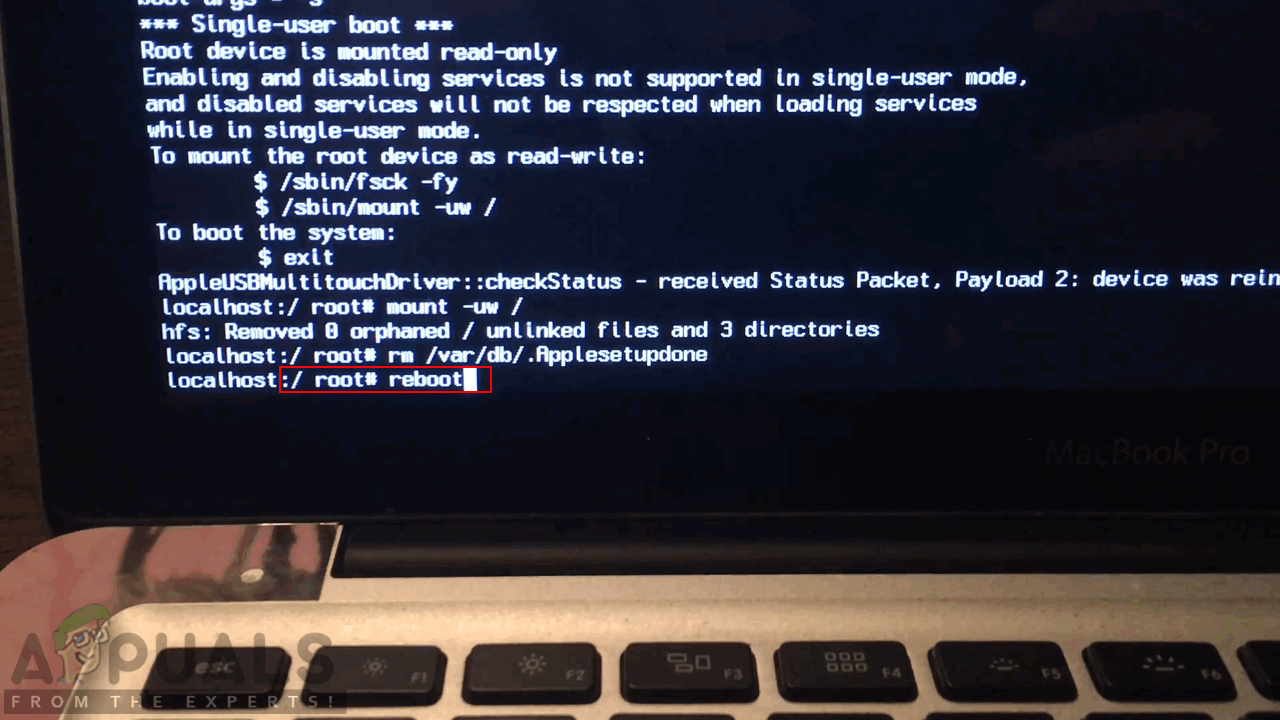
Reboot System - When the system reboot, you will find the welcome screen just like the first time you set up your macOS. Now you can go through steps and add a new administrator account for your system.
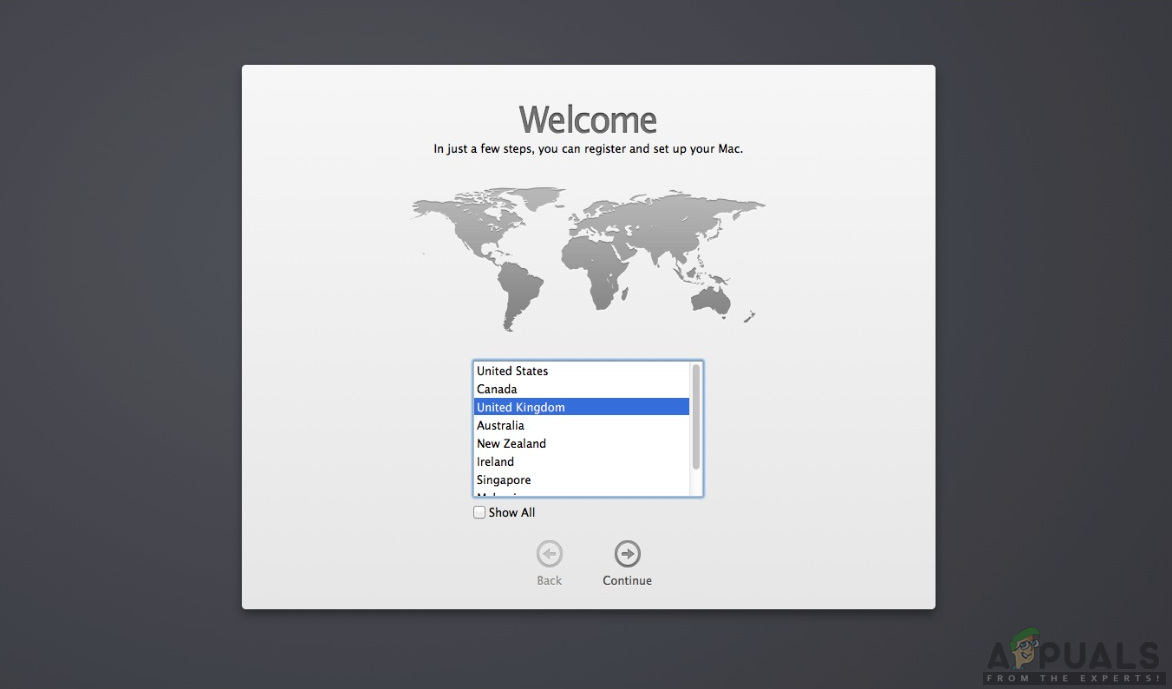
Set up the system again
How to Delete a User on macOS
Sometimes you have multiple user accounts on your system but you only use one of them. In that case, deleting the other user accounts will be a better choice to keep your system secure and faster. Deleting a user account is the same as creating one. You just need to follow the steps below for deleting a user account.
- Click on the Apple logo in the menu bar at the top and choose System Preferences in the contextual menu, then click on Users & Groups.

Opening System Preferences then Users and Groups - Click on the lock icon and provide admin password to unlock the add/remove options.
- Now select the account you want to delete and click on the Minus sign above the lock icon.
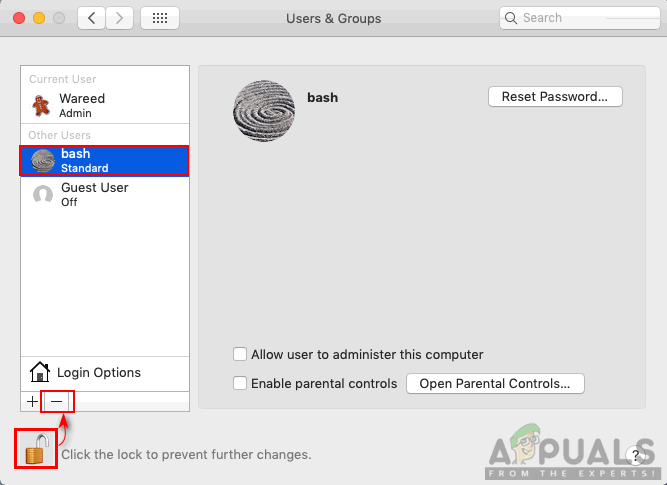
Selecting account to delete - Select the Delete the home folder option and click Delete User.
Note: You can choose other options if you want to keep the data of that user account.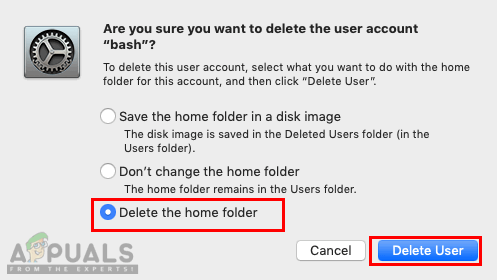
Deleting User Account - Your selected account will be deleted from the system.


