How to Create a Minecraft Server?
Minecraft by Mojang is one of the world’s most popular video games and that is because of the addiction and fun it has. And enjoyment level is high with multiplayer but is sky-high if those players are your friends and family.

Minecraft’s local multiplayer experience feature for both of its PC and PE editions is really helpful in achieving this functionality but it has 3 limitations
- You cannot play with the user who is not on the local network.
- The original game host has to be active to access previous creations for both PC and PE editions.
- And the world for every user is on his computer and at one time it will become a real hassle to work on it.
Of course, you can join hundreds of online Minecraft servers including Minecraft Realms which help you in creating your virtual world.

But there are some hitches like, when you are using anyone else’s server you are bound by their rules, policies and a lot of things on their discretion or there is a limited number of players allowed e.g. Minecraft Realms allow you up to 11 players.
So, to jailbreak these limitations you have to run your own Minecraft server and you can bring all of your family and friends into the same games where you are the rule maker or breaker. and with a private Stand-Alone server of your own, you can create your very own virtual world.
Making a Minecraft server is not a very difficult task. There are two options by which you can run Minecraft Server.
- On your system.
- On a Hosted Service
Running server on your system
The call that has to be made is whether you are going to run the Minecraft server on your system or you will use a hosting. If you are going to run it from home then you do not need a top-notch system to run the Minecraft Server and even you can run the server on a machine that is not well equipped to play the Minecraft. But if you are running the server and playing the game on the same machine, you will need a really powerful system. Keep in mind that hosting any type of server at your home system means that your system is exposed to the whole world.
If you are going to use the hosting provider you will have to pay monthly or yearly fees but you will not have to manage the hardware. You can use a shared server but if you are expecting a lot of users then the dedicated server is the best option.
Minecraft server software can be installed on your system whether it is Windows, Mac or Linux.

Requirements:
You will need a system with at least
- For Server 2 GB RAM server and to play and run server then at least 4 GB RAM if not 6 GB but if you are using 32 Bit OS it will only use the first 4 GB of RAM.
- For Server 2 GHz dual-core processor and to play and run server than one of the modern high systems with a dedicated Graphics Card.
- A good wired internet connection although you can work with Wireless but cut down latency, it is better to use a wired connection.
- To use a Minecraft server you must also have a version of the game client from Minecraft.net.
- And if you are expecting a lot of players then you will need a more powerful system.
But you must keep in mind that knowledge of basic computer and networking is a must-have. Also, you should be familiar with the undermentioned things
- Usage of Command Line and ability to edit configuration files
- Networking concepts like IP, DHCP, ports
- Configuration of your system
- Configuration of Network
- Configuration of your router
Basic Workflow:
To install Minecraft we have to follow the undermentioned workflow.
- A web host system.
- Install/update to the latest version of Java. You have to use the Java offline version, not the Java plug-in for your web browser.
- Install the latest version of Minecraft Server
- Configure your Server/network
- Start the Server
- Access the Server
Before we begin the installation, a good idea is to stop as many background processes or running programs as possible. We will be using the default server software by Mojang which is distributed free of charge. You can access the custom server software list, but these software applications are not supported by the Mojang.
Keep in mind that Each player who wants to connect must have purchased Minecraft Java Edition for their PC from minecraft.net. The mobile & console versions are not supported by the Java version.
Make your Windows PC as Minecraft server.
Windows is the most used OS for desktops and you can set up a Windows PC as Minecraft fairly easy.
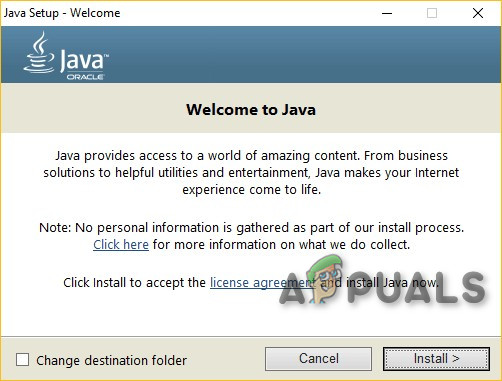
Step-1: Install/Update Java
You need Java Runtime Environment (JRE) or simply Java to install Minecraft Server. And it is always a good idea to have the latest version of Java. If Java is not installed then Visit the Download and install.
And if Java is already installed check/update to the latest version
Step-2. Choose a Location for your Minecraft Server Files
Before downloading the server software, it is a good idea to create a dedicated folder for it because the server when started will create its few configuration files and to have all the files at the same place is a good idea. This folder can be anywhere on your system you would like it to be.
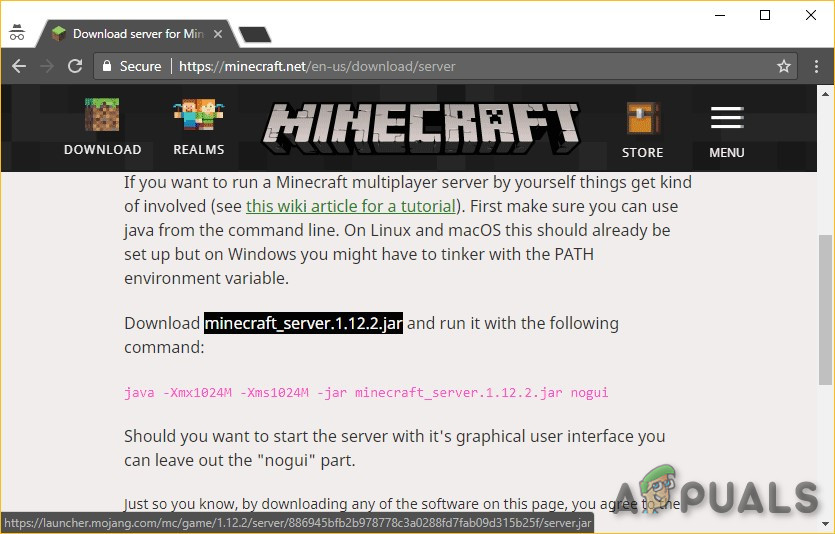
Step-3. Downloading and Installing
Download the latest Minecraft server setup software from the official Minecraft download page. The server will be is available as a “.jar” file.
Right-click the downloaded file and run it as Administrator, an Administrator password would be required, the server will start, and will quit immediately afterward.

You may be prompted to allow the Minecraft server to communicate to the networks through the firewall.

In the first run, the server will write configuration files in the folder,
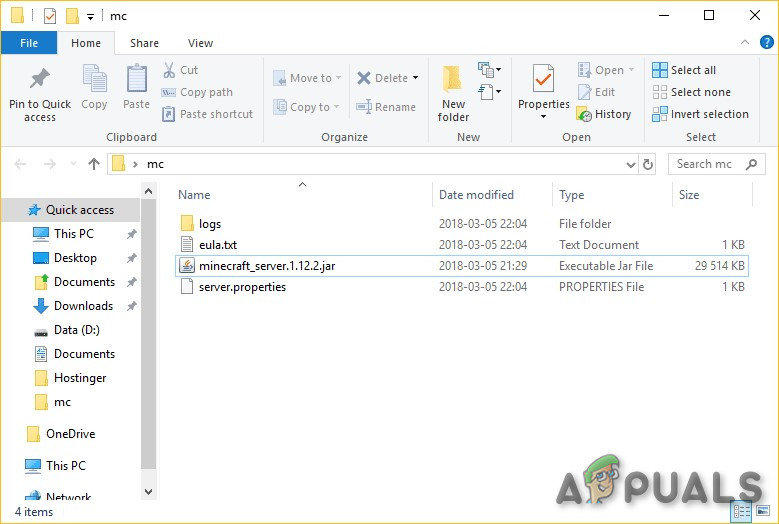
The A text file named eula.txt was created in the dedicated folder after the. And you have to edit it by Opening this file in a text editing application and find the line eula=false and change to eula=true, which means that “end user license agreement” has been read and accepted. If not done the server will not work properly.

Open the server file again and During this second run of the server, after you accepted the EULA, additional files are downloaded and the default world is generated. The default world is located in /world/ and looks a whole lot like a regular old /.minecraft/saves/[someworldname]/ folder from regular Minecraft (in fact, it is). You can play the generated world or you can replace the contents of /world/ with the contents of a saved game from a Minecraft or a world downloaded from the Web.
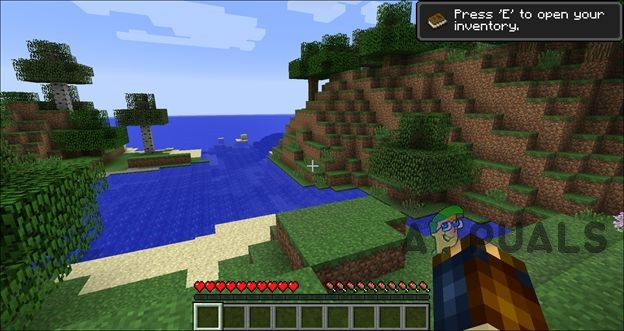
If a similar screen is shown then your Minecraft server has successfully started:
Step-4: Start the Minecraft server.
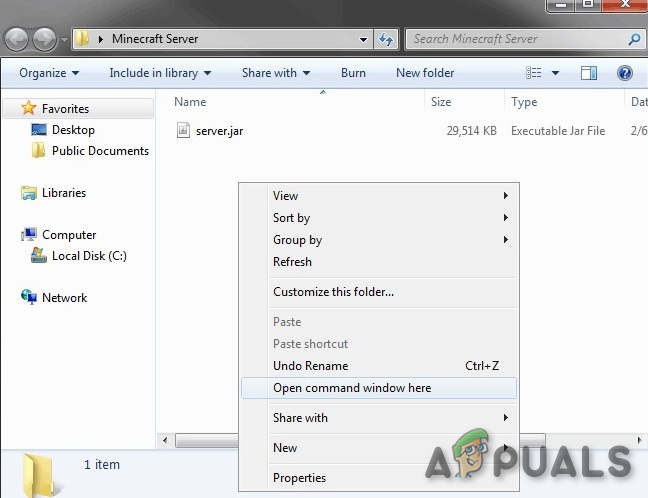
Open the Windows command prompt or power shell in the folder where you stored the server jar file. To easily do this, hold down shift while you right-click in an empty space inside the folder:
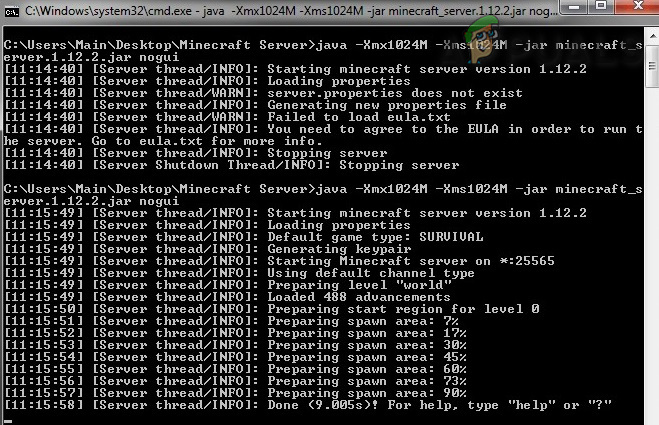
Once the command prompt is opened, run the command below to start the server:
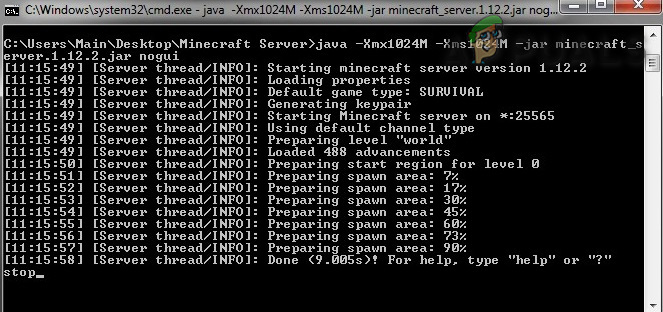
java -Xmx1024M -Xms1024M -jar server.jar nogui
(Use the actual server file name.)
This command will open Java, and assigns 1GB Min/1GB max RAM, and indicates the file is a JAR, names the JAR, and tells the system that no GUI is needed. You can change the RAM values, by Using the Xms and Xmx parameters. By default, the Minecraft server runs with 100 MB of RAM, which is not enough. To add more (or less) RAM to your server, change the 1024M to something else, like 2048M. The first number is the maximum amount of RAM it can use, and the second number is the minimum amount of RAM. Things can get unruly when the number of users increases, especially when crazy stuff like blowing up huge caverns with massive amounts of TNT is being done.
Keep in mind that lowering the memory values, make other players ops, and change the in-game time is not recommended.
If you’d rather use the Server’s UI, exclude the “nogui” parameter to provide a cleaner and easier to manage server experience:
java -Xmx1024M -Xms1024M -jar {server file name} 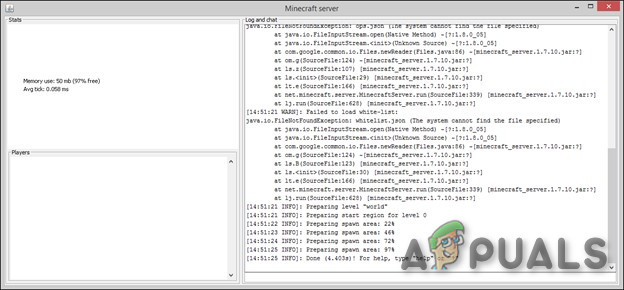
The GUI interface and terminal window show you the same details, whereas GUI will show you a stats window in the upper-left and a list of currently logged-in players in the lower-right.
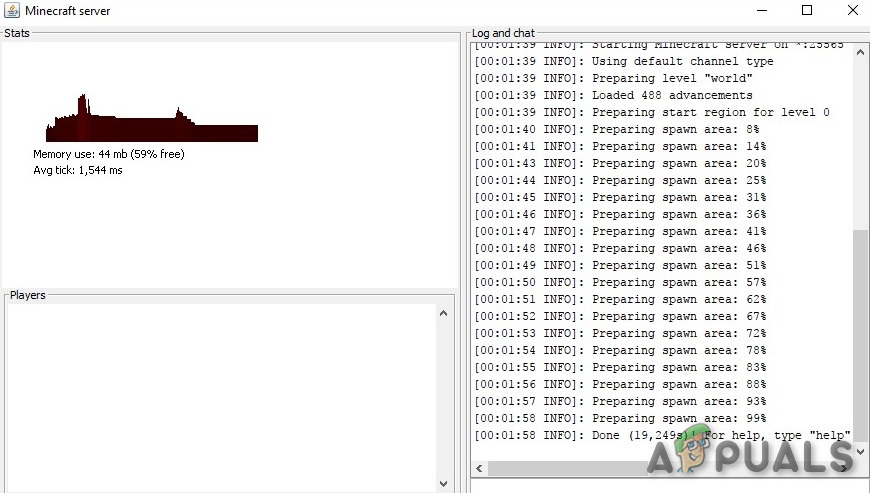
In the brand new server, the world should be loading smoothly. The game will be in survival mode because it is the server default which could be changed. And a stream of notices will be shown in the console window as things are happening like players joining, player communications, and other notices.
Step-5. Fine Tuning the server
1. Create a .bat file to store the common commands
To start the Minecraft server preconfigured and you have not to enter all commands every time, a .bat file could be created in the server folder.
To do so, create a new .txt file in Notepad by selecting File > New. Type the following:
java -Xmx3G -Xms1G -jar server.jar
- Go to File > Save As and name the file “bat.”
- Select Save as type, then select All Files.
- Choose your application folder for the location and select Save. Whenever you want to launch your server, just double-click the run.bat file you created.
- Now invite other players to join the Minecraft server. They just need to know your public IP address, or your local IP address if you’re playing on the same network.
Double click the file to start your server. You may get a “Class_Not_Found” and ServerGuiConcole error, just ignore these errors and you should see your “Server Thread/INFO” dialog start the server
2. Server Commands
Server commands could be used both in the console window and on the “Operator” if you are an OP or “operator” on the server. There are a lot of server commands, many of them rather obscure and infrequently used. For details visit the command list.
When in the server console window, enter the command without “/” and when in the chat window enter the command with “/”.
But most importantly you should be able to use stop, which safely closes down the server and saves the world.
3. Tweaking with Server Properties
Close the server before moving on, or if you are running via Terminal Window then just type “stop” in the Terminal Window. Because we can’t tweak the server when it is running.
Inside the server folder, you will find the “world” folder, which contains your generated map area, an ops list, and a server.properties file, among other things.

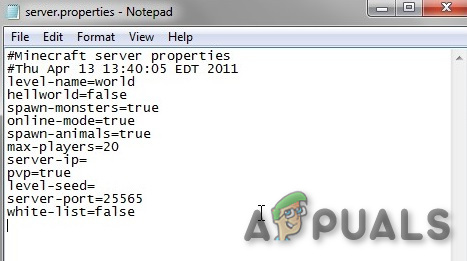
If you open the server.properties file in a text editor you’ll find a simple configuration file that can be manually edited. Some of these settings are available via server/in-game commands but many commands are not.
By use of simple numerical toggles or true/false, we can allow players to fly during survival mode, turn off The Nether, adjust server timeout settings, and a host of other variables.
Some important options will be shown.
- level-name: Which is, in fact, the name of the Minecraft world. And if you change this name then the server will look for a folder with the changed name, and if no folder is found then the server will generate a new level with the changed name.
- spawn-monsters: If this option is set to false then the monsters like zombies, creepers, and skeletons will not spawn. Usually turned off for “op” or “creative” servers in which everyone builds and survival is not the focus of the game.
- spawn-animals: If this option is set to false then the animals such as wolves, sheep, cows, and chickens will not spawn.
- PVP: If this option is set to false then players can not harm each other, but still damage could be inflicted by pushing others off of ledges.
- white-list: If this option is set to true then the server will only allow the usernames entered in the “white-list.txt” file to connect and play.
While many of the settings are fairly self-explanatory, a few require a more in-depth understanding of the variable involved. Visit this detailed server.properties list. Once changes are made, save the file.
Remember to add your Minecraft username in the “ops.txt” file so you will be an “operator” with all admin rights and you can generate any item as per your liking,
Step-6: Connecting and Playing On a Server
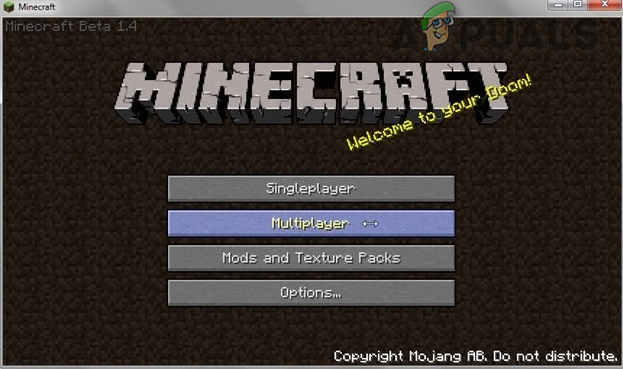
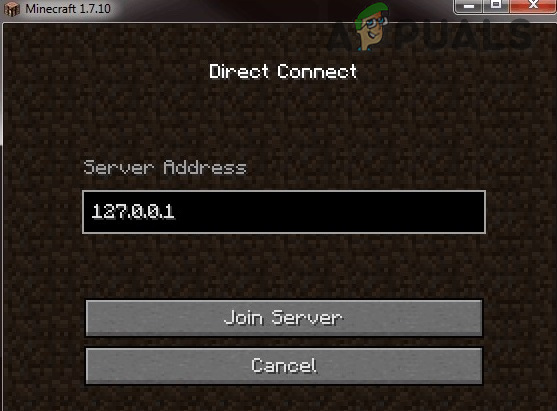
Once Minecraft server is up and running open the Minecraft game, click the Multiplayer button, then click Direct Connect button and You’ll be prompted to enter an IP address here
The IP address is based upon your connectivity to the server computer
1, On the Same System via localhost.
If the Minecraft game is being played on the same system as the Minecraft server, enter 127.0.0.1:
2. On the LAN via your local IP address
If you’re on another computer in the local network (connected to the same router), enter the local IP address of the computer that’s running the server. To find this, go to the computer that’s running the server and type ipconfig into a command prompt. The IP address should look similar to 192.168.1.1, though the last two numbers could be different.
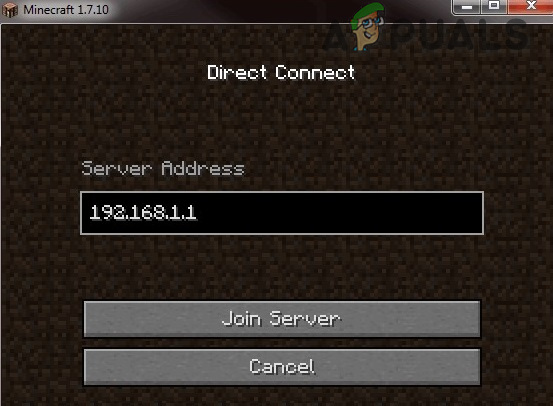
(The above is an example IP address only)
3. Over the internet via your external/public IP address
If you want to play with people outside your local network you have to set up port forwarding so players outside your home network can access the server. Most home broadband connections can easily support many players. Because the Minecraft server does not have a password system you should create a whitelist on the server. Use the command & parameters
/whitelist [on/off/list/add/remove/reload] [playername]
for the whitelist to maintain it.
A. Enable port forwarding on your router.
Port forwarding is done by your router so that it can send the right traffic to the right computer. Port forwarding is a potential security risk that opens your network to the outside world. Read your router’s documentation to find particular instructions on how to configure port forwarding on the router.
- Visit portforwarding.com, select your router model.
- Select the game i.e. “Minecraft Server” in this case.
- Visit your router’s homepage by entering your default gateway IP address into a web browser’s search bar.
- You’ll be prompted to enter the username and password for your router.
- On your router page, locate the Port Forwarding section on your router’s homepage. It may be under advanced settings. Check the router’s manual for help if necessary.
- From here, you can set up rules for port forward. Depending on your router, you might have to select a button that says Addor something similar to proceed. Name the rule “Minecraft.”
- In both port fields, enter the default Minecraft server port i.e. 25565.
- Enter your computer’s static IP address in the IP Address Also, we need to enter the server’s local IP address as the Output IP or Server IP for the port forwarded, which tells the router which system to point at. To find the server’s local IP, open command prompt and type ipconfig.
- Select both the UDP & TCP
- Click Save or Apply.
- After the router reboots, the Minecraft server should be accessible to the players on the internet.
- Find the public IP address of the Minecraft server by visiting whatismyip.com.
- And to check if the Minecraft server is accessible, enter the public IP address of the Minecraft server into the Minecraft Server Status Checker.
Keep in mind that the Minecraft server should be running when you try to connect it.
Moreover both your external and local IP addresses may change when you shut down your computer or reset your modem. Each time you start your server, be sure to double-check your internal and external IP address and update settings accordingly. And you do not want to update every time your computer is connected to router then You should use a static IP address. Or otherwise look for a DNS service that will allow you to have a name, rather than an IP address, that will remain the same.
If you have trouble with connecting publicly over IPv4, try connecting over IPv6. But should only be done for testing whether the Minecraft server is online, external players will still use IPv4.
Now you can send the external IP address of the Minecraft server to the players who can use the Minecraft server over the Internet:

(The above is an example IP address only)
Step-7. Play Minecraft multiplayer:
Hit T to bring up the chat console.
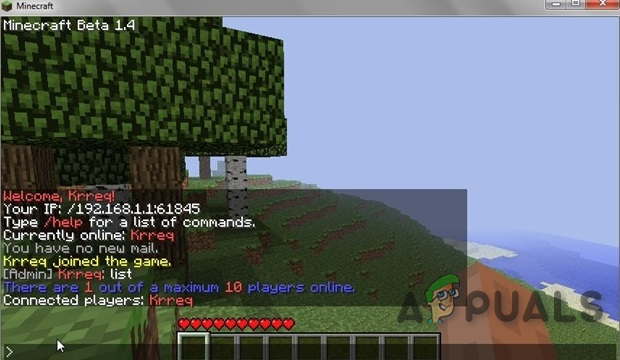
All of the public messages will be shown here. In the lower-left corner Notice the prompt (>). Type something & hit Enter and the message will be sent to all other players in the group chat. Commands can also be executed here, too, but start the command a forward slash (/).
As an op, typing “/list” and hitting Enter will list all connected players. Also, items could be given to any player (including yourself), ban and pardon particular users, change the game time and more. If you are not sure of a specific command, you can type “/help” to get more info.
It is time to invite some players!
Make a Minecraft server on your Mac
Running Minecraft Server on Mac is a very easy task if you have some basic knowledge of the system.
Step 1. Make sure you have Java installed.
Keep in mind that the server won’t run correctly on macOS versions earlier than10.8 and may crash your machine.
Java is updated through Java’s website if you are running macOS 10.8.* (Mountain Lion) or macOS 10.9.* (Mavericks). Find out details on how to install/update from this KB from Apple’s website
Newer versions of macOS include Java by default.
- From the Apple menu, go to System Preferences and look for the Java icon. Open it to launch the Java Control Panel.
- Click the Update tab, then select Update Now.
- When the installer window appears, select Install Update > Install and Relaunch.
Step 2. Choose a location for your Minecraft server files.
Create a folder for the Minecraft server files. You could create the folder as per your choice.
- Download the Minecraft server software.
- Create a new folder and name it “minecraft_server” and drag the downloaded Minecraft server file into it.
Step 3. Download the Minecraft server software
Download the Software (here). It comes as a Java .jar file. Save this file to the location created in the last step.
- Go to your Applications folder and double-click the TextEdit
- Open a new .txt document
- Once in TextEdit, select Format > Make Plain Text > OK.
- Type the following into the document:
#!/bin/bash

cd "$(dirname "$0")"

exec java -Xms1G -Xmx1G -jar {server file name} nogui

Enter the downloaded in place of {server file name}.
For detail see the Windows Section discussed above.
- Save the file in the folder containing your server’s .jar file and name it “command.”
- Open the Mac terminal by going to Applications > Utilities, then double-click the Terminal
- To Grant execute permissions on file start.command to Owner, Group. and Public, in the terminal window, type “chmod a+x” (without the quotation marks) followed by a single space, and then press Enter.
- Drag and drop the command file you created into the terminal window, then press Enter again. (This gives run permission to the start.command script.)
- Now you can open the command file to run the server. When you double-click the file, a new window will open, and you might see some error messages. Don’t worry about them; the server should now be ready to play Minecraft.
Step 4. Enable port forwarding on your router.
Please see the instructions in the windows section discussed above for enabling port forwarding.
Step 5. Start the Minecraft server.
Double-click the “start.command” file you created in step A Terminal window will open. Some error messages may pop-up, the first time you run the normal server.

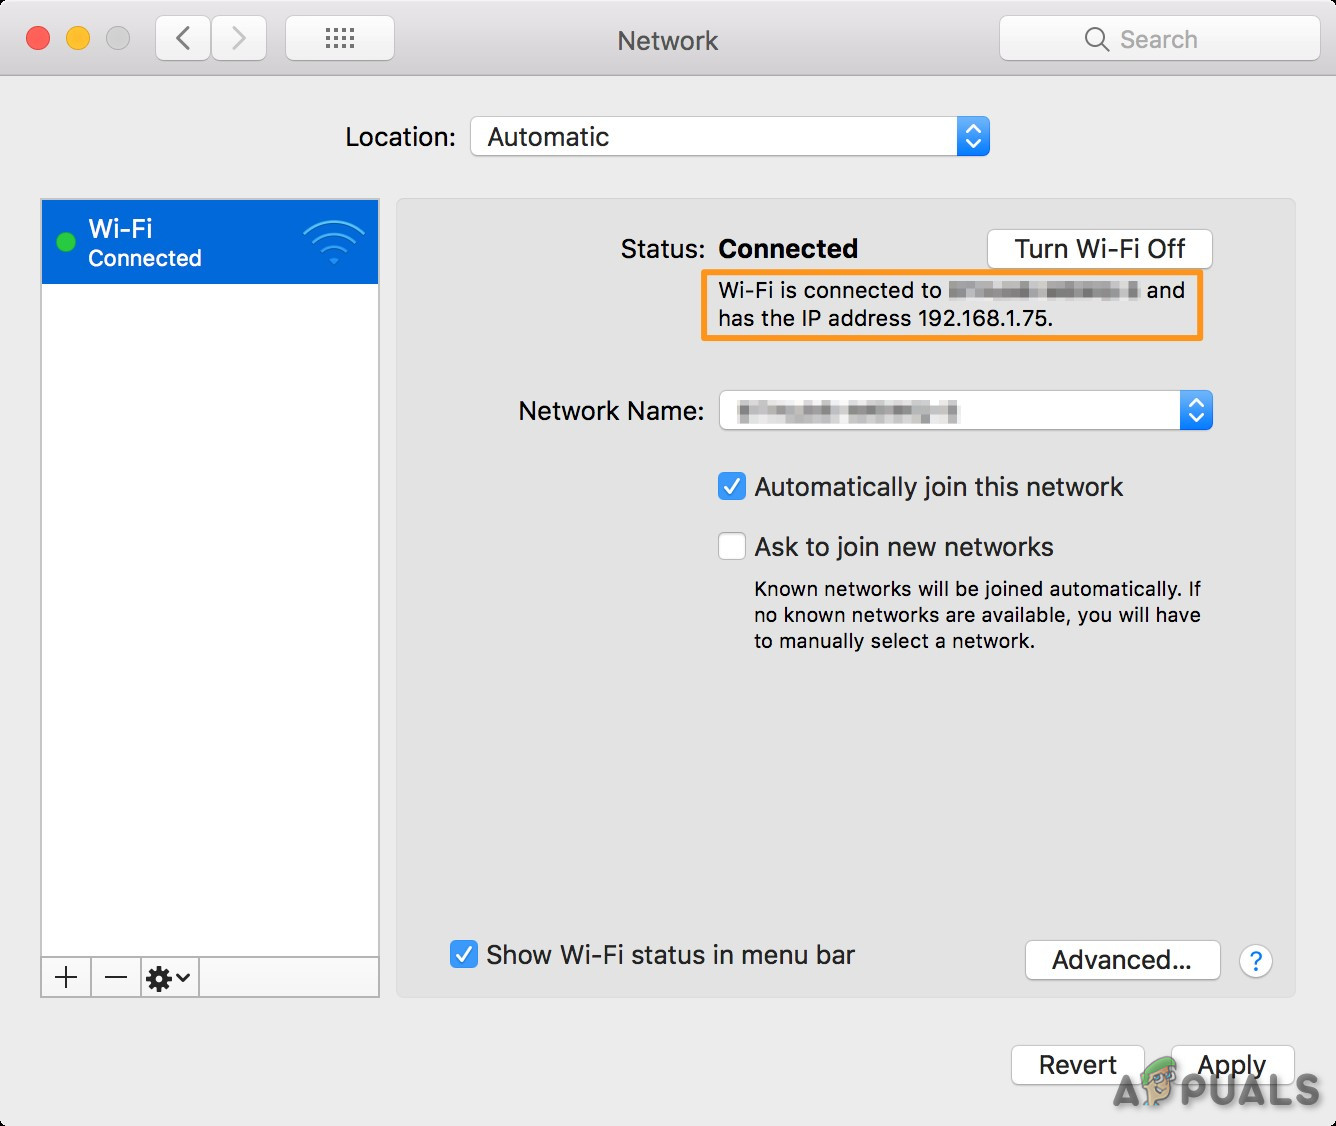
Step-6: The IP location on OS X
- Open the desktop.
- Open the Apple menu under the logo
- Scroll down to the System Preferences
- Select “Network“
- On the lower right, your IP should be as “IP address (xxx.xxx.xxx.xxx)”. Copy it.
Once the Minecraft server is up and running, you can invite players to connect to the Minecraft server
For details about Tweaking with Server, Port Forwarding, Connecting and playing on the Server please see the Windows section discussed above.
Make a Minecraft server on a Linux
Linux has many different varieties called distributions or distros, from which some are designed or better suited for running a server. Also, a 64-bit version of Linux performs better on a 64-bit CPU and a 32-bit version of Linux only uses the first 4 GB of RAM even if more RAM is installed.
We will use one of the most popular Linux distributions i.e. Ubuntu 18.04 Bionic Beaver for Minecraft server.
Privileged access to the Ubuntu 18.04 system is required. Some Linux commands will be executed with root privileges either directly as a root user or by use of sudo command while other commands will be executed as a regular non-privileged user
Step 1. Install Java and Prerequisites
Let’s start the installation of all prerequisites including Java and the nmap command which we can later use for some basic troubleshooting purposes:
$ sudo apt update$ sudo apt install wget screen default-jdk nmap
Check your distro’s documentation. It should have information on how to install JDK and other prerequisites.
Or other, visit Java’s website directly to download the Java package for Linux.
Step 2. Create a Minecraft user
Next, we have to create a new user named Minecraft. And the Minecraft server will run under this user:
$ sudo useradd -m -r -d /opt/minecraft minecraft
Step 3. Install Minecraft Server
Multiple instances of the Minecraft server could be run on a single system and we will have to create a separate directory for each instance under the
/opt/minecraft directory. Let our first instance be survival:

$ sudo mkdir /opt/minecraft/survival
Step 4. Download and Install Minecraft Server
- Now Download the latest Minecraft server from the download
- After downloading run command below:
$ sudo wget -O

/opt/minecraft/survival/minecraft_server.jar
3. Accept the EULA terms & conditions:$ sudo bash -c “echo eula=true > /opt/minecraft/survival/eula.txt” 4. Change the ownership of the Directory /opt/minecraft/survival/ and all its files by:$ sudo chown -R minecraft /opt/minecraft/survival/
Step 5. Create Minecraft SystemD startup script
- To be able to conveniently start the Minecraft server after the reboot use your favorite text editor for example vi:
$ sudo vi /etc/systemd/system/minecraft@.service
- Create a new text file with file holding the following content:
[Unit]

Description=Minecraft Server: %iAfter=network.target[Service]WorkingDirectory=/opt/minecraft/%iUser=minecraftGroup=minecraftRestart=alwaysExecStart=/usr/bin/screen -DmS mc-%i /usr/bin/java -Xmx2G -jar minecraft_server.jar noguiExecStop=/usr/bin/screen -p 0 -S mc-%i -X eval 'stuff "say SERVER SHUTTING DOWN IN 5 SECONDS. SAVING ALL MAPS..."\015'ExecStop=/bin/sleep 5ExecStop=/usr/bin/screen -p 0 -S mc-%i -X eval 'stuff "save-all"\015'ExecStop=/usr/bin/screen -p 0 -S mc-%i -X eval 'stuff "stop"\015'[Install]WantedBy=multi-user.target
This file is just an example only and you can tweak with commands as per your liking e.g. to increase RAM to 4GB from 2GB make the following change:
FROM:
ExecStart=/usr/bin/screen -DmS mc-%i /usr/bin/java -Xmx2G -jar minecraft_server.jar nogui
TO:
ExecStart=/usr/bin/screen -DmS mc-%i /usr/bin/java -Xmx4G -jar minecraft_server.jar nogui
Step 6. Start Minecraft Server
- Next, use the systemctlcommand to start your new Minecraft server:
$ sudo systemctl start minecraft@survival
- Confirm that the new Minecraft server is up and running:
$ sudo systemctl status minecraft@survival
- To restart the Minecraft server after the reboot, execute:
$ sudo systemctl enable minecraft@survival
- Now should be able to use the nmap command to check for the default Minecraft port 25565:
$ nmap -p 25565 localhost
Step 7. Running More Than one Minecraft server instance on the same host
- The following Linux commands will configure a new Minecraft server named linuxconfigon port 25566.
/opt/minecraft/linuxconfig/server.properties.
- Using our existing systemd script to deploy another instance of Minecraft server is easy as:
$ sudo mkdir /opt/minecraft/linuxconfig

$ sudo cp /opt/minecraft/survival/minecraft_server.jar /opt/minecraft/linuxconfig/

$ sudo bash -c "echo eula=true > /opt/minecraft/linuxconfig/eula.txt"

$ sudo bash -c "echo server-port=25566 > /opt/minecraft/linuxconfig/server.properties"

$ sudo chown -R minecraft /opt/minecraft/linuxconfig/
- Enable the Minecraft server to start after reboot and start the server:
$ sudo systemctl enable minecraft@linuxconfig

$ sudo systemctl start minecraft@linuxconfig
- Lastly, check for status:
$ sudo systemctl status minecraft@linuxconfig
For details about Tweaking with Server, Port Forwarding, Connecting and playing on the Server please see the Windows section discussed above.
Final Word
Congratulations! Now you can make a Minecraft server on different operating systems.


