How To Connect A Subwoofer To An Integrated Stereo Amplifier
Subwoofers are often integrated with home theater sound systems to allow them to reproduce a wider range of frequencies. This lets the audio systems account for the entire variety of notes that your audio source signal is sending forward. Without an integrated subwoofer, you may miss out on different sound frequencies that are a part of the original soundtrack and your overall listening experience may be missing some important components such as the bass notes. While this technology is more commonly incorporated in larger surround sound or home theater setups, it can be integrated with stereo amplifiers to improve your sound quality as well.
While home theater and AV receivers are hooked to the subwoofer with a single interconnection cable, stereo receivers and pre-amps do not have the same bass management options. AV receivers for example let you direct the bass frequencies to the speakers through a channel that tunes the frequency ranges before they reach the output. In a stereo amplifier setup, a more high level (or surface level) of connections are needed due to this lack of internal bass management. When connecting a stereo setup, due to the two channels, the connections will all need to be doubled up.
Some subwoofers come with internal amplifiers already integrated but if yours does not have one or your internal amplifier is not as strong, you can opt to integrate a separate stereo amplifier into your sound system. If you have a two-channel integrated amplifier or a two-channel stereo receiver without an RCA subwoofer output to go to a powered subwoofer, this guide will show you how to integrate that with a two-channel integrated amplifier with only the B speaker’s output. The Speaker A output will be connected to front end speakers.
Hardware Requirements Before You Begin
Before you begin, you need to check the following on your two-channel stereo receiver or two-channel stereo integrated amplifier (such as these): you must have speakers A and B on this device. In this guide, your speaker A output will feed into your front speaker setup. Your speaker B output is what we will use to integrate it with the active amplifier built-in subwoofer. Head onto the back of your two-channel receiver amplifier and notice that there is no subwoofer output visible here. Instead, you will find the speaker A output (right and left) and the speaker B output (right and left).
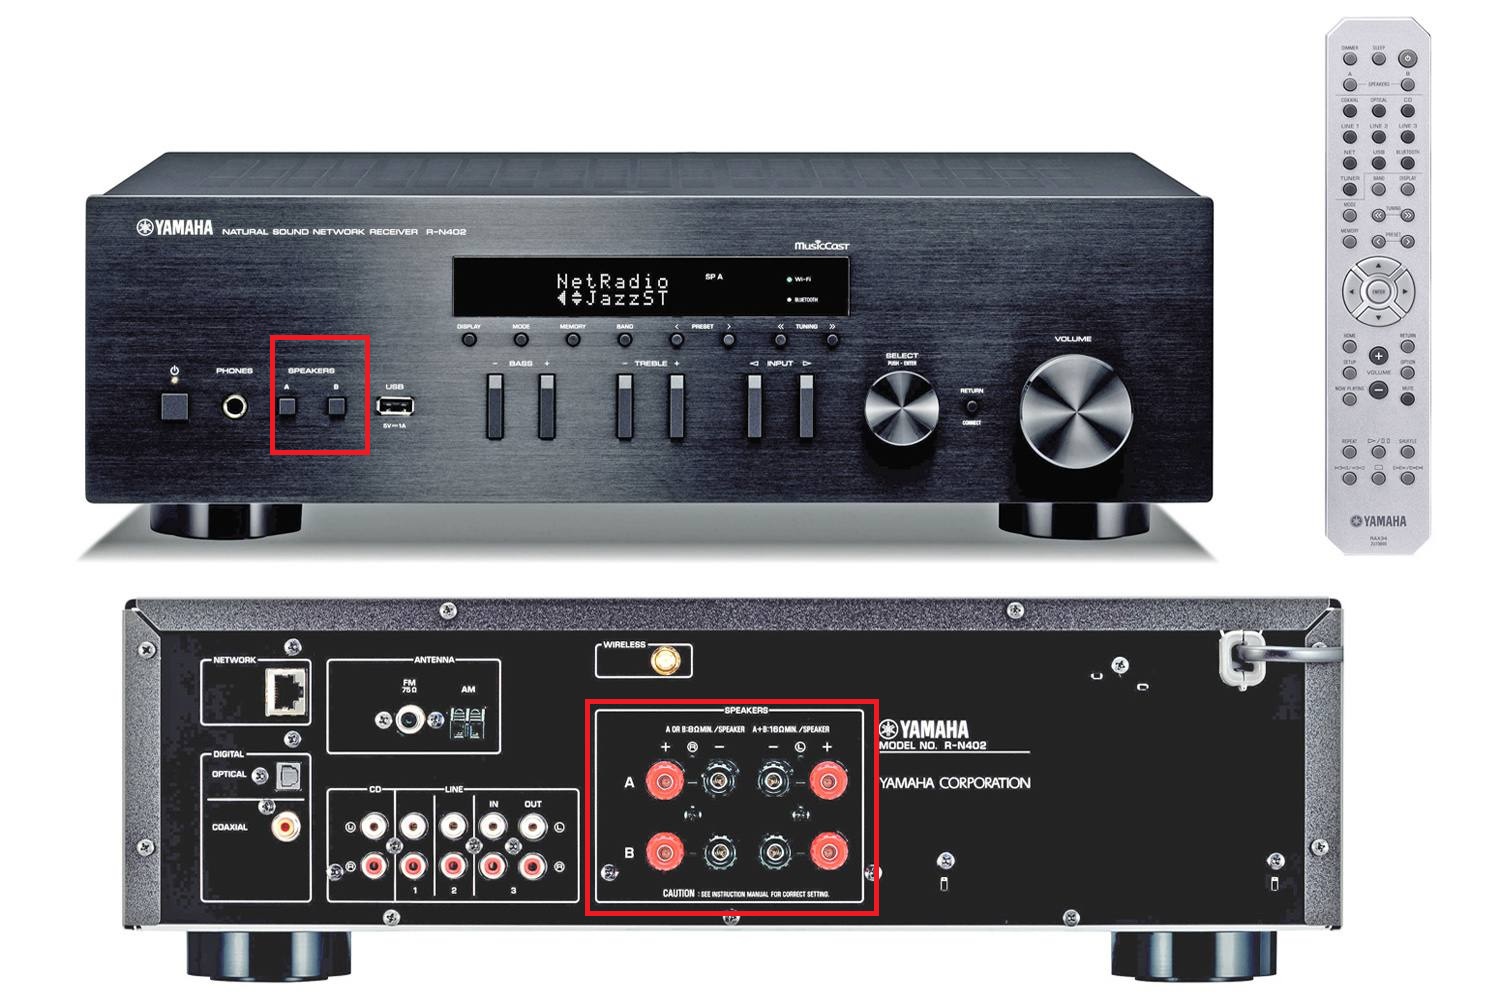
On your powered subwoofer, instead of just the RCA low-level inputs, you will need to have high-level inputs to connect the left and right speaker wires. Head onto the back of your powered subwoofer and find the left and right high-level input ports.
Beyond this, the other equipment you will need for this setup is two sets of two cable speaker wires.
Once you have ensured that your equipment meets the above two conditions and you’ve got your speaker wires ready to go, you can proceed with the connections outlined ahead.
Set-Up
- Ensure that your subwoofer and stereo amplifier are disconnected from any power source and switched off.
- Connect your speaker A outputs from your two-channel output receiver to your front end speaker setup.
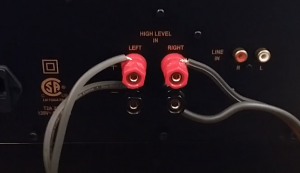
Powered Subwoofer input terminal connections with Speaker B wires. Image: TeeJay - Take a set of speaker wires and connect it from the positive and negative terminals of the right-side output of speaker B on the back of your two-channel stereo amplifier receiver to the positive and negative terminals of the right side high-level input of your powered subwoofer. Be mindful of the positive/negative and right/left markings and match them up exactly. You can fix in straight wires or use ones with banana plugs for your ease.
- Repeat the above step with another set of speaker wires for the left output of your two-channel stereo amplifier receiver and powered subwoofer high-level input.
- Advanced customization: if you want to go in and tweak your subwoofer, start out with the following settings. For 4 inch or smaller subwoofers, set the crossover frequency (used in the intrinsic low pass filter) to 100 Hz or above. For subwoofers that are 5 inches or bigger, use an 80 Hz crossover frequency or below. This step is optional. Most subwoofers come with a moderate base setting already configured.
- Before powering on your system, place it somewhere close to your media screen. Since the subwoofer primarily works to boost your bass and lower tone frequencies, the placement of this speaker system is not that pivotal in determining how the sound comes across. With higher pitched frequencies, you have to pay attention to your speaker angling and potential echo or bounce back to get the most out of those tones. With a subwoofer, however, this is much more simple and your speaker can arbitrarily be placed anywhere. Keeping it close to the screen and facing the direction where the audio is required is what is recommended.
- Connect your amplifier to a power source with the switch still off.

Two-Channel Stereo Receiver and Powered Subwoofer connections on the Speaker B ports. - Check your wiring one last time as explained in the steps above. Be sure that the connections are firmly and correctly placed.
- Once everything looks good to go, turn on the power.
- Turn on Speaker A and observe the sound on the front speakers. Turn this off and then turn on Speaker B and observe the bass on the subwoofer. Turn both on simultaneously to get the full bass amplified output.
- Adjust the subwoofer’s volume to bring it up to the level where you can hear the bass and low note frequencies. If you would like more bass notes, turn this up higher. Adjust the main volume dial on the speaks for actual volume and the subwoofer volume dial for the pronunciation of the bass frequencies.
Verdict
Once you have completed the initial setup, you will have to listen to a variety of songs with different bass levels to go back and adjust the cross over frequency and subwoofer volume. This will take a while to optimize just right for the majority of the music or sound you intend to listen to. The crossover frequencies specified in the setup procedure earlier are the common standard frequencies for subwoofer and stereo amplifier integration. For your particular taste, however, you may choose to tweak these a bit.