How to: Bulk Rename Files using the Bulk Rename Utility
Sometimes you have hundreds of files that you need to rename in a certain format. It will probably take you ages to rename these files, so what you need is a way to bulk rename or batch rename your files. Using the file properties are some of the best ways to rename your files. Common properties are ‘Date created,’ ‘Date modified,’ ‘Author,’ ‘Title’ among others tags. A common case is where a user has recovered data using a recovery utility. Most of the time this files are renamed by the utility with numbers according to how they were found; if you so choose, you can rename these files using their properties. The most widely used property for renaming files is the ‘date created’ or ‘date modified’ property.
Windows does provide ways of renaming your files. You can rename files from your Windows/File Explorer or via MS DOS (command prompt). Windows PowerShell also offers a renaming cmdlet. The only problem with these methods is that you can only rename files one by one. There might be complex batch renaming MS DOS commands and PowerShell cmdlets that allow you to rename your files, but they don’t seem to be able to pick your file properties or are too complex to execute: you will have to create a text file list of names for the computer to use and your current files must be in a certain format. Eventually these methods do not help in saving your time.
There are several third party applications/utilities that you can use to rename files. Most allow you to find a certain word of your filename and replace it instead of picking and using the files’ properties. A few can read your file properties and use those properties in renaming your files. With this automation, you can rename thousands of files in a few minutes. We are going to show you the best way to rename your files using two of the most popular third party applications that allow you to use the properties of your files to rename your files.
Method 1: Use ‘Bulk rename utility’ to batch rename your files and folders
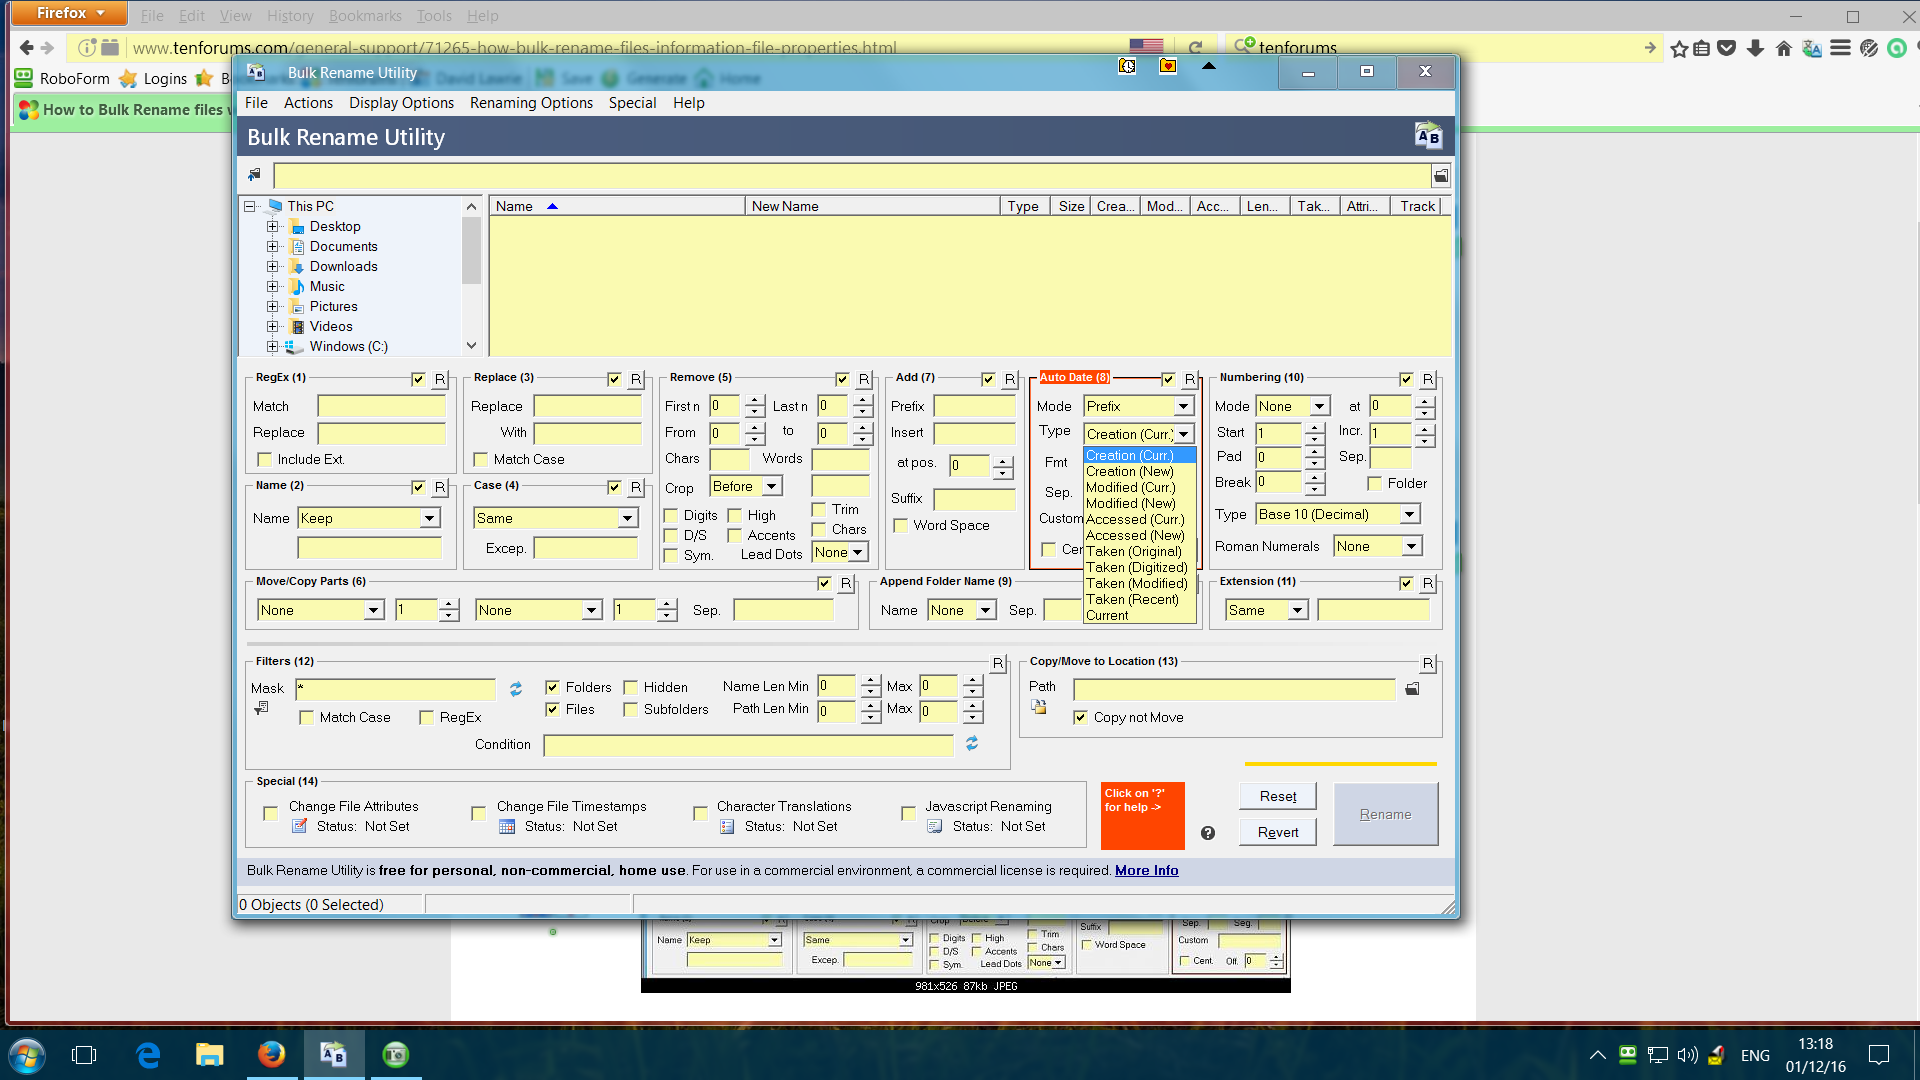
The Bulk Rename Utility provides a powerful interface from which you can select on how to rename your files. You will get a preview of how the new names will appear once you decide to rename those files. The interface is somewhat cluttered but it is very simple to use.
- Download the Bulk Rename Utility from here
- Put the files and folders you want to rename into one folder
- After installing the tool, launch it, navigate to the files and folders you want to rename, and select them. You can select all by using Ctrl + A or from the Action menu.
- Change options in one or more of the many available panels, and you’ll see a preview of your changes appear in the “New Name” column where your files are listed.
- To rename according to the date created, go to ‘Auto date (8)’ section. Change the mode to suffix or prefix
- In the ‘Type’ dropdown choose ‘Creation (curr.)’ to rename by date of creation.
- Set your date format in the ‘fmt’ dropdown; where Y is Year, M is month and D is day
- Type a separator (e.g. a dash -) for your date to separate the date from the rest of the name e.g. 20161231-XXXXXX. To segment your date, type a segmenting character (e.g. a dash -) so that your date appears as 2016-12-31-XXXXXX. Characters that are not allowed (e.g. / or ?) will make the new name turn red
- Since your files might have the same creation date, you might want to add a incrementing numbering suffix from the ‘Numbering (10)’ section.
- To remove the current name from the method go to the ‘Name (2)’ section and select ‘Remove’ from the name dropdown box. You can also choose a fixed name and type it in this section.
- You can tweak other settings like ‘Find and replace (3)’, ‘Append Folder Name (9)’ and others. Your extensions will remain the same unless you choose to change them.
- After you are done setting up you method click ‘Rename’ on the bottom right corner. Confirm the renaming process and wait for the files and folders to be renamed.
Method 2: Use Advanced Renamer to batch rename your files
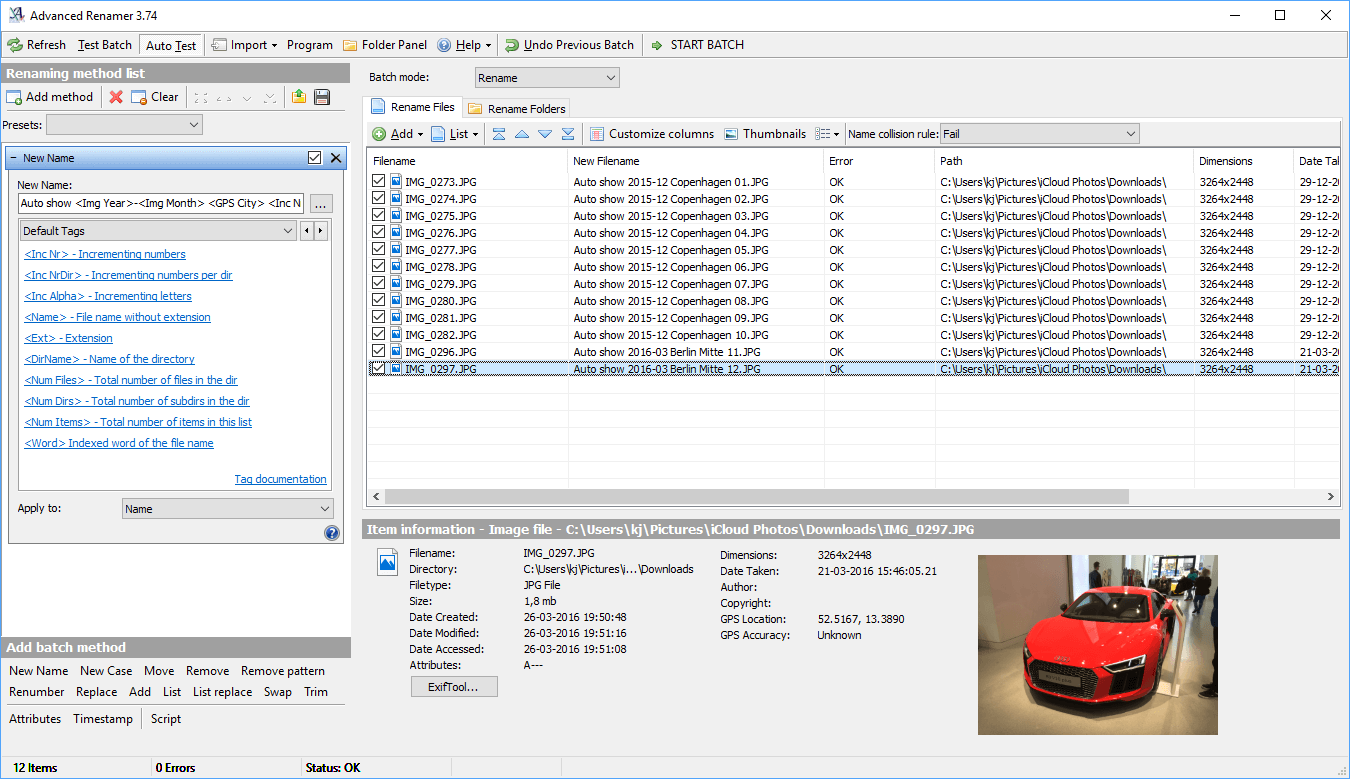
Advanced Renamer also provides several ways to rename your files. However, instead of presenting them all as panels in the interface, it asks that you to use a pretty simple but powerful syntax to create renaming methods. The syntaxes are pretty simple to learn with good support, along with examples. The interface is much friendlier and supports setting up advanced batch jobs so you can combine multiple renaming methods and apply them to large numbers of files. You can also save your renaming methods for later use.
- Download Advanced Renamer from here and install it
- Run/Launch the program. First you need to add some files to the list. Click the Add menu item above the file list. In the drop down list pick Files and a dialog for opening files appear. Select the files you would like to rename and click Open. You can also use the drag and drop method to add files.
- Now you need to setup how the files should be renamed. This is done in the left part of the program where it says ‘Renaming method list’.
- Click the button ‘Add method’ and select a method in the appearing window. With the ‘New Name’ method you can construct a completely new filename based on known information of each individual file.
- In the box called ‘New Name’ you can write the new name of the file. To rename your files using the YMD (Year month date) format with a fixed name prefix and an increment of 1 (in case files have the same creation date), type in “Fixed Name_<Year>_<Month>_<Day>_(<Inc Nr:1>)” (without the quotes).
- If you are not sure what to type for a certain property, there is a list below the box you can choose from.
- Click the button ‘Start Batch’ in the top of the window. In the new window click ‘Rename’. Now you will see a progress bar progressing as the files are renamed.
- When it completes you are done and can click OK.
Try KrojamSoft BatchRename