How to Bring Back ‘Safely Remove Hardware’ icon
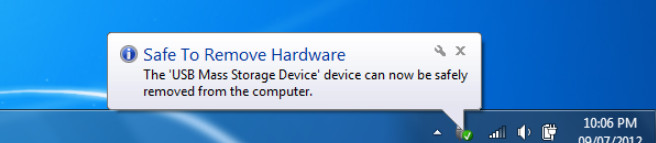
The module of ‘Safely remove hardware’ has been in Windows for quite some time and allows users to safely stop all communication with a USB device or hard drive for it to be safely plugged out. If you abruptly plug out a USB device, the device might get corrupted or your device might lose the data present inside.
Lately, there have been several reports where users noticed that the safely remove hardware icon has been missing from their taskbars. This usually happens because either the icon is disabled from the taskbar settings or there are some problems with the system files.
How to fix safely remove hardware icon missing
Users have reported that the safely remove hardware icon is missing from the notification area in Windows 10. This not only occurs in Windows 10 but is also present in Windows 7 and XP. There are also issues where the safely remove hardware icon doesn’t show the devices currently connected to the computer. This guide targets to fix all these issues.
Solution 1: Enabling ‘Safely remove hardware’ from the taskbar
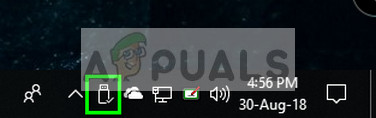
The icon and the module will not be shown in your taskbar if it has been disabled from the taskbar settings. It is possible that in the past you might have disabled the option and hence it refuses to be shown. We will open the settings and enable the module once again.
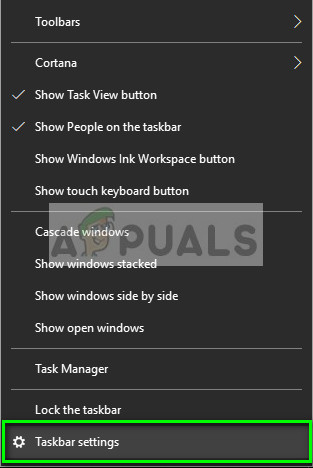
- Right-click anywhere on your taskbar and click Taskbar settings.
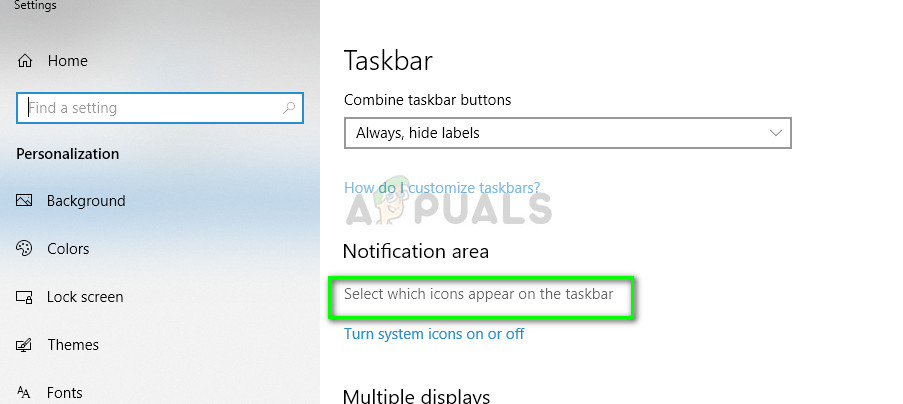
- Navigate down to the Notification area and click Select which icons appear on the taskbar.
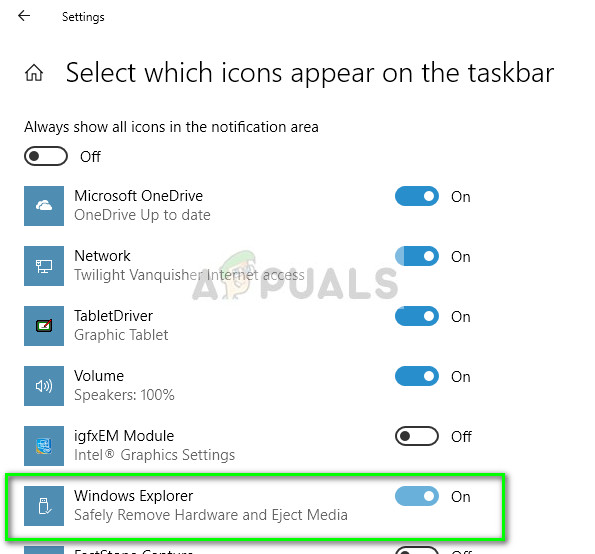
- Check the option Windows Explorer: Safely remove hardware and eject media.
- After saving changes, exit. Now the icon will appear automatically on your taskbar. If it doesn’t, click on the Up arrow to expand the taskbar and select the icon to safely remove hardware.
Note: You can also enable the taskbar option “Windows host process (Rundll32)” if the above doesn’t solve the issue on its own.
Solution 2: Disabling Quick Removal
USB devices have a technology called ‘Quick removal’ which disables write caching on the device and in Windows so you can plug it out without using the Safely remove hardware icon. This may increase accessibility but may reduce the performance. We can try changing this and see if this does the trick.
- Press Windows + R, type “devmgmt.msc” in the dialogue box and press Enter.
- Once in the device manager, expand Disk drives, right-click on your USB drive and click Properties.
- Once in properties, select the tab Policies and check the option Better performance.
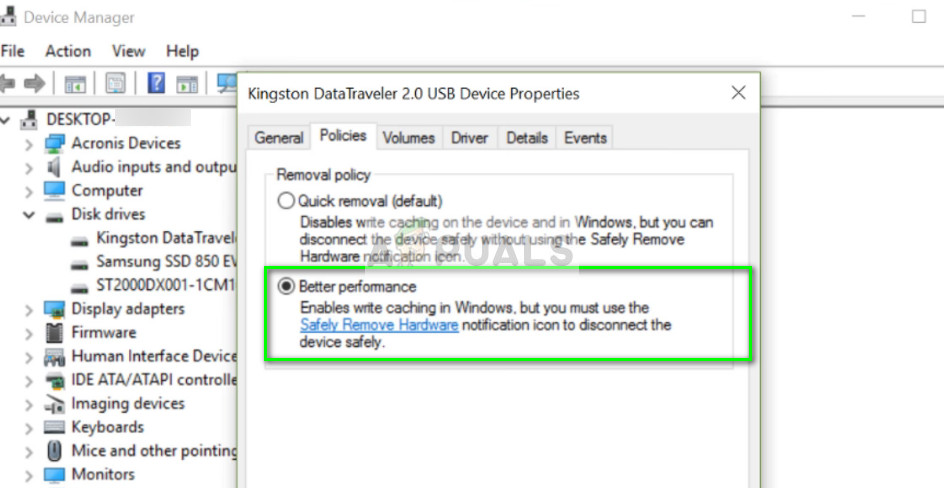
- Now check if the icon is present in the taskbar. If it isn’t, you can navigate back to the device manager and select Quick removal again and check.
Solution 3: Checking ‘Plug and Play’ service
The service “Plug and Play” is responsible for synchronizing the entire procedure of the USB plugging in and out in your computer. This service detects the USB or hard drive connected to your computer and gets it ready for the data transfer to begin. We can check if this service is running properly.
- Press Windows + R, type “services.msc” in the dialogue box and press Enter.
- Once in services, search for the entry “Plug and play”. Right-click on it and select Properties.
- Make sure that the service is running and the startup type is set as Automatic.
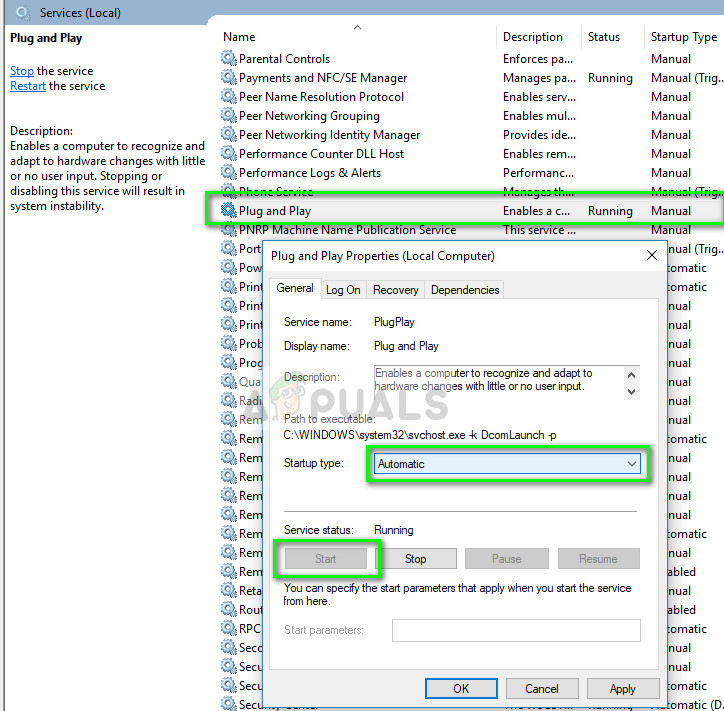
- Press Apply to save changes and exit. Restart your computer and see if the icon is visible in the taskbar.
Solution 4: Using the Run command
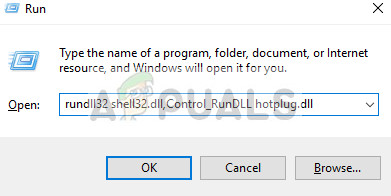
If all the above methods don’t work, you can try launching the safely remove hardware manually using the Run command on your computer. This may seem like a headache because you have to manually prompt the safely remove hardware. However, we will create a shortcut for it if this method works for you.
- Press Windows + R, type “rundll32 shell32.dll,Control_RunDLL hotplug.dll” in the dialogue box and press Enter.
- From here select the USB device which you want to stop and click on the stop
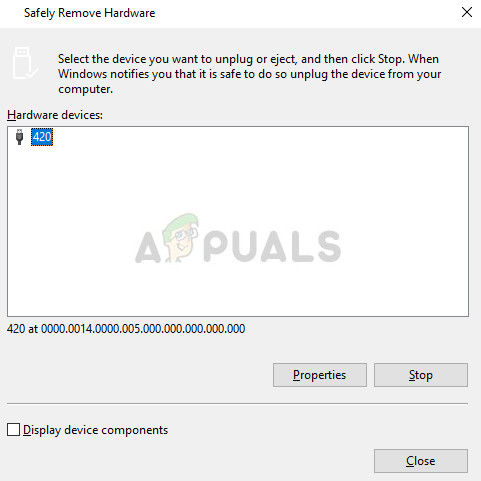
- You can now remove your drive safely from the computer.
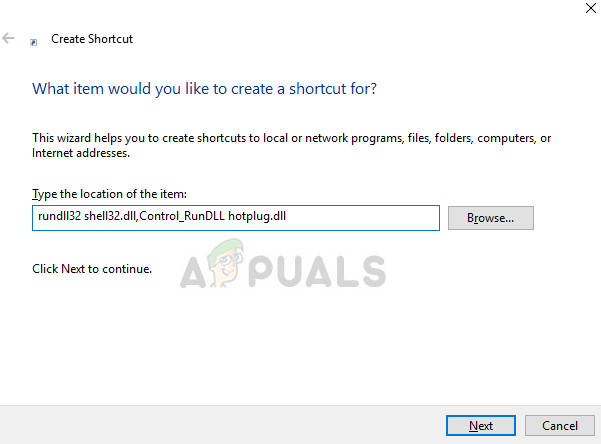
If this method work for you, you can create a shortcut for it anywhere on your Desktop. This will take care of the hassle of running the Run command every time.
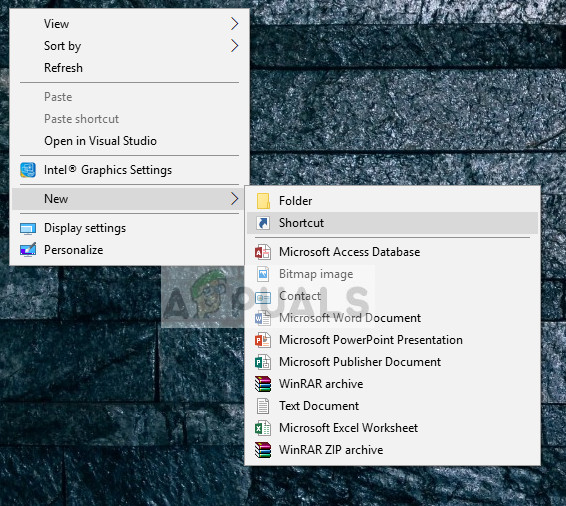
- Right-click anywhere on your Desktop and click New > Shortcut.
- In the dialogue box, enter the command “rundll32 shell32.dll,Control_RunDLL hotplug.dll”.
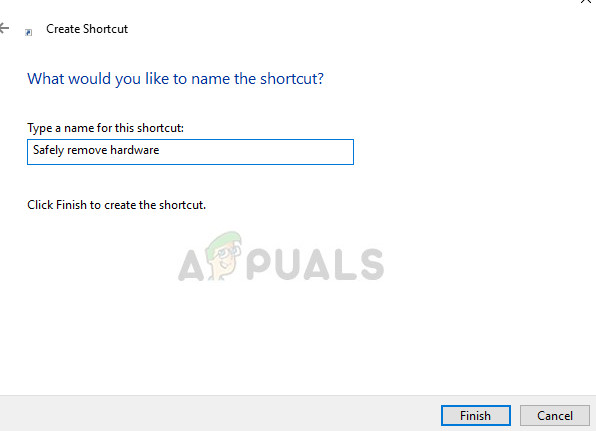
- In the next window, you can name the shortcut as “Safely remove hardware”. Press OK for the shortcut to be made.
- Now whenever you click the shortcut, the window will pop up and you can easily stop all the devices.
Note: If all the method doesn’t work, you can go ahead and run an SFC scan on your computer. This scan will fix all the corrupt registries and if this module is broken, it will fix it.


“Solution 4: Using the Run command” worked for me. After pressing Stop button USB Mass Storage ejected and ‘Safely Remove Hardware’ icon reappeared on Taskbar. Windows 10 LTSC 1809.Thanks for the solution.