How to Add and Delete a Header in Google Docs
A header is what is written right at the top of your document. Most of the academic writings and even for professional papers, headers are used to bring clarity to your work to remind people what the paper is titled. Mostly, headers include the title of the paper so that the reader does not have to turn back the pages to relate to the topic. Not every page in the report or the thesis has a header. The title pages, for example, will not have headers.
Let’s first have a look at how you can add a header to your document on Google Docs. You can also create a header and a footer either for your first page or for any number of pages in the document.
Adding a Header to your Document on Google Docs
- Open a blank document on your Google Docs. To add a header, click on your first page of the document, then click on Insert, and find the tab for Header and Page Number. When you bring your cursor to ‘Header and Page Number’ the tab will extend and show you the options out of which you need to click on Header.
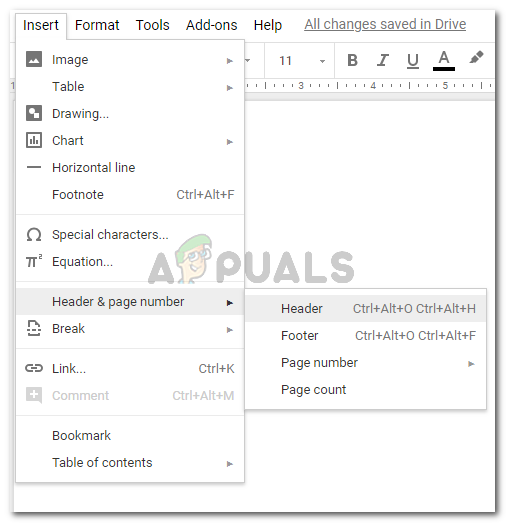
Clicking on Insert on your Google Docs is where you will find Header options for your document. This is also where you can add a footer(notes at the end of the page), page numbers and also display a page count for the reader. - Once you click on the header, your document will look like this.
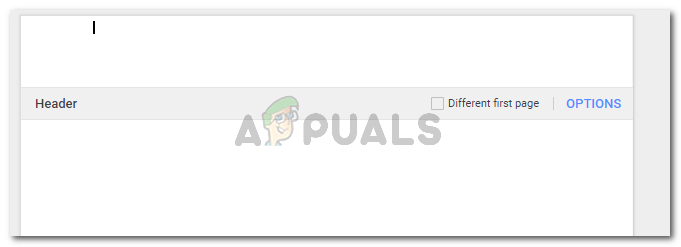
Clicking on Header in the previous step displays the page like this, where you will add a note, a title, or your name as per your requirements for a header. Write whatever the title is, or whatever you want to be visible as a header to the reader, type it in the space for Header. Once you have written, take your cursor and click it anywhere on the document to make the header permanent.
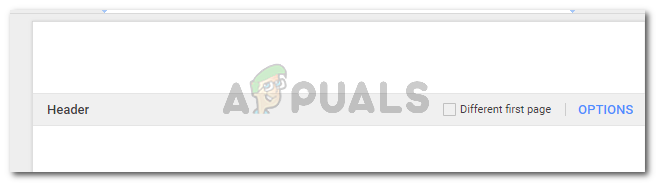
Your header has been added - You can alter the space or the margins for a header by clicking on the header, and then clicking on the ‘Options’ tab written in blue that appears on the screen right next to ‘Different first page’ as shown in the pictures above.
Clicking on Options will lead you to this dialogue box, where you can change the margins of your header depending on your requirements of the paper.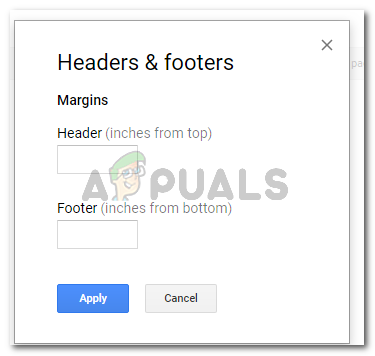
Altering the margins Usually, the header should not take too much space on your paper. So keep it to limited space as well as a different font size in comparison to the main content of the paper.
Deleting a Header on Google Docs
Deleting a header is easier than adding a header. When you have to add a header to your document, you have to follow a few steps before you can actually add it. But for deleting a header, all you need to use it the backspace button on your keyboard or the delete key.
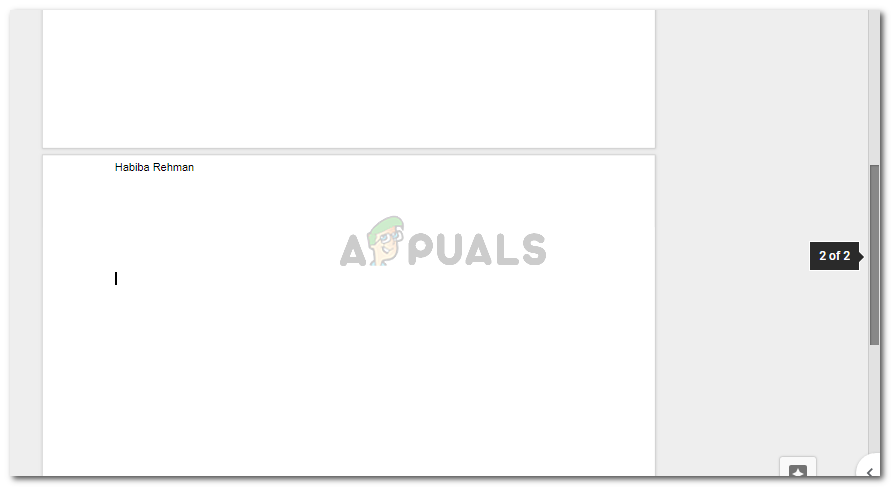
- Click on the title or the space for the header where you already have added something. In my case, I have written Habiba Rehman as a header. When I click on that space, the page looks like this.
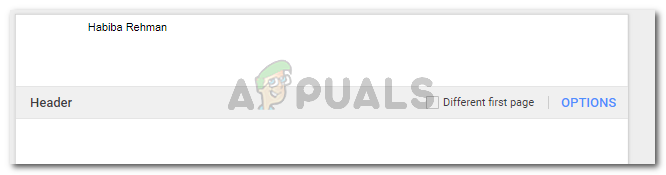
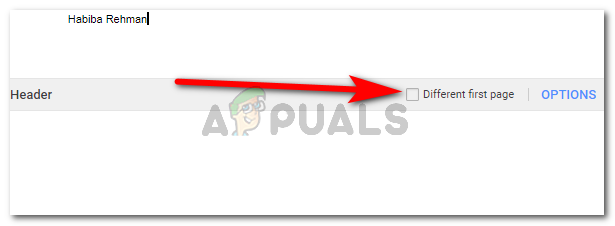
Click on the header that you added. This will make the options for Header editing visible as shown in the picture Now because I want to delete the header from all the documents, I will simply backspace my name all the way.
Backspace or press delete on the text that you have added as a header to delete it. Just how I clicked anywhere on the document to make the header permanent, I will do the same again to make these settings permanent. The header will now not be visible on any of the pages of the document.
Easy right? Deleting a header from a document on Google Docs is a one-major step process. Use the keys on the keyboard to delete the header, and you are good to go. But this is the case only if you want to delete it from all the pages of the entire document.
However, if you want to remove the header ‘only’ from the first page and not from the entire document, here is what you need to do.
- When we added a header in the earlier steps, remember the option which said ‘Different First Page’ with a checkbox? This is where that checkbox will be used.
- To make the header start from the second page, you need to check this box. This will delete the header from the first page, and make it visible from the second and pages that follow.
This option for ‘different first page’ plays a crucial role in managing your header for any document 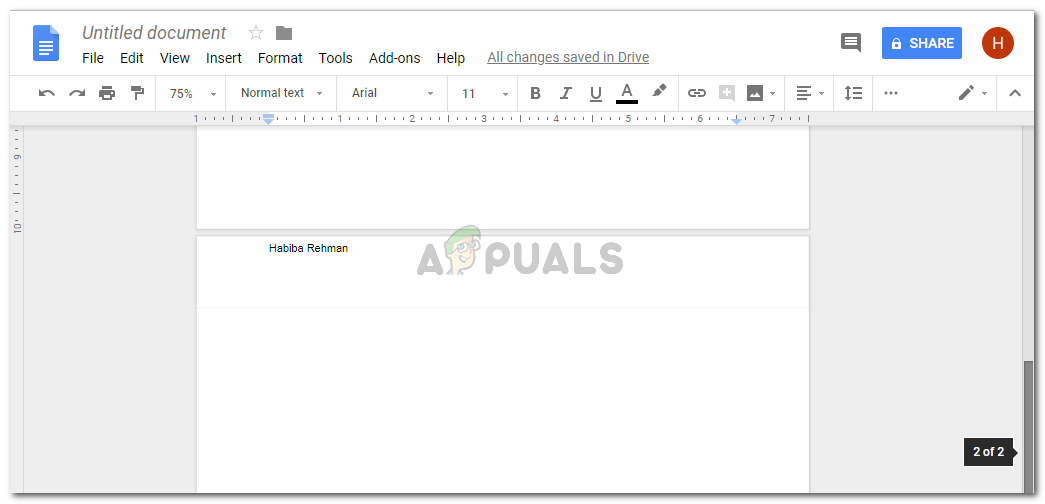
This is the second page of my document which still shows the header as I added it. The first page, however, does not have a header anymore because I selected the option for ‘different first page’ Un-check the box for ‘different first page’ if you change your mind later.


