FIX: Host Process Has Stopped Working Error (Windows 10)
The Windows updates have caused us troubles time and time again. Most of the users have been forced to turn off the automatic updates because they often have to wait for the updates to finish to restart the computer and the wait can be tiring, to say the least. Apart from this, often the updates (that have been rolled out after months of testing), fail to be completely compatible with operating systems and users have to post on forums endlessly to find workarounds and solutions before Microsoft realizes.
One such error occurred after an update that was officially rolled out on April 12, 2016. After its installation, when you shut down or restart your computer, it gives you an error prompt with the message that your host process has stopped working. It will also show you the path of the faulty application normally as “C:\Windows\System32\svchost.exe” The guilty update’s name is: Cumulative Update for Windows 10 Version 1511 for x64-based Systems (KB3147458) and while Microsoft released it to fix a few security nuances and to enhance the performance of some security features, it didn’t roll out as planned. We will have to get rid of this update to make sure our computer reboots peacefully like before. Don’t know how to do that? Don’t worry, we have got you covered. Perform the following steps:
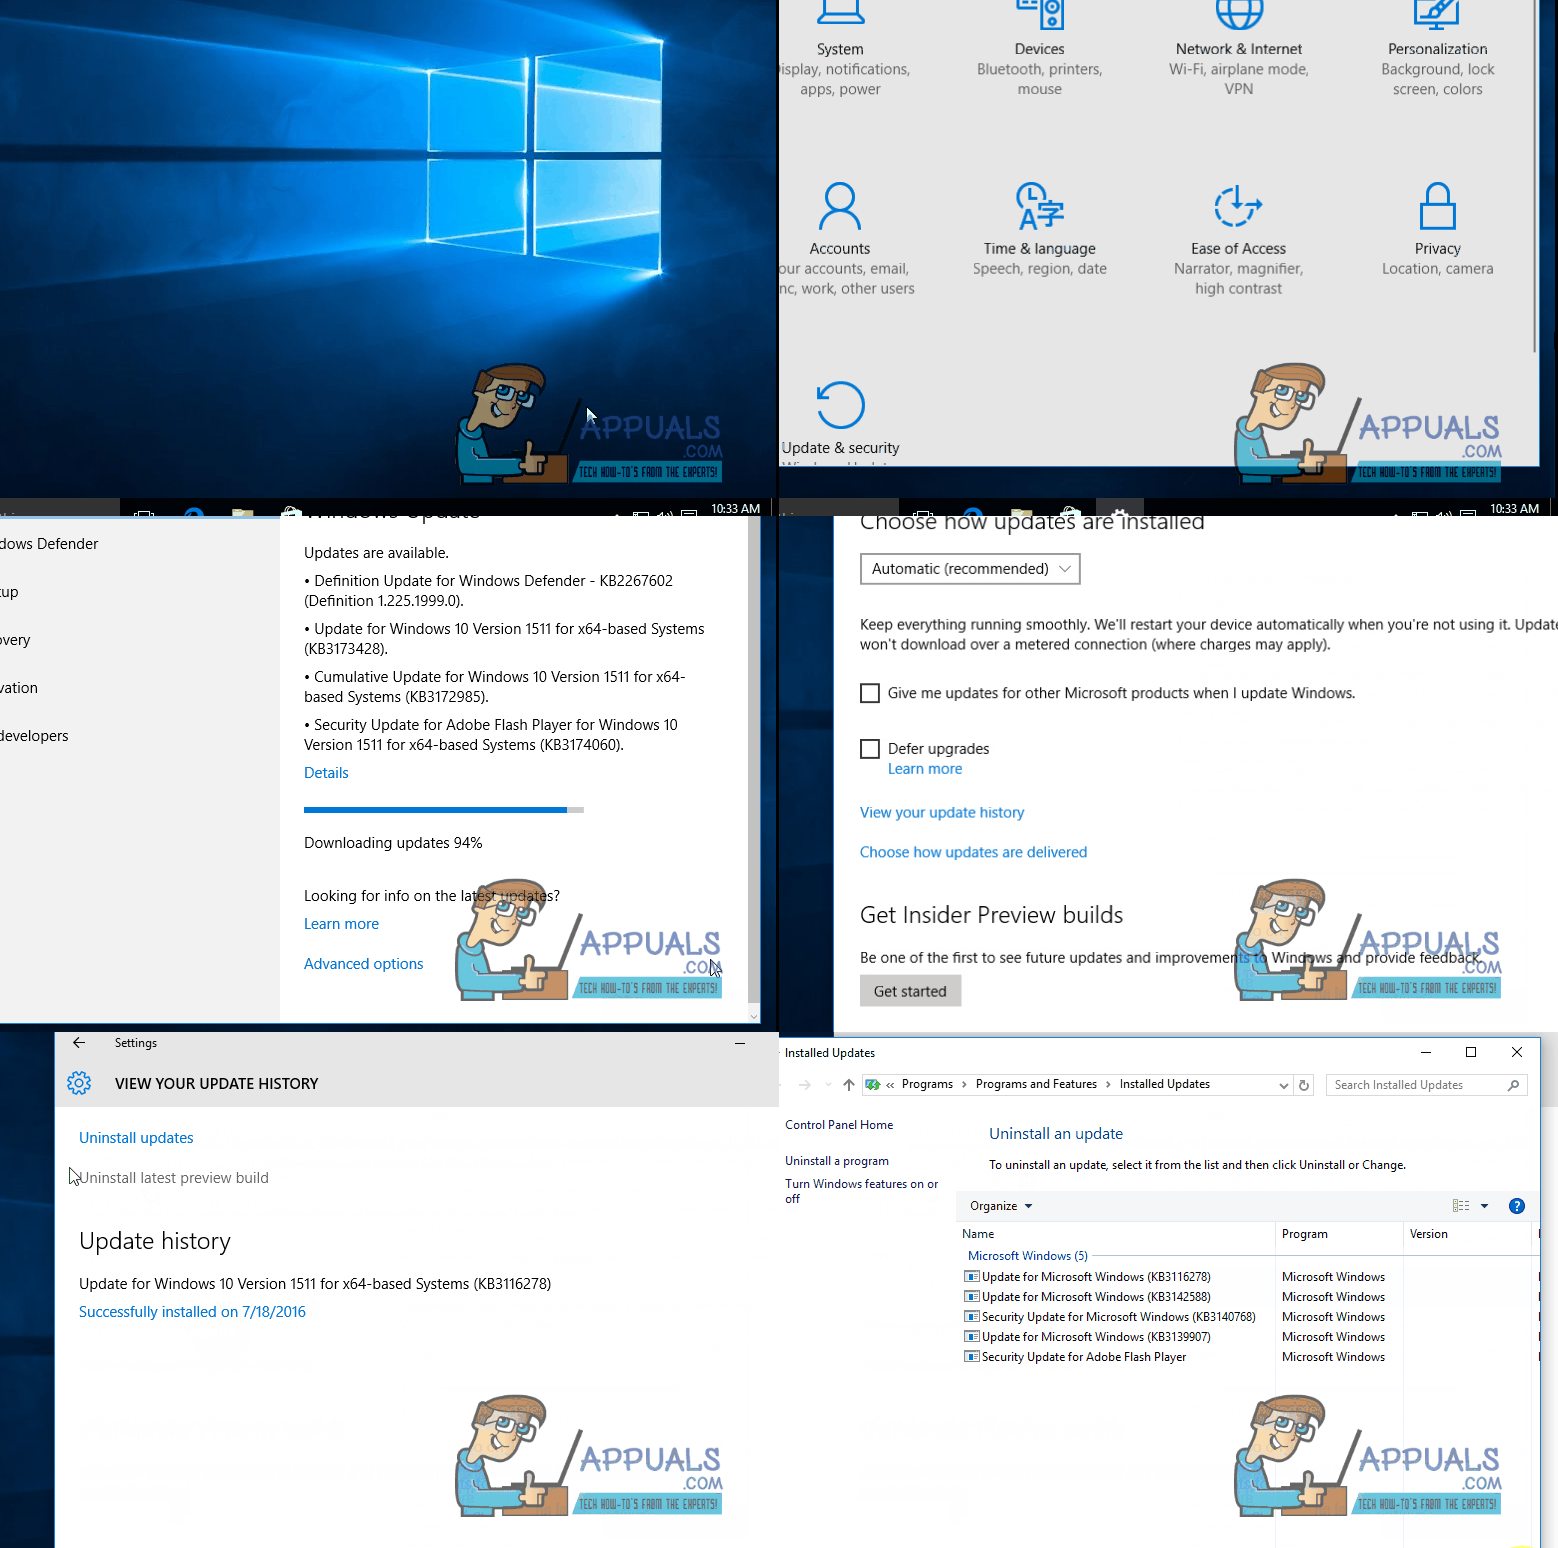
To uninstall an update, you need to make your way to the “Settings” window. To do that, press “the Windows key + A” and the action center from the right must crawl on to your screen. Click on “All Settings” and the settings window should appear.
Now at the absolute end of all the options available in the Settings window, you will find “Update and Security”, click on it.
On the sidebar, you will see a few tabs to select from. Go to the “Windows Update” tab if the focus isn’t already on it.
Click on the highlighted “Advanced options” button that must ideally be present at the bottom.
In the window that is now open, you will see another highlighted button by the name “View your update history”. This should be able to do just what its name suggests; show you the history of your updates. Click on it.
At the very top of the window in front of you, there will be an “Uninstall updates” button. Click on it.

Here you should be able to navigate to the update that goes by the name “Cumulative Update for Windows 10 Version 1511 for x64-based Systems (KB3147458). When you find it, right click on it and select “Uninstall”. A pop-up might appear confirming from you that you want to proceed; go ahead. Restart once the update has uninstalled.