7 Easy Way to Fix Horizontal Lines on HP Laptop Screen
 Reviewed by Huzaifa Haroon
- Horizontal lines on an HP laptop screen can arise from various causes, including loose or damaged video cables, outdated graphics drivers, or physical damage to the screen itself.
- You can fix horizontal lines issues by reconnecting video cables, updating graphics drivers, adjusting screen resolution, or performing a clean boot to eliminate software conflicts.
- Regularly update your system and drivers, ensure the laptop is kept in a cool, dry environment to avoid overheating and moisture damage and avoid exposing the laptop to potential magnetic fields or physical shocks.
If you’re seeing horizontal lines on your HP laptop screen, it can be really frustrating and can mess with your work or fun. These lines can pop up suddenly and might point to some issues with your laptop, from minor software bugs to big hardware problems.
In this guide, we will explain why these lines show up and give you a step-by-step method to figure out and fix the problem. Whether the lines on your screen come and go or stick around all the time, this guide will help you get your laptop’s display back to looking good.
We’ve made sure to keep the instructions easy to follow so you can get things fixed no matter how much tech experience you have.
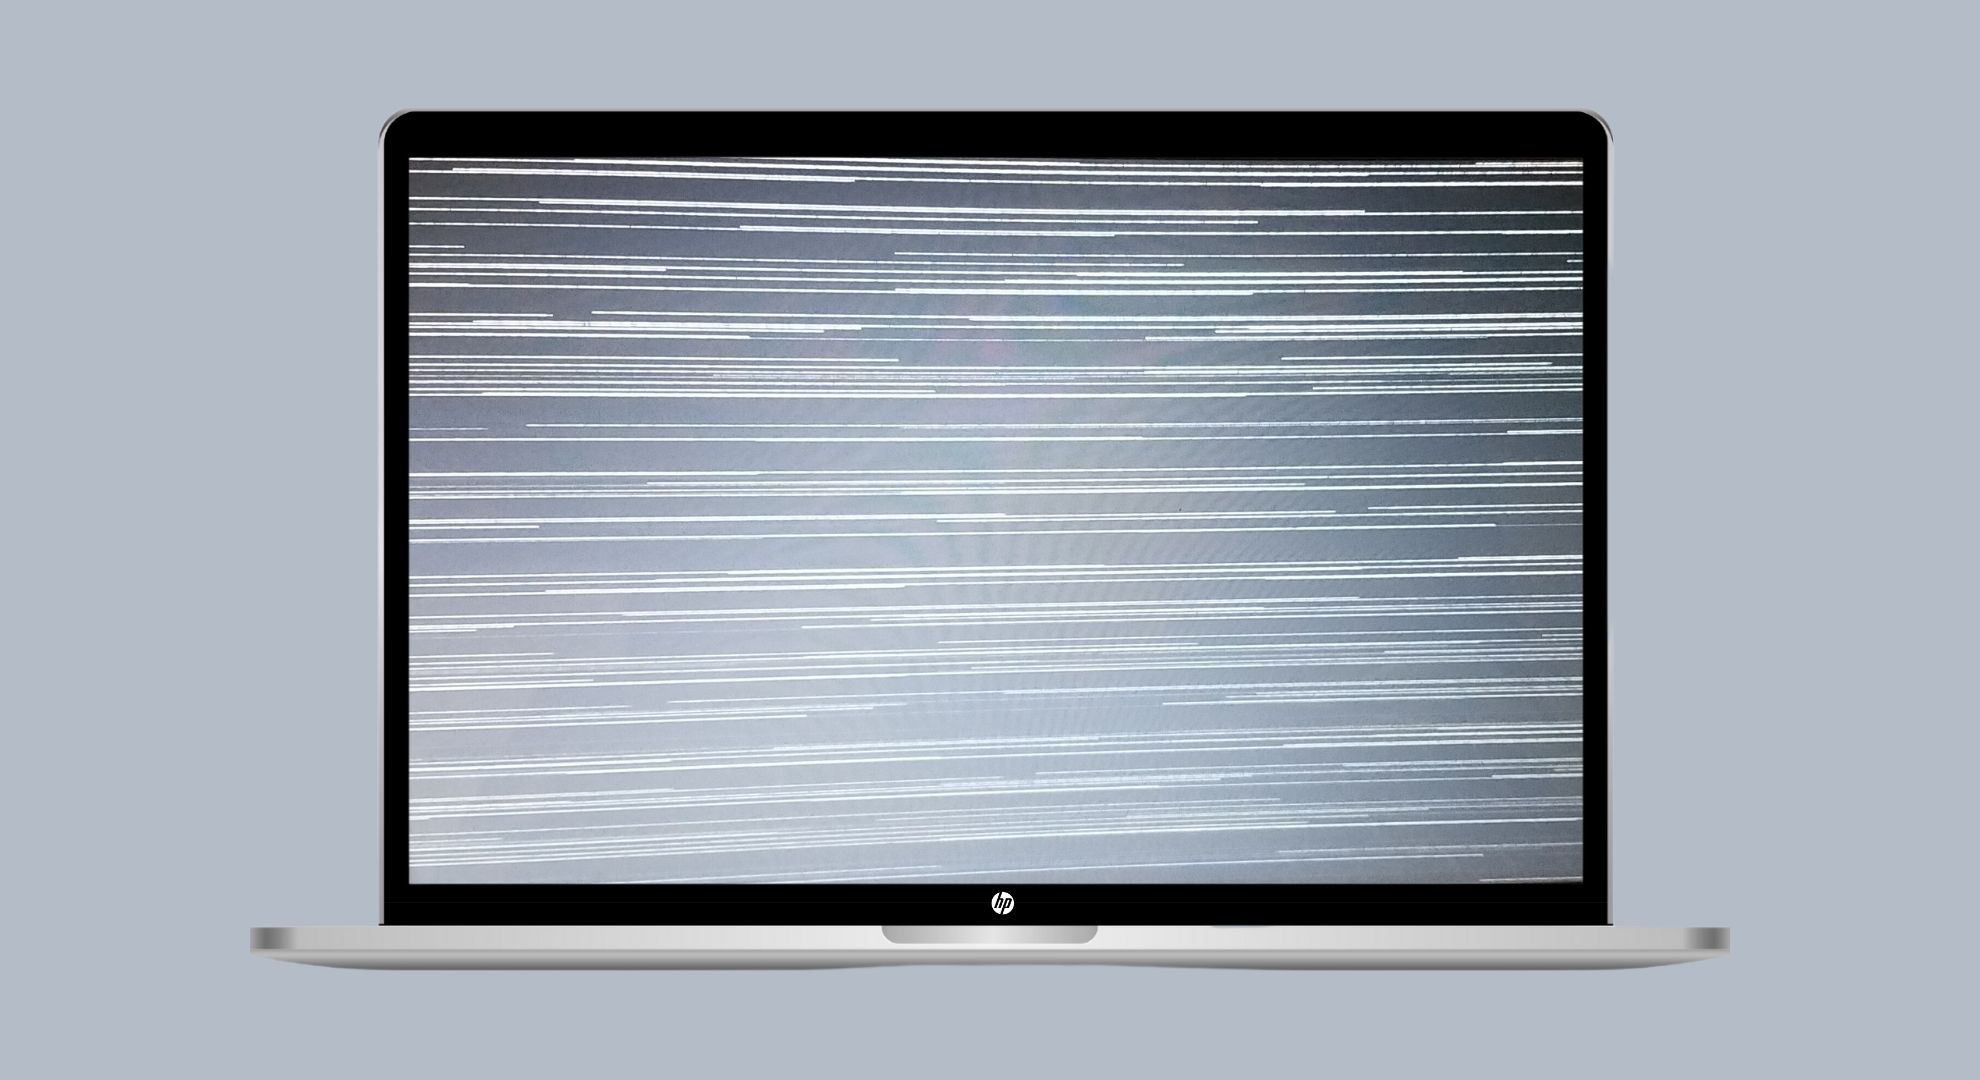
Understanding horizontal lines on HP laptop screens
Horizontal lines on an HP laptop screen are visual disturbances that can disrupt your viewing experience. These lines may be continuous or recurrent, appearing in various colors or patterns depending on the underlying issue. The symptoms of horizontal lines can include:
- Flickering screen content.
- Distortion in the display where the lines are present.
- Lines that may change appearance or move when adjusting the screen angle.
↪ Causes of horizontal lines
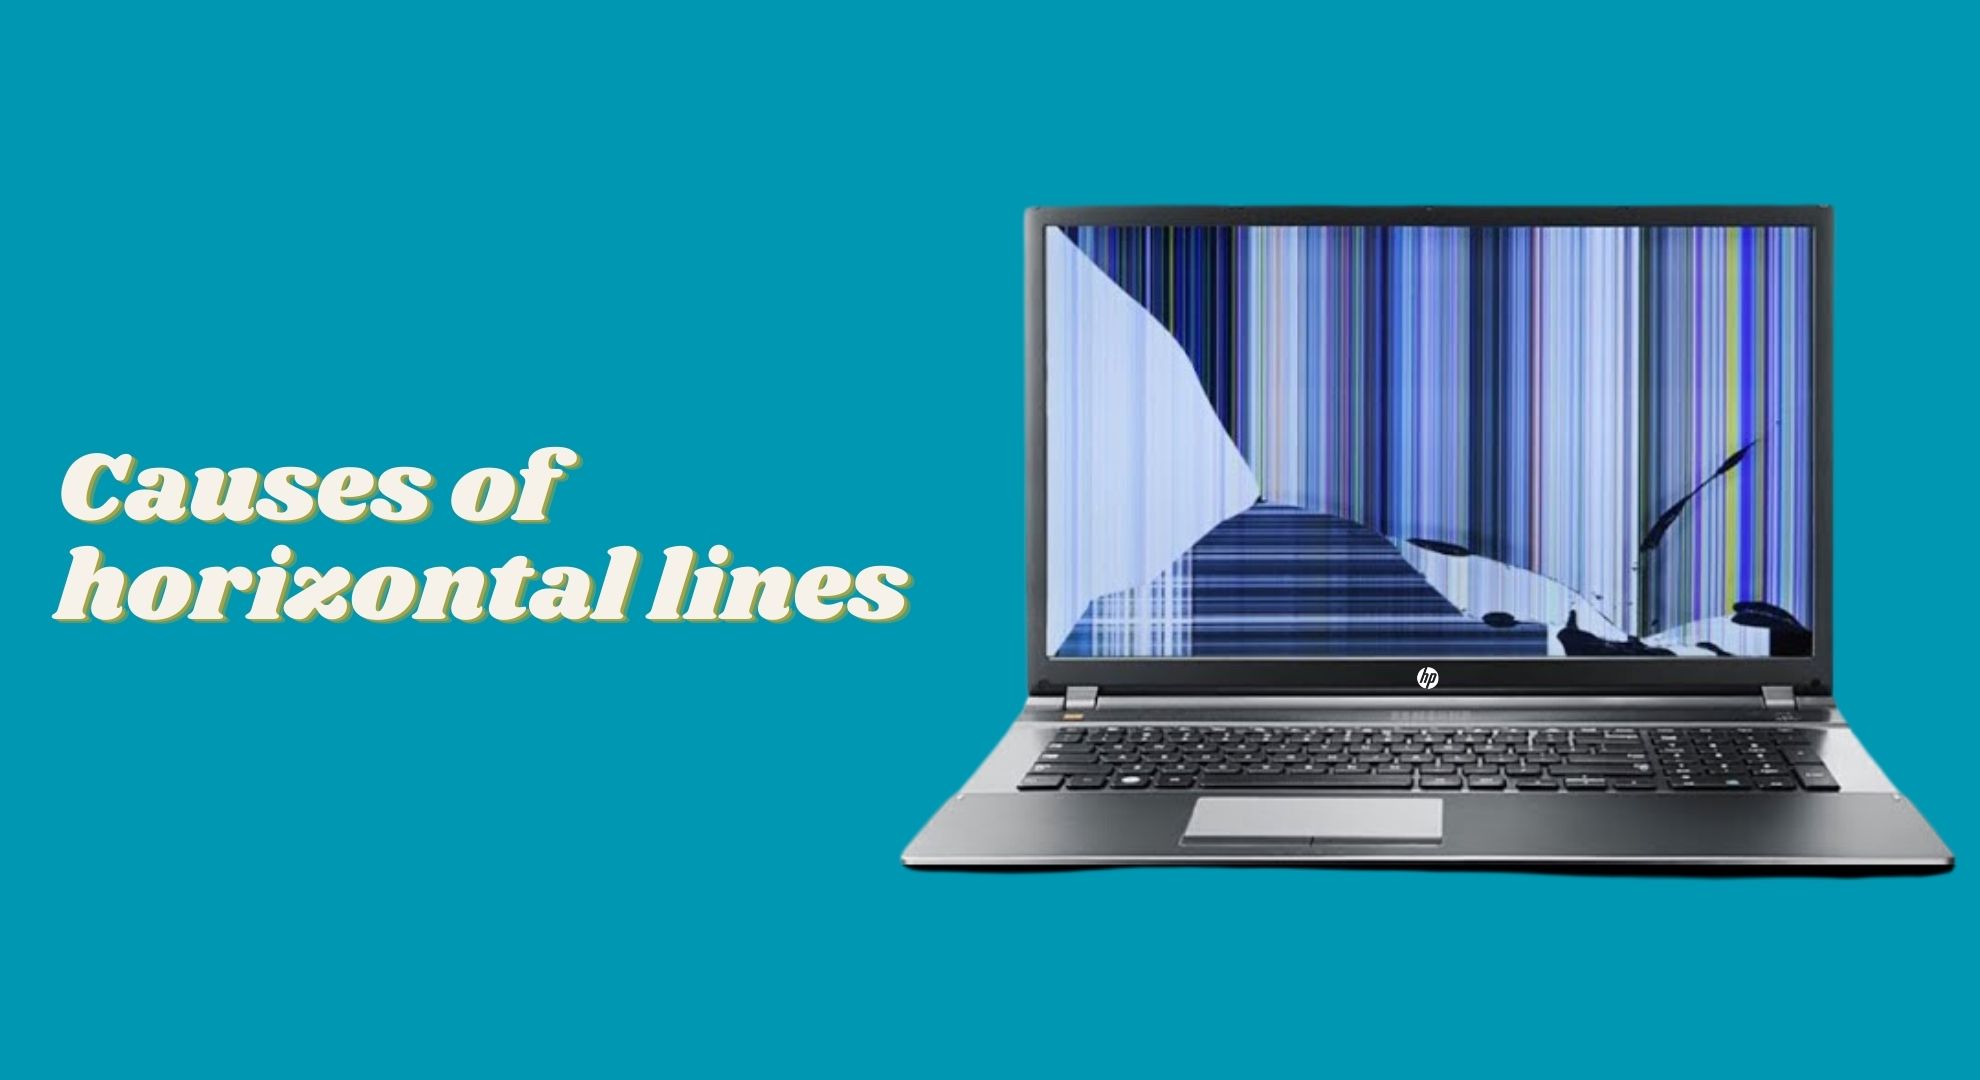
Here are some commonly noted causes of this issue:
- Overheating or malfunctioning of the GPU can cause lines on the screen.
- Damage to the LCD Panel or loose connections can lead to these lines.
- Loose or damaged cables can disrupt the signal, causing horizontal lines.
- Outdated drivers can lead to compatibility issues with the display.
- Glitches between software or systemic errors can also manifest as lines on the display.
Make Sure it is Not Some Physical Damage
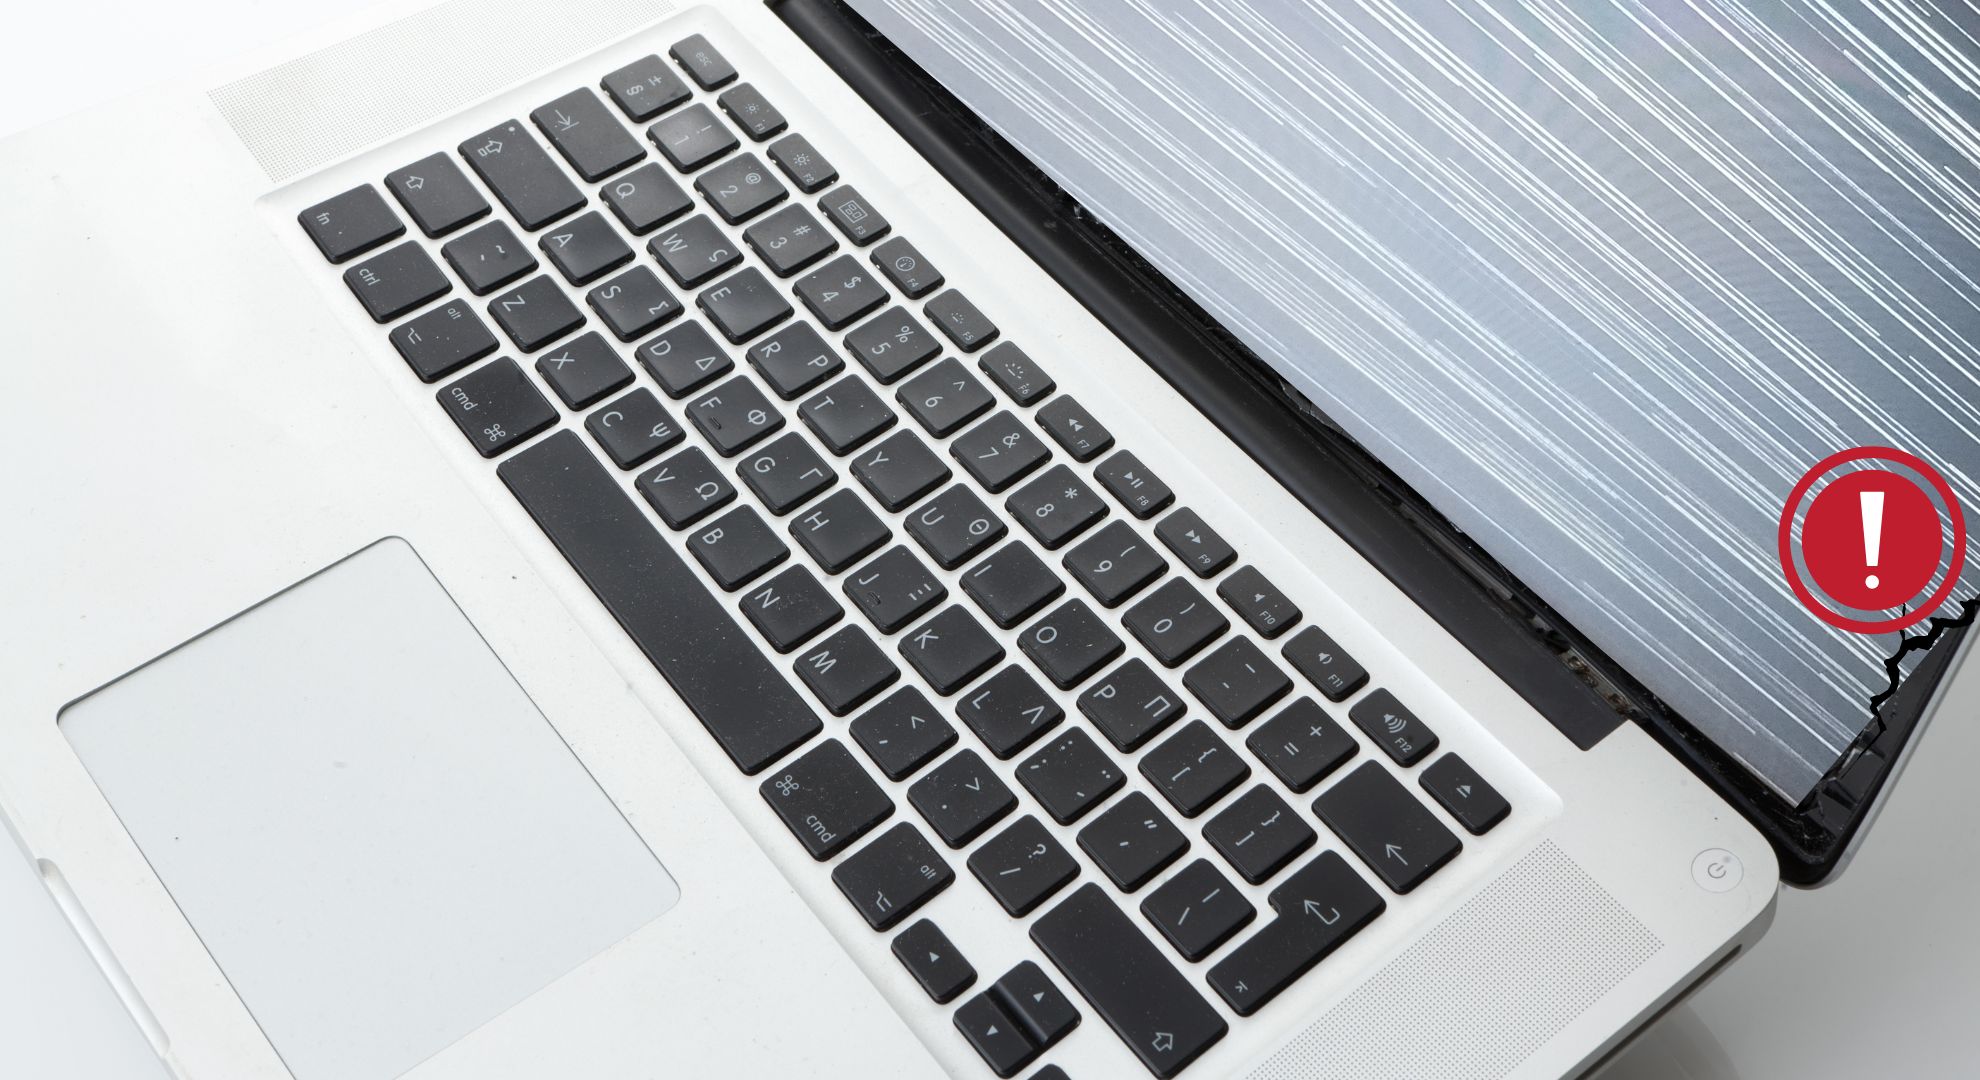
Before trying any software or hardware fixes for horizontal lines on your HP laptop screen, checking for any physical damage is crucial. Inspect the screen closely for signs of cracks, dents, or other visible damage that could be causing the display issues.
Additionally, ensure the laptop has not been dropped or subjected to any impacts that could have dislodged internal components like the video cable. If you find any physical damage, professional repair will likely be necessary to restore your screen. This initial check can save you time by directly addressing any physical problems before attempting software troubleshooting.
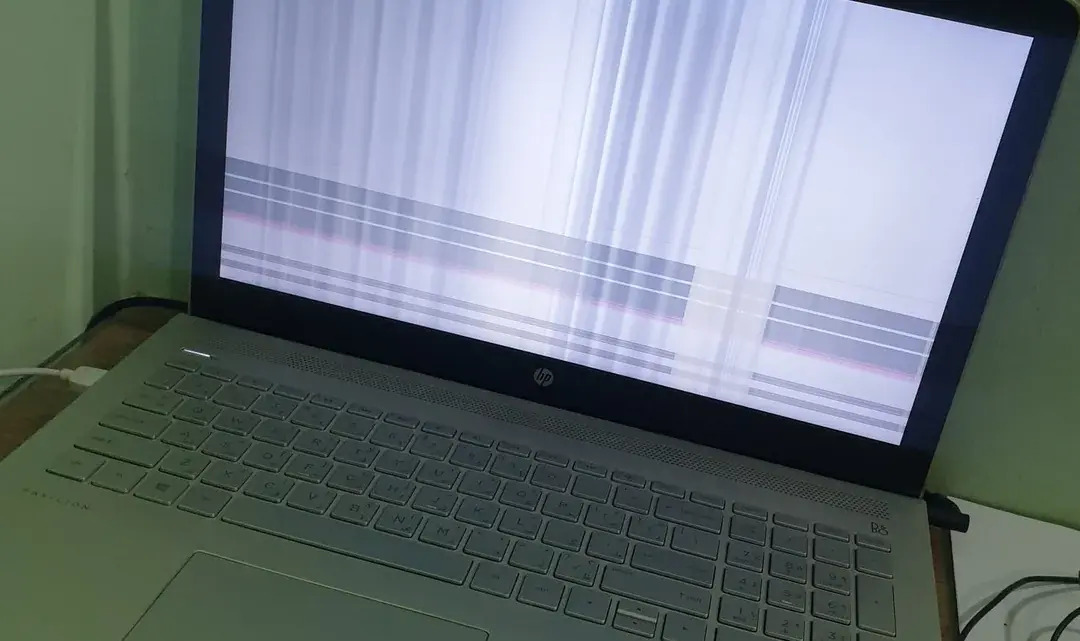
How to Fix Horizontal Lines on HP laptop screen?
If you’re facing persistent horizontal lines across your HP laptop screen, there are several strategies you can employ to diagnose and potentially resolve the issue. Let’s explore how you can start tackling this frustrating issue:
1. Initial checks
Start by checking the basic elements that could cause horizontal lines on your laptop screen. These initial checks are often quick fixes that can resolve more straightforward issues.
- Checking cable connections: Ensure all video cables connected to your laptop are secure. If you use an external monitor, check both ends of the cable — from the monitor to the laptop. Loose connections can often cause display issues such as horizontal lines.
- Restarting the laptop: Sometimes, a simple restart can fix display glitches. This action refreshes the system’s hardware and software connections. Shut down your laptop completely, then turn it back on to see if the horizontal lines disappear.
2. Update graphics drivers
Outdated or corrupted graphics drivers are common causes of display issues like horizontal lines. Updating them can often resolve the problem.
- Right-click on the Start menu, search “Device Manager,” and click “Open.”
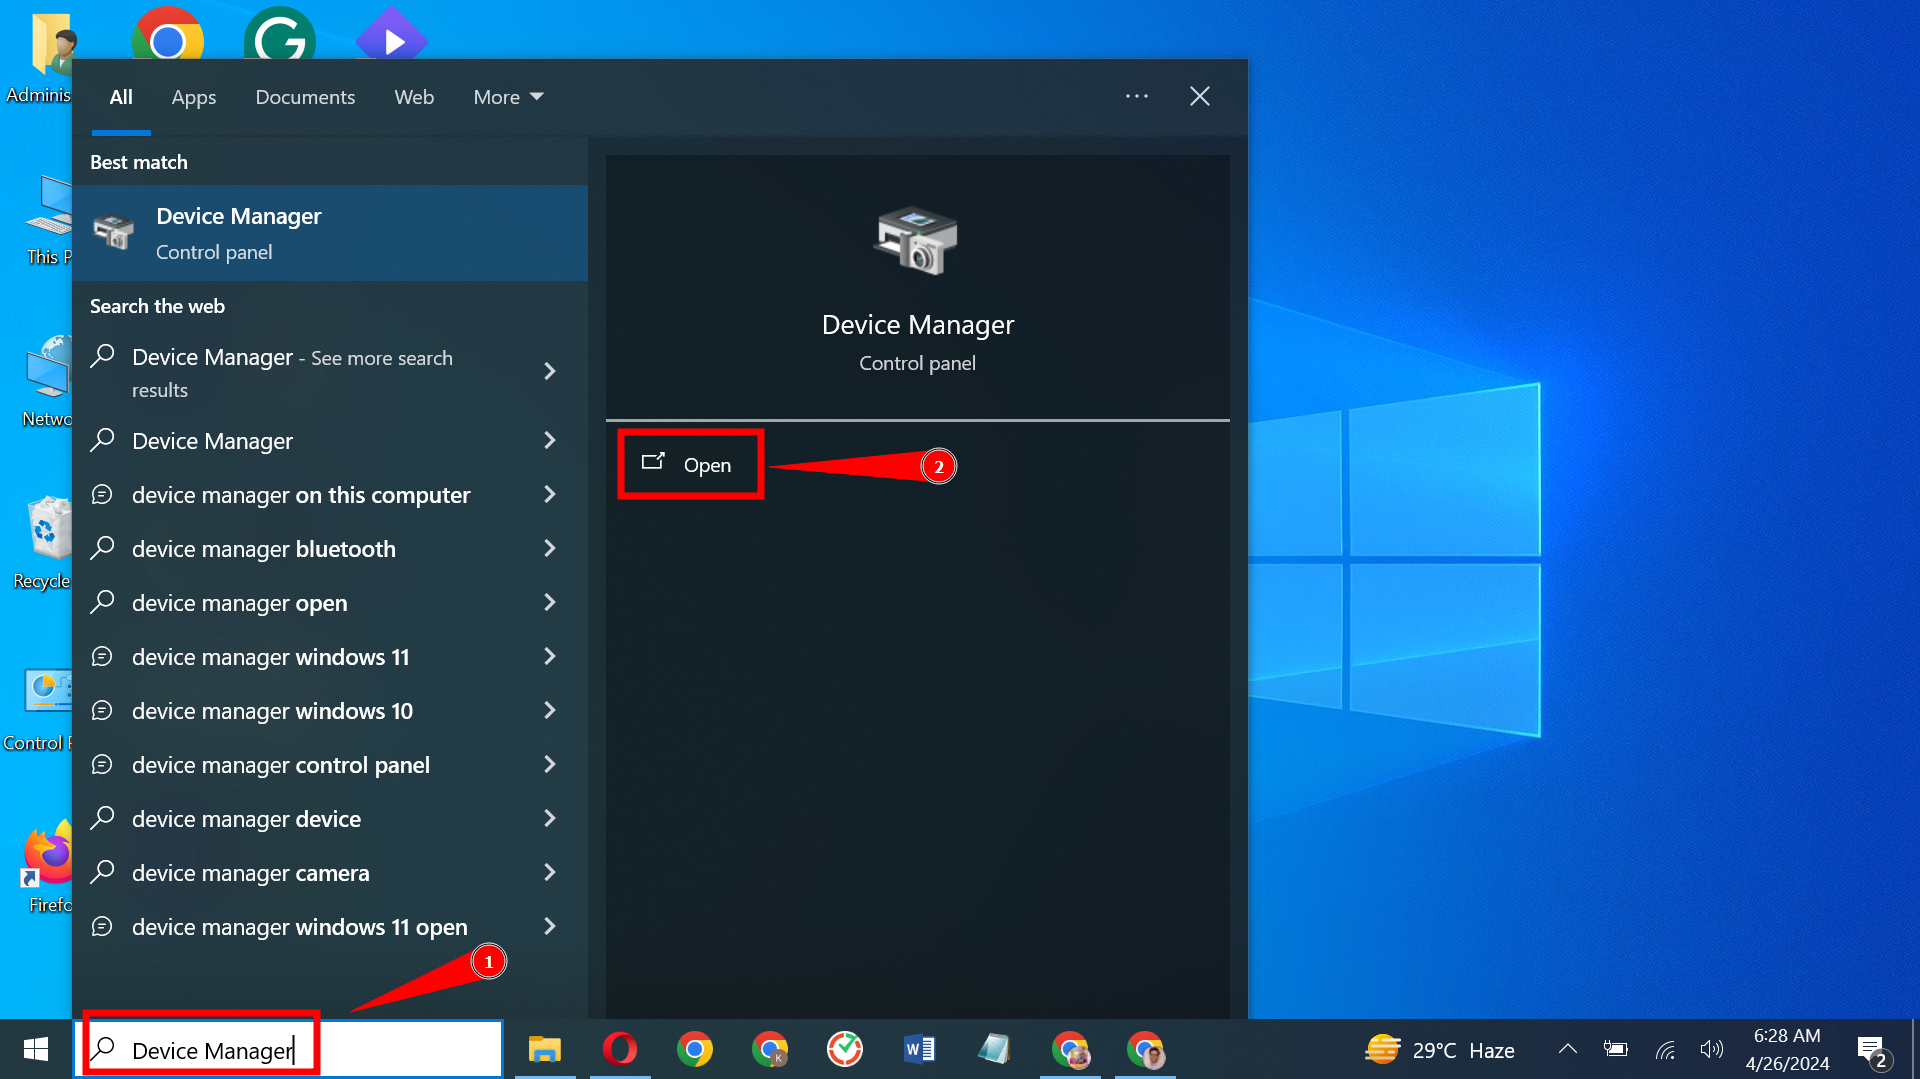
Open Device Manager - Find and expand the “Display Adapters” section.
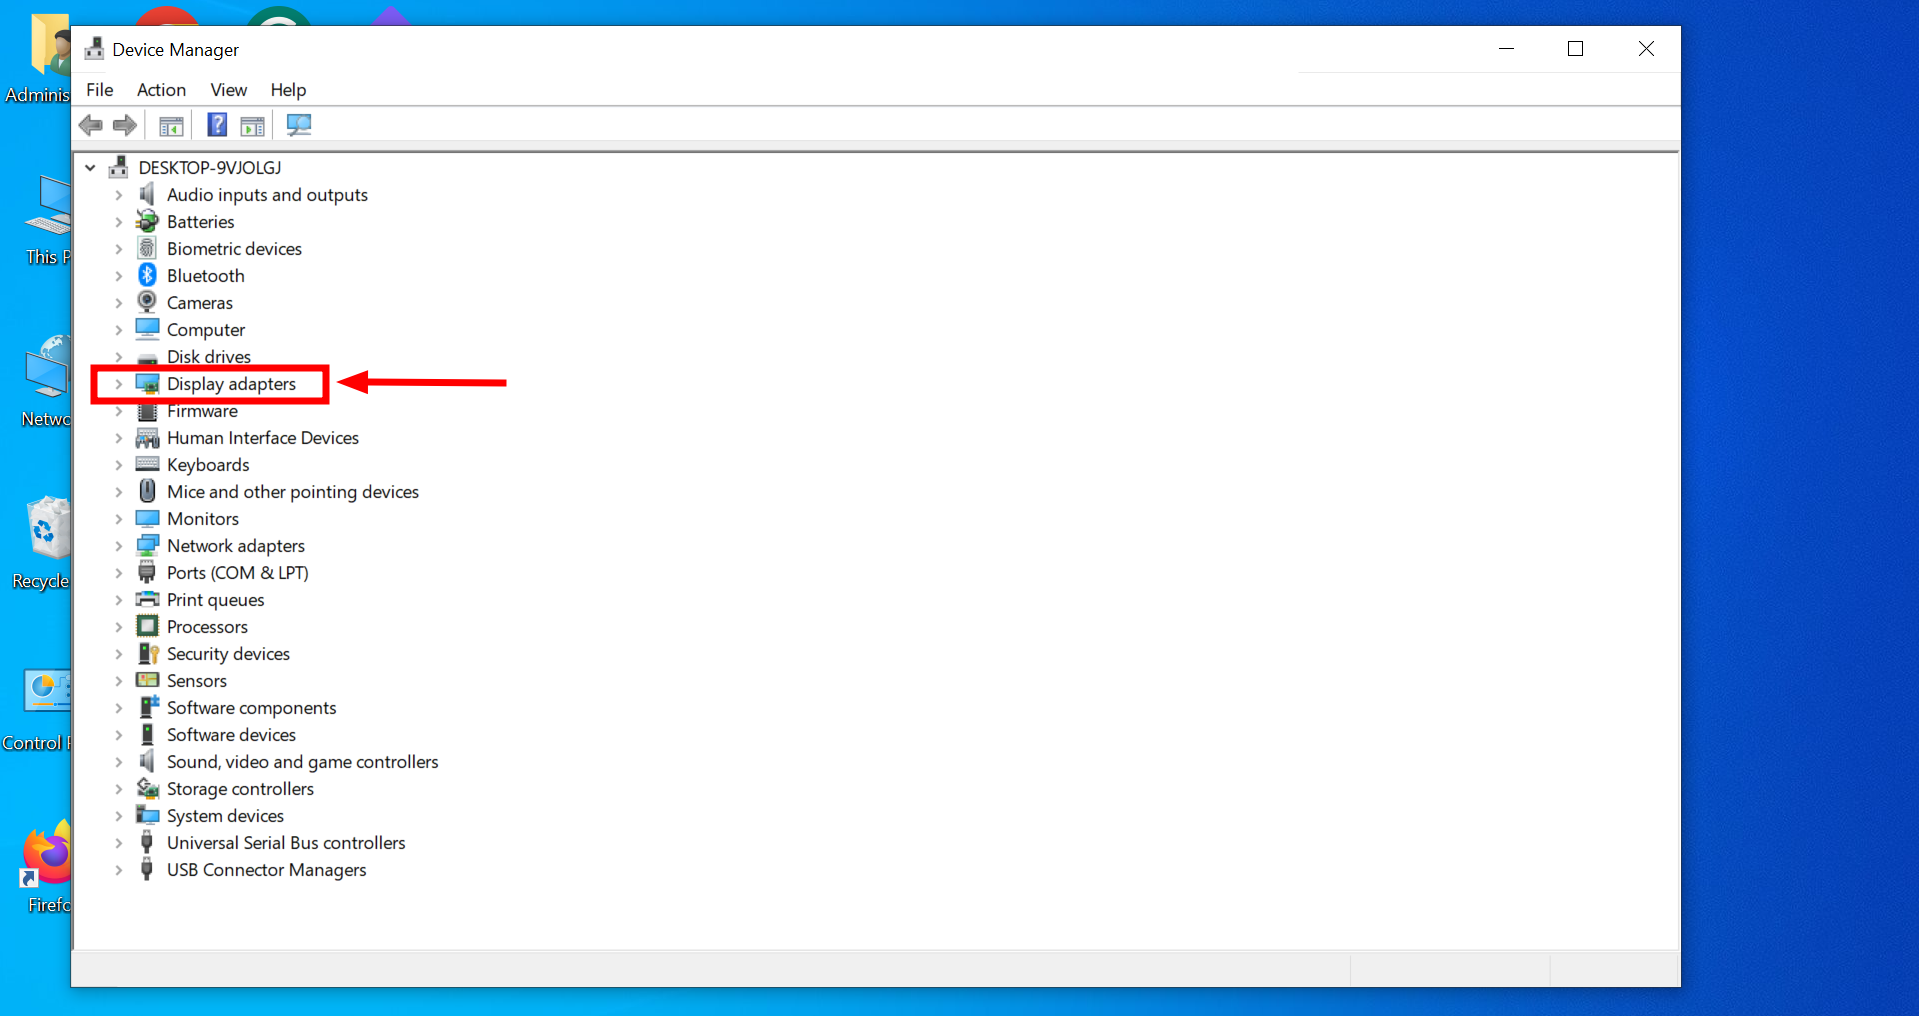
Click on Display Adapters - Right-click on your graphics card and choose “Update driver.
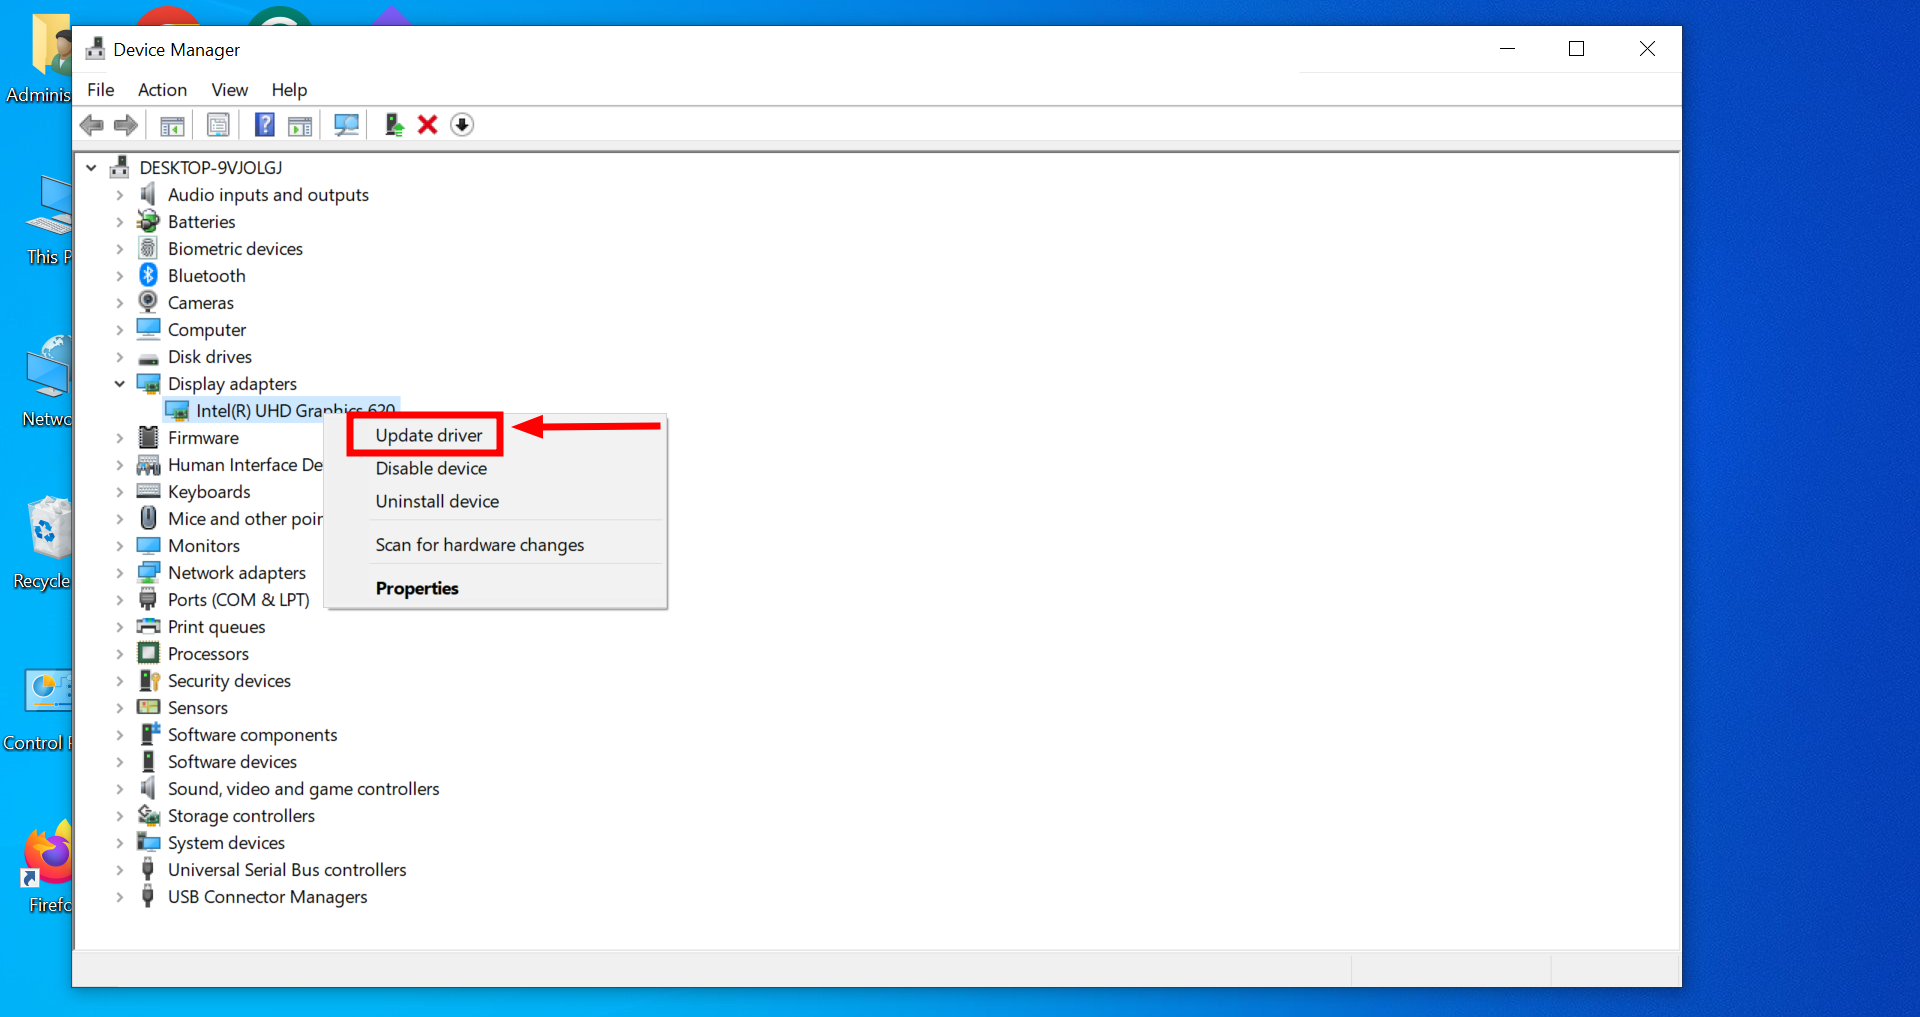
Click Update driver - Select “Search automatically for updated driver software” and follow the prompts to install any updates you find.
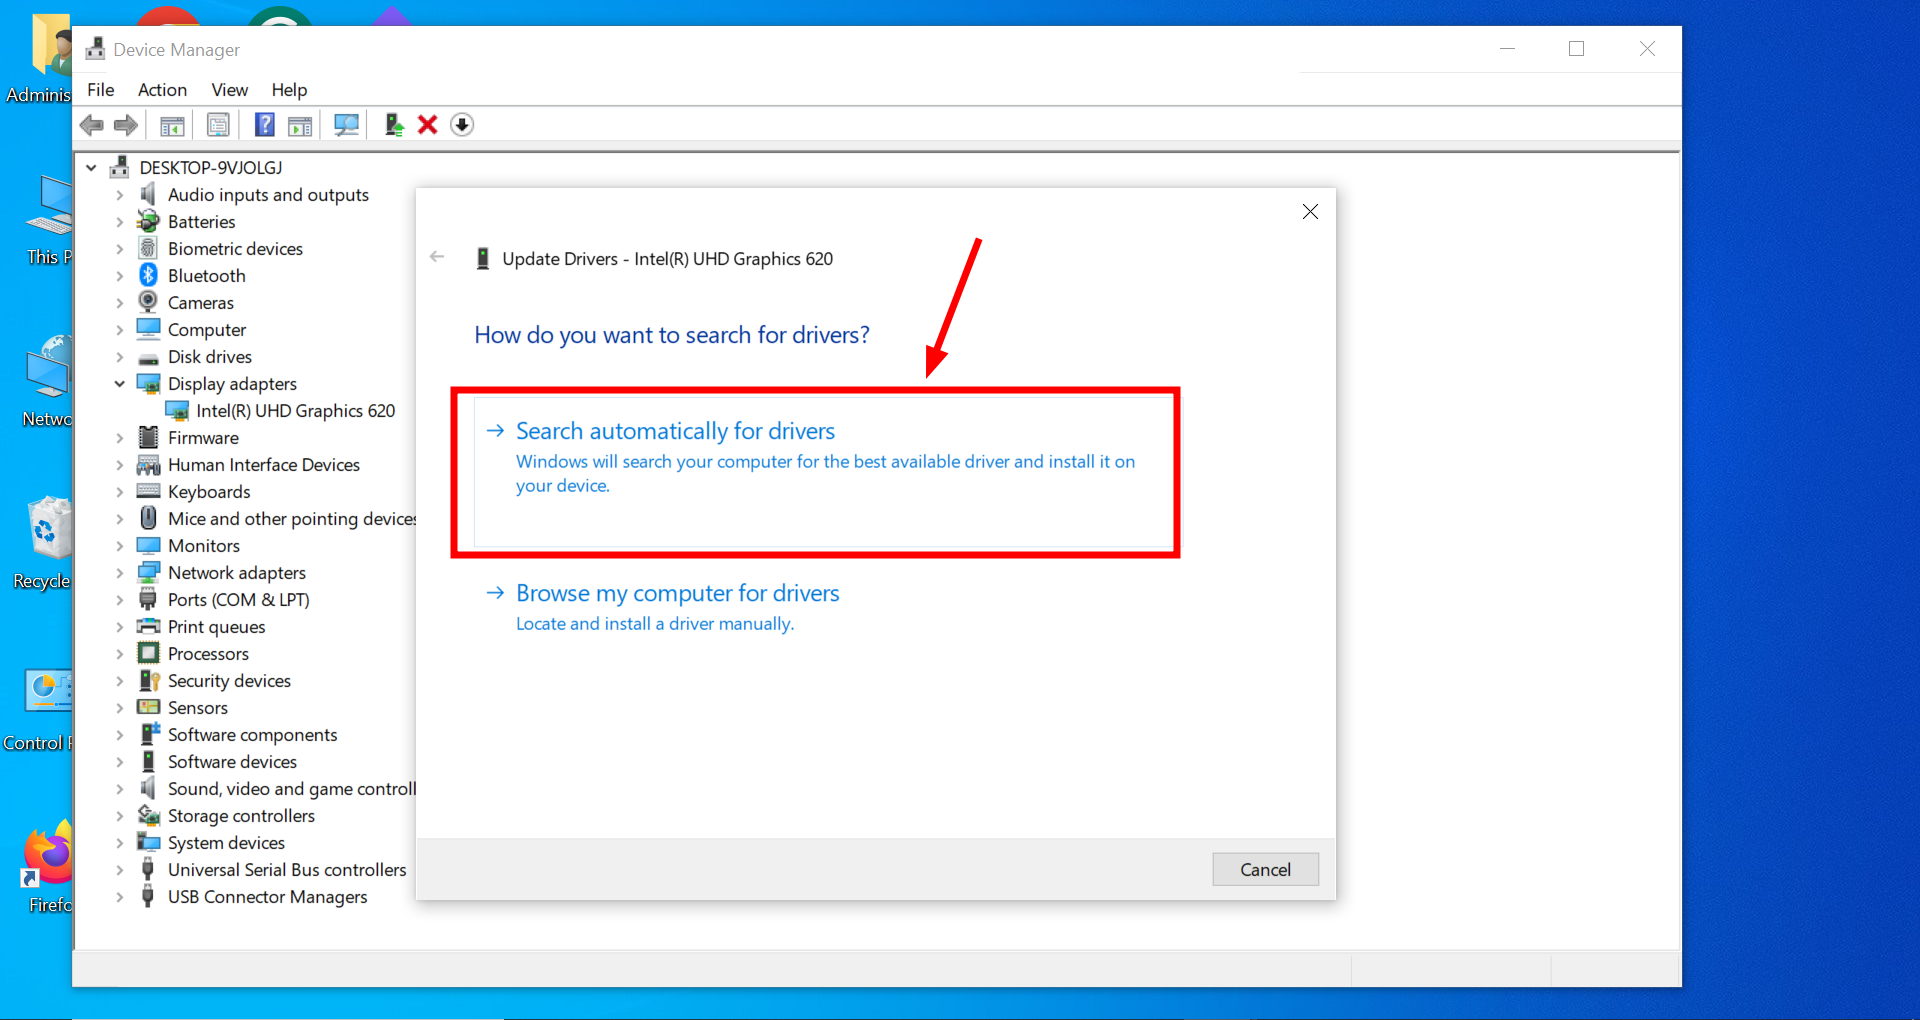
Select the search option
Once the update is complete, restart your laptop to ensure the changes take effect.
3. Adjust screen resolution and settings
Incorrect screen resolution settings can also cause display issues. Adjusting these settings might help.
- Right-click on the desktop and select “Display settings.”
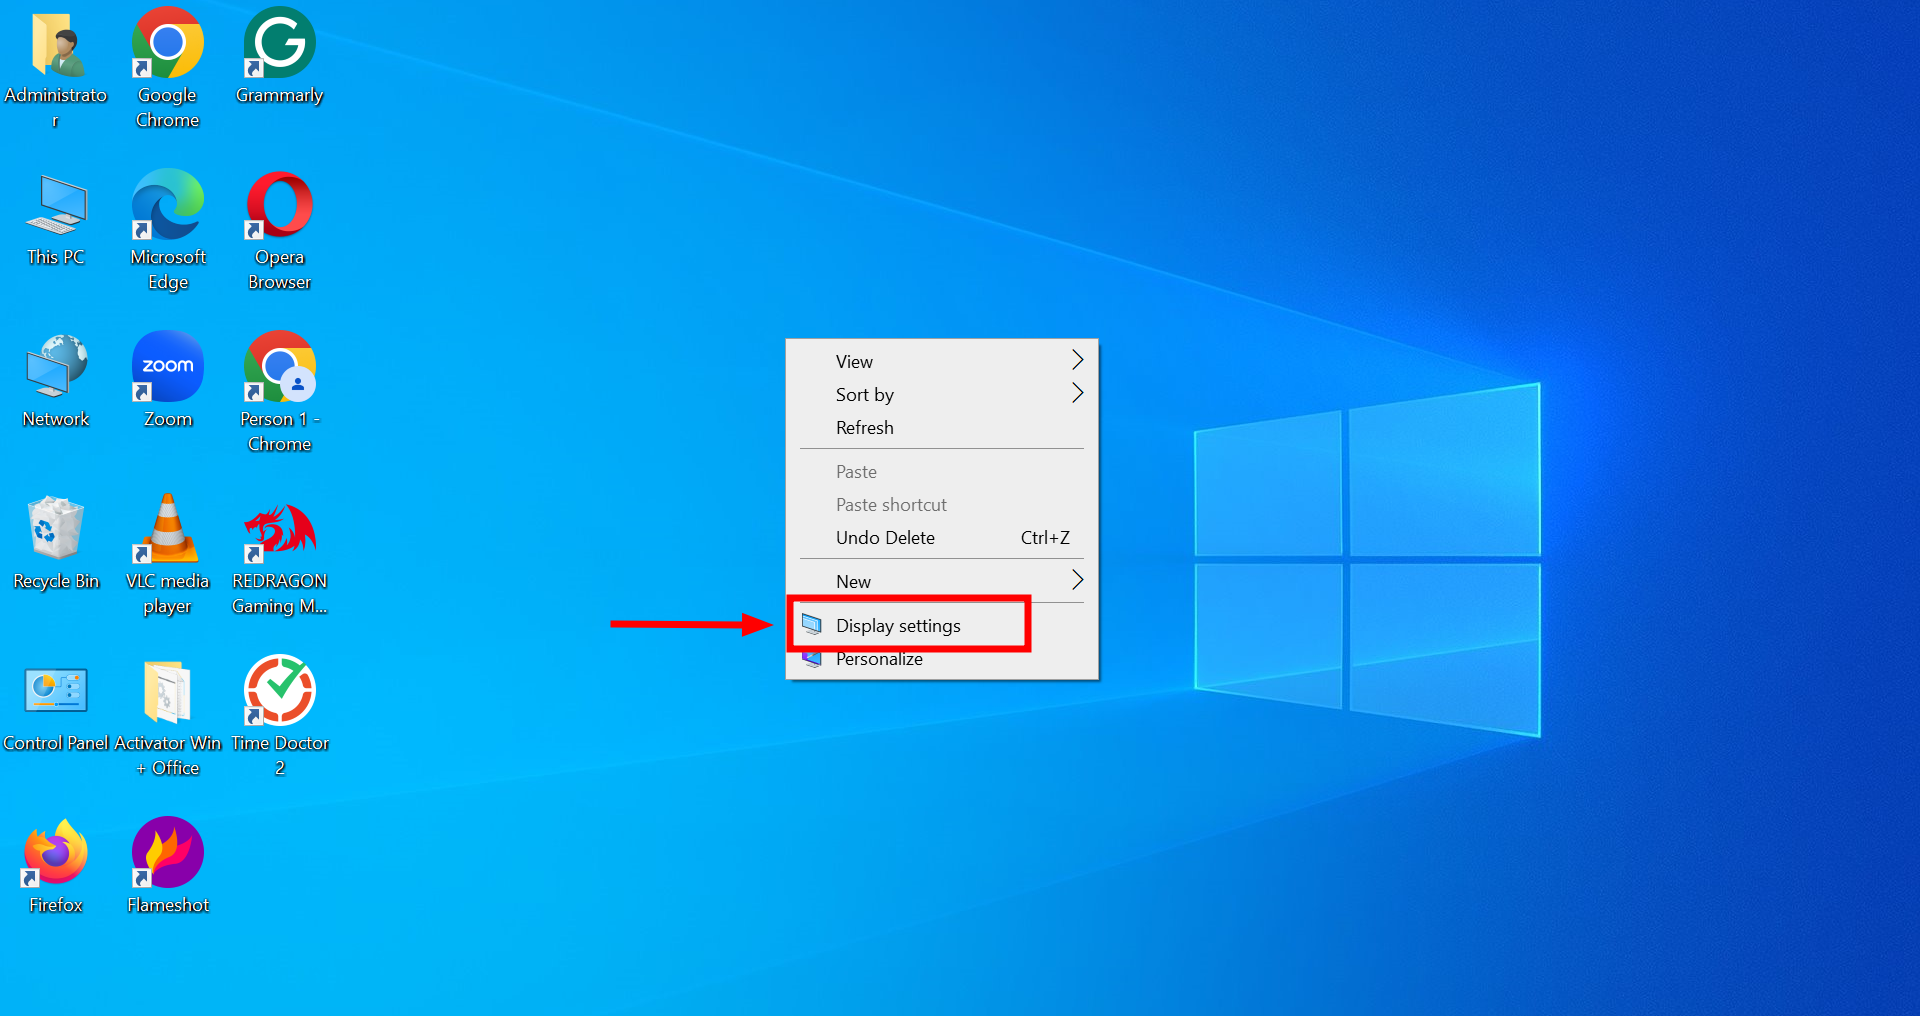
Open Display Settings - Scroll down to “Display resolution.”
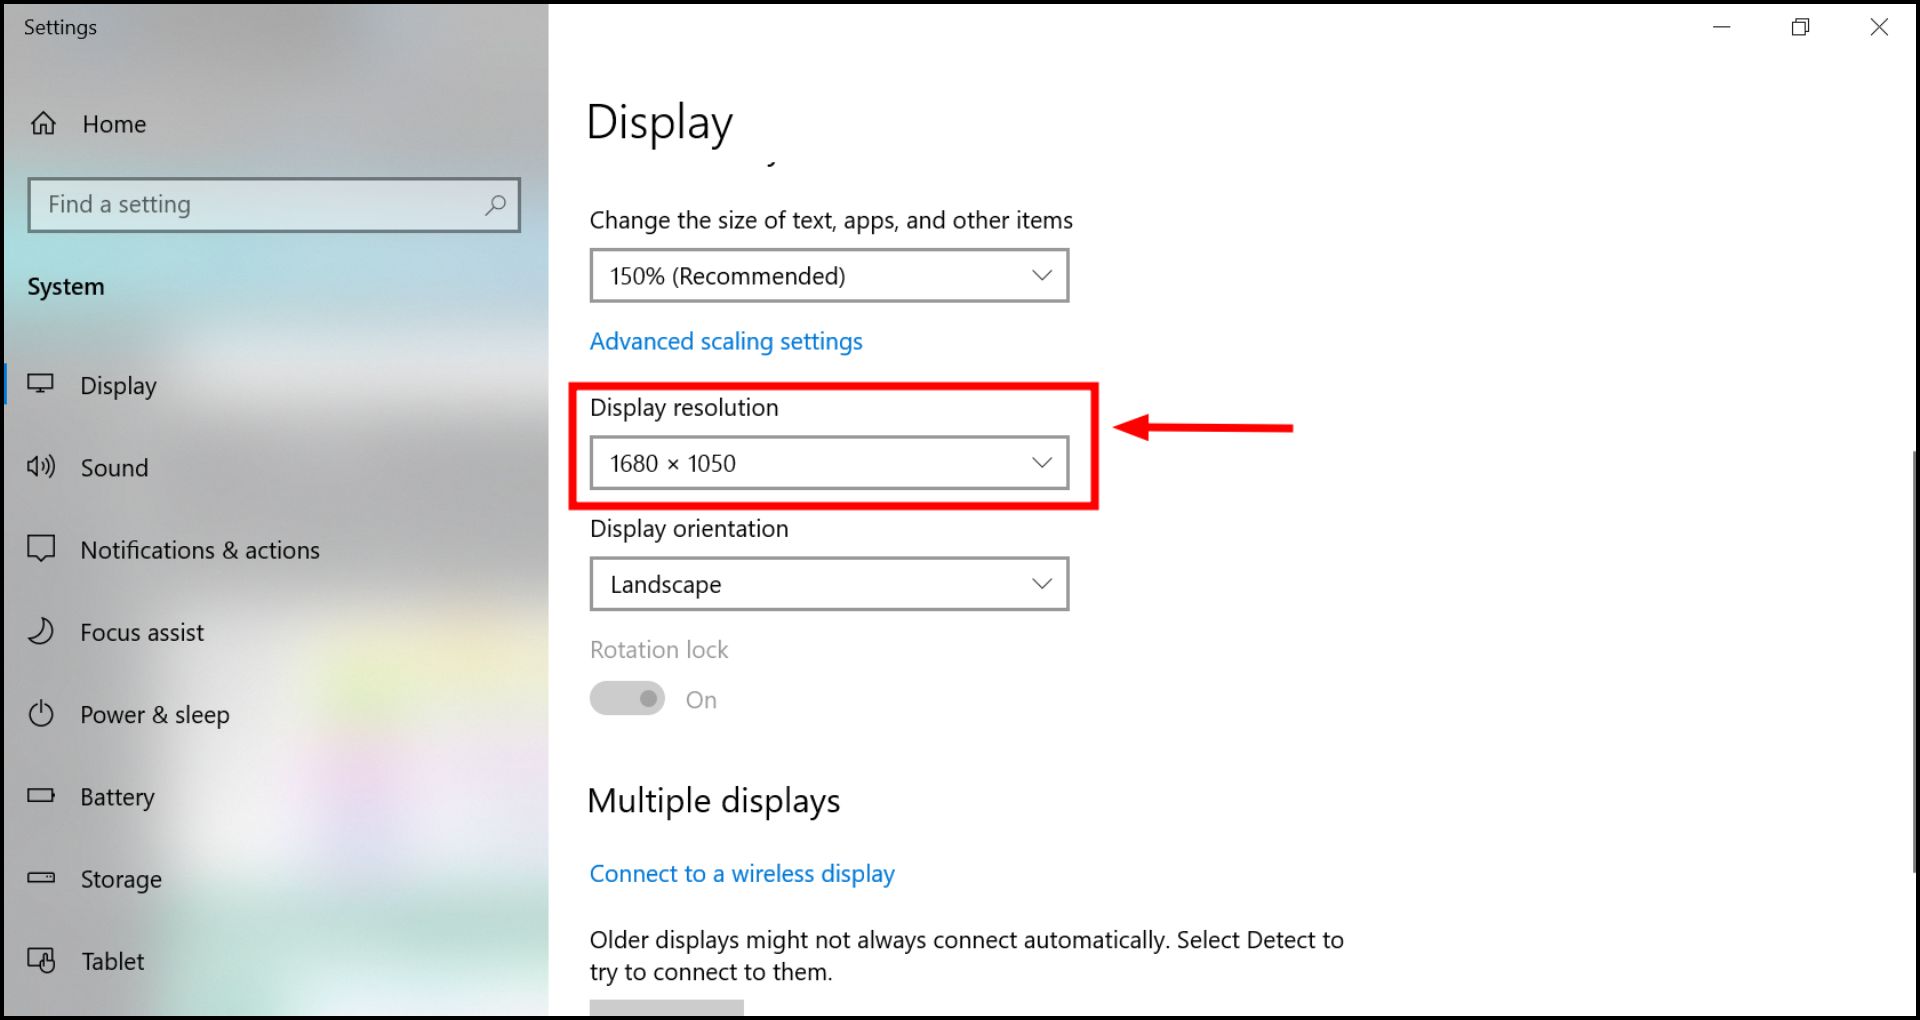
Go to Display resolution - Use the drop-down menu to select the recommended resolution (usually marked as “(1980 x 1080 recommended)”).
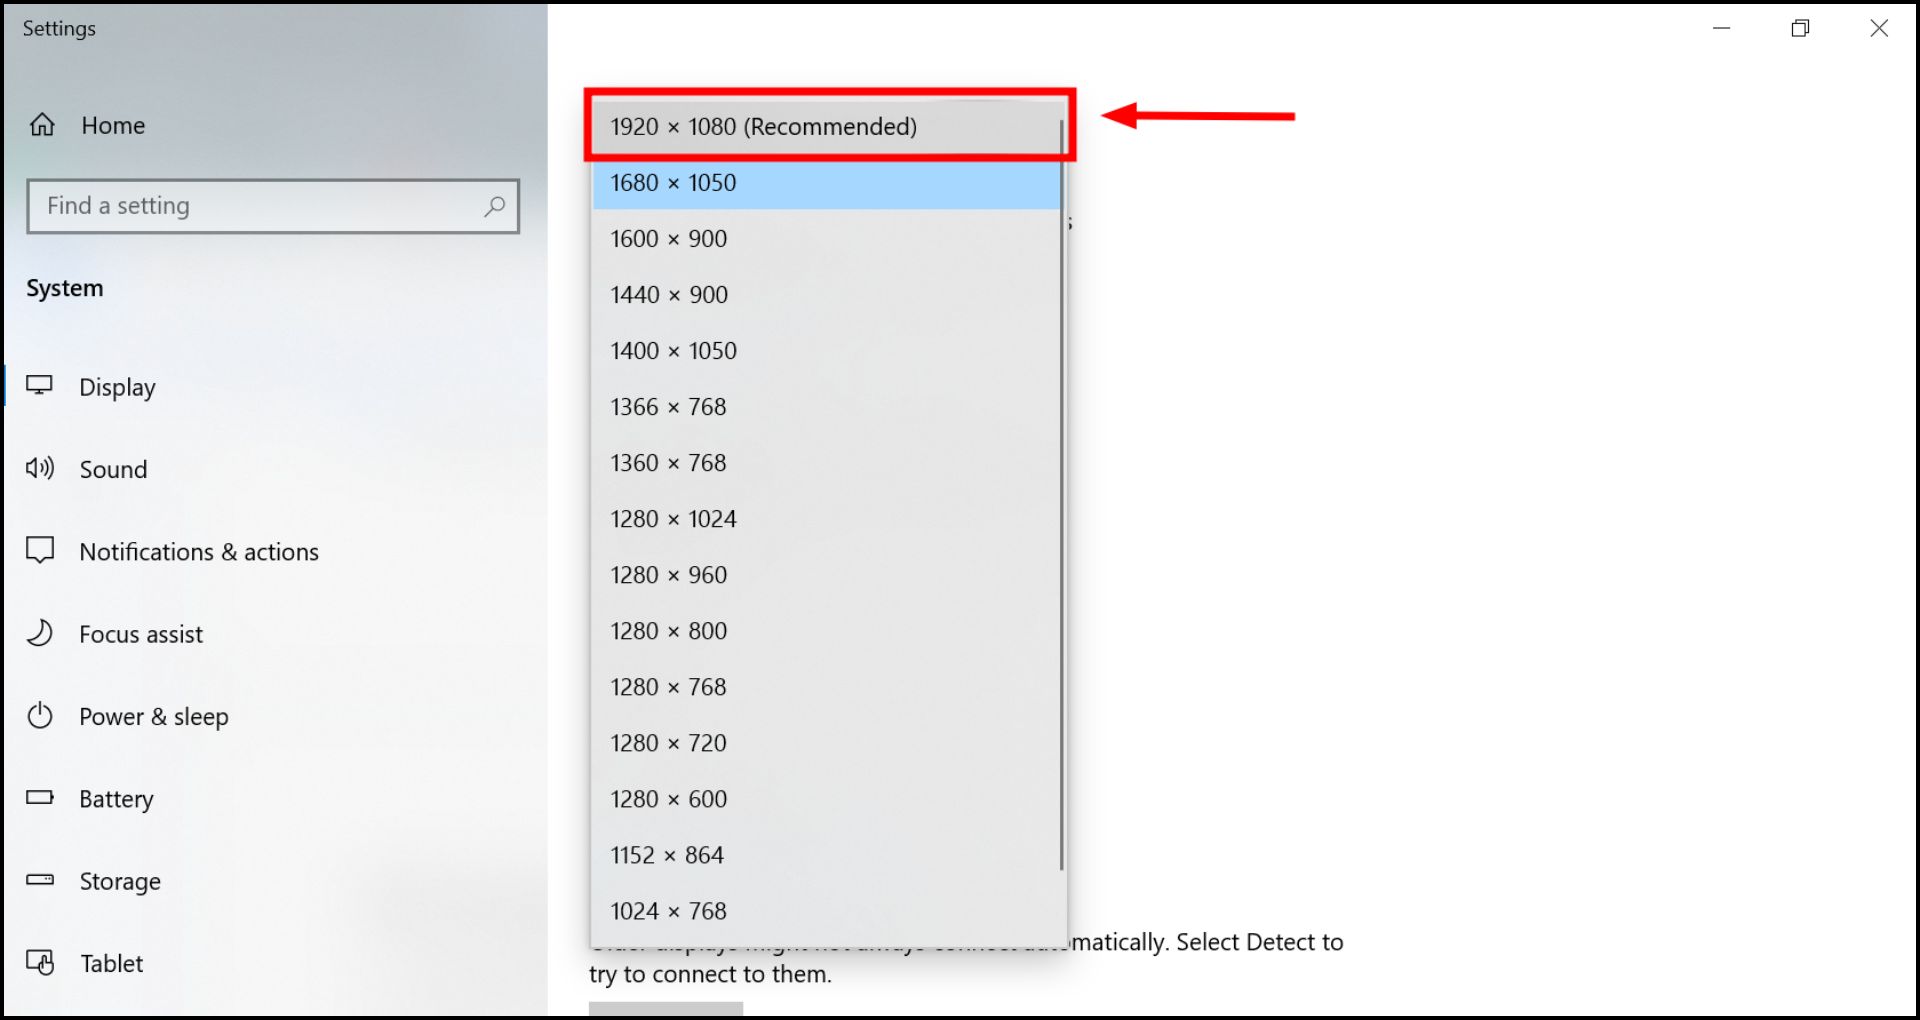
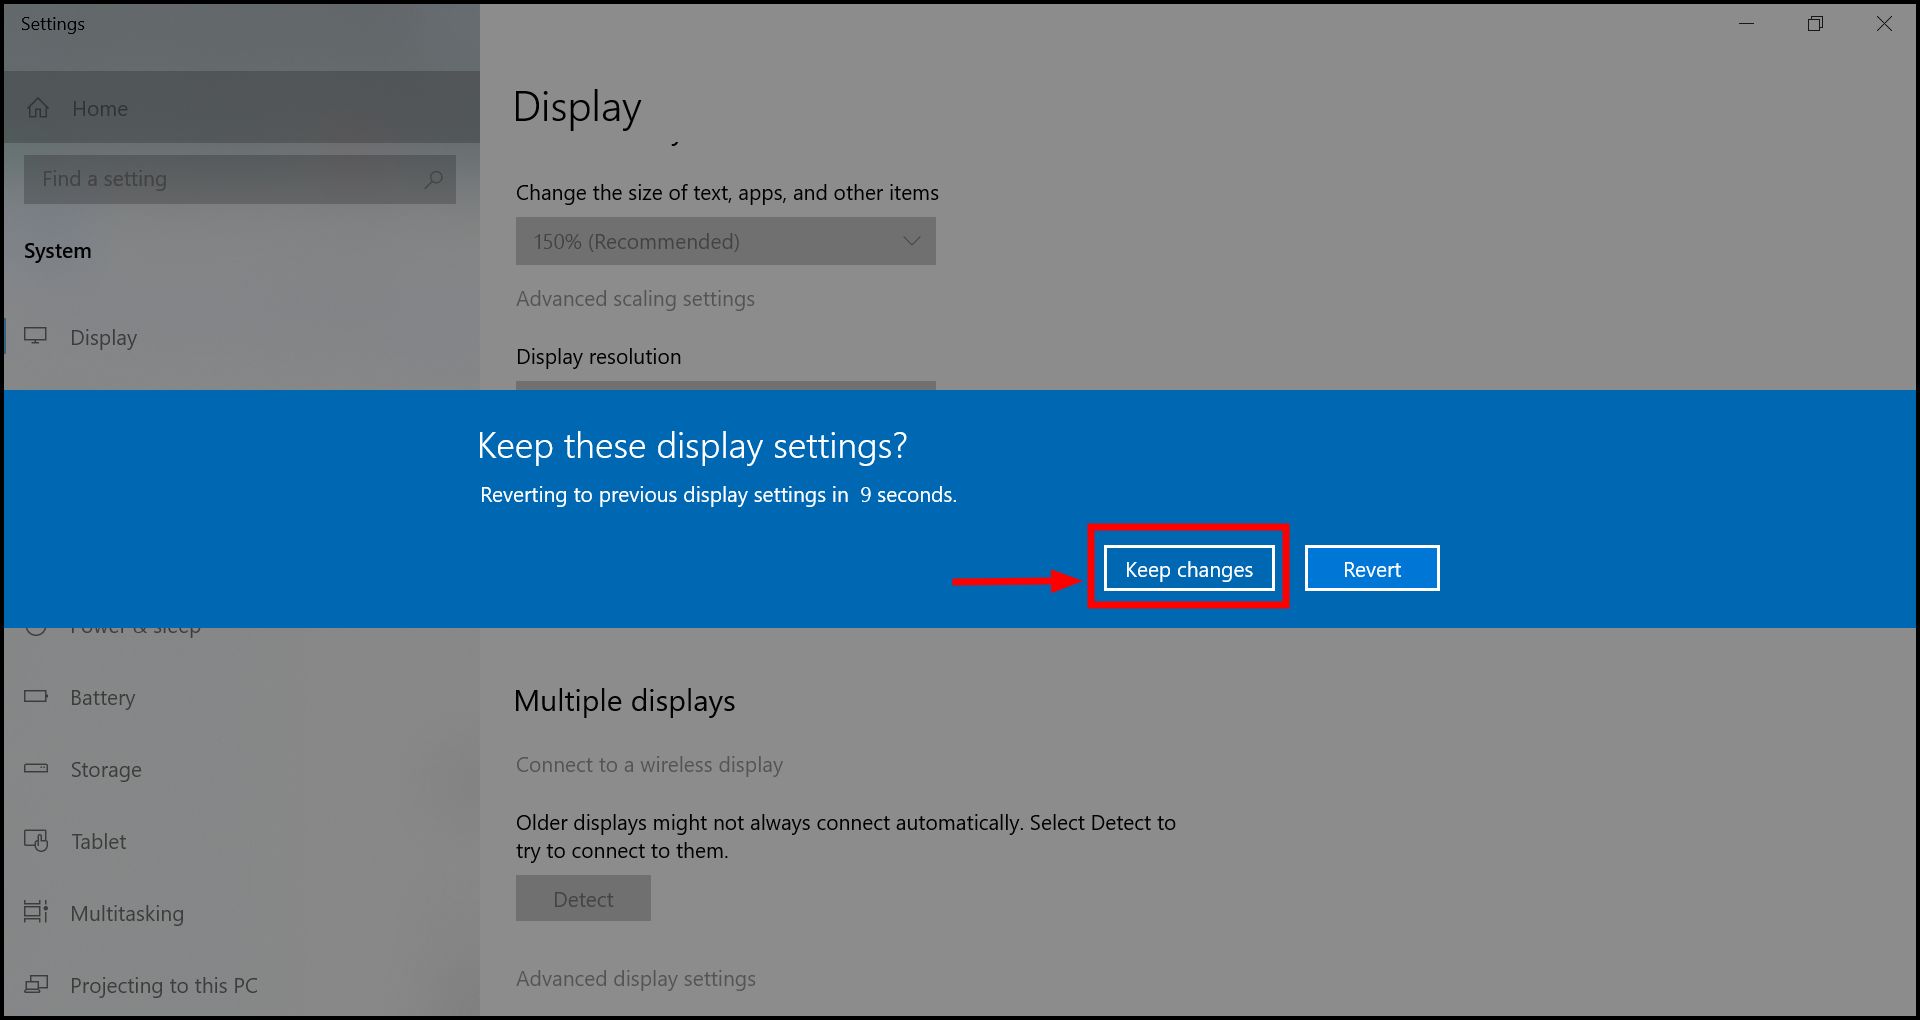
Pick the resolution you want - A prompt will appear, and you must select “Keep changes” within 11 seconds; otherwise, new changes will not be applied.
4. Run System Diagnostics and the HP Support Assistant Tool
HP laptops come equipped with HP Support Assistant, which includes troubleshooting and diagnostic tools to help identify and possibly fix issues. Here are the steps to use HP Support Assistant:
- Search for “HP Support Assistant” in your Windows search bar and open the application.

Open HP Support Assistant - A prompt will appear, “Do you want to allow this app to make changes to your device?” click “Yes” to allow the application.
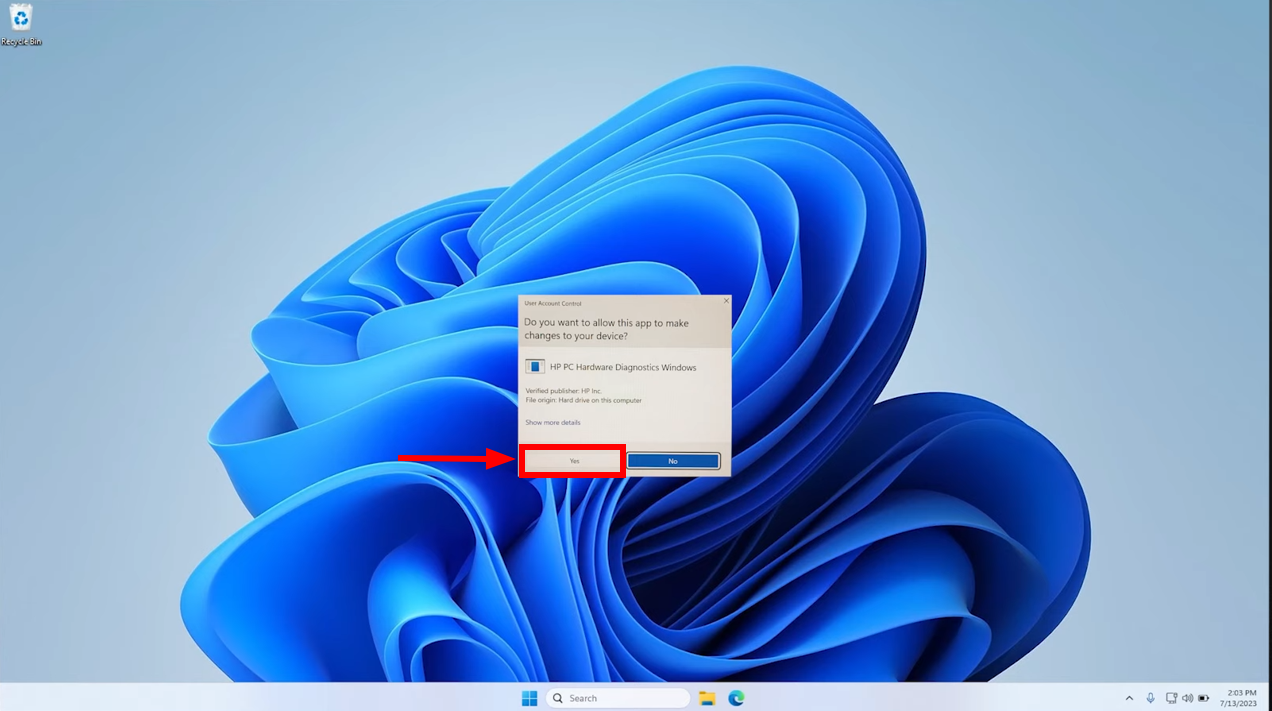
Click Yes - Navigate to the Troubleshooting and Fixes tab. Here, you can find various tools to diagnose issues.
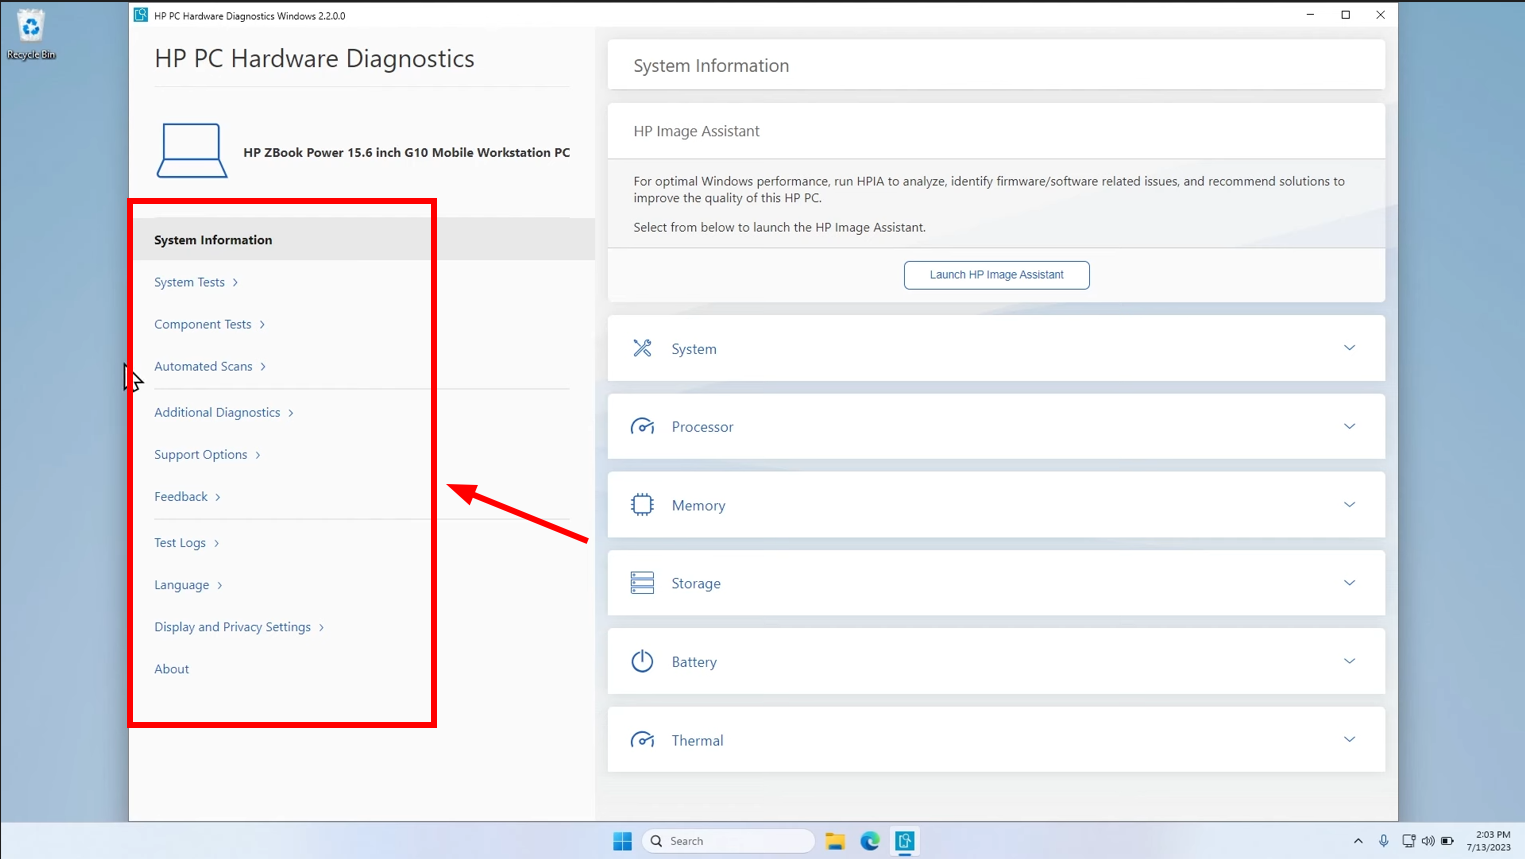
Go to Troubleshooting section - Choose the “System Tests” option and follow the prompts to check for hardware issues.
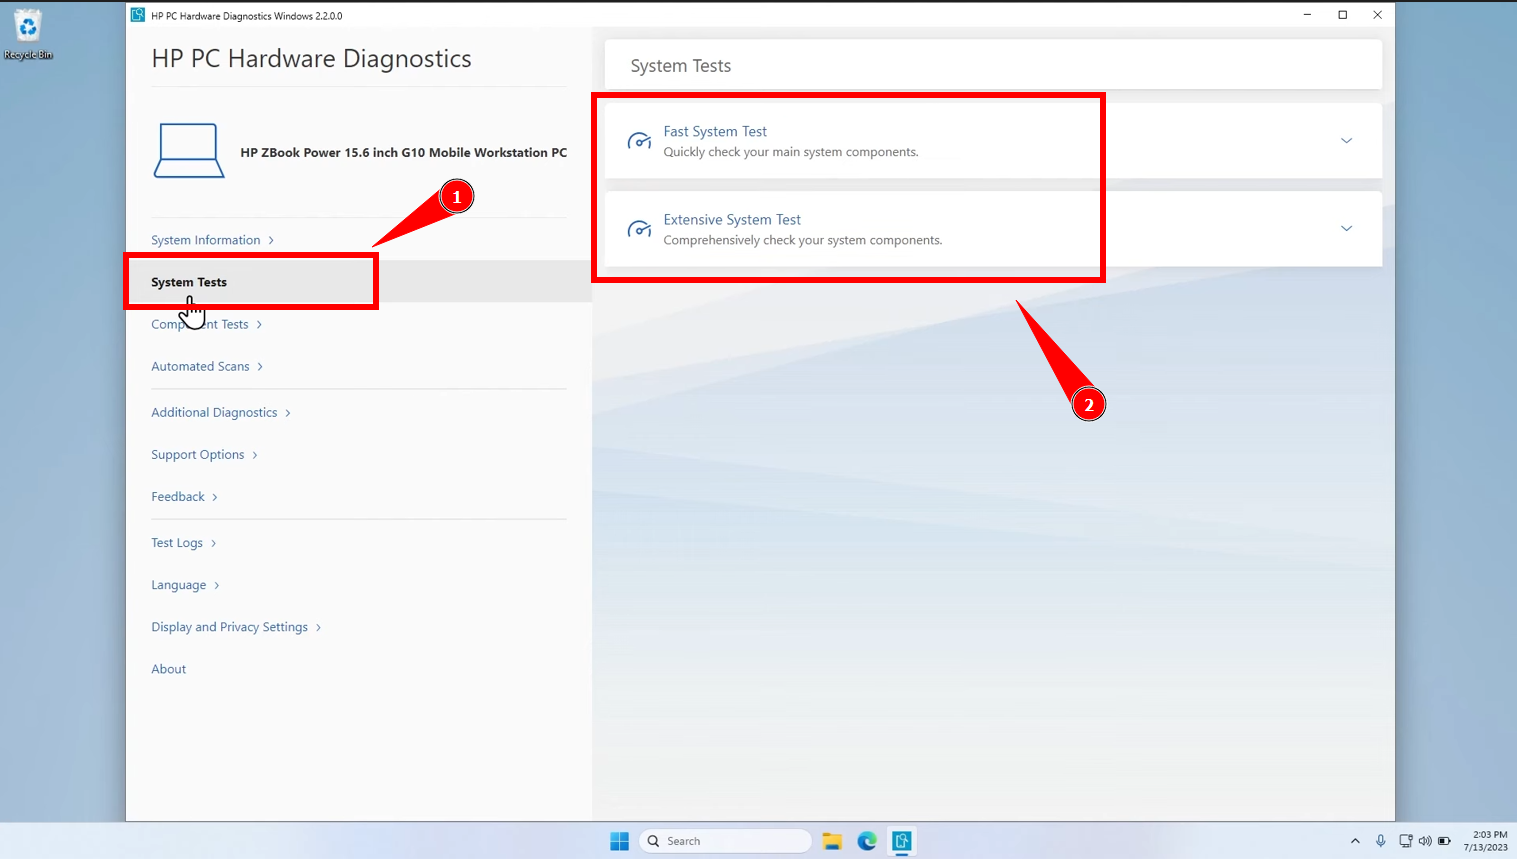
Click on System Tests - Select “Fast System Test” and click “Start Fast Test.”

Click Start Fast Test
Follow On-screen Instructions. The tool may offer fixes or recommendations based on the diagnostics results.
5. Reconnect and Replace Video Cable
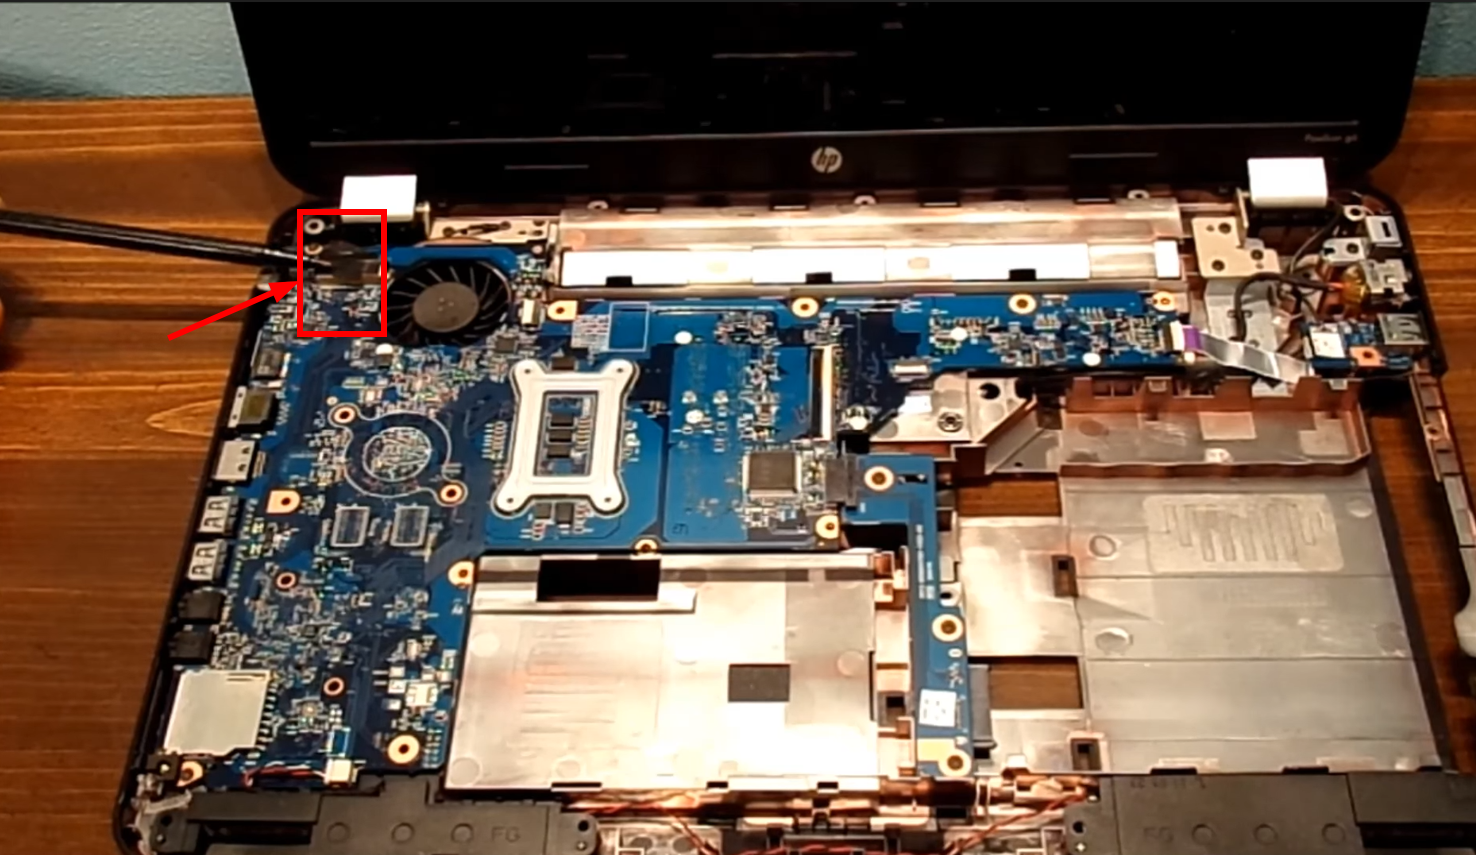
Loose or damaged video cables often cause horizontal lines on laptop screens. To address this, start by turning off your laptop and unplugging it from any power source. Depending on your HP laptop model, you may need to remove the back panel or access the battery compartment to reach the video cable connections—consult your laptop’s manual for detailed guidance.
Once you access the video cable, disconnect and securely reconnect it to ensure it’s properly seated. During this process, inspect the cable for any signs of wear, such as frayed edges or broken pins. If you find damage, it’s important to replace the cable with a compatible new one, which can be obtained from HP or third-party vendors.
6. Performing a Clean Boot
A clean boot can help you determine if background programs are causing the horizontal lines on your laptop screen. By starting Windows with a minimal set of drivers and startup programs, you can identify if the issue stems from software conflicts.
- Press the Windows key + R to open the Run dialog box. Type “msconfig” and press Enter. This action opens the System Configuration utility.
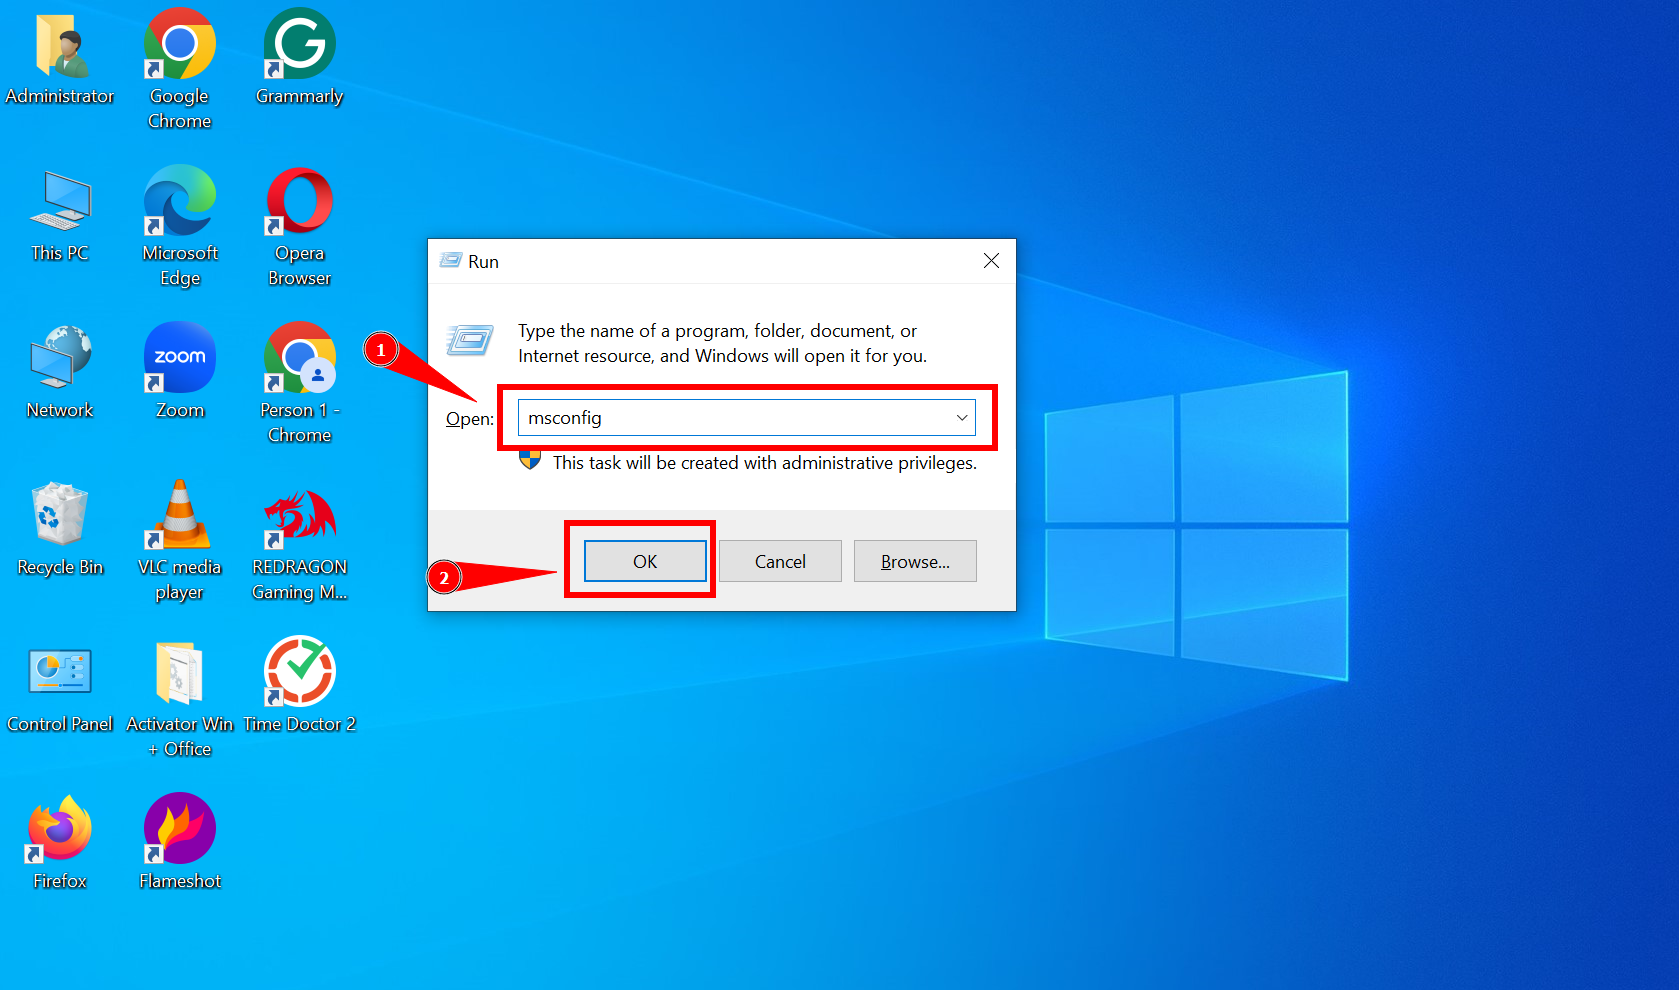
Tyep msconfig and press Enter - Navigate to the “General” tab and select “Selective startup.”
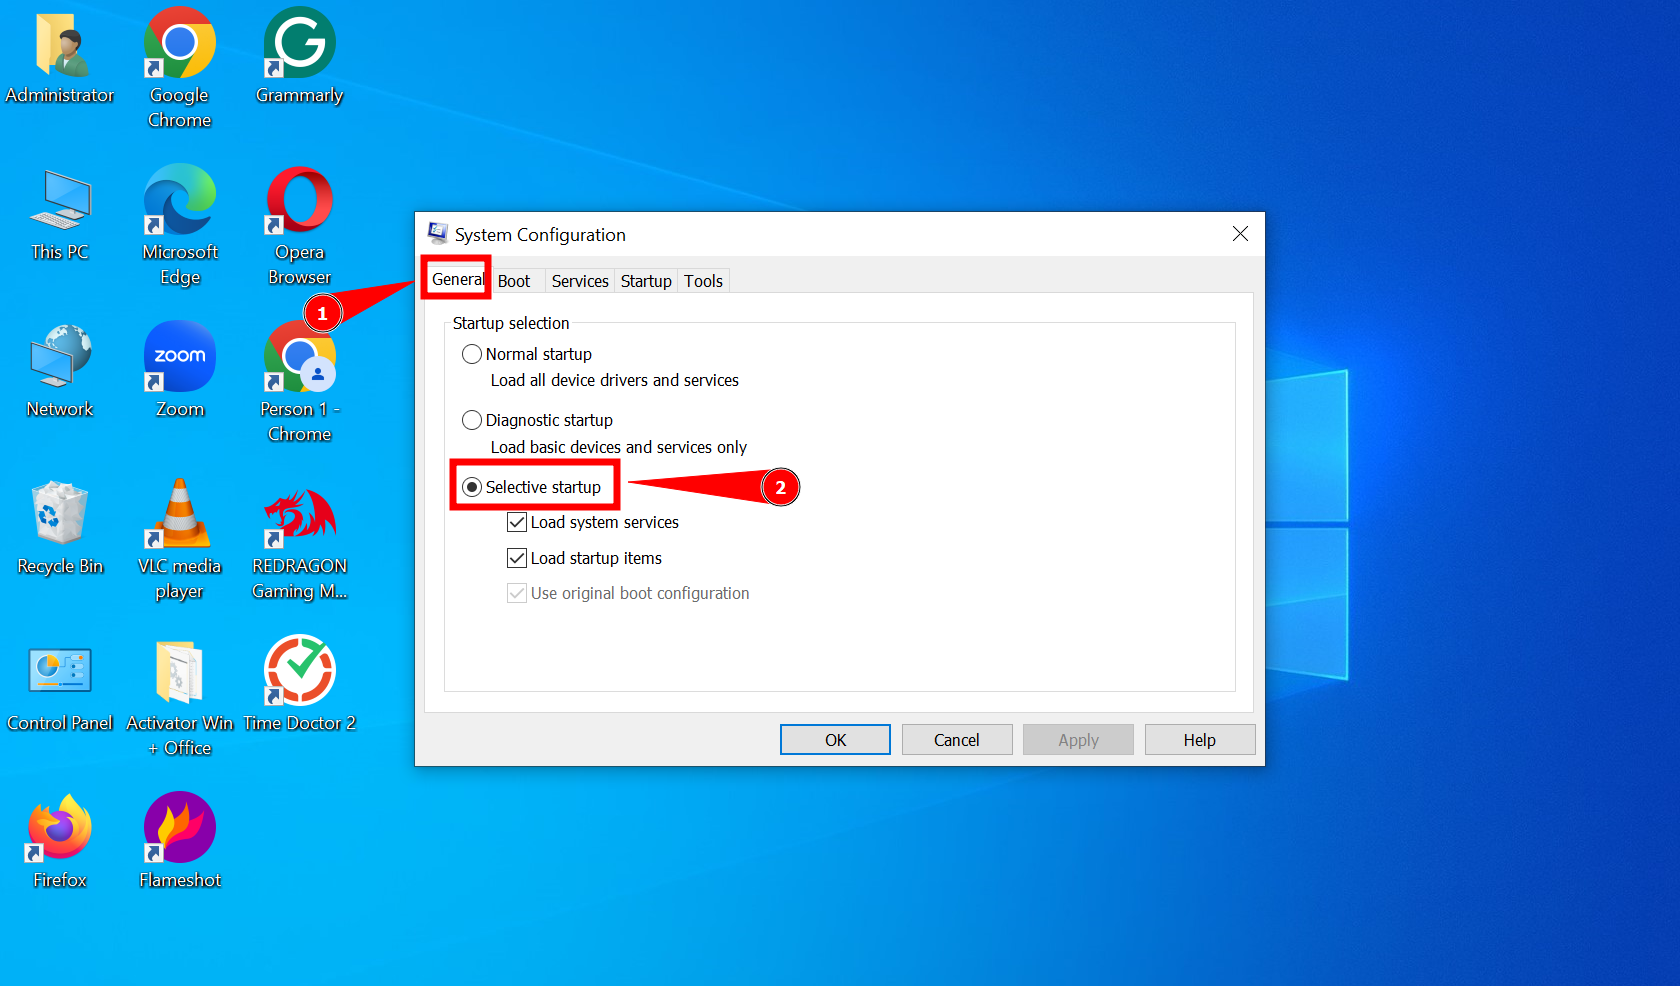
Click on Selective startup - Also, uncheck “Load startup items.”
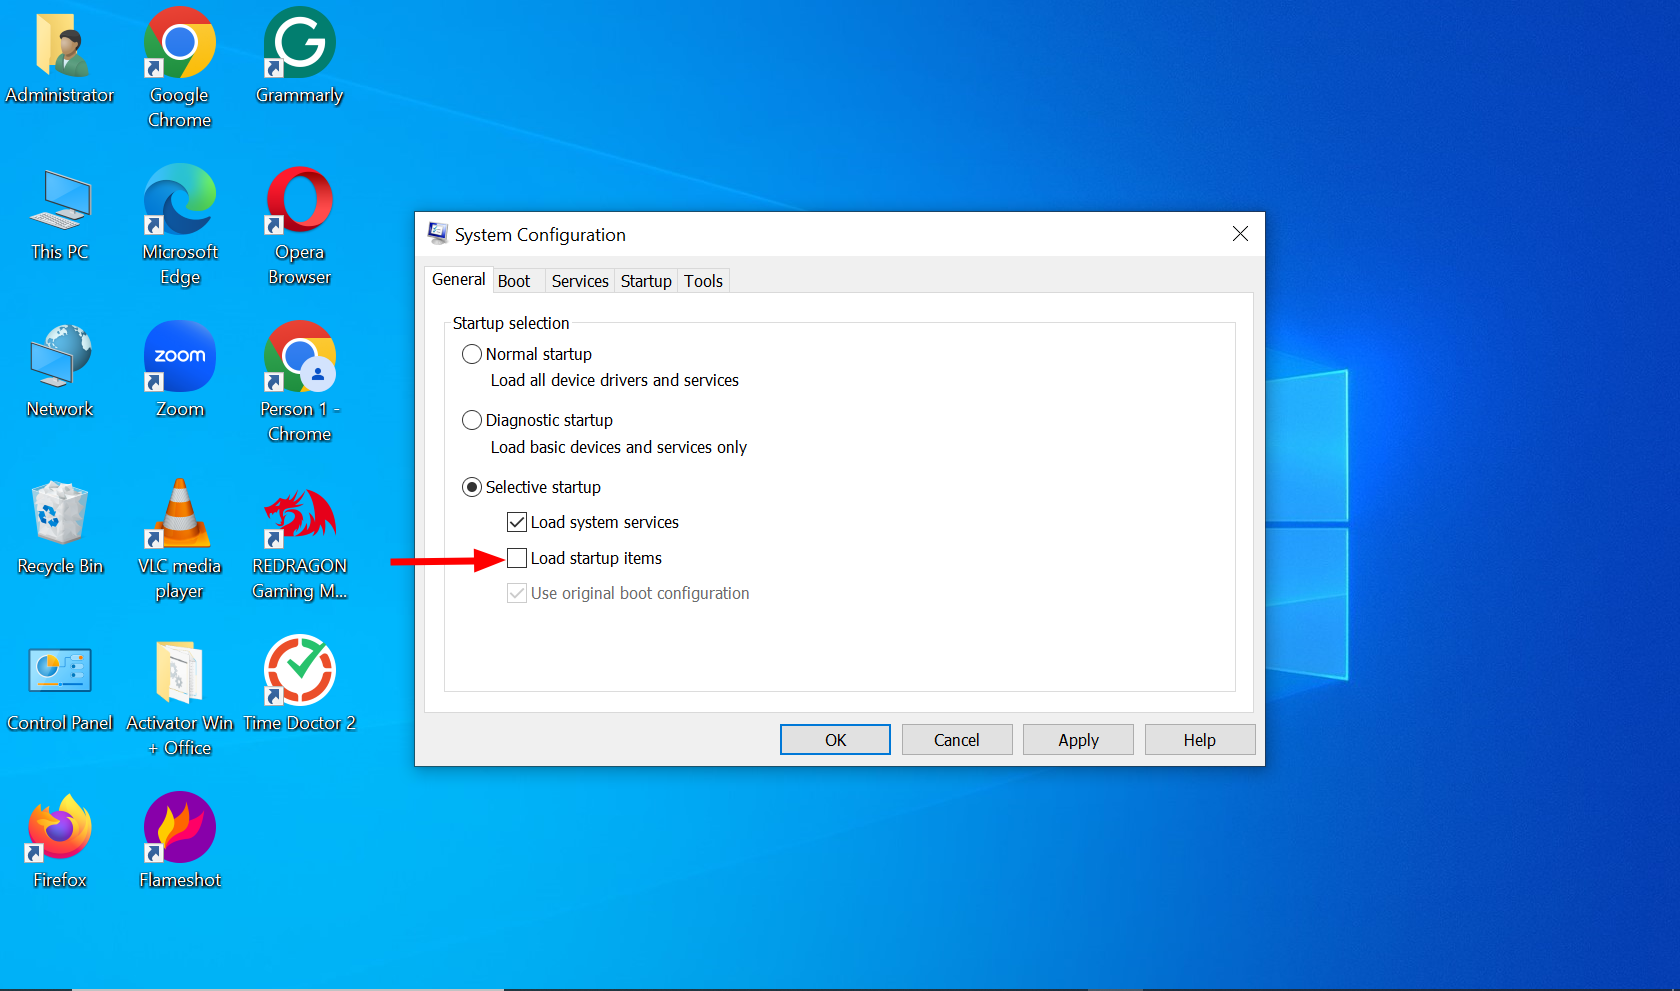
Uncheck Load startup items - Now switch to the “Services” tab and check the box at the bottom to “Hide all Microsoft services.”
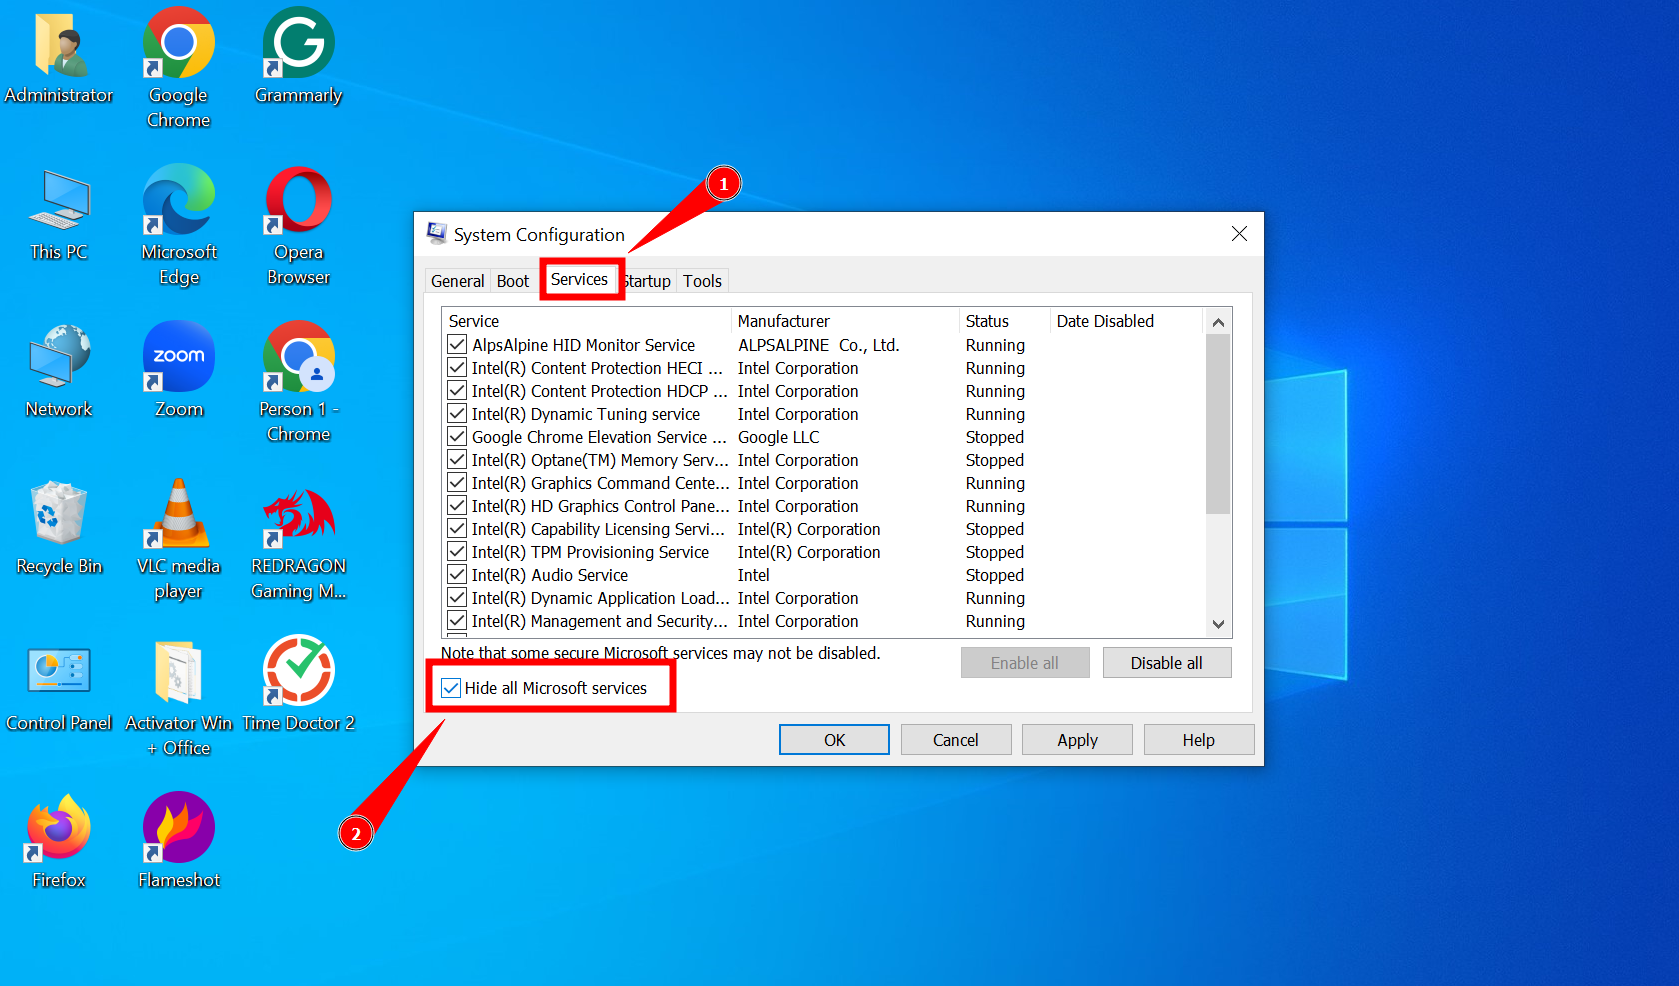
Check Hide all Microsoft services - Click “Disable all” to turn off the remaining services. This ensures that no third-party services will interfere during the boot.
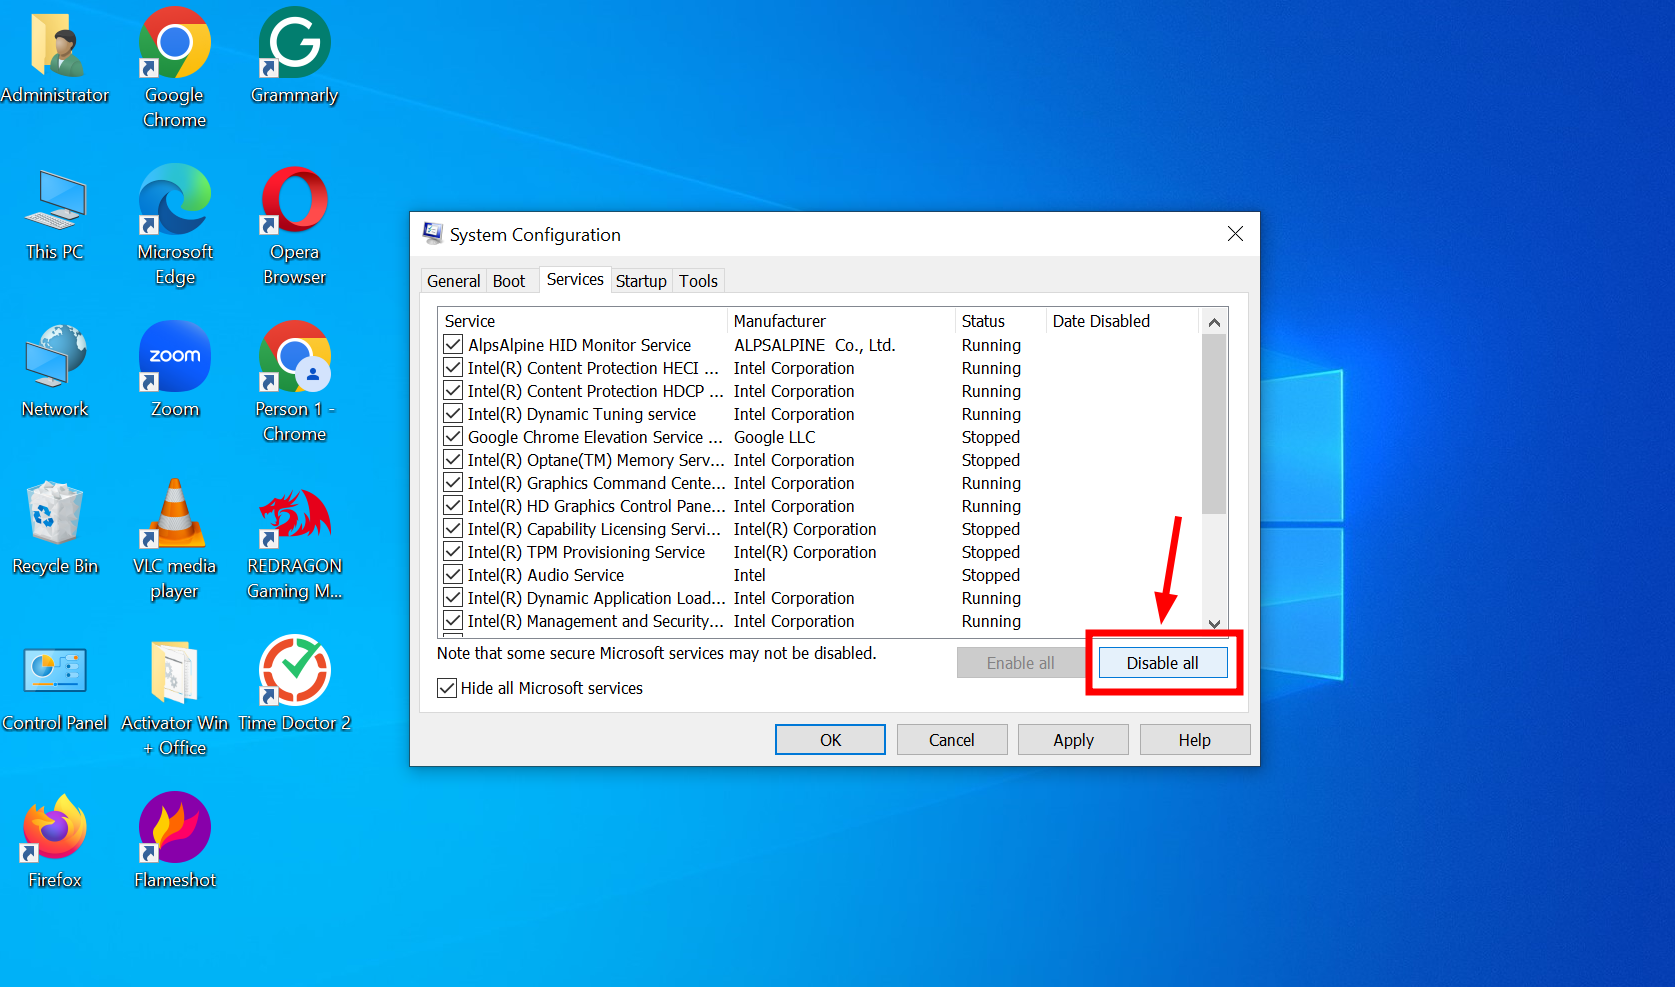
Click on Disable all
↪ Manage Startup programs
Next, you need to manage and disable startup programs to complete the Clean Boot process. Here’s how to do it:
- Type “Task Manager” in the Start search and open the Task Manager.
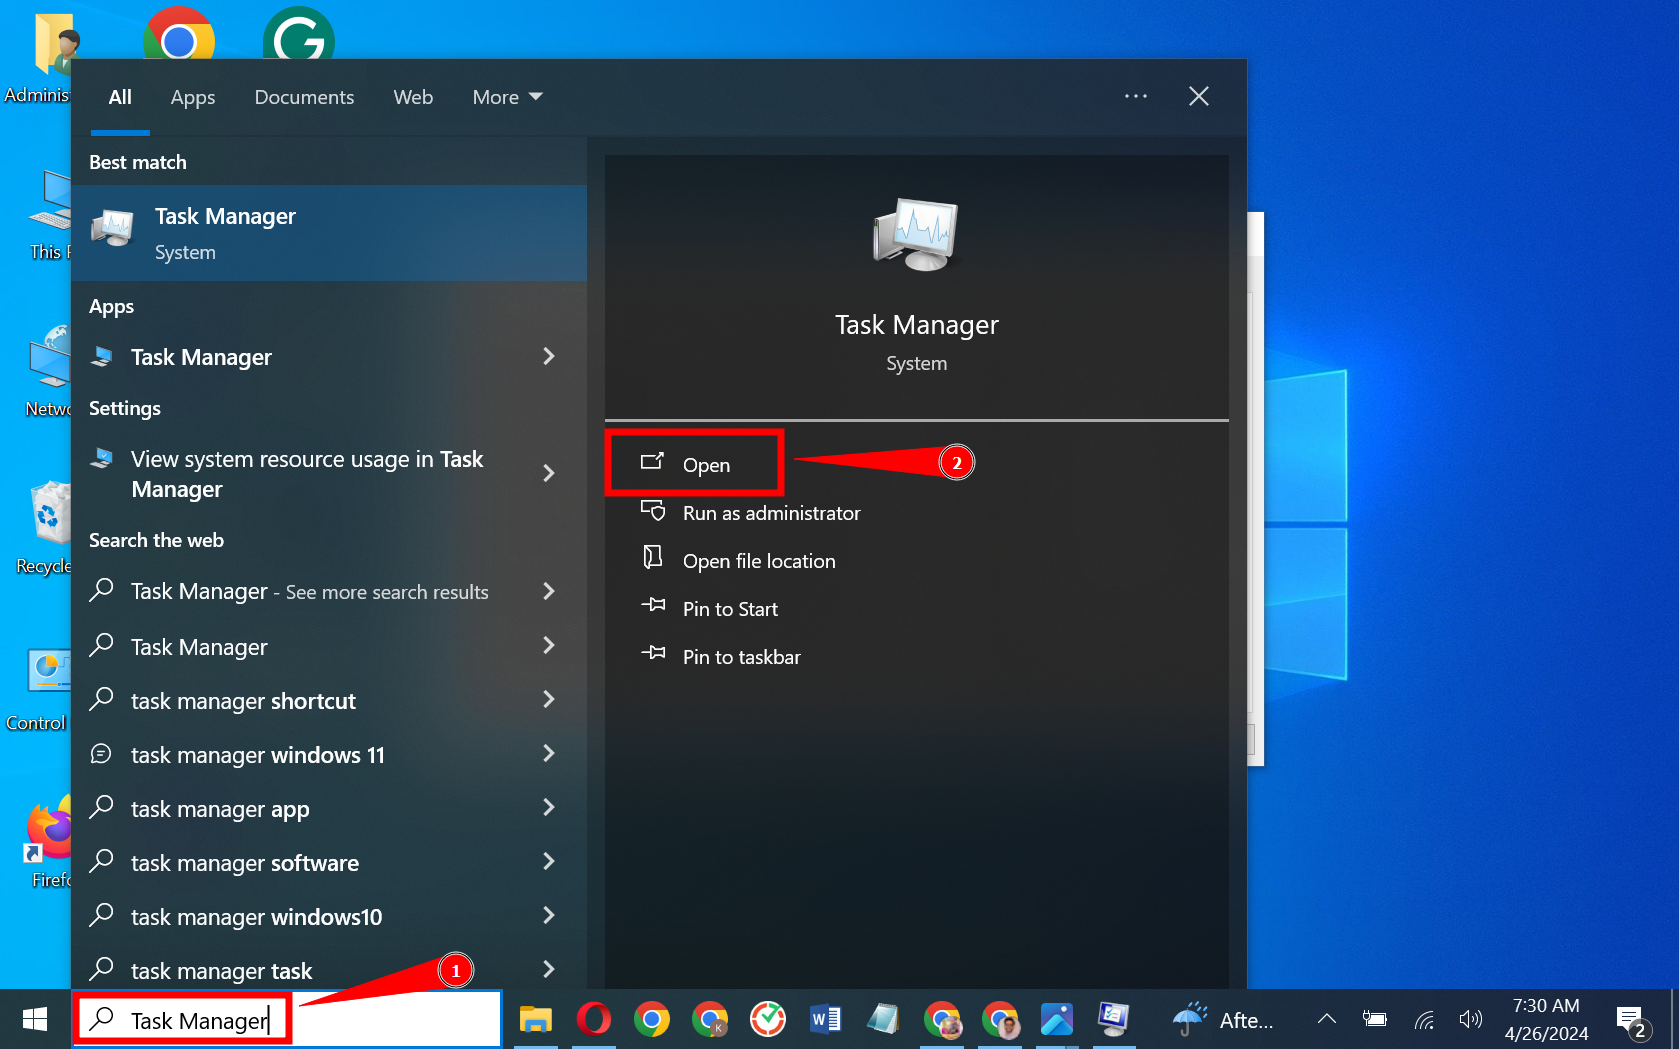
Open Task Manager - Go to the “Startup” tab in the Task Manager, right-click on each item listed, and select ” Disable.” This will prevent these programs from launching at startup.
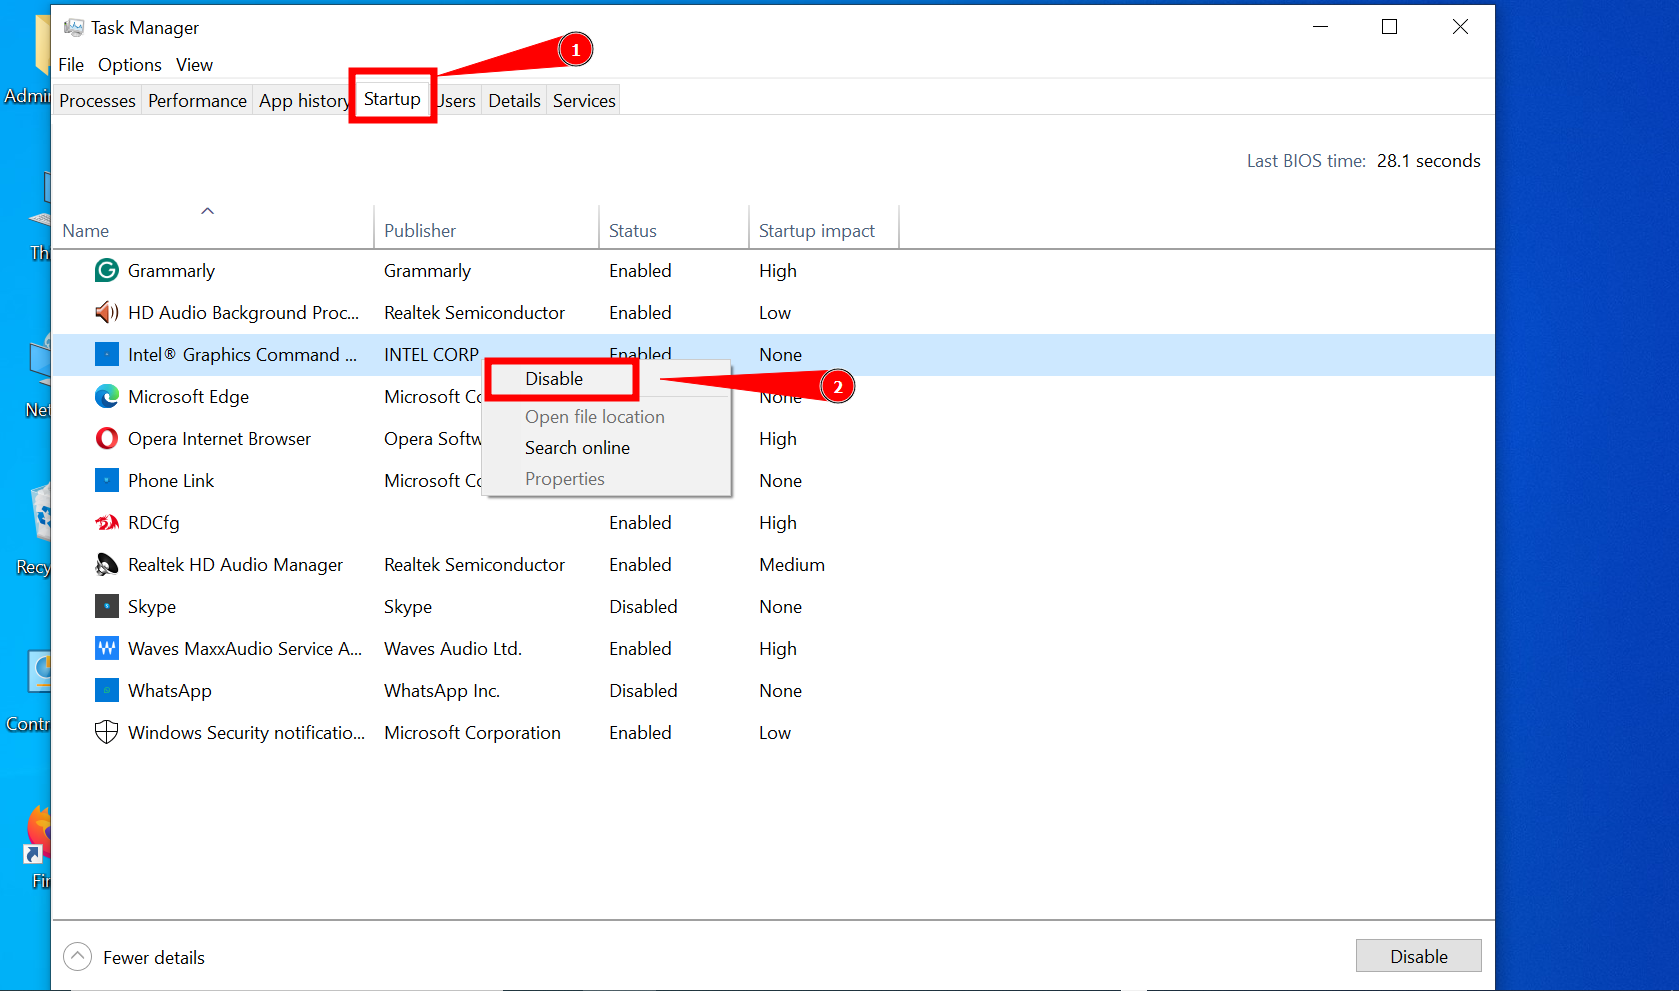
Click on Disable - Close the Task Manager. Click “OK” in the System Configuration window to apply the changes.
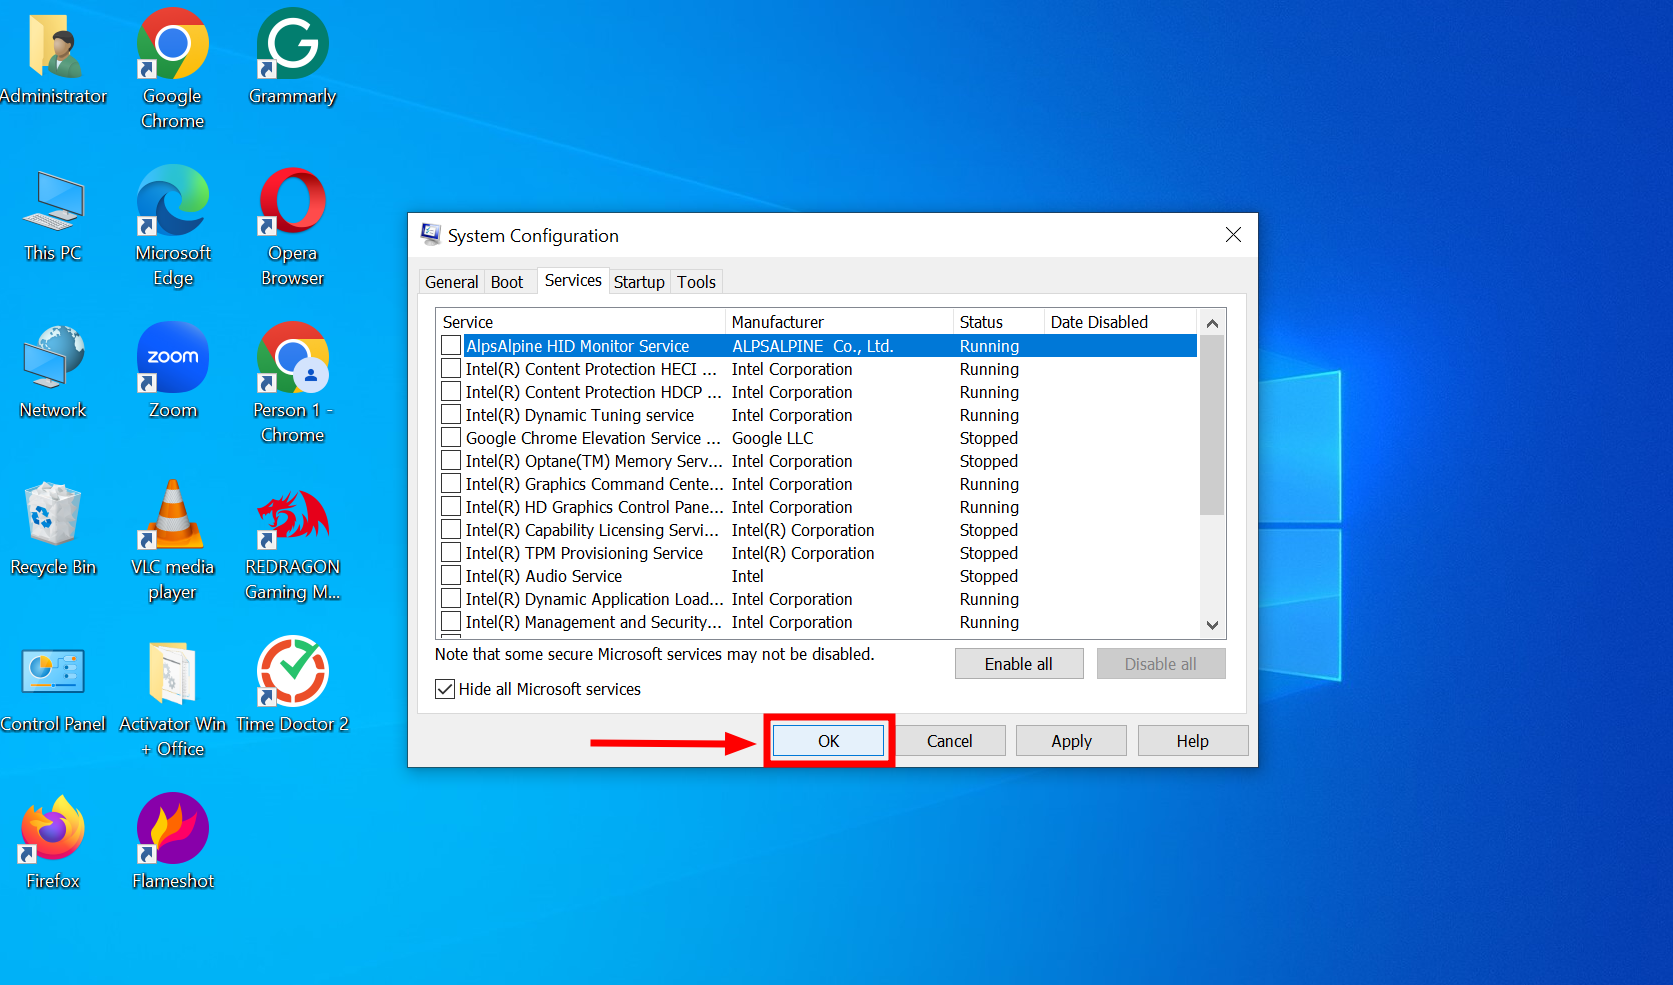
Click OK
Restart your computer to initiate the clean boot.
7. Seek professional help

If the troubleshooting steps haven’t resolved the horizontal lines on your HP laptop, it’s advisable to seek professional help. This is especially important if the issue appears in the BIOS screen, indicating a possible hardware problem, or if your laptop has experienced physical damage.
For support, you can access the HP Support website to connect with a technician, use the HP Support Assistant on your device, or locate an authorized HP service center through the website for expert care.
Reviewed by Huzaifa Haroon


