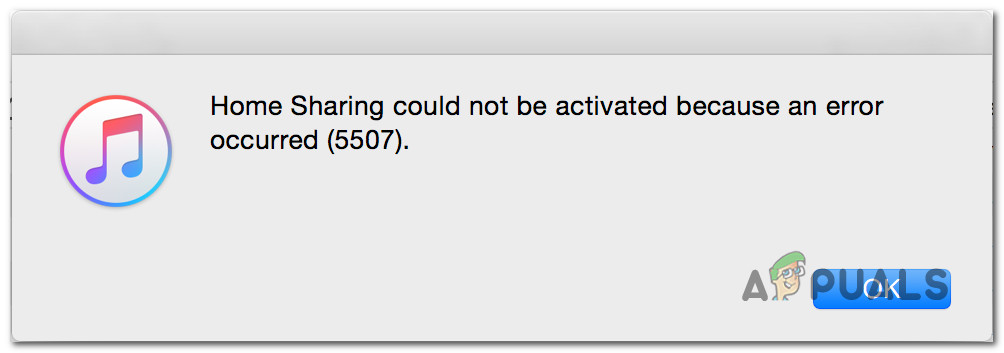
[FIX] Home Sharing Could Not Be Activated (Error 5507)
Some Windows users are unable to activate Home Sharing via iTunes on their Windows computers. Every attempt ends with the error “Home Sharing could not be activated because an error occurred (5507)”. This problem is confirmed to occur on Windows 7, Windows 8.1, and Windows 10.
After investigating this particular issue thoroughly, it turns out that there are several different potential culprits that might be responsible for the apparition of this error code. Here’s a short list of scenarios that might be responsible for the apparition of this issue:
- Access code is not added to password field – One of the most common instances that will spawn this error is a case in which the user has not added the access code at the end of the password when trying to enable home-sharing.
- Outdated iTunes version – Another scenario that might cause this issue is an instance in which you are using a severely outdated iTunes version that is not fully compatible with the security protocol currently used by the home-sharing functionality. In this case, you can get the issue fixed by forcing the auto-update function to complete the installation of the new update or completing the installation of the latest iTunes version manually.
- Outgoing Connections are blocked by Firewall – As it turns out, this issue can also be caused by an overprotective firewall that ends up blocking connections using the home-sharing protocol. In this case, you can fix the issue either by whitelisting iTunes in your firewall settings or by uninstalling the overprotective suite.
Now that you know every potential culprit, there’s a list of methods that other affected users have successfully used to get to the bottom of this issue:
Method 1: Adding the access code to the Password Field
As it turns out, the first thing you should do in case you’re encountering this issue while trying to activate home-sharing is to add the access code at the end of the password field. I know this is very counter-intuitive, but this particular fix is confirmed to work by a lot of affected users that were previously encountering the “Home Sharing could not be activated because an error occurred (5507)” error.
Until Apple finally decides to take the steps clearer for users in this particular situation, follow the instructions below to circumvent the 5507 home sharing error:
- Inside iTunes, type your Apple ID and password, then hit the Turn on Home Sharing button.
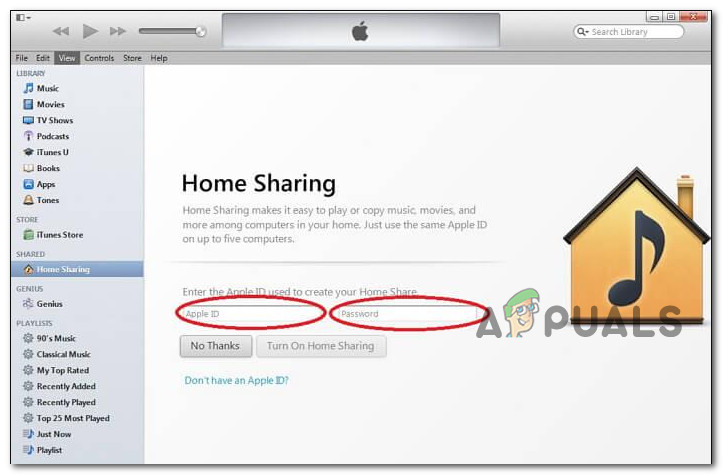
Enabling Home Sharing - Once the error message appears, don’t close iTunes. Instead, wait for the 6 digit access code to pop up on your primary Apple device (iPhone or iPad).
- Next, repeat step one to insert the Apple ID and password, but when you’re typing the password field, make sure to add the 5 digit access code that you received at the end of your regular password and hit Done.
- If all goes well, you should see a success message telling you that Home Sharing is now on.
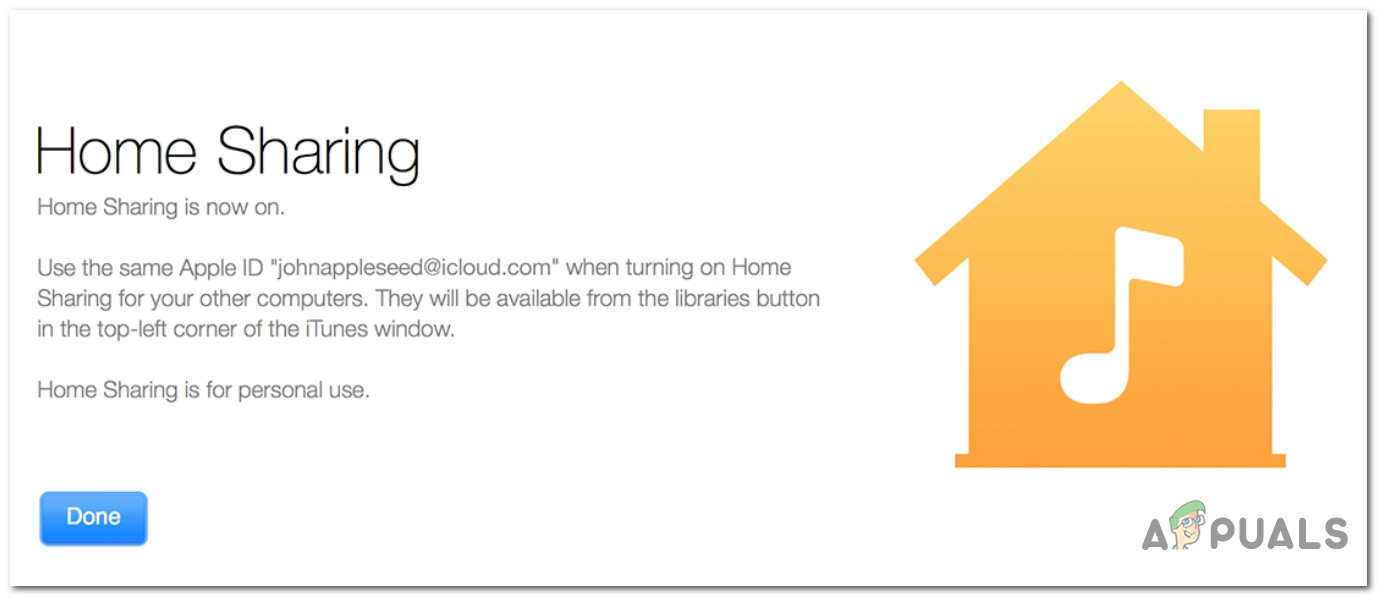
Home Sharing is ON
In case this method didn’t work in your case, move down to the next potential fix below.
Method 2: Update iTunes to the latest version Available
As it turns out, you might see this issue popping up due to a Windows glitch that Apple has pathed via an iTunes application update several iterations ago. If you are actively preventing the application from auto-updating itself or the auto-update component is broken, you need to force it to update to the latest build available.
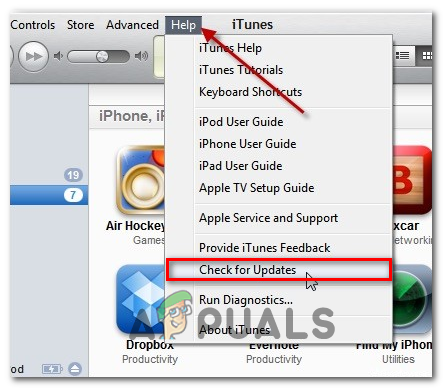
Conventionally, you can do this by accessing the Help menu of iTunes from the ribbon at the top and clicking on Check for Updates.
If a new update is available, follow the on-screen prompts to complete the installation of the new iTunes update.
However, if the update component is broken due to some kind of corruption, the only viable fix that will allow you to install the latest iTunes version is to manually uninstall the current version before installing the latest build.
But keep in mind that the instructions for doing so will be different depending on if you’re using the desktop or the UWP version of iTunes. Because of this, we’ve created 2 separate sub-guide to accommodate both potential scenarios:
A. Reinstalling the UWP version of iTunes
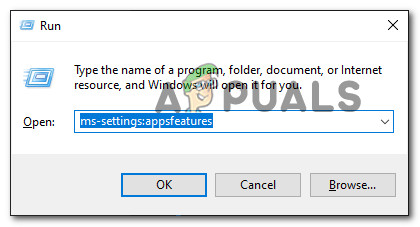
- Open up a Run dialog box by pressing Windows key + R. Inside the newly appeared text bpx, type ‘ms-settings:appsfeatures‘ and press Enter to open up the Apps & Features tab of the Settings app.
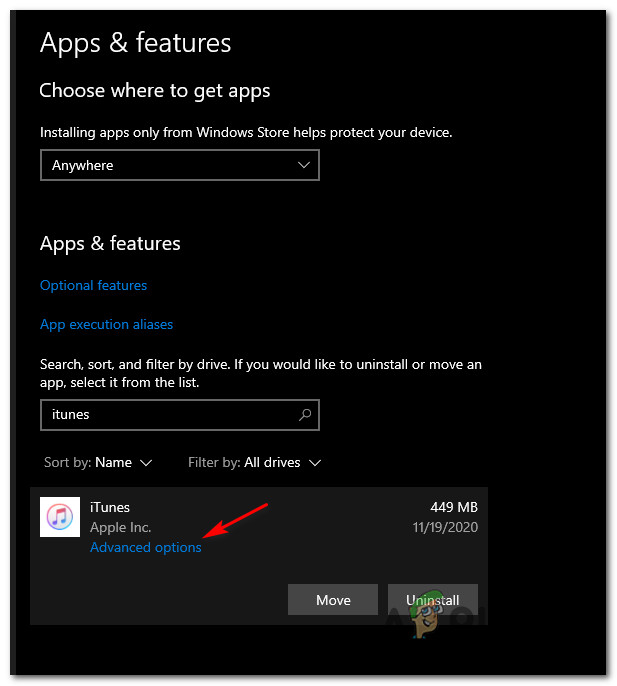
Accessing the Apps & Features menu - Inside the Apps & Features menu, use the search functionality (top-right corner) to search for iTunes. Next, from the list of results, click on iTunes, then click on Advanced Options hyperlink.
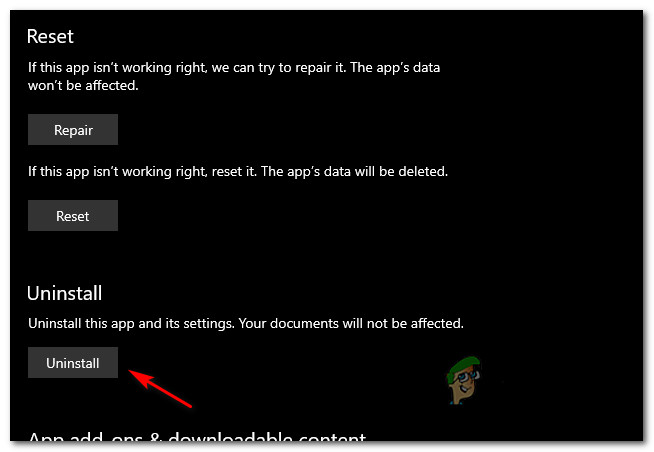
Accessing the Advanced Options - Inside the Advanced Options menu of iTunes, scroll all the way down to the Reset tab, then click on the Uninstall button.
Uninstalling the iTunes UWP app - When you get to the confirmation prompt, click on the Uninstall button once again, then wait for the process to complete.
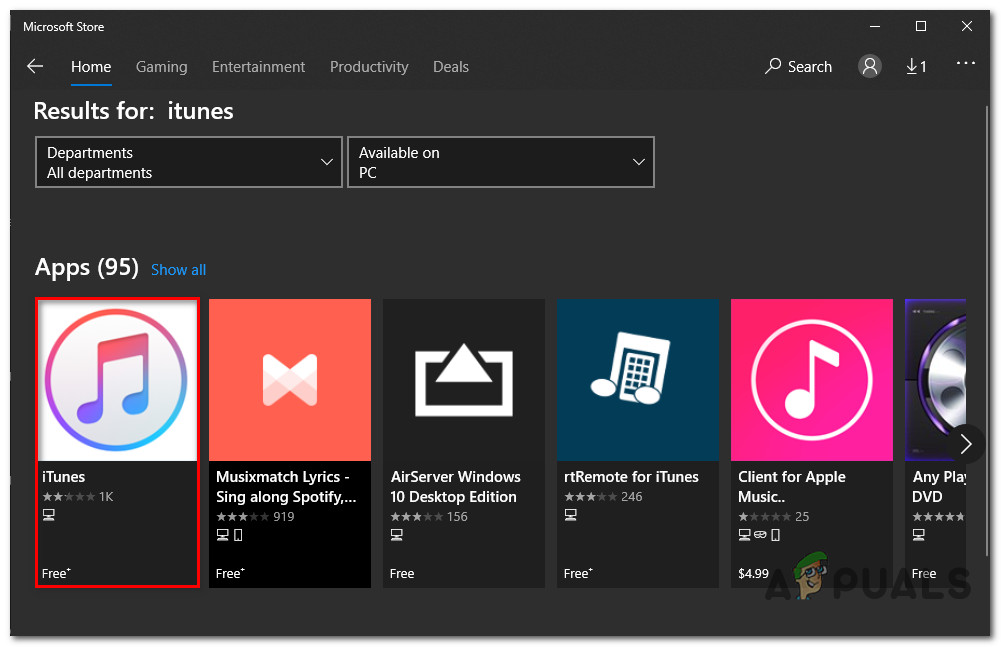
- Next, open Microsoft Store and use the search function to download & install the latest version of iTunes UWP.
Accessing the iTunes tab - Once the latest version is installed, launch iTunes UWP normally and see if the problem is now fixed.
B. Reinstalling the Desktop version of iTunes
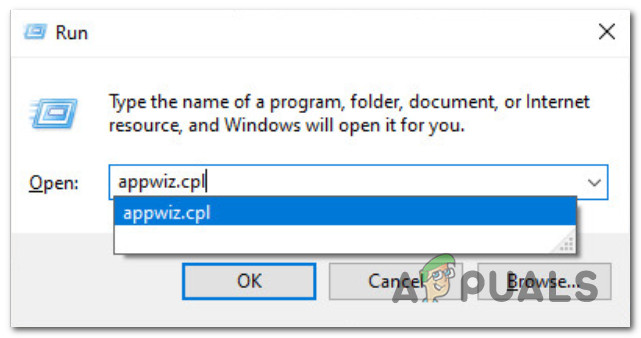
- Open up a Run dialog box by pressing Windows key + R, then type ‘appwiz.cpl’ inside the text box and hit Enter to open up the Programs and Features menu of the Classic Control Panel interface.
Accessing the Programs and Files Menu - Inside the Programs and Features screen, start by clicking on the Publisher column at the top to filter the list of installed programs via their publisher. This will make it easier to uninstall the main iTunes application along with every supporting software.
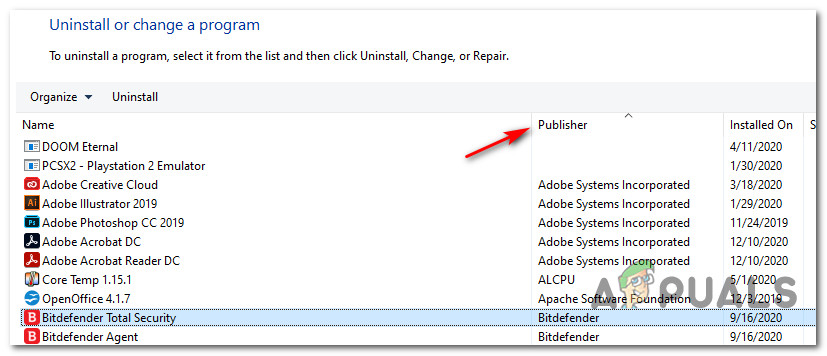
Sorting via Publisher - Now that you have a clear view of every product published by Apple Inc, go ahead and start uninstalling them systematically by right-clicking each entry, clicking Uninstall, and then following the on-screen prompts to complete the process.
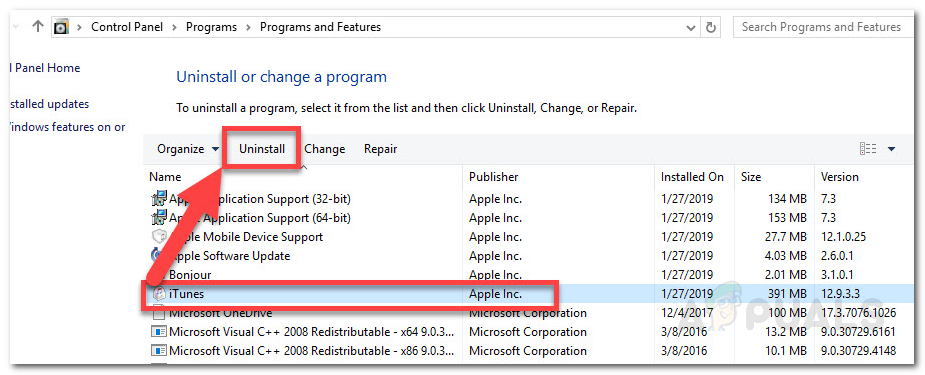
Uninstalling iTunes and every supporting application - After you uninstall iTunes along with every supporting software, restart your computer and wait for the next startup to complete.
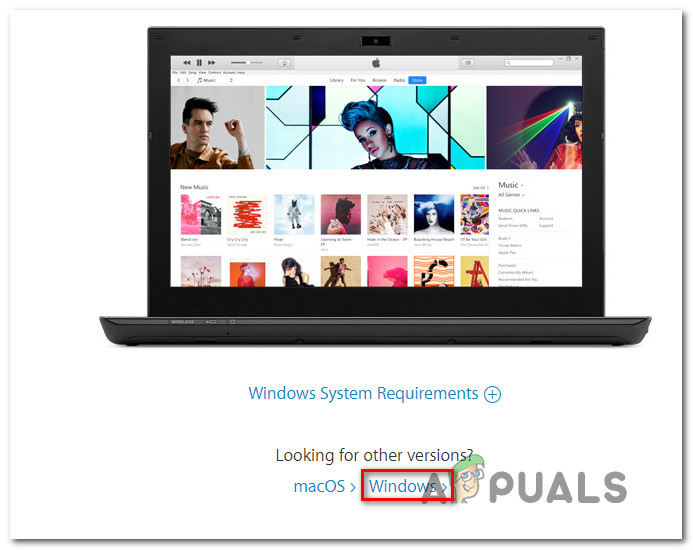
- Once your PC boots back up, open your browser and access this iTunes download page.
- Once you’re inside, scroll down to the Looking for other versions section and click on Windows to download the latest version of iTunes for desktop.
Downloading the desktop version of iTunes - Once the installation is complete, open the installer and follow the on-screen prompts to install the latest version of iTunes on your computer. You will then be asked to install the supporting software.
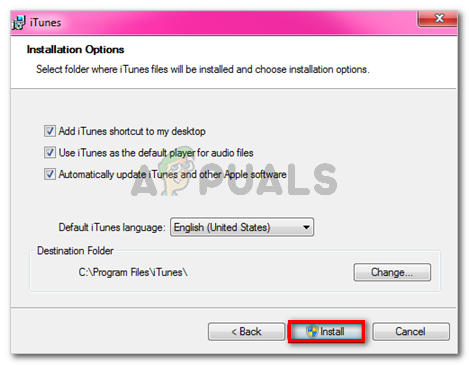
Installing iTunes on your computer - Once the installation is complete, reboot your computer once again and see if the problem is fixed at the next computer startup.
In case the same issue is still occurring, move down to the next potential fix below.
Method 3: Whitelisting iTunes in your Firewall
As a lot of Windows users have confirmed, this issue can occur due to some kind of interference caused by an overprotective firewall. Depending on your particulars, this can happen with both the integrated Windows Firewall and with certain 3rd party equivalents.
Regardless if you’re using the native firewall or a 3rd party firewall, the steps you need to take are the same – You need to whitelist the main executable of iTunes in order to prevent it from blocking the incoming or outgoing connections.
Note: If you’re using a 3rd party firewall, the instructions for doing this will be different from suite to suite. The best course of action is to search online for specific instructions for doing so or move down to Method 2 for instructions on uninstalling the overprotective firewall.
But in case you’re using the built-in Windows FIrewall, follow the instructions below to whitelist iTunes and prevent the 5507 iTunes error from occurring again:
- Open up a Run dialog box by pressing Windows key + R. When you’re prompted by the text box, type ‘control firewall.cpl’ and press Enter to open up the Windows Firewall utility.
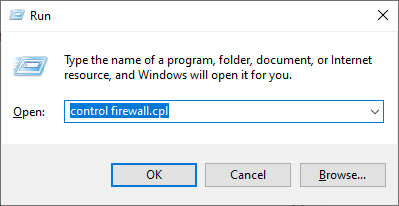
Opening the Windows Firewall screen Note: The command above will work regardless of your Windows version (Windows 7, Windows 8.1, and Windows 10).
- Once you’re inside the Windows Firewall menu, use the menu on the left-hand side to click on Allow an app or feature through Windows Defender Firewall.
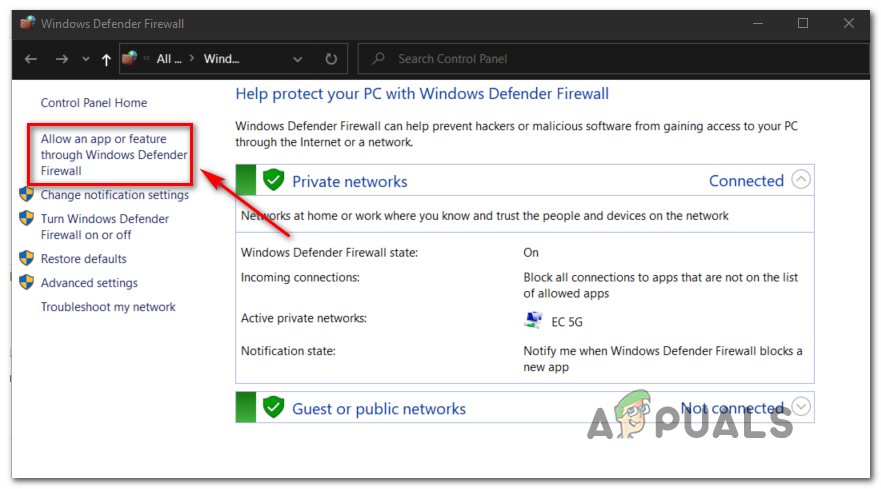
Allowing an app or feature through Windows Defender Firewall - Inside the Allowed apps menu, click on Change settings button, then click on Yes at the User Account Control prompt to grant admin access.
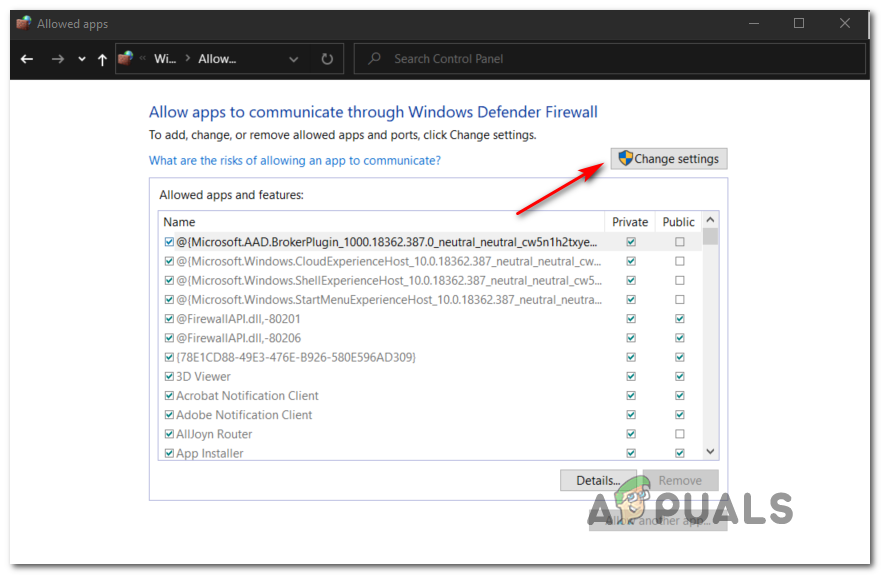
Changing the Settings - Once you finally have access to the list, scroll down through the list of items and identify iTunes. When you do so, ensure that the associated boxes for Private and Public are checked before clicking Ok to save the changes.
Note: If iTunes is not on the list, click on Allow another app, then go ahead and add the entry manually.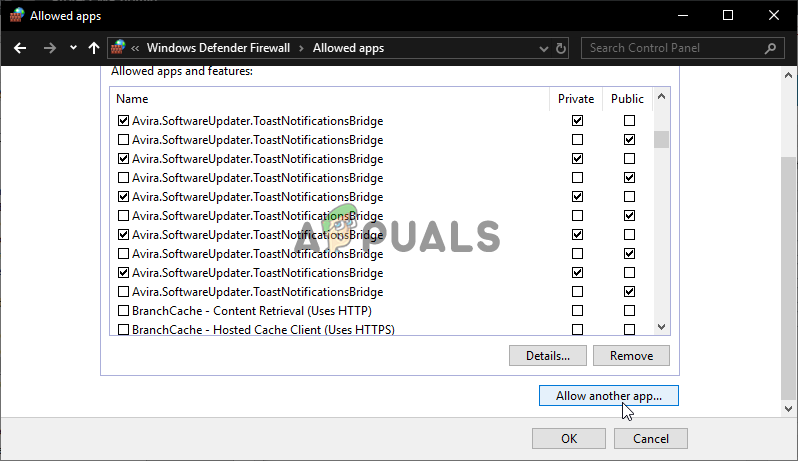
Allowing another app inside Windows Defender Firewall - After the iTunes have been successfully whitelisted inside the Windows Defender firewall, repeat the attempt to set up home sharing and see if the problem is now fixed.
In case you still end up seeing the same “Home Sharing could not be activated because an error occurred (5507)” error, move down to the next potential fix below.
Method 4: Uninstalling 3rd-party Firewall (if applicable)
In case you’re using a 3rd party firewall and you were previously unable to whitelist the iTunes executable, an alternative method to fix the “Home Sharing could not be activated because an error occurred (5507)” error is to simply uninstall the overprotective suite.
Note: Keep in mind that by disabling the 3rd party suite, you will not resolve the issue since the same security rules will remain firmly in place.
To completely out rule your 3rd party firewall from the potential culprit list, you need to completely uninstall it from your system and remove any remnant files associated with it.
To make things easier for you, we’ve put together a step-by-step guide that will walk you through the entire process:
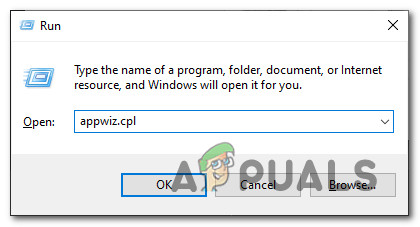
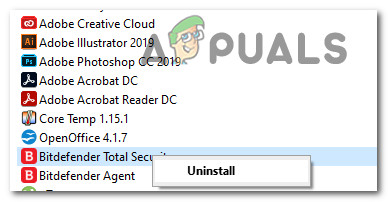
- Press Windows key + R to open up a Run dialog box. Next, type ‘appwiz.cpl’ inside the text box and press Enter to access the Programs and Features menu.
Accessing the Programs and Features menu - Once you’re inside the Programs and Features menu, scroll down through the list of installed applications and locate the 3rd party firewall solution that you plan on uninstalling. When you see it, right-click on it and choose Uninstall from the context menu.
Uninstalling the 3rd party firewall - Once you’re inside the uninstallation screen, follow the on-screen instructions to complete the installation, then restart your computer.
- After your PC boots back up, follow these instructions to remove any remnant files belonging to your firewall.
- Launch iTunes once again, attempt to set up home sharing, and see if you still end up seeing the same “Home Sharing could not be activated because an error occurred (5507)” error.


