How to Fix High Disk Usage Issue when Playing Games on Windows 10
High disk usage is a very common issue. It can cause low FPS, Higher loading times, Stuttering, and have the potential to damage your hard drive. It mostly occurs when your hard drive is struggling to provide it’s best for gaming as it is being held back by some programs & processes. Your hard drive is constantly being bloated by Windows default services and programs which causes it to slow down and as your hard drive treats all processes and services as a task it confuses to prioritize which program needs more attention.

Method 1: Check for malware
Your computer might be infected with malware which is causing it to spike the disk usage that can be an issue and sometimes even if your antivirus is running in the background what might be happening is that your antivirus might be trying to remove the virus and virus isn’t being removed which can cause a loophole of errors because both antiviruses and viruses have an almost identical amount of permissions so make sure to do a full system scan once in a while.
Method 2: Disable/Stop Windows Search Indexer
If you really don’t use Windows Search much, you can disable indexing completely by turning off the Windows Search service. You’ll still be able to search however it will just take a longer time to search without an index. Your search might be a bit slow after that but if you have your Operating system installed in an SSD you won’t even be able to notice anything at all. You can disable the Windows search either temporarily or permanently for disabling it temporarily you need to open the Command prompt as an administrator. You may ask how can I do that? It’s really simple, just follow these steps shown below.
- Hold the Windows Key and Press X. Choose Command Prompt (Admin) or PowerShell (Admin)
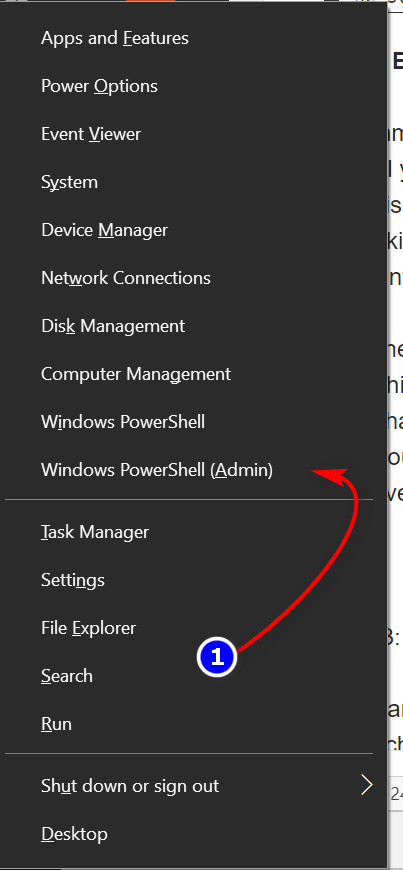
Opening Windows PowerShell - Type the following command to Stop or Disable Windows Search Service.
net.exe stop "Windows Search"

Stopping Windows Search - Press Enter
This command will stop Windows Search Indexer service temporarily which might make your search queries a bit slower till you restart your computer but it will drastically help in fixing this high disk usage issue. Keep in mind that this is going to disable Windows search temporarily once you will restart your computer Windows search will start working as it was again which might cause high disk usage again so if you want to disable Windows search permanently you have to follow these steps.
- Click Start or Press the Windows Key
- Type cmd and right-click cmd and choose Run as Administrator
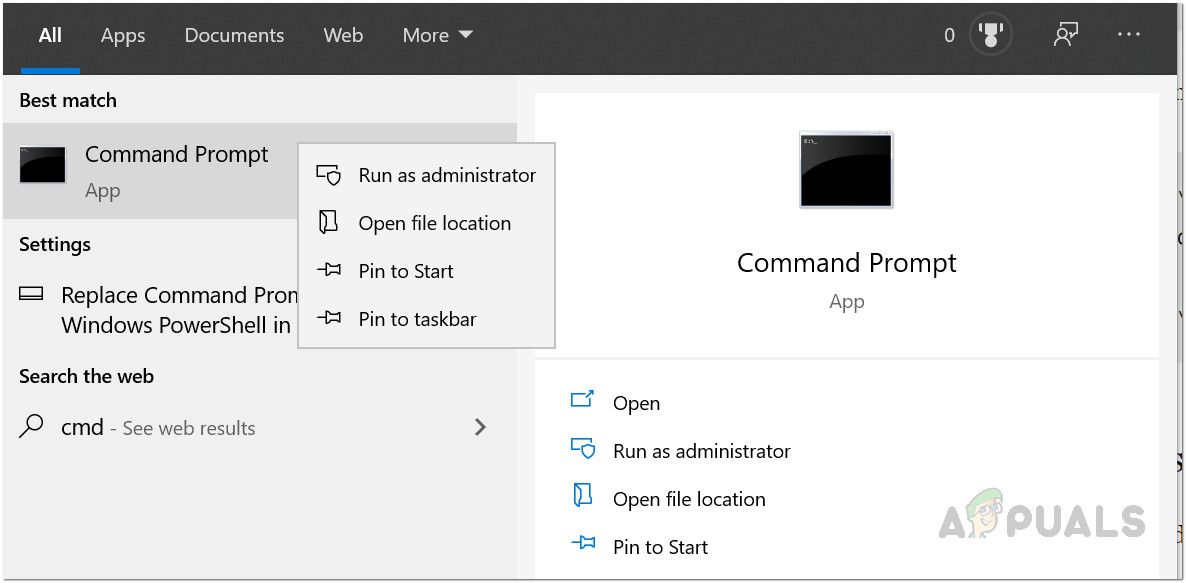
Run CMD as Administrator - Type
sc config WSearch start= disabled
- Press Enter.

CMD disable Windows Search Service
After that press, the Enter key and you are all set! Just restart your computer to apply the changes. After a restart, your taskbar search might not work but no need to worry as we have already made a guide on how to fix that over here it is quite easy to do and it won’t use a search service.
Method 3: Disable Superfetch/Sysmain Service
There is another feature in Windows 10 that can cause problems in Windows sometimes. It is known as Superfetch. You can disable this service temporarily in a similar way like we disabled the Windows search indexer service by just opening the Command prompt and writing this command:
net.exe stop superfetch
- Click Start or Press the Windows Key
- Type cmd and right-click cmd and choose Run as Administrator

Run CMD as Administrator - Type
net.exe stop sysmain //to stop Superfetch service from running
net.exe start sysmain //to start the service again
sc stop "SysMain" & sc config "SysMain" start=disabled //to disable the service permenantly
sc config "SysMain" start=auto & sc start "SysMain" //to enable the service again.
- Press Enter.
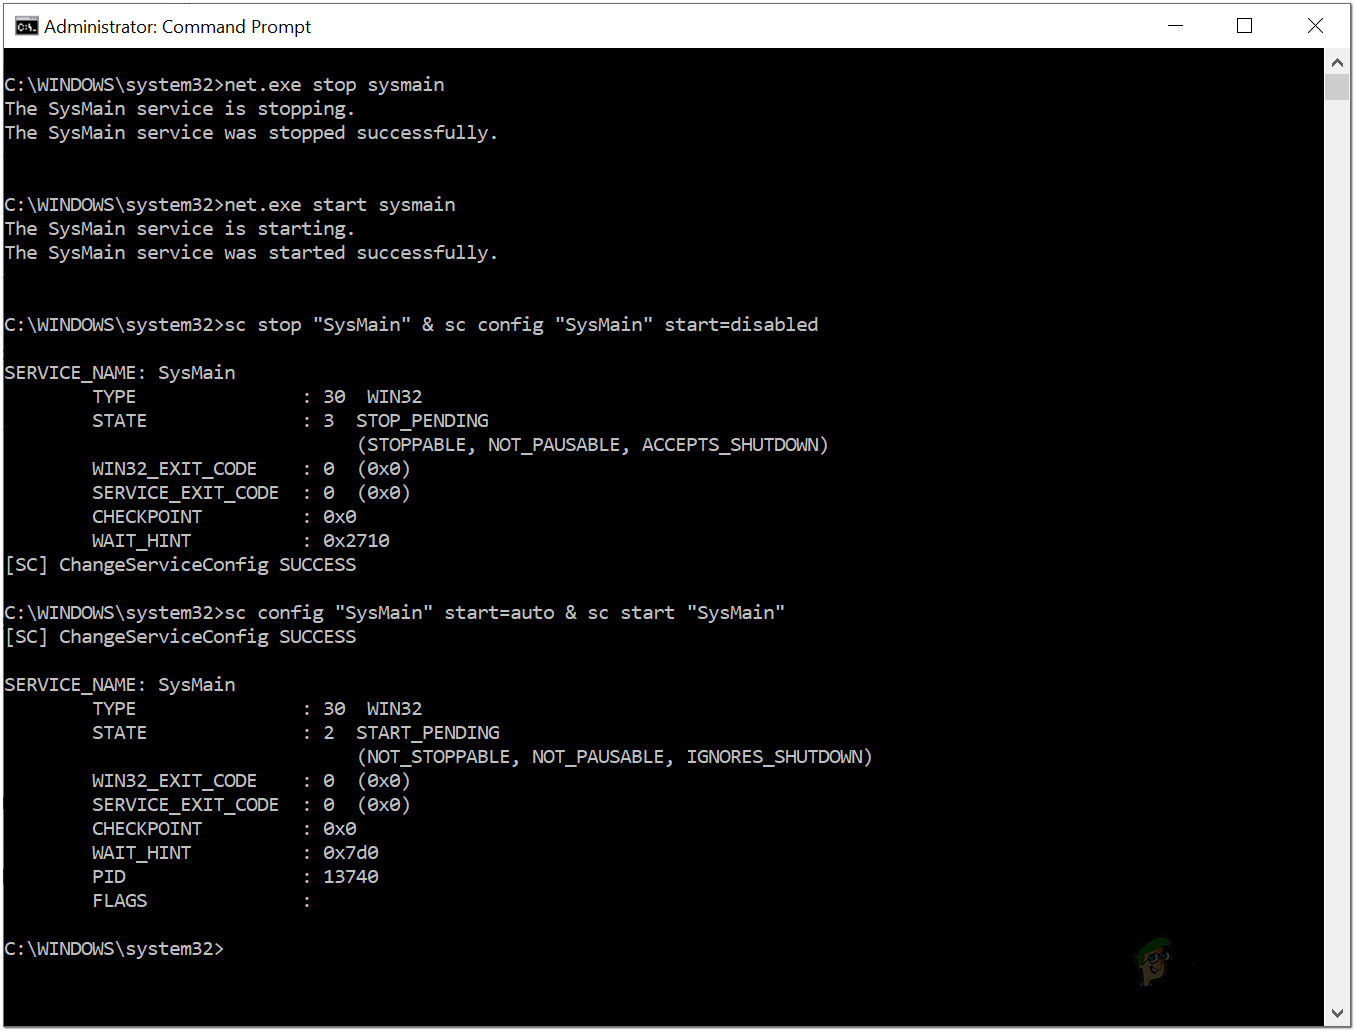
Sysmain / Superfetch illustration.
If you are not happy with the results and think that you want to revert the changes here are the steps on how to enable the service again.
Method 4: Disable Hibernation
Hibernation is a really good feature it makes your computer startup speed a bit faster but it requires a lot of Disk usage as it is constantly saving your computer’s current state which helps make your experience with Windows a bit smoother than usual however this doesn’t benefit while gaming and end up in high disk usages so we are going to show you how to disable it.
OK so disabling Hibernation is fairly easy, follow the steps below to disable hibernation on your own computer.
- Click Start or Press the Windows Key
- Type cmd and right-click cmd and choose Run as Administrator

Run CMD as Administrator
Here is what it looks like.

That’s it, If this didn’t help or disabled Hibernation you don’t need to worry as we have covered it in a different article please head over there for more information. Click here! And don’t worry about the Title it will work on any version of Windows as this command is pretty basic.
Method 5: Checking your Disk for problems and bad sectors
Ok if none of the methods shown above work for you it’s most likely that your Hard disk is having some problems reading and writing files which results in a bad sector in your hard drive so what can you do to fix it? You can simply use the built-in disk checking utility that comes with Windows. We are going to show you exactly how to access that program and fix your hard disk.
- Hold the Windows Key and Press E
- Right Click on your Windows drive and open properties.
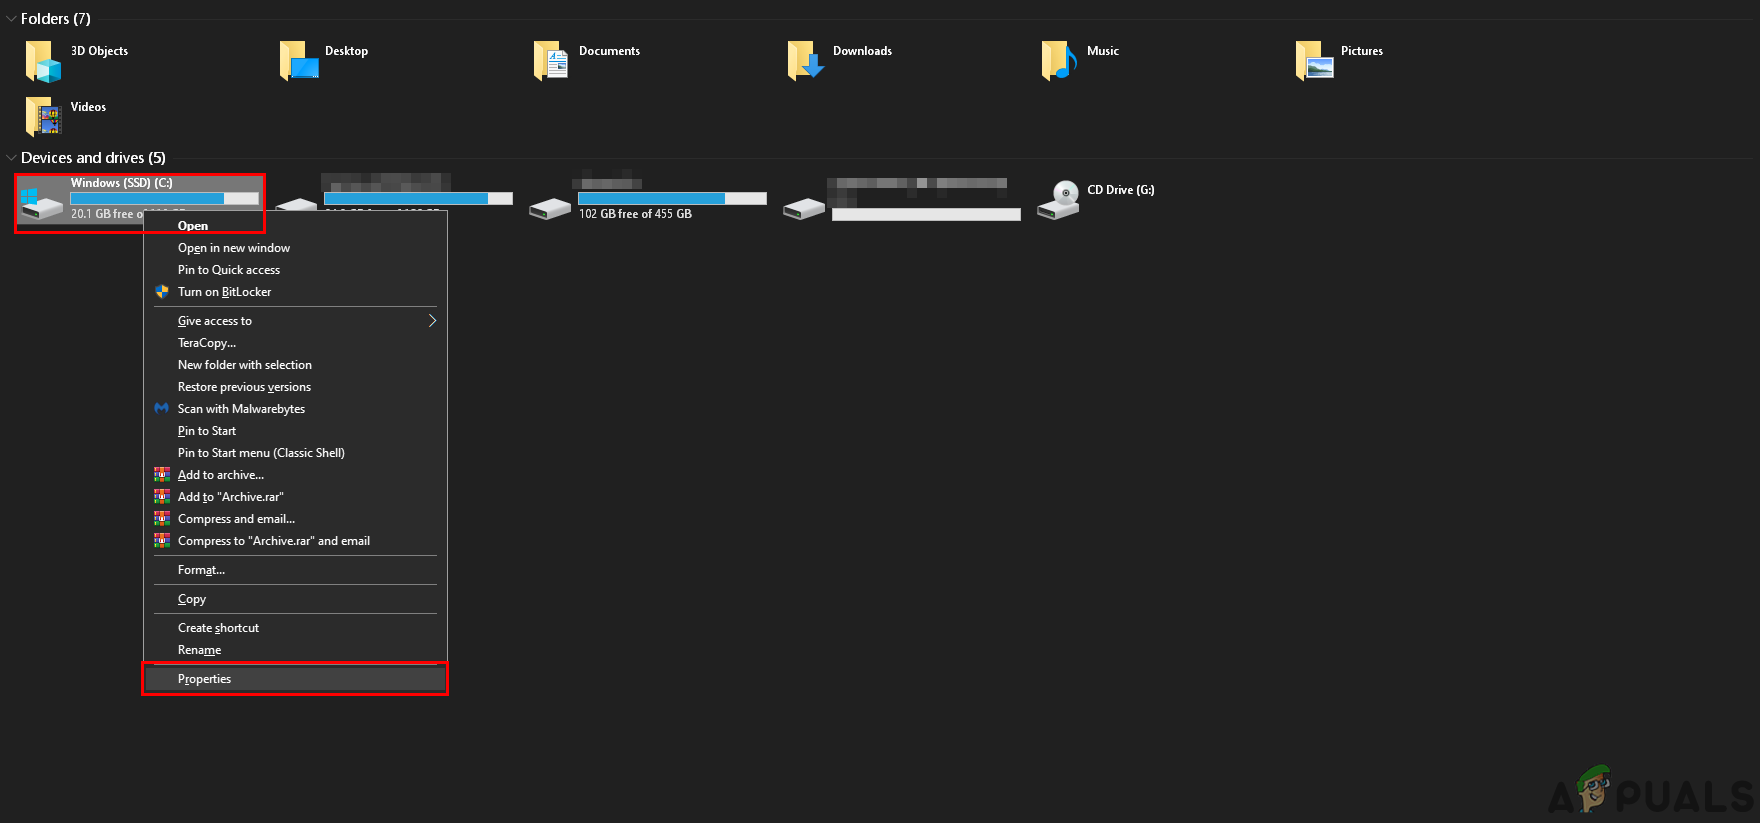
3: Now once you are in properties go to the section named “Tools” and find the Check button then press it.
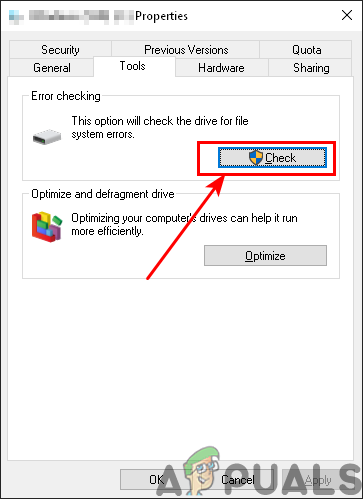
Follow the instructions shown on your screen and you are all set!
If these methods don’t resolve your issue with 100% disk usage on your Windows 10 computer, you may need to look into replacing your hard drive. One last thing that I can suggest you to do is try to get your hand on an SSD as it is way faster than mechanical hard drives nowadays. In general, your hard drive shouldn’t be at 100% usage all the time, so if it is, there is a reason behind it so head over to your local hardware repair center so that they can diagnose and get to the root cause of the problem otherwise it can lead to some serious problem such as data loss or a loss of hard drive


