FIX: Hidden Attribute Greyed Out (Windows 7 / 8 and 10)
The Hidden attribute is very useful for those times when you don’t want everyone to see your files. It is found in the Properties of the files and folders, and it hides them from view unless you specify that they are visible within the parent folder.
However, you might run into a problem that shows this attribute as greyed out, and you can’t change it. While you can leave the parent folder’s settings to show hidden files or folders, this is not a complete solution. There are, however, two methods that you can try, and you will get your files and folders to remain unhidden.
Method 1: Revert the customization settings
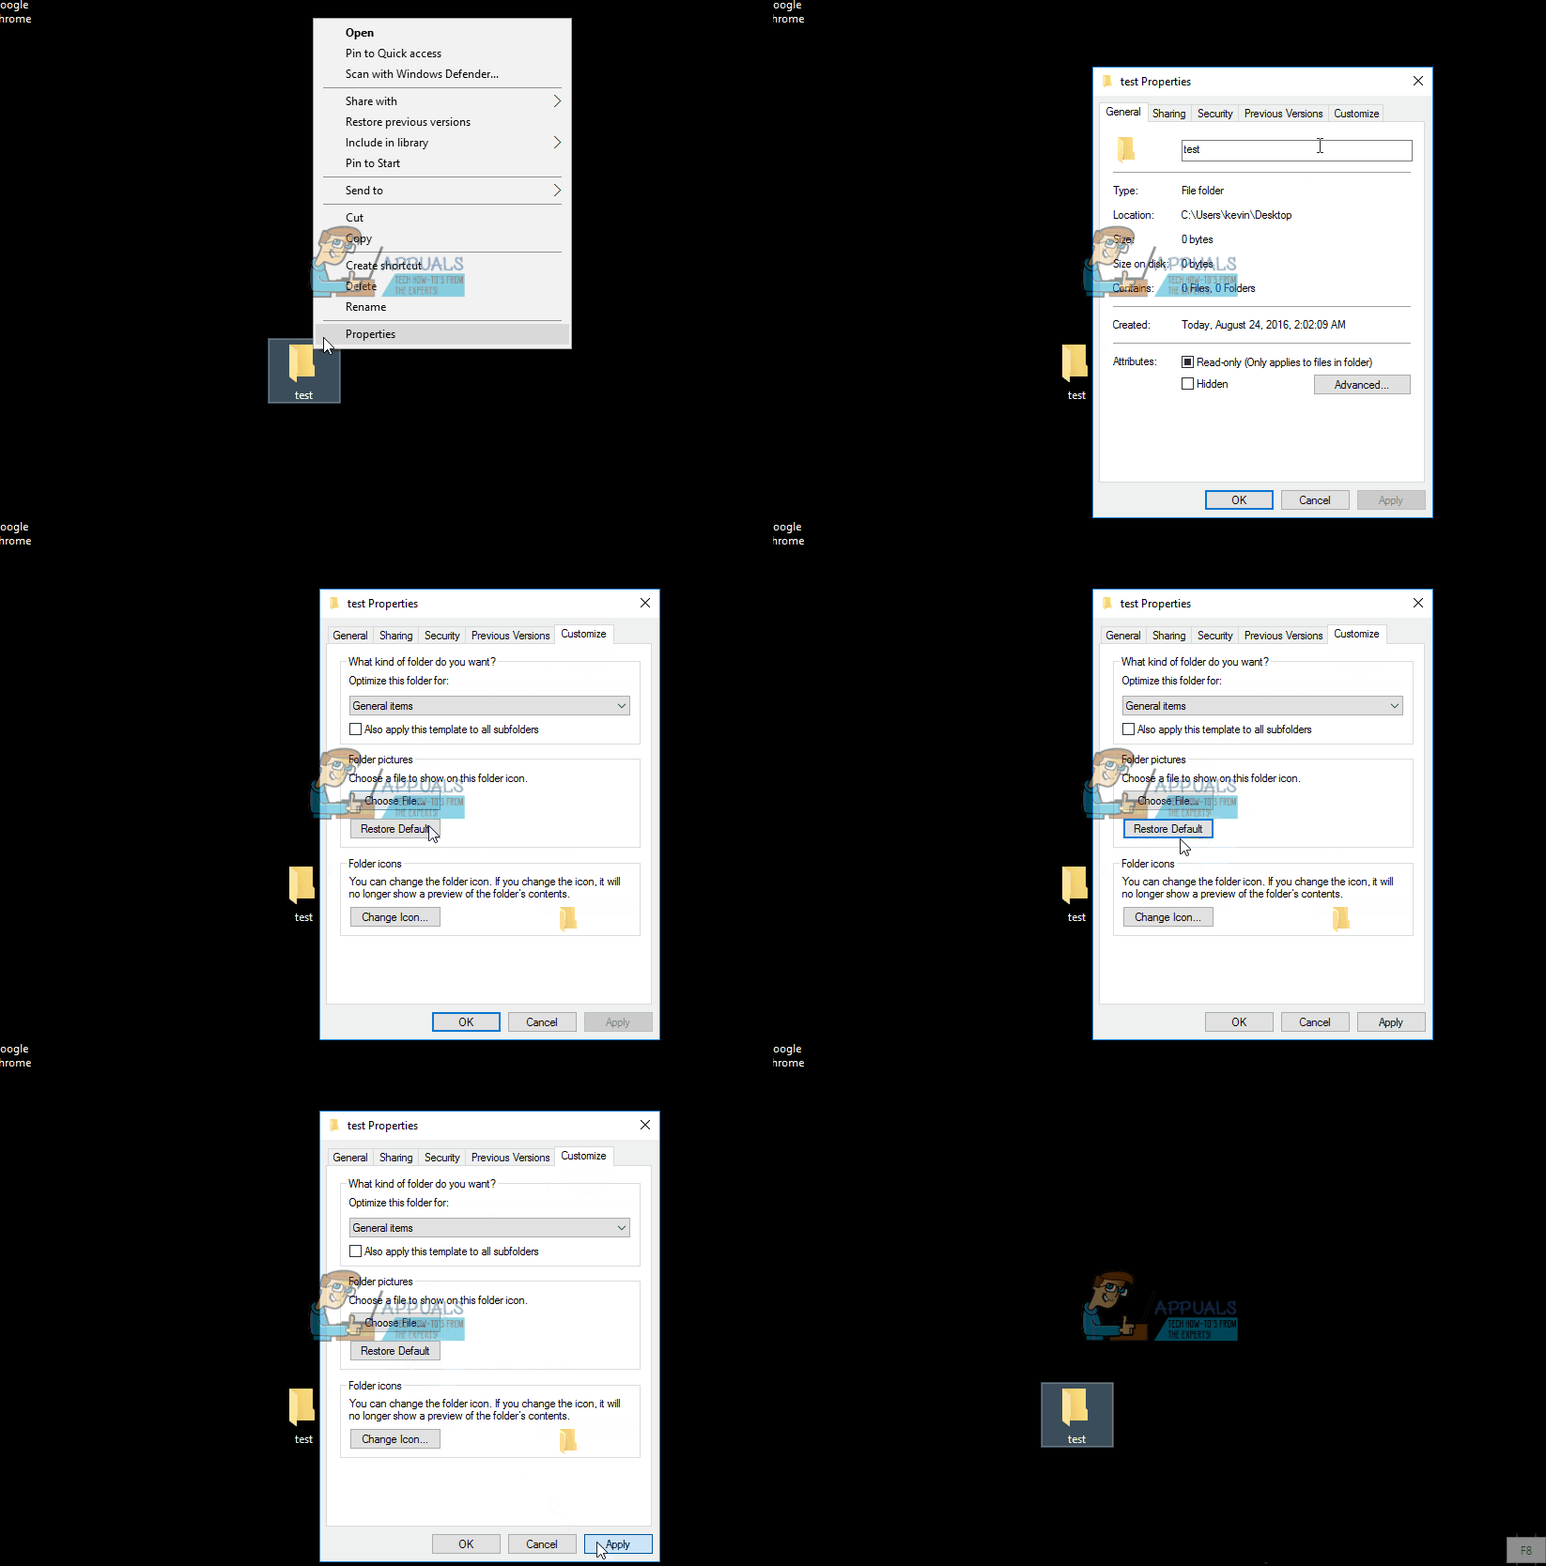
If you have messed around with a folder’s customization settings after checking the Hidden attribute, that attribute will be later greyed out, and you won’t be able to unhide the folder. This is done when you modify any of the settings found in the Customize tab of the folder’s Properties. The solution is very easy – you just revert the customizations to their default settings.
Right click the folder in question, and select Properties
Select the Customize tab
Click Restore Default
Click Apply or OK, and close the window
Reopen the Properties window of the folder – the checkbox won’t be greyed out and you can remove the Hidden attribute

Method 2: Use an elevated command prompt to unhide the files and folders
This method is a bit more advanced – and you should follow it without skipping steps, as that might mess up your files. The first step is to open a command prompt. You can do this with either a non-elevated, or an elevated one, it works with both, however you will get the best results with an elevated one.
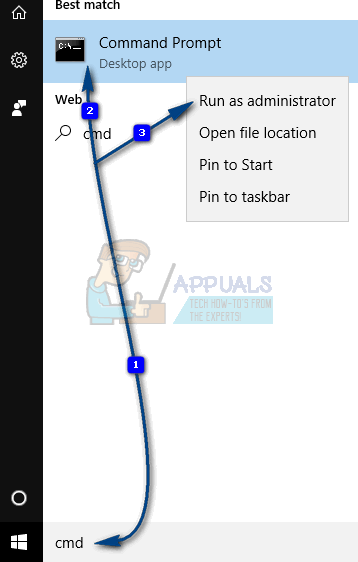
Open the Start Menu by pressing Start on your computer, type cmd in the search box. Right click exe and click Run as administrator. If you get a User Account Control window, click Yes

Inside the command prompt, you have several options, each with a different command. The ATTRIB command set is a powerful tool, and you can get all possible parameters by typing attrib /? In the command prompt, but we will detail the ones we need below.
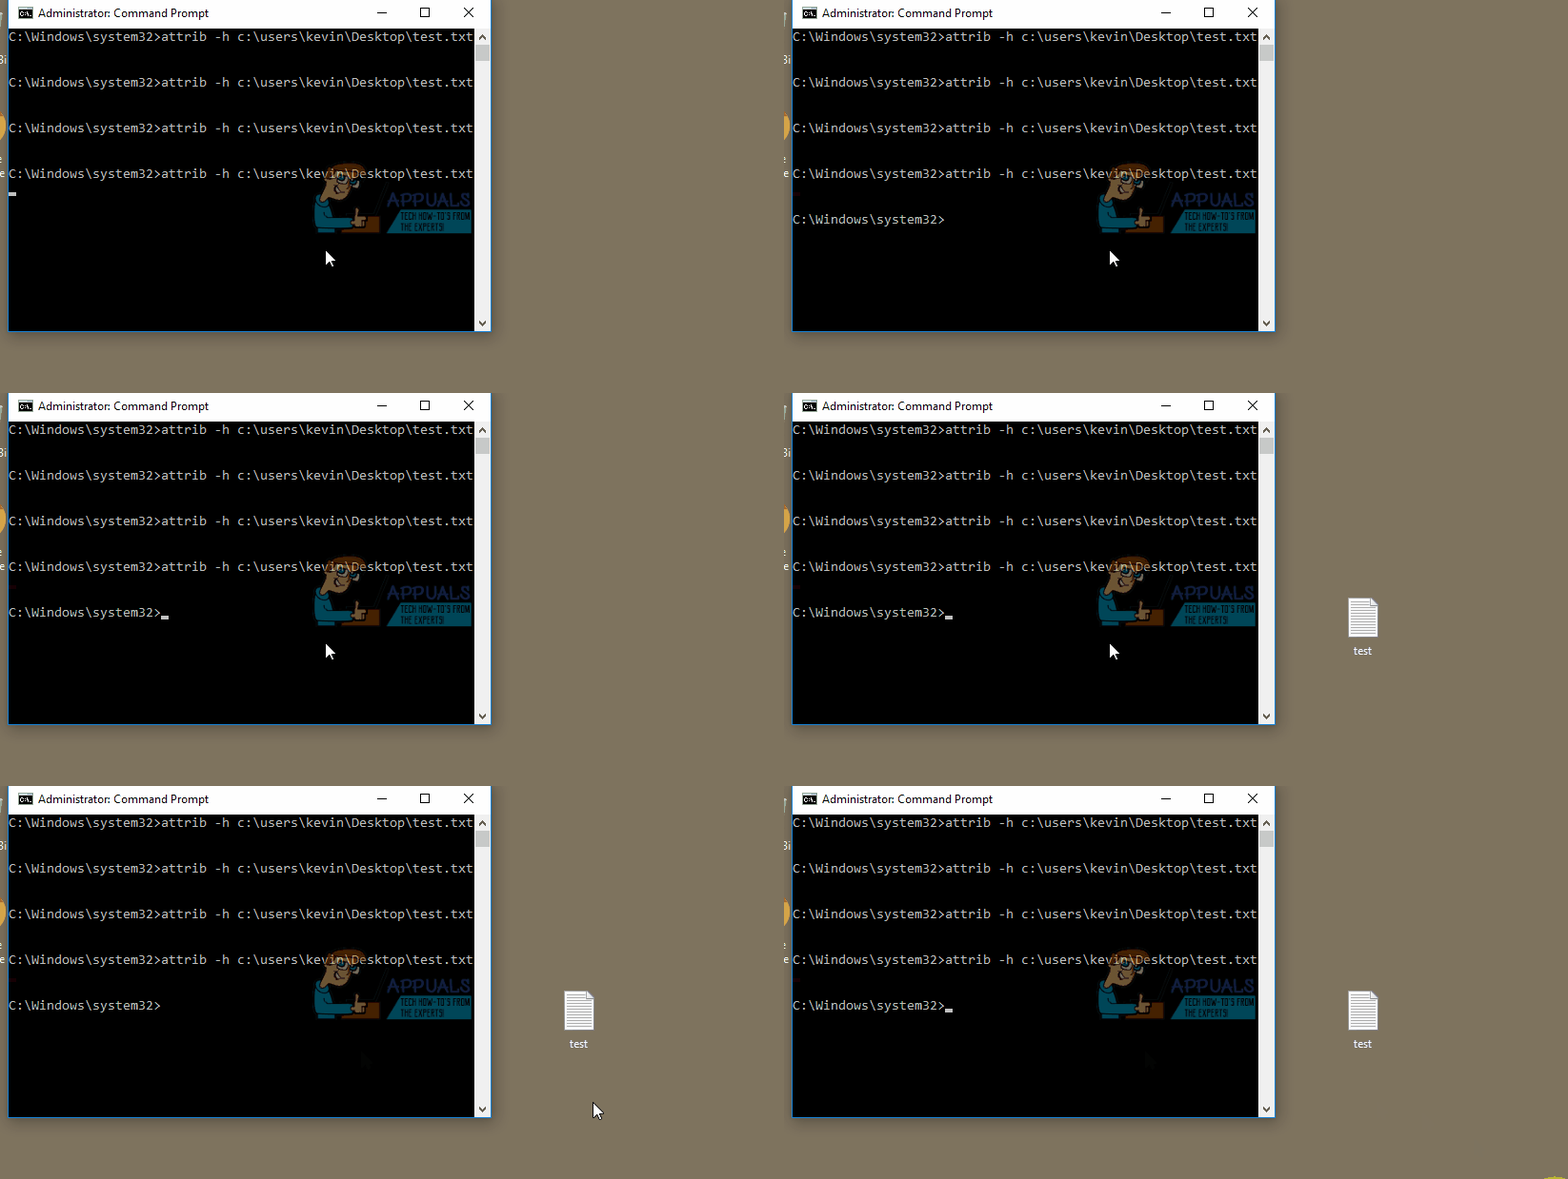
ATTRIB -H “Full path of the file, with extension here” is the command we need to unhide the file. For example, if you have a Test.txt file on your desktop that you would like to unhide, the command would be
ATTRIB -H “C:\Users\UserName\Desktop\Test.txt”

ATTRIB -H “Full path of the folder here” is the command that we use if we want to unhide a folder. If you want the command to apply for all files and subfolders as well, you should add /D and /S as well, and the full command will be ATTRIB -H “Full path of the folder here” /S /D . For example, if you have a Test folder on the desktop that you don’t want hidden, along with its subfolders and all files, your command should look like this
ATTRIB -H “C:\Users\UserName\Desktop\Test” /S /D
When you’re done, simply close the elevated command prompt, and your files and folders should not be hidden anymore.
While the main cause for the attribute being greyed out is usually customization of the specific folder, the option that you have a virus in your computer that is messing with your files shouldn’t be excluded. When possible, you should use a virus scanner to get rid of any potential threats in your system.