Halo Infinite Could not Load CommonEventLoggingLibrary_Release.dll? Try these fixes
Fix: "Could not load commoneventlogginglibrary_release.dll" Error on Halo Infinite
Halo Infinite players have been getting the “Could not load commoneventlogginglibrary_release.dll” error message while trying to launch the game. As it turns out, in most cases, this issue is caused due to the Microsoft Visual C++ runtime libraries that are required by several apps to operate properly as they use the libraries. In such a scenario, you will have to either repair the runtime libraries that are installed on your computer or simply reinstall them. In this article, we are going to take you through the process and show you just that so just follow through and you should be back in the game in no time.
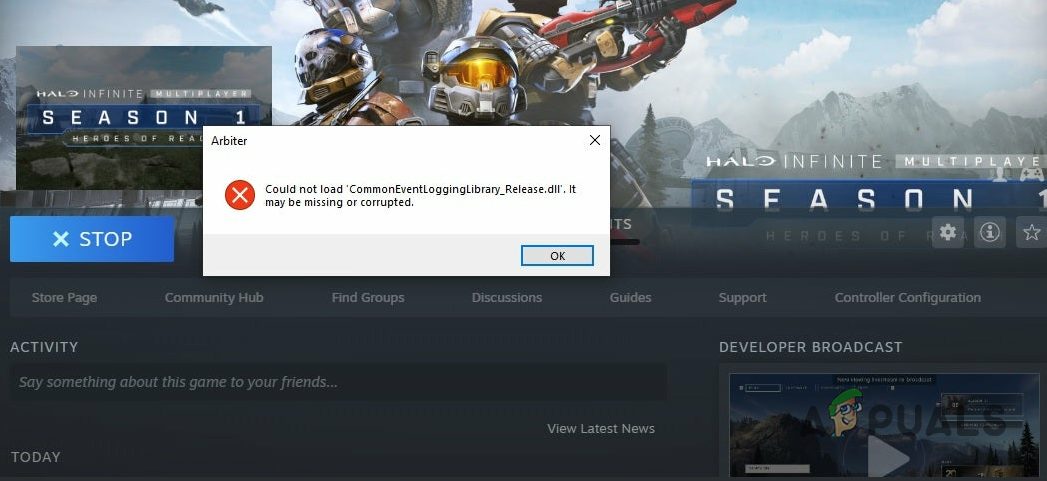
As it turns out, Microsoft released Halo Infinite multiplayer before its official release date in order to celebrate the 20th anniversary of Xbox during a live event. While the single-player campaign is yet to be released, players have been flooding in the servers to experience the new Halo game. While the game works just fine for the majority, there are some players that experience various issues while trying to play the game. The issue in question seems to appear due to a corrupted or damaged installation of the Microsoft Visual C++ libraries that are required by the game in order to work properly.
The error message in question can be resolved quite easily and that is what we are going to show you here. With that said, let us get started and mention the different methods that you can implement to fix the issue. So, without further ado, let us dive right in.
Redownload Problematic File
As it turns out, the first thing that you should try when you encounter the error message in question is to try and re-download it. This can be done very easily by taking advantage of the verify integrity of game files feature that comes in the Steam client. Essentially, how this works is that you will delete the problematic file or the file that is mentioned in the error message from the installation directory. Once that has been done, verify the integrity of game files which should download the file again. To do all of this, follow the instructions given down below:
- First of all, go ahead and open up the Steam client on your computer.
- Then, on the Steam client, navigate to the Library.
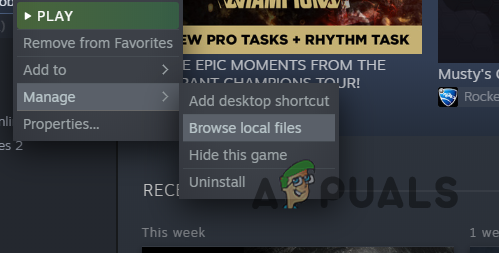
Navigating to Steam Library - On the left-hand side, from the list of games, right-click on Halo Infinite, and from the drop-down, choose the Manage > Browse local files option.
Opening up Game Installation Directory - This will open up a File Explorer in the installation directory of Halo Infinite.
- Look for the file mentioned in the error and delete it.
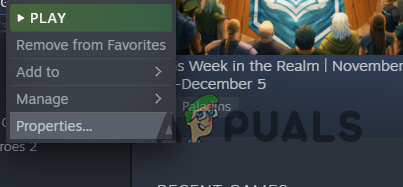
- Once you have done that, right-click on the game and choose Properties in the Steam client.
Opening up Game Properties - Now, on the left-hand side, click the Local Files option.
- From there, click the Verify integrity of game files option.
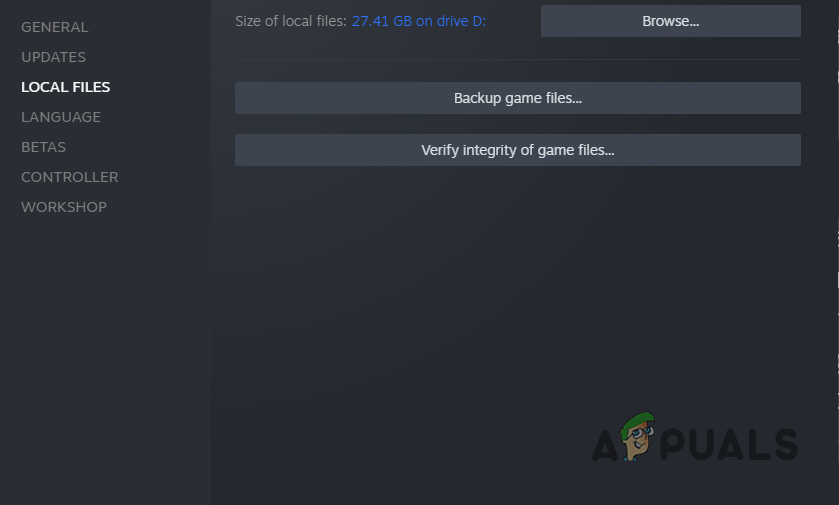
Verifying Integrity of Game Files - Wait for the verification to complete as it scans your game files and downloads any missing or damaged files.
- Once that is done, go ahead and launch the game to see if the error is still there.
Repair Visual C++ Redistributables
If downloading the problematic file again does not fix the problem for you, then you can try repairing the Visual C++ runtime libraries that are installed on your computer. Doing this will essentially look for any damages and repair them by replacing the files. This can be done via the Control Panel. If even this does not work for you, then your last option would be to reinstall these runtime libraries. Follow the instructions given down below to repair the runtime libraries:
- First of all, go ahead and open up the Control Panel by searching for it in the Start Menu.
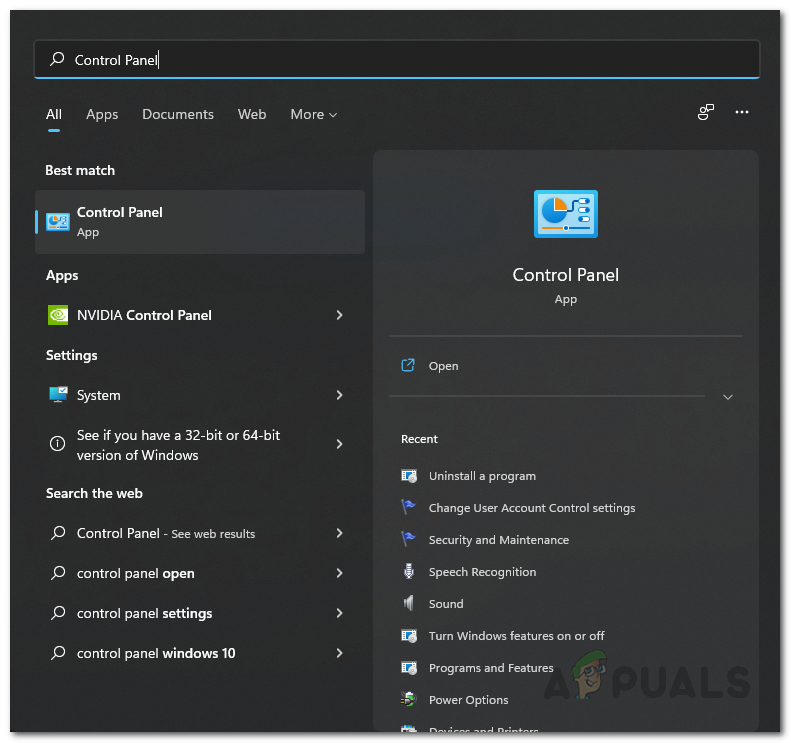
Opening up Control Panel - Once the Control Panel window is open, click on the Uninstall a program option under Programs.

Control Panel - This will show you a list of the applications that are installed on your computer.
- Now, from the list, locate Microsoft Visual C++ Redistributables and click on them.
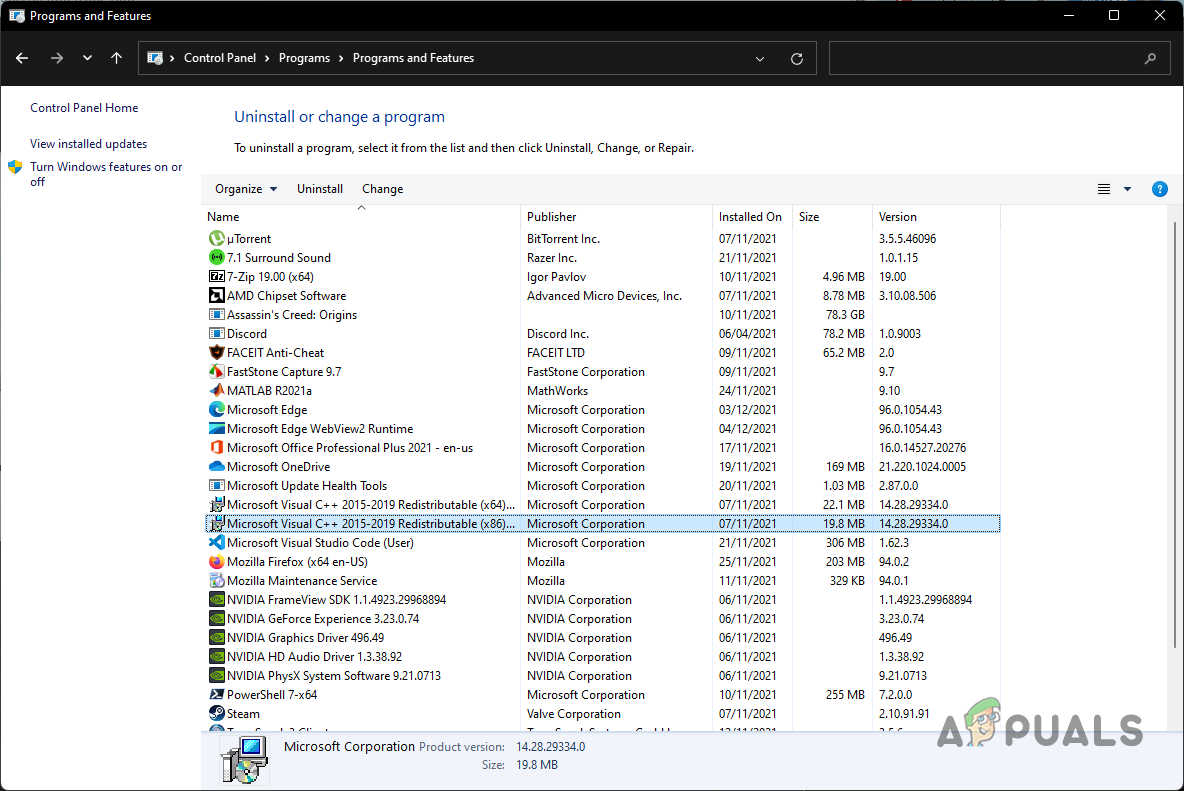
Looking for Microsoft Visual C++ Runtime Libraries in Control Panel - Once you have it selected, at the top, click the Change option provided.
- On the window that appears, click the Repair option provided.
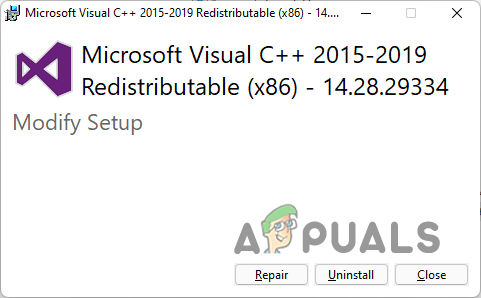
Repairing Microsoft Visual C++ Runtime Libraries - Wait for the repair process to complete.
- Do this for all of the entries of Visual C++ Redistributables.
- Once you have done that, go ahead and launch the game to see if the problem still appears.
Reinstall Microsoft Visual C++ Runtime Libraries
Like we have mentioned earlier, if repairing the runtime libraries do not fix the error message in question for you, then you will have to reinstall these runtime libraries on your computer. Uninstalling the Microsoft Visual C++ Runtime libraries will remove its components and thus you will have a fresh copy of the runtime libraries once you install it again. To uninstall the runtime libraries, follow the instructions that are given down below:
- To start off, open up the Start Menu and search for the Control Panel. Open it up.
Opening up Control Panel - On the Control Panel window, click on the Uninstall a program that is given under Programs.
Control Panel - Now, from the list of applications, look for Microsoft Visual C++ Redistributables and double click on them to uninstall them.
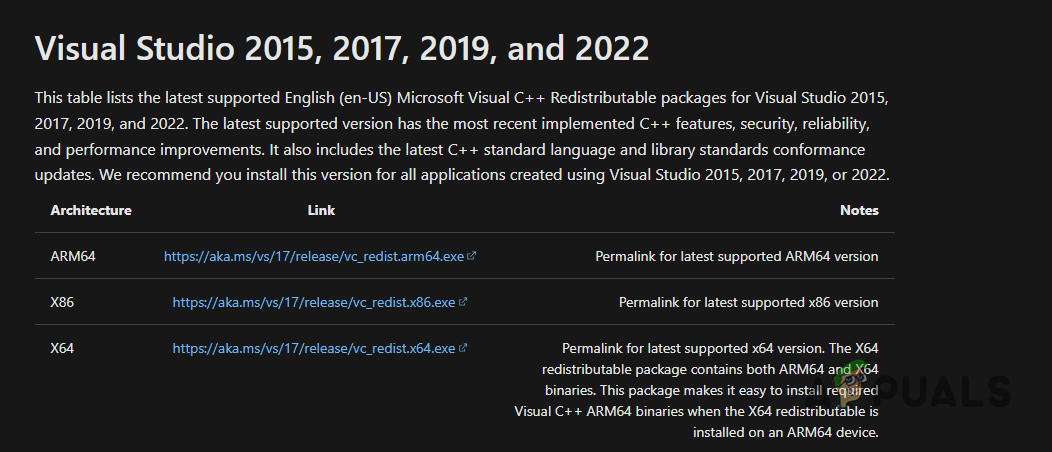
Looking for Microsoft Visual C++ Runtime Libraries in Control Panel - Once you have done that, go ahead and navigate to the Microsoft Visual C++ Redistributable download page by clicking here.
- Download the installer for your respective architecture by clicking the link provided.
Downloading Microsoft Visual C++ Runtime Libraries - Once you have downloaded the installer, run it and go through the on-screen prompts to finish the installation.
- After the installation is complete, go ahead and restart your computer.
- Once your PC boots up, open up the game and see if the error message is still occurring.


