Get Rid of the Bing Image in Search Bar on Windows 10 / 11
If you’re still on Windows 10, you might have noticed a new icon that’s neatly attached to the search box taskbar. You might like it but, most users don’t – and they’re looking for options to get rid of it.

Why you’re seeing this icon
The image is part of a new feature that was rolled out to Windows 10 and Windows 11 in April 2022.
“Search Highlights” is a feature that incorporates a revolving series of icons onto the right-hand side of the toolbar search bar. The symbols vary depending on the day, from specific entries like the one above with a putting green and golf ball to more general entries on less notable days with recommended backgrounds like photographs of U.S. national parks or similar.
On both Windows 10 and Windows 11, the “Search Highlights” function places “highlighted” items in the search menu in addition to placing the icon in the search box. News, current articles, small word of the day, and quotation of the day tiles (probably rolled out on quiet news days), and a trending searches tile (as seen above) are among the highlights.
If you prefer Microsoft’s attempt to imitate a Google-style daily doodle mixed with a news aggregator in your search menu, you can, of course, leave things alone.
However, if you had a negative reaction to the change—and we completely understand—thankfully it’s quite easy to turn off.
How to Remove this icon from Windows 10’s search box
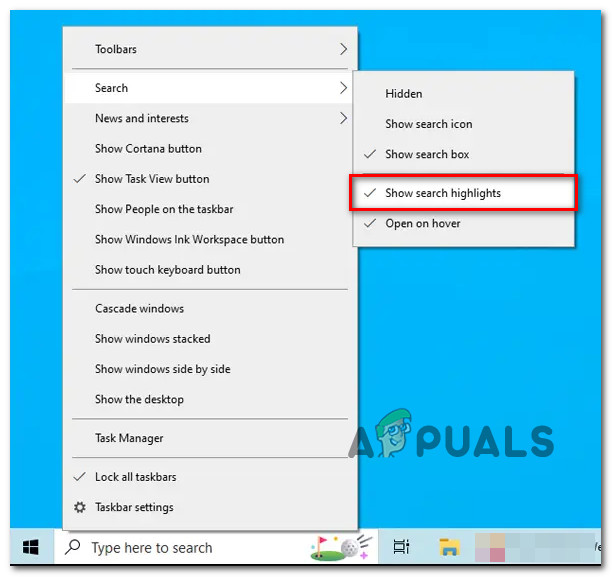
To remove these icons on Windows 10, right-click anywhere on your task to bring up the menu, pick “Search,” then uncheck “Show search highlights.”
Note: Even though Windows 11 doesn’t have a search box (and hence no new icon), you can still disable the highlights in the search menu. Simply go to Privacy & Security > Search Permissions > More Settings in the Settings app. Toggle off “Show Search Highlights” in the More Settings section.
That concludes our tutorial. There will be no more icons in the search bar or news highlights in the search menu after this easy adjustment.
Disable the Bing integration too
If you don’t use the Bing search function on your Windows 10 installation and you want it removed, you can do that too.
Note: By default, Windows 10 sends anything you search for in the Start Menu to Microsoft’s servers so you can get Bing search results — so be sure you don’t type anything personal into your own PC’s Start Menu. Alternatively, you may just turn off the Bing integration in the Start Menu.
However, the exact instructions on turning off the Bing integration will be different depending on if you have the May 2020 Windows 10 update or not.
Disable the Bing integration (updated Windows 10 version)
This feature is controlled by a new registry setting that was introduced with Windows 10’s May 2020 Update. To block web searches in the Start menu, you must update the Windows registry.
Important: This solution will also disable the Microsoft Edge advertisements that would normally appear when you search for Chrome in Windows 10’s Start menu.
If you want to remove the Bing functionality inside your Windows 10 installation and your operating system is up to date, follow the instructions below:
Note: This method involves using a Registry Editor. Making the wrong adjustment can cause your system to become unstable or even inoperable. This is a simple adjustment that should go well if you follow the directions below. However, if you’ve never used it before, back up your registry first before following the steps below.
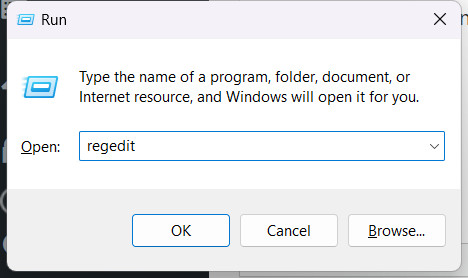
- Press Windows key + R to open up a Run dialog box.
- Next, type ‘regedit’ inside the text box and press Ctrl + Shift + Enter to open up the Registry Editor.
Open up the Registry Editor - When you’re prompted by the User Account Control, click Yes to grant admin access.
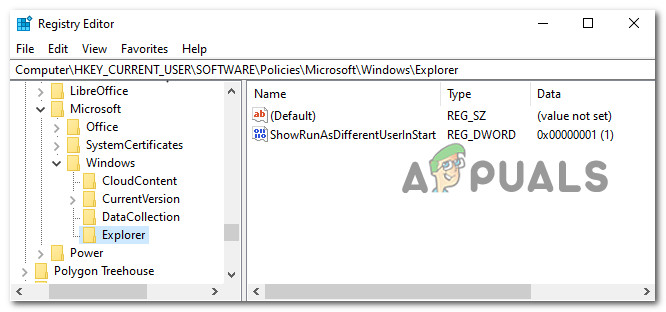
- Once you’re finally inside the Registry Editor, use the left-hand section to navigate to the following location:
Computer\HKEY_CURRENT_USER\SOFTWARE\Policies\Microsoft\Windows\Explorer
Note: You can either navigate to this location using the left-hand menu or you can paste the full location directly in the nav bar at the top and press Enter to get there instantly.
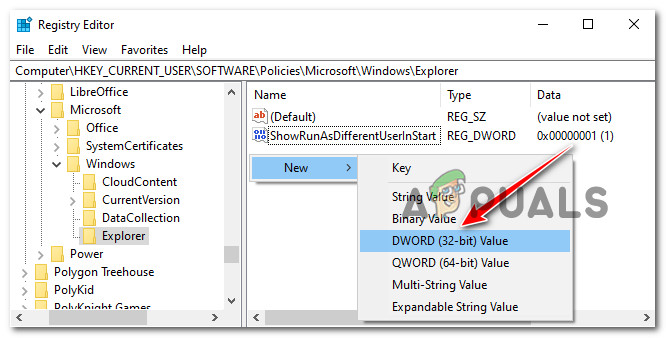
Navigate to the correct location - Once you arrive in the correct location, create a new DWORD value by using an empty space on the right-hand side to right-click and select New > DWORD (32-bit) Value.
Create w new DWORD value - Next, name the newly created value entry to “DisableSearchBoxSuggestions”, then double-click on it and set the Base to Hexadecimal and the Value data to 1.
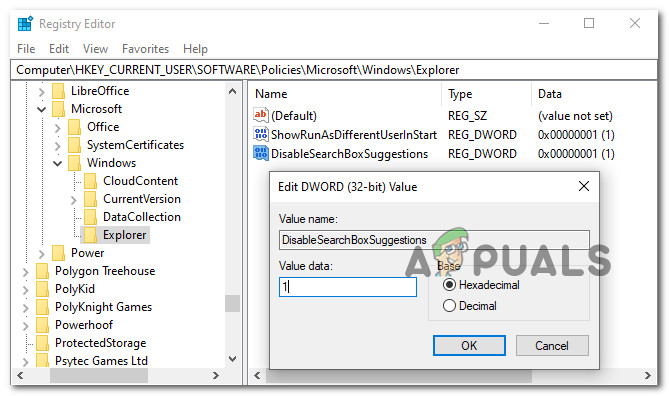
Disable Search Box Suggestions - Once this modification is successfully operated, restart your PC to allow the changes to take effect.
Disable the Bing integration (outdated Windows 10 version)
If you’re using a severely outdated Windows 10 version (not recommended) that[‘s using a pre-November 2019 Update build, the steps you need to follow in order to disable the Bing integration will be different.
There are different Registry keys that you need to adjust in order to get the issue resolved..
Here’s what you need to do:
- Press Windows key + R to open up a Run dialog box.
- Next, type ‘regedit’ inside the text box and press Ctrl + Shift + Enter to open up the Registry Editor.
Open up the Registry Editor - When you’re prompted by the User Account Control, click Yes to grant admin access.
- Once you’re inside Registry Editor, use the left-hand side menu to navigate to the following location:
HKEY_CURRENT_USER\SOFTWARE\Microsoft\Windows\CurrentVersion\Search
Note: You can either navigate to this location using the left-hand menu or you can paste the full location directly in the nav bar at the top and press Enter to get there instantly.
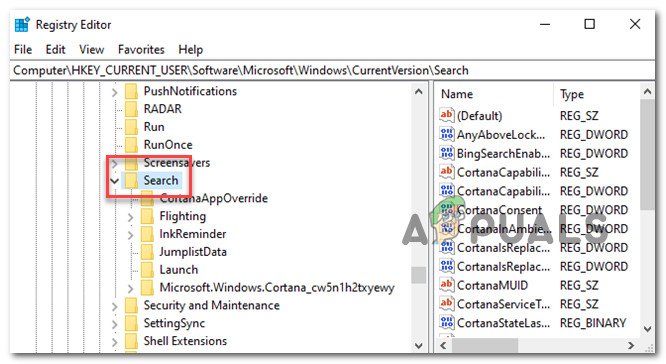
Accessing the Search key - Next, choose New > DWORD (32-bit) Value from the context menu when you right-click the Search icon. BingSearchEnabled is the new value’s name.
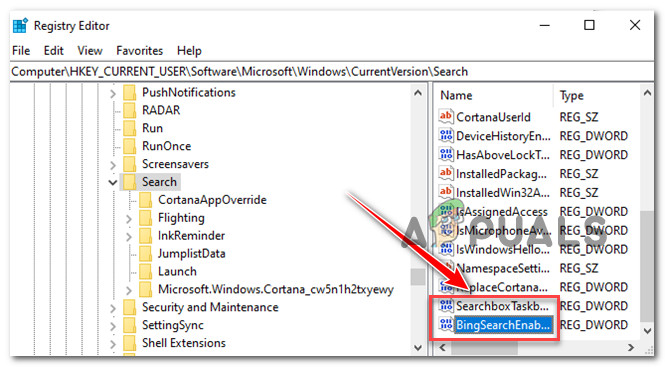
Accessing the BigSearchEnabled key - Next, double-click on the newly created BingSearchEnabled and set the Base to Hexadecimal and the Value Data to 0, then click Ok to save the changes.
- CortanaConsent should be listed underneath BingSearchEnabled. To access the properties dialog for this value, double-click it. Change the value of the “Value Data” box to “0.”

Accessing the Cortana Consent Note: If you don’t see CortanaConsent, make it using the identical methods as you did for BingSearchEnabled.
- You may now exit the Registry Editor. Only local results should now appear when you search your start menu. Restart your computer if the modification does not take effect right away.Note: Simply launch the Registry Editor and update the BingSearchEnabled and CortanaConsent values back to 1 to restore web search results.


