How to Fix GeForce Now ‘Error Code 0X0000F004’
Some Nvidia GeForce Now (formerly known as Nvidia GRID) users are encountering the 0X0000F004 error code whenever they attempt to stream a game via the cloud gaming service. This problem is confirmed to occur on both Windows and macOS devices.

After we investigated this particular issue thoroughly, it turns out that several different potential causes might trigger this error code. Here’s a shortlist of scenario in which this problem might occur:
- Underlying server issue – Keep in mind that you can also expect to see this error in instances where Nvidia is currently dealing with underlying server issues that are currently affecting game streaming jobs on GeForce Now. In this case, the only thing you can do is identify the server issue and wait for the involved developers to fix it.
- Insufficient bandwidth – Streaming games over the internet is very demanding if you’re forced to use an ISP with limited bandwidth. If you end up seeing this error because your upload and download speeds are not fast enough to accommodate the connection and you’re using a Wi-Fi network, making the switch to a wired connection (via ethernet cable) should alleviate the symptoms.
- 3rd party AV or firewall interference – If you’re using a 3rd party firewall or a complete security suite that’s known to go overboard with restricting installed apps, chances are you’re seeing this error because it’s terminating the connection with the GeForce Now servers. In this case, you can fix the problem by disabling the 3rd party AV or firewall interference whether by disabling the real-time protection or by uninstalling the problematic suite altogether.
- A restriction imposed by network administrator – If you’re attempting to use GeForce Now while connected to a network with some kind of restrictions, that’s probably why you end up seeing this kind of error. This typically happens with school, work, and hotel networks and can be resolved by connecting to a different network or by using a gaming-focused VPN that will funnel the connection through a different server.
Method 1: Checking the Status of GeForce Now Servers
Before you deploy any of the fixes presented below, you should start by ensuring that Nvidia is not currently dealing with an underlying server issue that’s currently affecting the GeForce Now cloud gaming service.
Looking at past occurrences of this issue, the 0X0000F004 error can either occur due to a problem with the Nvidia Global Services or due to a problem with the streaming server that your GeForce Now client is using.
To verify this potential problem, access the official GeForce Now service status page and see if you spot any red flags that point towards a server issue.
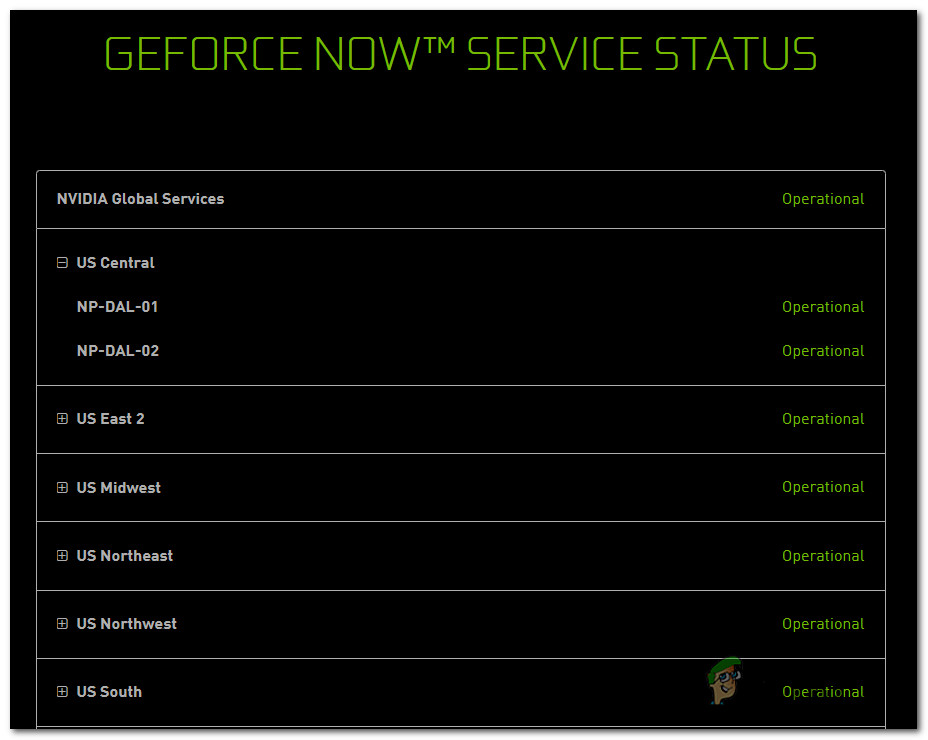
If the status page shows a problem with the NVIDIA Global Services or with the particular cloud gaming server that you’re client is using, chances are the issue is entirely beyond your control.
In case you’ve just confirmed a server issue, there is nothing else you can do other than wait for the involved developers to fix the problem.
On the other hand, the status page is not reporting any server issues that you should be aware of, chances are the 0X0000F004 error is occurring due to something that’s occurring locally – In this case, start by following the potential fixes below.
Method 2: Switch to a Wired Connection
If you’re working with a limited connection and you’re connected over a wireless connection, you might want to switch over to a cabled connection and see if the 0X0000F004 error stops occurring.
Several affected users have confirmed that switching over to a wired connection when using GeForce Now was the only thing that allowed them to stream games without seeing the 0X0000F004 error.
If you think this is the cause of your problem, go ahead and connect your PC or macOS via an ethernet cable before attempting to launching GeForce Now once again.

Once you are connected via an ethernet cable, open GeForce Now normally and see if the problem is now fixed.
In case the same error is still occurring or you were already using a wired cable when attempting to stream games via GeForce Now, move down to the next potential fix below.
Method 3: Disable 3rd party AV interference (if applicable)
As it turns out, one fairly common cause that will cause this 0X0000F004 error with GeForce Now is interference caused by a 3rd party firewall or security suite. There are several 3rd party suites that are known to block connections with the GeForce Now server due to security suspicions.
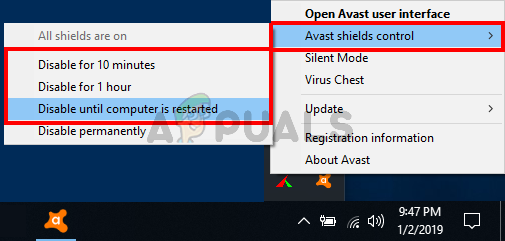
If you’re using a 3rd party suite that includes a firewall solution and you think this scenario is applicable, your should start by disabling the real-time protection before attempting to stream content via GeForce Now once again.
In most cases, you will be able to do this by right-clicking on your Firewall / Antivirus icon from the tray-bar and looking for options that will allow you to disable the real-time protection.
However, keep in mind that certain firewall suites will maintain the list of blocked connections even after you disable the real-time protection. In this case, the only way of freeing the blocked ports is to uninstall the security suite altogether and make sure that you’re not leaving behind any leftover files that might still cause this behavior.
Here’s a short guide that will walk you through the process of uninstalling the overprotective 3rd party firewall via the Programs and Features screen:
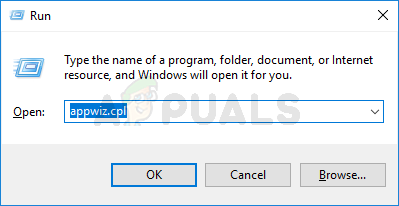
- Press Windows key + R to open up a Run dialog box. Next, type ‘appwiz.cpl’ and press Enter to open up the Programs and Features menu.
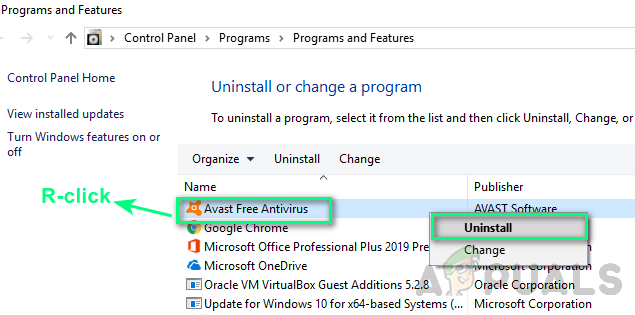
Type appwiz.cpl and Press Enter To Open Installed Programs Page - When you’re inside the Programs and Features screen, scroll down through the list of installed programs and locate the security tool that you want to uninstall.
- When you locate the overprotective AV/Firewall suite that you suspect might be causing the 0X0000F004 error, right-click on it and choose Uninstall from the context menu that just appeared.
Uninstalling Third-party Antivirus Software - Inside the uninstallation screen, follow the on-screen prompts to complete the uninstallation, then restart your computer and wait for your computer to boot back up.
- After the next startup sequence is complete, remove any remnant files left behind by the recently installed antivirus or firewall.
If this method didn’t fix the issue for you or this scenario was not applicable, move down to the next potential fix below.
Method 4: Switching the Network you’re Connecting to (if applicable)
If you’re attempting to stream games via GeForce Now from some kind of restricted networks like your workplace, school, hotel, or something similar, chances are GeForce Now is blocked by your network administrator.
Keep in mind that typically, GeForce Now is on the top of the list of services blocked by network administrators due to its potential of taking a lot of bandwidth.
In case you find yourself in this particular scenario, you should be able to fix the problem by only using the GeForce Now service from your home network or another network where this restriction is not imposed.
However, if you don’t have a choice but to use a restricted network, follow Method 5 below for an ingenious way of bypassing the restrictions imposed by your network administrator.
Method 5: Using a Gaming-Focused VPN
If none of the instructions above have worked for you and you’re attempting to use GeForce Now from a restricted network, the only way to bypass the restriction is to funnel your connection in a gaming VPN network.
Using a VPN is also effective in situations where your ISP is using a Level 3 node that’s causing the 0X0000F004 error.
Keep in mind that you don’t necessarily have to go for a paid VPN network – There are plenty of free VPN solutions, but the majority of them have some kind of restriction that will encourage you to update. But before you commit to a monthly VPN plan, take a look at our list of the best VPNs for gaming.
However, if you’re looking for specific instructions on setting up a free VPN to use with GeForce Now, follow the instructions below to learn how to install the free version of Hide.Me VPN:
- Start by accessing the official download page of Hide.Me VPN from your default browser. Once inside, click on the Download button.
- Once you’re inside the next screen, click on on the Register button that’s associated with the free version of Hide.Me VPN.

Downloading the VPN solution - Once you get to the next prompt, go ahead and insert a valid email address, then press Enter to complete the registration.

Registering for the service Note: It’s very important to use the real email address since you will be required to confirm it down the line.
- Next, access your email address and look for the verification email from the Hide.Me service. When you locate the correct email, click on the verification link to confirm the operation.

Creating an account with Hide.me Note: Once you click the registration link and verify your email, you will be automatically redirected to the account creation menu.
- Inside the account creation screen, add the username and password that you want to use, then click on Create account.
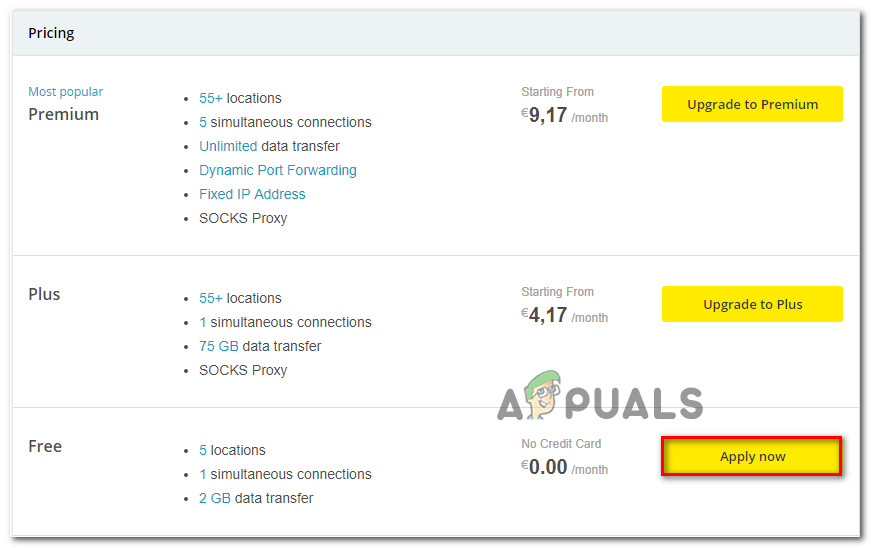
Creating an account with Hide.me - Once the operation is complete, make your way to Pricing > Free, then click on Apply now to activate the free plan.
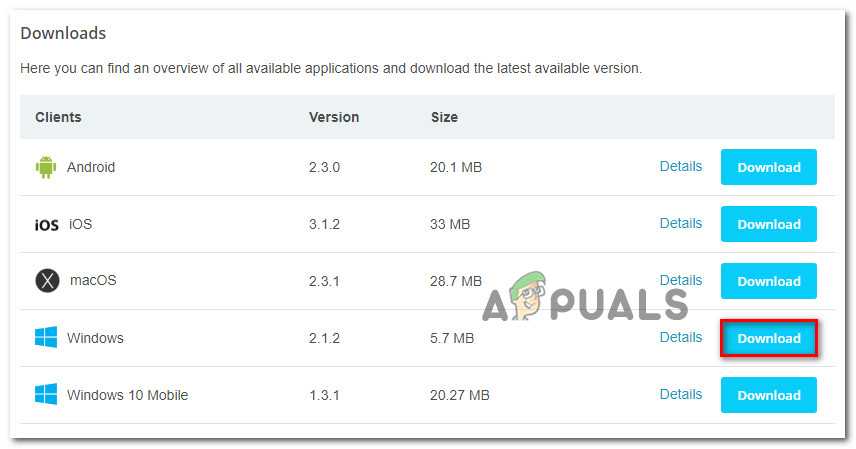
Apply for the free account - Once you’ve successfully selected the free plan, move over to the Download section and click on the Download Now button that’s associated with the Windows versions you’re actively using.
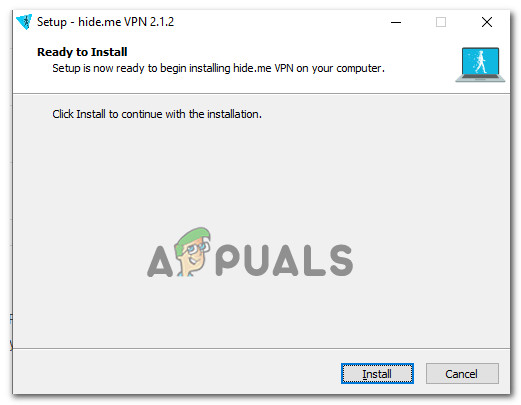
Downloading the Windows client of Hide.me - Once the download is complete, open the installer and follow the instructions to complete the installation of Hide.Me VPN.
Installing the Hide.Me VPN application - Once the installation is finished, use the credentials you previously established at step 4 and click on Start your Free trial, then select a viable location and start the system-level VPN.
- Once your VPN is finally active, launch GeForce Now and see if the problem is now fixed.