Fix: Your Computer Appears to be Correctly Configured, but the Device or Resource (DNS server) is not Responding
When you see the message “Your computer appears to be correctly configured, but the device or resource (DNS server) is not responding.” it usually means your computer can’t connect to the DNS server that changes website names into IP addresses. This problem often happens when your device is using the wrong or broken DNS server, or when there’s a mistake in the network settings.
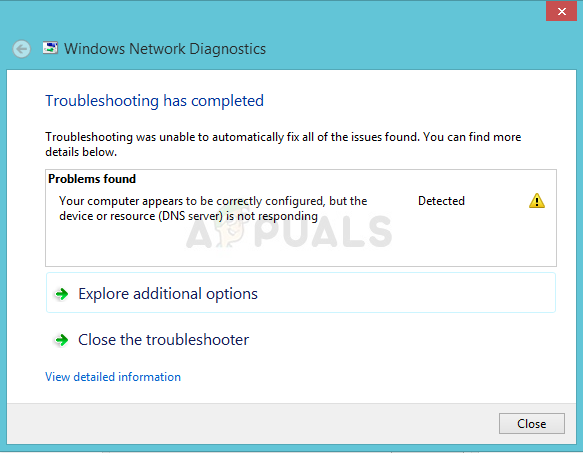
The most common cause is old or broken network drivers, but it can also be caused by a corrupted DNS cache or your antivirus software.
Other possible issues include wrong DNS or proxy settings and short-term problems with your router or modem.
In this article, we will talk about fixes to solve this problem.
1. Update or Roll Back Your Network Drivers
You can address DNS issues by focusing on network drivers, which help your computer link to the internet. Updating these drivers, if they are old or corrupt, can improve communication with DNS servers. However, if a driver update caused the problem, returning to a previous version might fix any compatibility issues.
- Press Windows + R, type ‘devmgmt.msc’, and hit Enter.

Running Device Manager - Expand the “Network Adapters” section. This will show all network adapters currently installed on the machine.
1.1 Update the Driver:
- Right-click the network adapter you wish to uninstall and select “Uninstall device.” This will remove the adapter from the list and uninstall the device.
- Click “OK” when prompted to confirm the uninstallation.
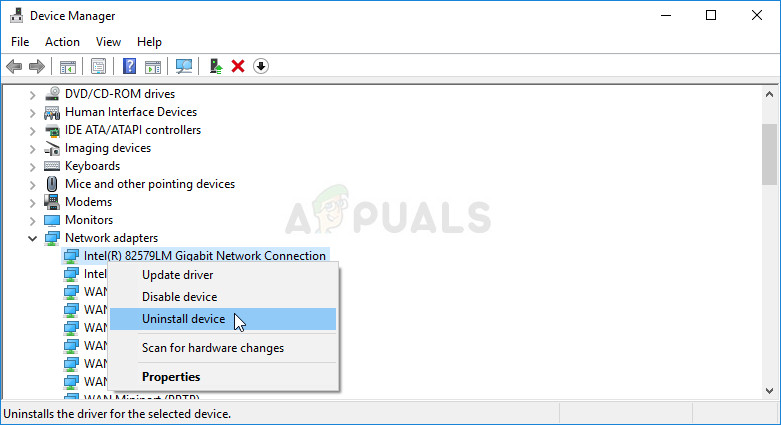
Uninstalling your networking device driver - Remove the adapter from your computer and visit the manufacturer’s website to find the latest drivers for your operating system. Download and run the driver from your Downloads folder.
- Follow the on-screen instructions to install the driver. If the adapter is external, like a Wi-Fi dongle, keep it disconnected until prompted to reconnect it. Restart your computer and check if the issue is resolved.
1.2 Rolling Back the Driver:
- Right-click the network adapter you want to uninstall and select Properties. In the Properties window, go to the Driver tab and locate the Roll Back Driver option.
- If the option is grayed out, it means the device wasn’t updated recently and lacks backup files of the old driver. This likely indicates that a recent driver update is not causing the problem.
- If the option is available, click on it and follow the on-screen instructions. Restart the computer and check if the issue persists in Command Prompt.
2. Change the DNS and IP Addresses you are using
Incorrect DNS settings can stop your device from reaching the right DNS server, leading to internet problems. By manually switching to a trusted public DNS, you can avoid issues with your ISP’s DNS server. This fix not only solves connectivity problems but can also improve speed and reliability because these servers are global and faster. Setting your IP settings to automatic helps your device connect properly with your network, fixing conflicts and making the connection more stable.
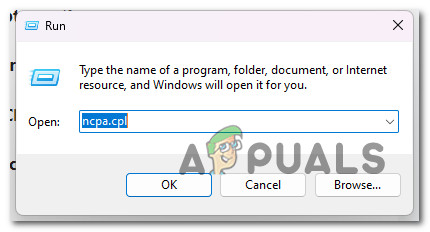
- Press Windows + R, type ‘ncpa.cpl’, and hit Enter.
- With the Internet Connection window open, double-click your active Network Adapter and click the Properties button. Ensure you have admin permissions.
- Find the Internet Protocol Version 4 (TCP/IPv4) item in the list. Select it and click the Properties button.
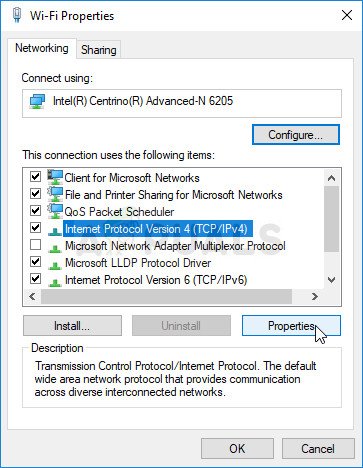
IPv4 Properties - In the General tab, switch both radio buttons to “Obtain an IP address automatically” and “Obtain DNS server address automatically” if they were set differently.
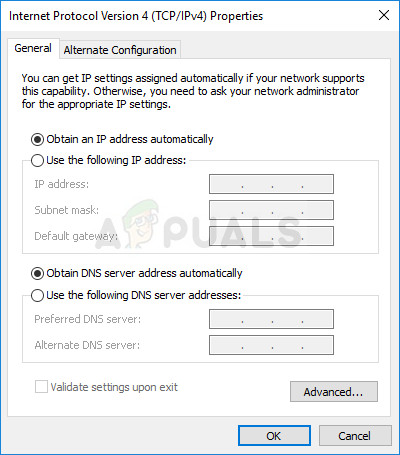
Switching IP and DNS settings to default - If not, select “Obtain an IP address automatically,” but keep the “Use the following DNS server addresses” option checked. Enter 8.8.8.8 and 8.8.4.4 as the Preferred and Alternate DNS servers, respectively.
- Ensure the “Validate settings upon exit” option is checked and click OK to apply the changes. Check if the error persists after running the network troubleshooter.
3. Clear Your DNS Cache and Reset Your IP Settings
Clearing the DNS cache and resetting IP settings is like refreshing your network. Sometimes, the DNS cache gets corrupted, causing wrong or outdated IP addresses and stopping proper connections. By clearing it, your computer asks the server for new DNS info, which usually fixes these problems.
- Search for Command Prompt in the search box and run it as an Administrator.

- Enter the following commands, pressing Enter after each one. Wait for the “Operation completed successfully” message to confirm that the process worked.
ipconfig/flushdns
ipconfig/release
ipconfig/release6
ipconfig/renew
- Try reconnecting to the Internet and check if the error persists.


