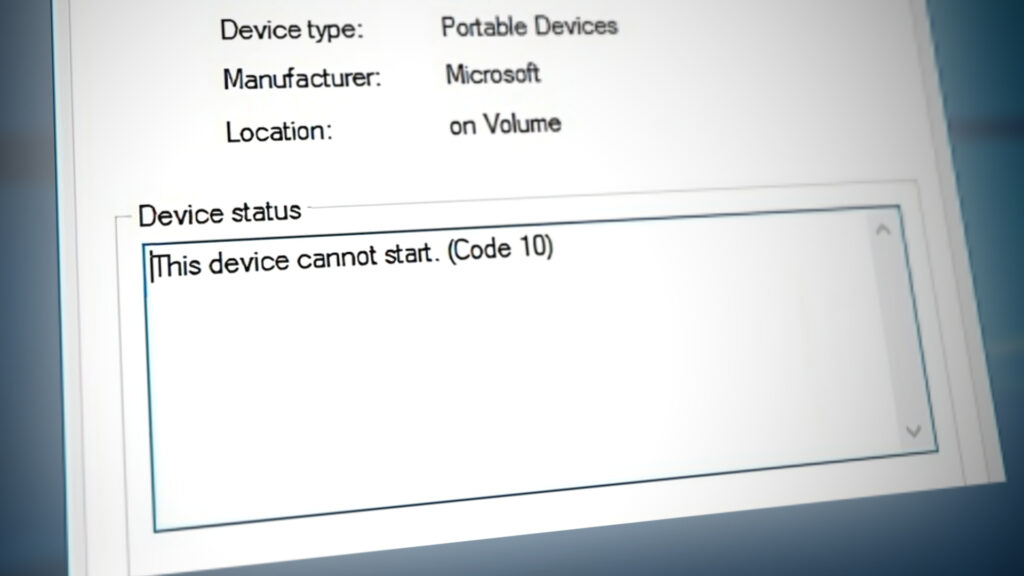
Fix: WPD FileSystem Volume Driver (Code 10)
The WPD FileSystem Volume Driver is one of the drivers your will never hear of before they start misbehaving and displaying various error messages on your computer. There are quite a few different problems which can occur with the WPD FileSystem Volume Driver and some of them are more common than others.
All of these issues have similar methods and solutions which can be used to solve the problem so make sure you follow through the entire article in order to find the solution which works the best for you.
Solution 1: Assign Drive Letters in Disk Manager
The most common errors regarding the WPD FileSystem Volume Driver such as the Code 10 error or simply a yellow exclamation mark next to it signalizing that something is wrong, can be fixed with the following method which simply consists of assigning drive letters to each storage device on your PC, especially the one which is causing problems when connected.
- First of all, you will need to make sure that no files from the storage devices you want to edit are in use or open in any other way. Next, make sure you are not copying or moving anything from or to the disk before proceeding.
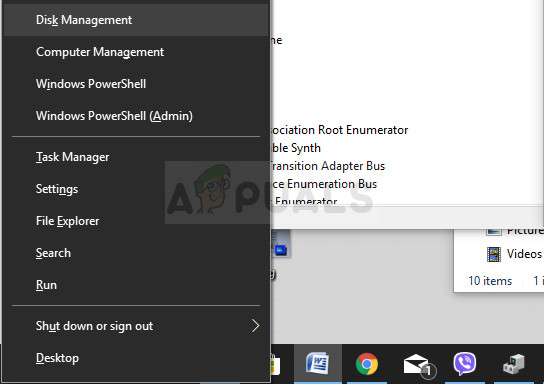
- After that, either use the Windows Key + X key combination or right-click on the Start menu and choose the Disk Management option in order to open its console.
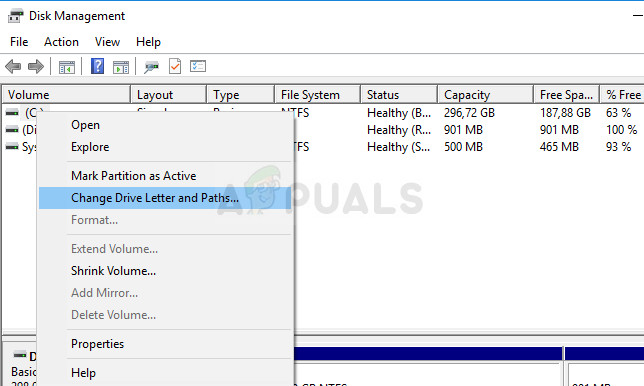
- Right-click the volume with the drive letter you want to change and choose the Change Drive Letter and Paths option. After that, click on change and choose from a list of available drive letters.
- We advise you not to choose letters A or B because they were reserved for floppy drives on older operating systems and this can confuse older software tools. Click on Apply and confirm any dialog boxes which may appear before closing the console.
After this process is over, it’s time to head over to the Device manager and restart our device. Follow the steps below:
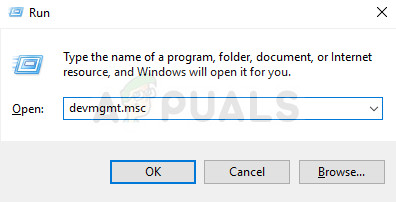
- Type “Device Manager” into the search field to open the device manager console. You can also use the Windows Key + R key combination in order to bring up the Run dialog box. Type in devmgmt.msc in the box and click OK or Enter key.
- Expand the field where the problematic device is located. If it is a DVD, it will be located under “DVD/CD-ROM Drives”, etc. This will list all similar devices that the machine has installed. Right click on the device you want to troubleshoot and choose Disable device. Enable it back after a minute.
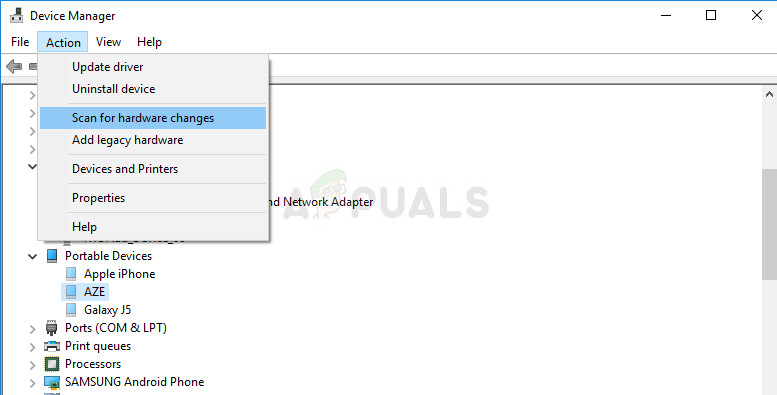
- After that, click on the Action button at the menu at the top of the window and choose Scan for hardware changes. If there are new drivers, the Device manager will try to install them. Exit and restart your computer in order to apply the changes. Check to see if the problem is still present.
Solution 2: Delete All Unused Hidden Devices in Device Manager
To be honest, even though the Device Manager windows has a button which says display hidden devices, Windows won’t actually show all hidden devices and there are three types of devices which won’t show up even after choosing this option. The only way to view and to uninstall these devices is by creating a new Environment Variable.
- Right-click on My Computer/This PC and choose the Properties option. After that, locate the Advanced system settings option at the right pane of the Properties window, click on it, and navigate to the Advanced tab.
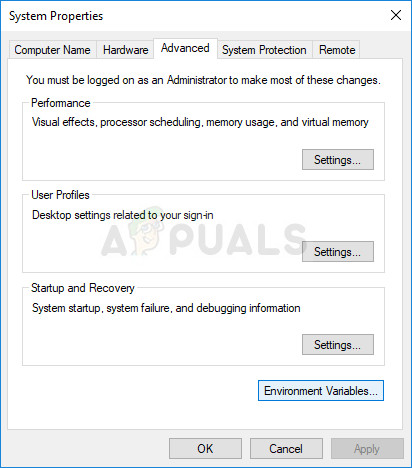
- At the bottom right part of the Advanced tab, you will be able to see the Environment Variables button so click on it and click on New… button under the System variables section.
- Set the name of the new variable to “devmgr_show_nonpresent_devices” and set its value simply to 1. Apply these changes and exit this window.
- Type “Device Manager” into the search field to open the device manager console. You can also use the Windows Key + R key combination in order to bring up the Run dialog box. Type in devmgmt.msc in the box and click OK or Enter key.
- Under the “Universal Serial Bus controllers” section, uninstall any grayed out entries which are not in use (that is why they were so hidden) and visit some other sections depending on which device you are struggling with.
- Restart your computer in order to apply the changes and check to see if you are still having issues with your device.
Solution 3: Reinstall the Microsoft WPD FileSystem Volume Driver Manually
If there is something wrong with the driver which manages the portable devices connected to your computer, then it’s the best to solve the problem with it directly instead of consulting others. The problem can be solved simply by reinstalling this driver manually using Device Manager.
- Click Start and type Run. Select Run. A Run dialog box will appear.
- Type “devmgmt.msc” in the run dialog box and click the OK button. This is to open Device Manager Window.
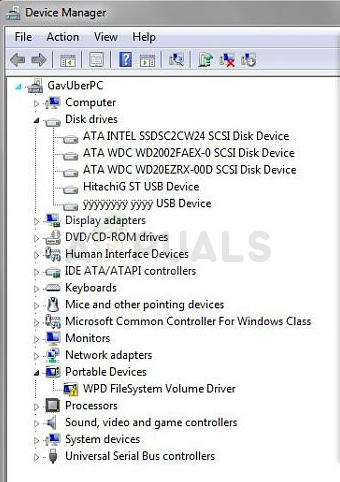
- Locate your WPD FileSystem Volume Driver by checking under the Portable devices section. If you can’t see it, click on View >> Show hidden devices. Click on the arrow left to this section in order to view the list of touchpad and mouse drivers.
- Right-click on your WPD FileSystem Volume Driver you currently have installed and select the Uninstall device option from the context menu.
- Click on Action >> Scan for hardware changes. Windows should now proceed to download and install the driver properly again.


THIS DOES NOT WORK PERIOD, SORRY BUT IT DOES NOT WORK