How to fix ‘Wireless capability is turned off’ error in Windows?
The error “wireless capability is turned off” usually occurs when the computer detects that the wireless adapter is disabled externally and it cannot turn it on itself. This error is very generic and may correspond to a lot of different situations. It comes forth when you run Windows Network Diagnostics when you are unable to connect to the internet.
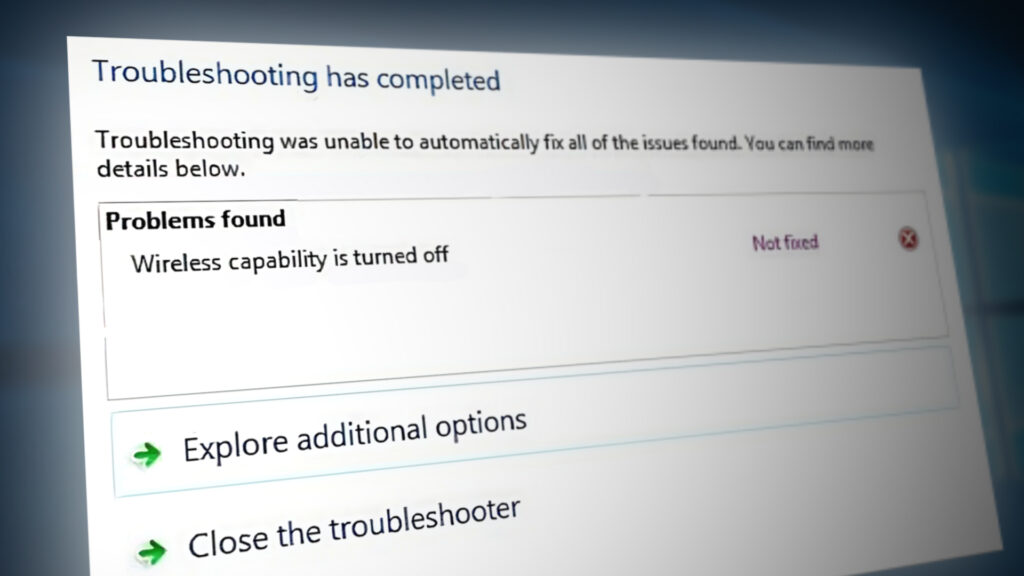
These situations include fault at BIOS settings, hardware button disabled, outdated drivers etc. This issue usually comes forth when you update your operating system or when you update your BIOS or install a recent Windows update. We have listed down a number of different solutions for this problem. Start with the first one and work your way down to more complex workarounds.
1. Turn WIFI On Using Physical/Keyboard Switch
Many laptops come equipped with a physical switch or keyboard shortcut that allows users to quickly turn WiFi on or off with a single button. If the hardware switch is turned off unintentionally, it can cause the error message. Look for any button present on the sides of your laptop or below the screen somewhere. In some models, there is also a touch laptop feature present near the bottom of your screen. Try looking for marking of a wireless icon and touch it to turn it on properly.

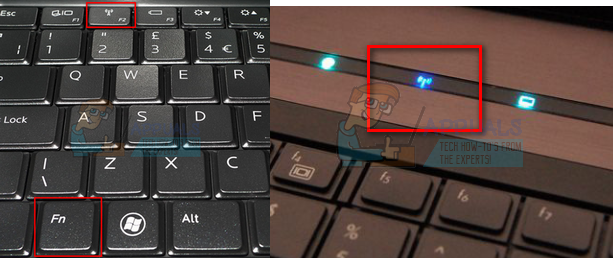
Other than the physical switch, there are also options to turn the WiFi off using a keyboard switch. They also provide the same function as the hardware switch; ease of access and accessibility. These buttons usually require you to press the “Fn” button before you can press them. This configuration may different laptop to laptop. Look around your keyboard for any key with a key representing a wireless switch.
In some models, there is also a touch laptop feature present near the bottom of your screen. Try looking for marking of a wireless icon and touch it to turn it on properly. One common key to turn it on is “Fn + F2”.
2. Power-cycle your Laptop
Another workaround which works for a lot of users is power cycling your laptop. Power cycling is an act of turning off a computer completely off and then on again. Reasons for power cycling include having an electronic device reinitialize its set of configurations parameters or recover from an unresponsive state or module. It is also used to reset all the network configurations as they are all lost when you turn the laptop completely off.
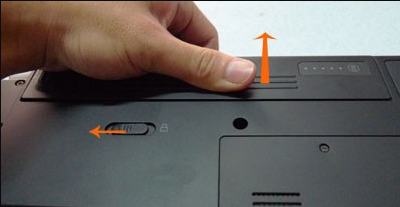
To power cycle your laptop, shut it down properly and remove all the wires from it. Next remove the battery properly and detach it. Now, wait for around 2-3 minutes before plugging the battery back in. The reason for taking out the battery is to make sure that all the capacitors are discharged correctly and all the current data stored in RAM is lost. After turning the laptop back on, check if the problem got solved.
3. Turn WIFI on using Windows Mobility Center
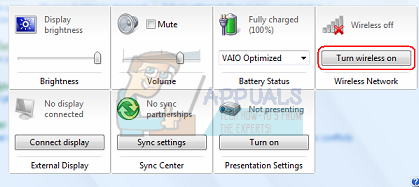
Windows Mobility Center centralizes information and settings relevant to your computer. It consists of square tiles consisting of a function each. It is usually inaccessible on various desktop computers. Functionalities such as brightness control, wireless options, battery or power plan etc. are all found there. It is possible that the WiFi configurations is turned off in Windows Mobility Center because of which you are facing the issue.
- Press Windows + S, type “Windows mobility center”, and open the application. For Windows 7 users, press Windows + X, and select the application from the ones listed.

- Click the button “Turn wireless on” option present underneath the wireless heading. If it is not accessible/not present, move on to the next solutions. Some computers don’t have this option in their mobility center.
4. Change Power Management Settings
Windows has a feature which turns off devices when not in use to save power and conserve energy. This is done so to maximize the battery life of your machines. Chances are that the system turned off your device and it isn’t turning back on. We can try disabling the power saving mode and check if this brings any improvement to our case. The amount of power spent to keep the wireless adapter is very minimal so you don’t have anything to worry about.
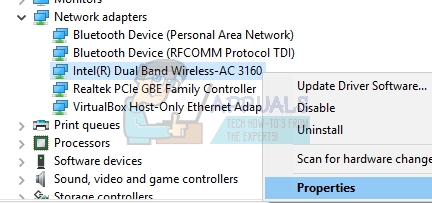
- Press Windows + R to launch the Run Type “devmgmt.msc” in the dialogue box and press Enter. This will launch a window consisting of all the devices present on your computer.
- Expand “Network adapters” and locate the wireless adapter connected to your computer. Right-click on the Wi-Fi adapter and select Properties.
- Select the Power Management tab and uncheck the option which says “Allow the computer to turn off this device to save power”.
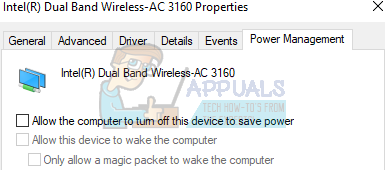
- Press Ok to save changes and exit. You might need to restart your computer.
5. Turn WiFi on at Login Screen
Another potential workaround which many users reported was turning the WiFi on at the login screen when you turn on your Windows. This feature is usually there so in-case the wrong authentication, Windows can look up to the internet and match the most recent password with the one you entered. The reason is unknown but if this solution works for you, you should create a new account and see if the wireless functionality works as expected.
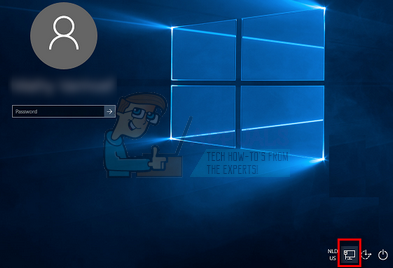
- Restart your computer and let the computer proceed to the login screen.
- Look at the bottom right side of the screen and locate the wireless adapter icon. Click it and turn the WiFi on.
- After WiFi is turned on, check if it is working as expected and there are no problems.
Note: You can also try turning the WiFi button on when you are on your login screen. There were some users who reported that this fixed their issue.
6. Update Network Drivers
Many users reported that they experienced this error because their drivers were not updated to the latest build. Drivers are the main driving force behind controlling your network adapter. A network adapter is just hardware and drivers are the main controlling mechanism which controls its operation. Windows is supposed to keep your drivers up to date automatically, but, you should try updating them manually too. Head over to your manufacturer’s website and download the latest network drivers to an accessible location.
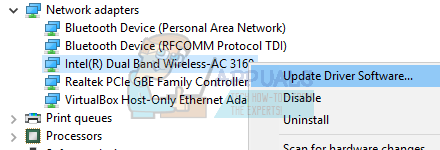
- Press Windows + R to launch the Run Type “devmgmt.msc” in the dialogue box and hit Enter. This will launch your computer’s device manager.
- Expand “Network adapters”, and right-click on your WiFi device, and select “Update driver”.
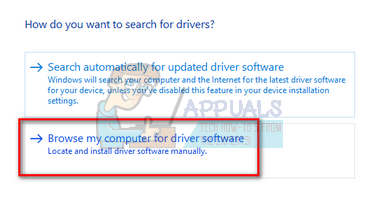
- Now Windows will pop a dialogue box asking you which way do you want to update your driver. Select the second option (Browse my computer for driver software) and proceed.
Select the driver file you downloaded using the browse button when it appears and update it accordingly.
- Restart your computer after the update and check if the connection is working properly.
7. Update BIOS
BIOS stands for Basic Input/output System and it is a firmware used to perform the hardware initialization during the booting process of your computer. The BIOS system is preinstalled on your computer by your manufacturer and it is the first software that runs when your computer is started up. It is more like a key which starts all other processes on your computer.
The BIOS is also responsible to test hardware components on your PC and make sure that they are working properly without any errors. Most of the BIOS are designed specifically to work with a specific model or motherboard. Traditionally, BIOS was written in ROM and hardware needed to be replaced when updating the BIOS. In modern computer systems, BIOS is stored in flash memory so it can be rewritten without the menace of replacing the hardware.
There were numerous reports that updating the BIOS of the computer solved the problem instantly but we kept it is a last resort as it is very technical. Backup your data completely before resorting to this solution We have a number of different articles targeting how to update the bios of your machine. Take a look.
How to Update Gateway Desktop or Laptop BIOS
How to Update BIOS on A HP Desktop/Laptop
In windows mobility centre, the wireless connection is not allowing me to change it.
In otherwords, the wireless button is unavailable.