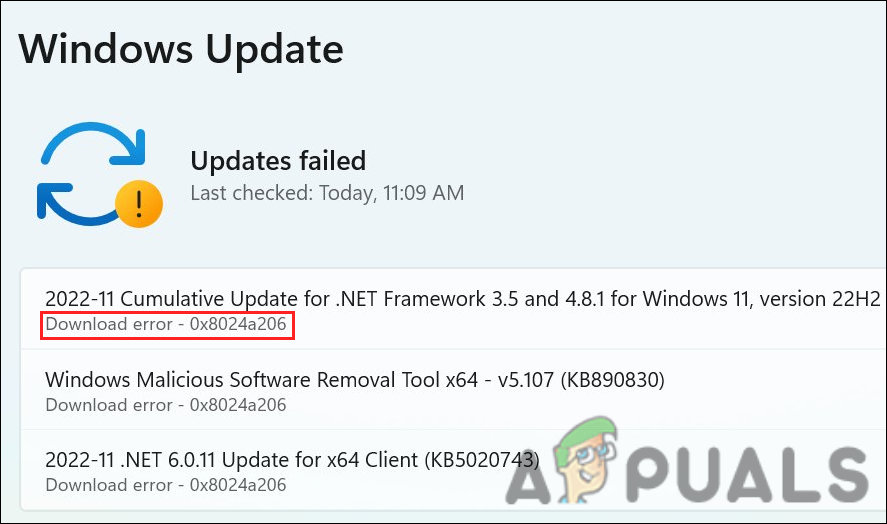
How to Fix Windows Update Error 0x8024A206
The update error code 0x8024a206 mostly occurs while installing the cumulative updates. In some cases, it can also make your Wi-Fi adaptor act up.
1. Run the Windows Update Troubleshooter
The most appropriate tool to use in this case will be the Windows Update troubleshooter. This tool can be found in the Settings app and can fix most of the issues preventing you from installing the updates.
Here is how you can run the tool:
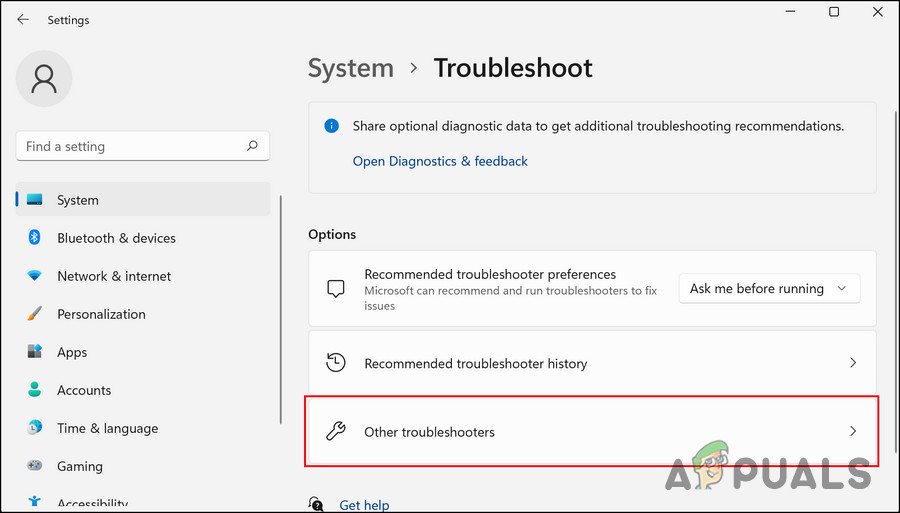
- Press the Win + I keys together to open Windows Settings.
- Navigate to System > Troubleshoot > Other troubleshooters.
Access the Other troubleshooters option - Go to the Windows Update troubleshooter and select Run. The troubleshooter should now begin scanning for problems.
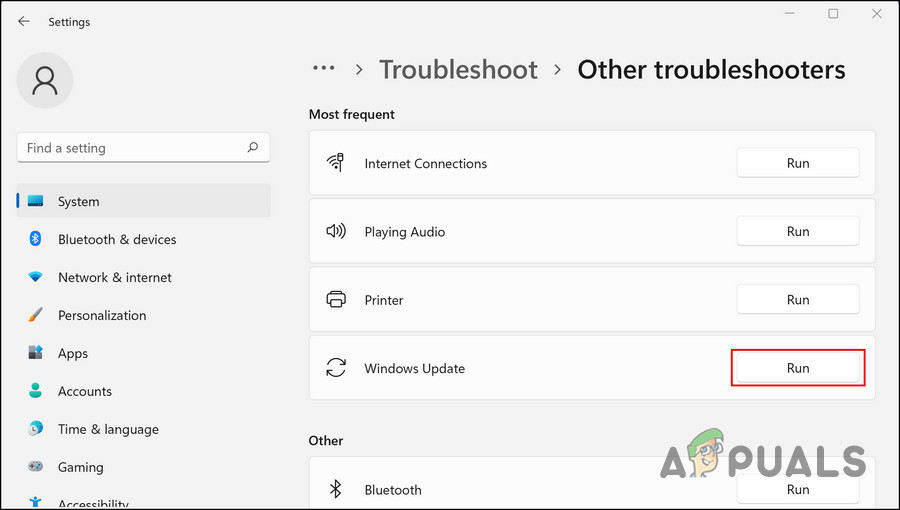
Run the Windows Update troubleshooter - Review the tool’s findings once the process has been completed.
- To proceed with the solutions, click on Apply this fix. Otherwise, click on the Close the troubleshooter option.
While you are at it, you can also make use of the two other troubleshooters Windows comes with – SFC and DISM. Both tools can be run using the Command Prompt and work by scanning the system for issues. If a problem is identified, they will resolve the problem as well.
2. Reset the Windows Update Services and Cache
When installing updates, it is important to have the relevant services enabled and working properly. It may be difficult to install the update if any of these services aren’t working.
The best solution is to reset the required components and services to their default values. We have created a batch file that will allow you to perform this action without having to manually reset all the services individually.
What you need to do is install the file and run it. It will reset the Windows update services and cache, resolving the issue at hand.
Here is all that you need to do:
- Click here to download the file.
- Select Download anyway in the next window.
- Right-click on the file after it has been downloaded and choose Run as administrator.
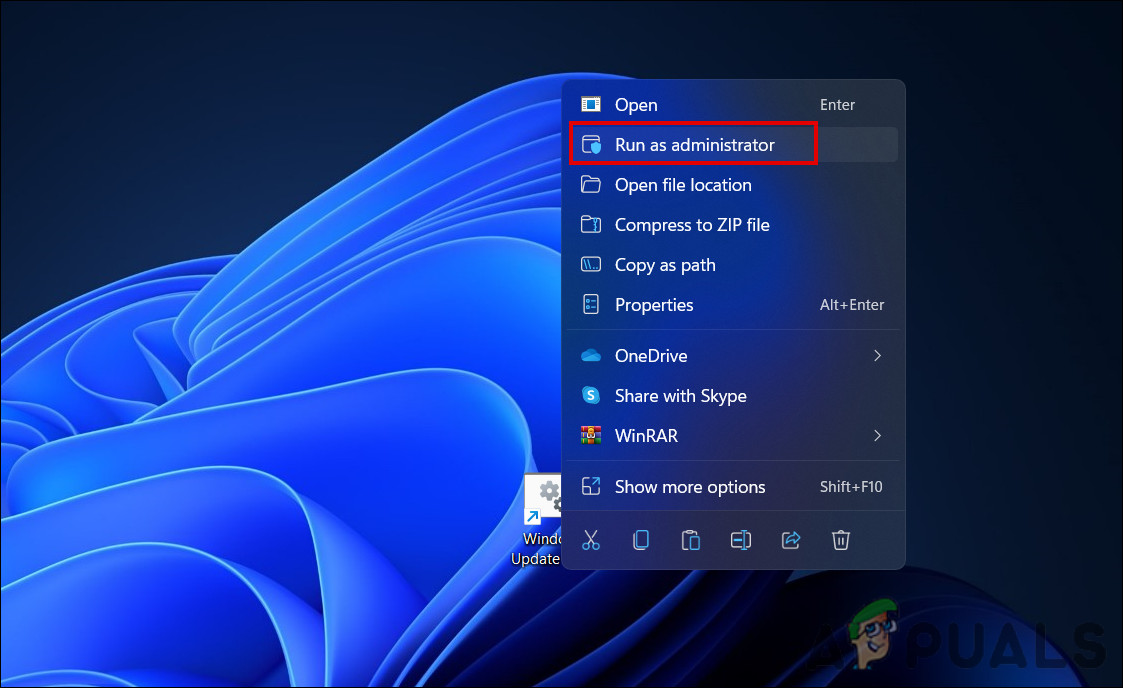
Run the bat file as administrator - In the following dialog, choose More info > Run anyway.

Run the bat file - Click Yes in the User Account Control prompt.
- Once the process is complete, restart your computer. After rebooting, check to see if the issue has been resolved.
3. Update the Network Driver
In some cases, where the users were facing an issue with the WiFi service as well, the outdated network driver was to blame. If this scenario is applicable, then updating the network driver should fix the problem at hand.
Here is how you can proceed:
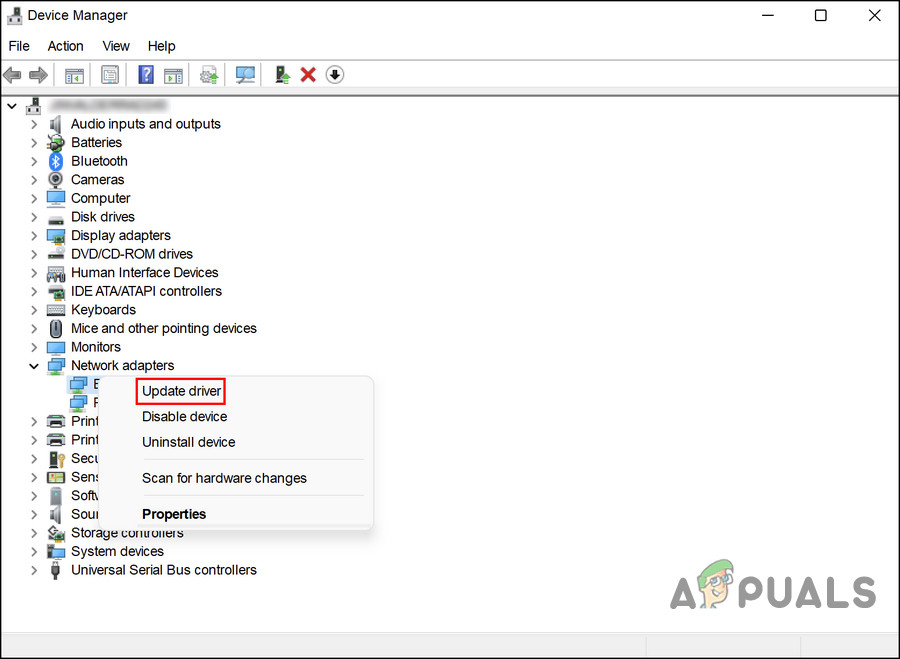
- Type Device Manager in Windows search and click Open.
- In the Device Manager window, locate the Network adapters section and expand it.
- Right-click on the network driver and choose Update driver.
Update the targeted driver - Click on Search automatically for drivers and let the tool pick a driver from the system.
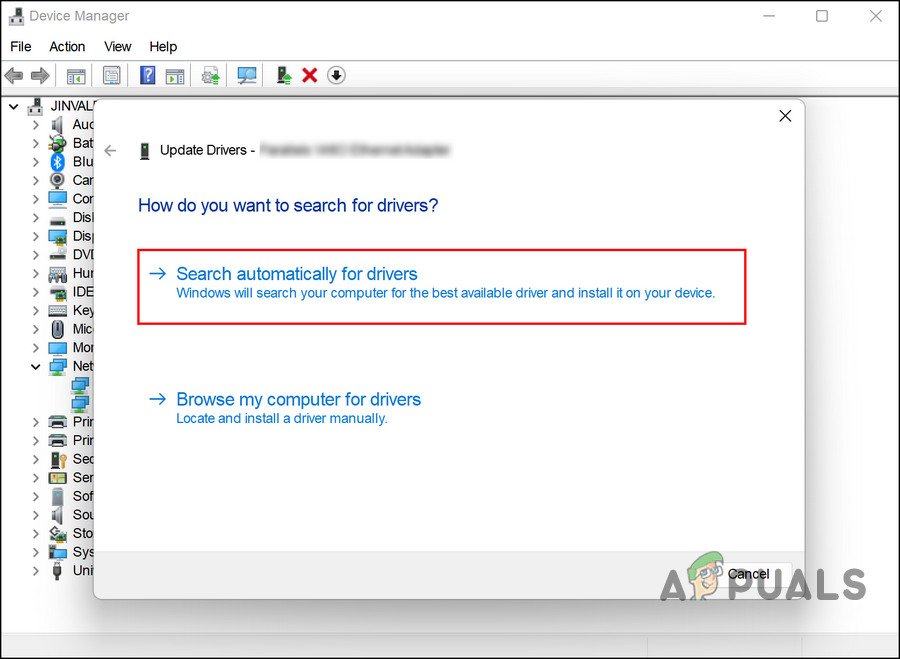
Click on Search automatically for drivers - Follow the on-screen instructions to proceed.
- Once done, close the Device Manager utility and restart your computer. Upon reboot, try installing the update again and check if the problem is fixed.
4. Install the Updates Manually
Another easy way of installing the updates that your system automatically cannot install is by using the Microsoft Update catalog, which is a directory of all the updates released by Microsoft.
You can search for the required update there using the KB number and then install it manually. Since the update will be directly installed on the system, you will be able to skip the download error.
Follow these steps to proceed:
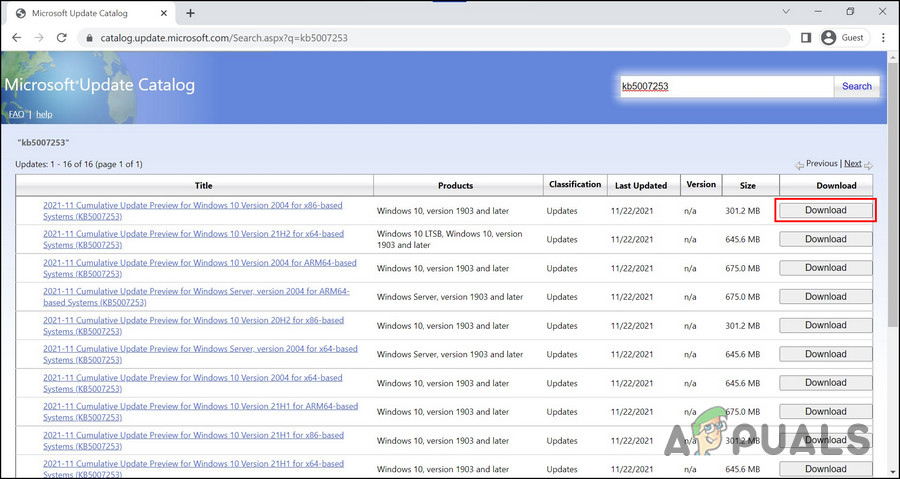
- Launch your browser and navigate to the Microsoft Update Catalog.
- Head over to the search bar at the top and enter the KB number of the update you want to install. Then, click Enter.
- Your computer should now show a list of available updates. Choose the one that best suits your device specifications and click the Download button.
Install the update manually - You can install the update by clicking on the update file and following the instructions.
Hopefully, you will be able to install the update without any problems.
5. Perform a Reset or a Repair Install
By this point, if you still haven’t discovered a viable solution, conventional troubleshooting methods won’t be effective.
The final option is to reset Windows to its default state, which will give your system a fresh start. By choosing this method, you will essentially be removing all applications you installed yourself on your computer and restoring Windows to its original configuration.
You can also perform a repair install, in which case your personal files and programs will not be affected by the fresh Windows installation.
The problem can be solved using either method, so you can choose your preference.


