How to Fix “Windows 10 Installation has Failed” Error?
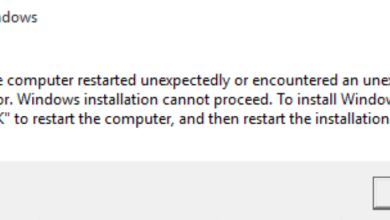
When trying to upgrade or install Windows 10, you might see the “Windows 10 installation has failed” error near the end, stopping the process suddenly. This error means something went wrong, like a corrupted file or an incompatible system.

The most common reason is outdated or incompatible drivers, but other causes can include bad installation media, interference from third-party antivirus software, not enough disk space, or incorrect BIOS settings. Unfinished Windows updates, damaged system files, or conflicts with existing software can also contribute to this problem.
In this article, we will discuss different ways to solve this error.
1. Meet the minimum requirements
Before trying anything else, make sure your computer meets the minimum requirements for Windows 10. Not enough RAM, a slow processor, or little disk space can stop the installation, so checking that your hardware fits these requirements is a key first step to avoid errors.
- Processor: 1 gigahertz (GHz) or faster processor or SoC
- RAM: 1 gigabyte (GB) for 32-bit or 2 GB for 64-bit
- Hard disk space: 16 GB for 32-bit OS or 20 GB for 64-bit OS
- Graphics card: DirectX 9 or later with WDDM 1.0 driver
- Display: 800 x 600
If any of the components listed above are below the minimum threshold, you will not be able to install Windows 10 conventionally.
In case you exceed the minimum requirements, move down to the next method below to troubleshoot a potential power management cause triggering the “Windows 10 Installation has Failed” error.
2. Remove all non-essential peripherals
Disconnecting non-essential devices, like printers or external drives, helps avoid problems during installation. These devices can sometimes create conflicts or errors. By simplifying the hardware setup, the installation can focus on the main components, reducing potential issues.
3. Uninstall Conflicting language packs
Removing unnecessary language packs can prevent issues with system settings during installation. These packs might cause file mismatches or errors, stopping the installation from finishing properly.
3.1. Uninstall language packs on Windows 10
- Press the Windows key to open the Start menu and type ‘Language settings’ in the search bar.
- Select Language Settings from the results.

Accessing the Language Settings menu - In the Windows Language menu, scroll down and set your active language to your preference, e.g., English (United States).
- Scroll under Preferred Language, click Remove to eliminate unnecessary languages.

Removing the unnecessary languages - After removing the unneeded languages, reboot your PC to check if the issue is resolved at startup.
3.2. Uninstall language packs on Windows 8.1/7
- Press the Windows key to open the Start menu.
- Type ‘languages’ in the search box.

Access the language menu on Windows 7 and Windows 8.1. - Navigate to the Region and Language menu and select the Keyboards and languages tab.
- Under Display language, click Install / Uninstall languages.
- Choose Uninstall display languages on the following screen.
- Remove all non-primary language packs from the language menu.
- Save changes, reboot your PC, and try installing or upgrading to Windows 10 again.
4. Clear the Attributes cache
Refreshing the file system’s attribute data can often fix conflicts during installation. By clearing the Attributes cache, the system can correctly read and apply file permissions, removing problems caused by damaged or outdated data that might block Windows 10 from installing successfully.
- Start the Windows 10 installation and proceed until the last screen, which summarizes the selections and settings.
- You should see a screen indicating what will be installed and the chosen settings.

Ready to install Windows 10 - Minimize the installer, open File Explorer, and navigate to Local Disk C.
- Find the $WINDOWS.~BT folder in the root directory of the Local Disk.
- If you don’t see the $WINDOWS.~BT folder, enable hidden files: Click the “View” tab in File Explorer’s menu, then check “Hidden items” in the Show/hide section.

Making the hidden items visible on Windows - Right-click the folder, then select Properties.
- In the General tab, look for the Attributes section at the bottom.
- Uncheck the boxes for Read-only and System. Click Apply and exit.
- Try rerunning the installation to verify if the issue persists.
5. Disable/Uninstall 3rd party antivirus
Antivirus programs from other companies can sometimes block important system processes during installation because they mistake them for threats. Temporarily turning off or uninstalling the antivirus helps ensure it doesn’t interfere, allowing the installation to continue smoothly.
If you are using an external antivirus without a firewall component, you should be able to resolve the issue by disabling real-time protection. In most cases, you can do this by accessing the tray icon for your AV software.

If your 3rd party security suite includes a firewall component, you will need to uninstall the suite temporarily (at least until they resolve the compatibility issue).
Follow the steps below to do this:
- Press Windows key + R to open the Run dialog box.
- Type ‘appwiz.cpl’ and press Enter to access the Programs and Features menu.

Accessing the Programs and Features menu - Find the security suite that needs to be uninstalled.
- Right-click on the third-party antivirus suite and select Uninstall to begin the uninstallation process.

Uninstall the problematic antivirus - Complete the uninstallation by following the prompts, then restart your PC to check if the “Windows 10 Installation has Failed” error is resolved.
6. Rename the install folder
Sometimes, hidden issues in the installation folder can interrupt the Windows setup process. Renaming the folder makes the installer create a new directory, avoiding any damaged or troublesome files that might be causing the error. This provides a smoother installation and gets rid of possible file problems.
- Begin the Windows 10 installation until you reach the final screen before actual installation begins, showing what’s being installed and your selected settings.

Installing Windows 10 - Minimize the installer, open File Explorer, and navigate to the installation media drive (USB or DVD).
- Open the drive and go to the sources folder.
- Find the file install.esd, right-click it, and select Rename.
- Change its extension from ‘esd’ to ‘wim’.

Change to wim extension - Attempt the installation again to see if the issue persists.
7. Repair the BCD Config
If the Boot Configuration Data (BCD) is damaged or set up wrong, it can stop Windows 10 from installing properly. Fixing the BCD makes sure the system has the right instructions to start up and continue with the installation, solving errors caused by missing or wrong boot details.
NOTE: If your computer’s system is down, you will have to use the installation media used to install Windows for this process.
- Insert the installation drive into your computer and boot it up.
- When prompted, press any key to boot from the installation media.

Press any key to boot from installation media - Select Repair your computer on the first setup screen (bottom-left corner).
- Choose your preferred keyboard layout.
- Navigate to Troubleshoot >> Advanced Options >> Command Prompt.

NOTE: If no system issues exist, use Windows UI: Open Settings with Windows Key + I or click the Start menu gear icon. Choose Update & security >> Recovery and select Restart Now under Advanced startup.
Restarting in the recovery menu - Your PC will restart, displaying the Advanced options screen.
- Select Command Prompt from the Advanced options.
- In the Command Prompt, enter these commands sequentially, pressing Enter after each, to repair the Boot Configuration Data:
bootrec /RebuildBcd
bootrec /fixMbr
bootrec /fixboot
- Close Command Prompt and restart your computer to check if the issue is resolved.
8. Install in Clean Boot Mode
Removing background interference is crucial when fixing installation errors. Doing a clean boot reduces conflicts by disabling unnecessary services and startup programs. This creates a stable environment where the Windows 10 installer can work without interference from third-party software or drivers.
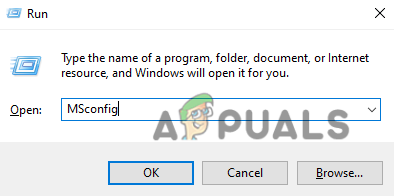
- Press Windows + R, type MSCONFIG in the Run dialog, and click OK.
- In the Boot tab, ensure Safe Boot is unchecked.
Accessing the MsConfig menu - Go to the General tab, select Selective startup, and uncheck Load startup items.
- In the Services tab, select Hide all Microsoft services and click Disable all.

Accessing the services tab - Navigate to the Startup tab and click Open Task Manager. Disable each enabled startup item by right-clicking on them and selecting Disable.

Disable the Startup items - Enable startup items one by one, restarting each time, to identify the issue.
- Repeat for Services to determine if any disabled items in Step 4 cause problems.
- When you find the problematic item or service, decide whether to reinstall or repair it if it’s a program, or disable it if it’s a service.
9. Repair Corrupted System Files
Corrupted system files can mess up the installation by causing errors or stopping important parts from working correctly. Fixing these files makes them work right again, allowing the system to install without problems or failures. This step removes obstacles caused by broken settings or needed files.
- Search for cmd, right-click and run Command Prompt as Administrator.

- Type the commands:
sfc /scannow
Dism /Online /Cleanup-Image /RestoreHealth

- Restart your PC when the processes finish.


10. Perform a System Restore
Using System Restore to revert your system to an earlier state can undo recent changes that might be causing the installation to fail. This process removes any conflicting software, updates, or drivers that were recently added and could be disrupting the installation process. By going back to a stable setup, you allow for a fresh start for the Windows 10 installation.
- Open a Run dialog (press Win + R) and type ‘rstrui’ to access the System Restore wizard.

Accessing the rstrui menu - Click Yes if prompted by User Account Control for admin access.
- In the System Restore wizard, click Next.
- Select Show more restore points, choose a suitable restore point, then click Next.

Show more restore points - Click Finish to begin the recovery. Your PC will restart and be restored to an earlier state. Verify if the “Windows 10 Installation has Failed” error is resolved.
11. Clean install Windows
If none of the solutions work, the final option is a clean install. This means erasing the drive and starting over. It removes all conflicting files, settings, or software, guaranteeing a fresh Windows 10 installation without any previous errors or corruption.
Check our article on how to clean install windows here.

Man Linux never gave me this type of issue 🙁