Fix: The Wait Operation Timed Out
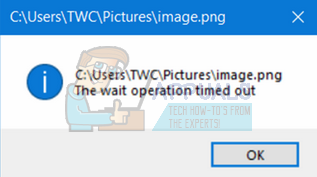
The error “The wait operation timed out” usually occurs with the Windows default applications. They occur when the operating system is unable to forward the request to open the multimedia (photos etc.) to the default Windows application. When the operation times out, we are faced with this error.
This is a very common error which arose after a Windows Update. There are limited workarounds available. If these don’t work, we have to perform a system restore or a clean install of Windows. Furthermore, you can work your way around this situation by using another multimedia player.
Solution 1: Restarting Windows Explorer and Performing Disk Checks
A simple and one of the easiest workaround is to restart the Windows Explorer using the task manager and then performing the disk check of Local Disk C (where your Windows is installed). Restarting the Explorer refreshes your entire GUI and is useful where people are unable to access it. The disk check ensures there are no discrepancies present on your disk where all the operating system is contained.
- Press Windows + R to bring up the Run Type “taskmgr” in the dialogue box to bring up your computer’s task manager.
- Click the “Processes” tab located on the top of the window.
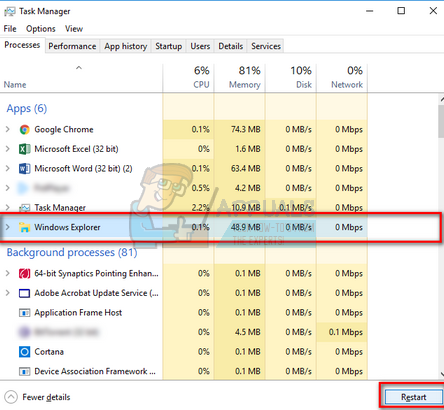
- Now locate the task of Windows Explorer in the list of processes. Click on it and press the “Restart” button present at the bottom left side of the window.
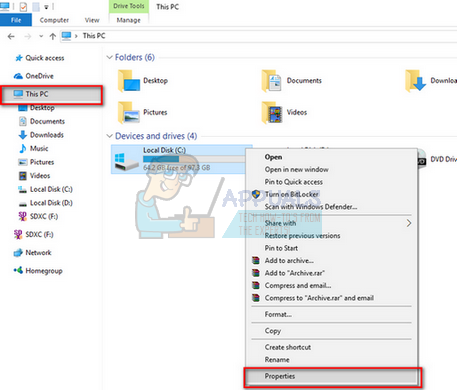
- Now press Windows + E to launch the File Explorer. Click on “This PC” using the left navigation pane. Right-click on Local Disk C and click “Properties”.
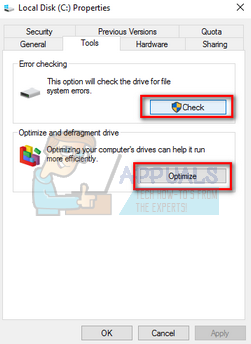
- Navigate to the tab “Tools”. Now you have to perform two operations; Disk Error Checking and Defragmentation. Perform both operations fully. It may take some time for both of them to complete so be patient.
- Restart your computer after carrying out the actions and check if this solves the problem at hand.
Solution 2: Ending the Process ‘Movies, Photos, Film or TV etc.’
If you are still unable to launch the application which is causing the problem, you should check if the application isn’t already running the background. Ideally, if the application is already running and you submit a new job (open another photo or video), it should automatically switch to it. It seems that this action isn’t being implemented which is causing the problem.
- Press Windows + R, type “taskmgr” in the dialogue box and press Enter.
- Locate the default application which is causing the trouble (it can be Photos, Film and TV etc.), right-click on it and select “End task”.

- Now try opening the media once again and check if the error message goes away.
Solution 3: Disabling/Uninstalling Antivirus Applications
Another interesting phenomenon which was observed was that it seemed there were many antivirus applications which were seen interfering with the operating system after the update and were the root of the problem. Even though the calls to default windows application by the operating system shouldn’t be interfered with, it seemed that the antivirus applications were doing so.
You should disable all antivirus applications. You can temporarily disable them or if they don’t have that function, consider uninstalling them (only if you have the product key and have access to the installation package). You can also check our article on how to Disable Avast Antivirus Temporarily.
Note: Please disable the antivirus at your own risk. This article is for information purposes only. Appuals will not be responsible for any damage done to your computer in case of being infected with malware/virus.
Solution 4: Reinstalling Photos Application
Before we try any other methods, we can try reinstalling the Photos application. Thus if there is a problem with your application, it will get fixed instantly. Do note that this solution requires administrative privileges so make sure that you are logged in with an administrator account.
- Press Windows + S, type “powershell” in the dialogue box, right-click on the application and select “Run as administrator”.
- Once in PowerShell, execute the following command:
Get-AppxPackage *photos* | Remove-AppxPackage

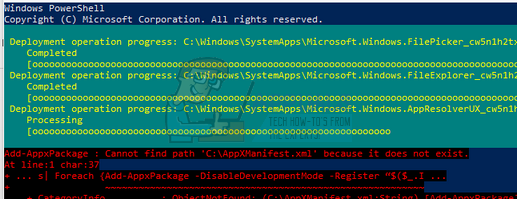
- If the uninstall worked perfectly, you would see the following process in your PowerShell windows. Wait for it to complete. After the uninstallation is completed, execute the following command to install the application again. This process will consume some time so be patient and let the process complete. Do not cancel at any stage.
Get-AppxPackage -AllUsers| Foreach {Add-AppxPackage -DisableDevelopmentMode -Register “$($_.InstallLocation)\AppXManifest.xml”}
Note: This command will install all the default apps again on your computer. Which means if you have deliberately uninstalled a default Microsoft application from your computer, it will be installed again using this method.
- After the installing process is finished, check if the Photos application works. If it doesn’t, restart your computer and check again. Do note that you might get some red lines of error during the process. Don’t panic and just let the process complete.
Solution 5: Resetting the Photos Application using Settings
Another workaround to solve this problem is to reset the Photos application using settings. This option resets all the configurations and user data associated with your Photos and makes the application go into a state when you first used it. This method solves any discrepancies that your application might be facing.
- Press Windows + S to launch the search bar. Type “settings” in the dialogue box and open the application.
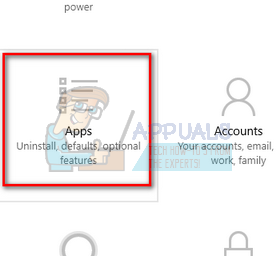
- Once in Settings, select the category of “Apps”.
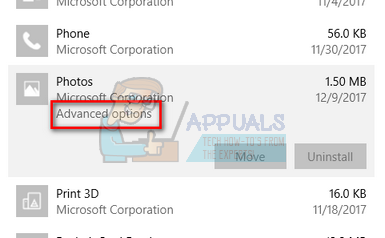
- A list of applications installed on your computer will be listed accordingly. Scroll through them until you find “Photos”. Click on “Advanced options” present under its name.
- Click on the “Reset” button present on the next screen. A new popup will come up stating that all the preferences and sign-in information will be lost. Press “Reset” anyway and let the computer reset the application.

- Once the reset is done, restart your computer and check if the problem is solved.
Solution 6: Using Another Media Application
The simplest solution without having to restore your computer is to view the media using other media viewing applications. The problem is with Windows default application, not with the file type or the extension. Hence you can download any media viewing application and use it to view the content.
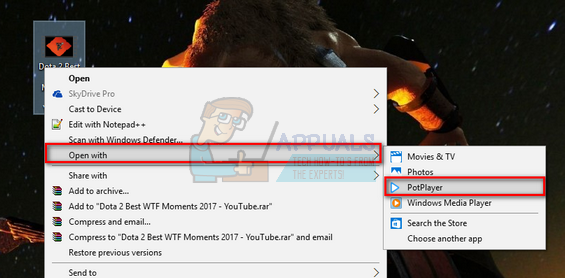
- Right-click on the file, select “Open with” and select any program other than Windows inbuilt programs.
- Hopefully, you will be able to view the content without any problem.
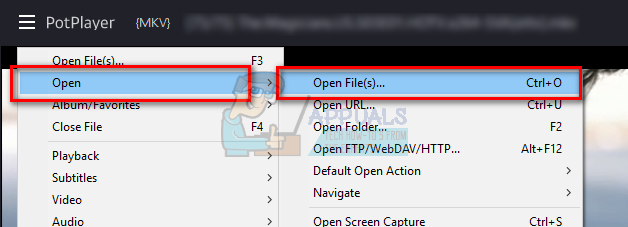
Solution 7: Using ‘Open’ Functionality
Another workaround which also worked was opening the same application and using “File > Open” the content you are trying to view. This isn’t only restricted to Windows Default applications but also valid for others which are causing this error. Instead of making Windows redirect our request to the application, we will open the application ourselves and open the file. Since there are numerous media applications out there, it is not possible to show how to open a file in each one of them but here is a small example.
Solution 8: Restoring from last Restore Point/ Doing a Clean Install
If all the above methods don’t work, we are left with no choice but to restore Windows to the last restore point. If you don’t have a last restore point, you can install a clean version of Windows. You can use the utility “Belarc” to get all your licenses saved, backup your data using external storage and then perform a clean install.
Note: Make sure to back up your data before performing this solution. Use an external hard drive or USB to save all your important files just in case.
Here is the method on how to restore Windows from the last restore point.
- Press Windows + S to launch the start menu’s search bar. Type “restore” in the dialogue box and select the first program which comes in the result.

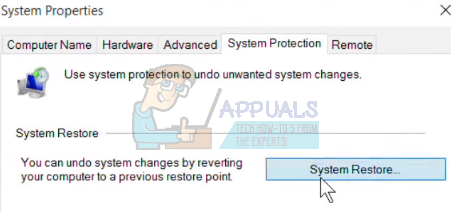
- Once in the restore settings, press System Restore present at the beginning of the window under the tab of System Protection.
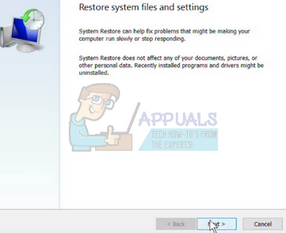
- Now a wizard will open navigating you through all the steps to restore your system. Press Next and proceed with all the further instructions.
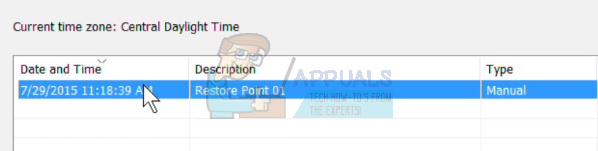
- Now select the restore point from the list of options available. If you have more than one system restore points, they will be listed here.
- Now windows will confirm your actions for the last time before it starts the system restore process. Save all your work and backup important files just in case and proceed with the process.
You can learn more about system restore to gain more knowledge about what it does and what are the processes involved.
- Once you have restored successfully, log into the system and check if the error at hand got fixed.
If you don’t have any restore points or if the system restore doesn’t work, you can do a clean install of Windows using bootable media. You check our article on how to create a bootable media. There are two ways: by using media creation tool by Microsoft and by using Rufus.
Note: If this problem occurred due to a recent Windows Update, it is recommended rolling back to the state of the system when the update wasn’t installed. If you don’t have such state, do a clean install and stop Windows Update by either disabling it or setting your network as ‘metered’. Once you are absolutely certain that the issue is fixed in some update, you can turn them on.