Virtual machines (or VMs, as they are commonly referred to as) are astounding things. You can use a virtualization program to create a virtual machine, and on a virtual machine, you can run an entire virtual computer – complete with its very own Operating System – in a window on your current system. Virtual machines are commonly used to try out different Operating Systems, test programs in a sandbox environment and to experiment with the features of a system without worrying about any repercussions. For virtualization programs such as VMware and Hyper-V to work on a computer, though, they need access to the hardware acceleration technology that comes built into almost all CPUs in this day and age.
The hardware acceleration technology built into Intel CPUs is known as Intel VT-X hardware acceleration and that in AMD CPUs is known as AMD-V, whereas other CPU manufacturers (such as AMD) bless their processors with different hardware acceleration technologies. In many cases, VT-X is, by default, disabled on Intel processors. Trying to run a virtual machine on a computer that has such a processor results in the virtualization app being used spitting out an error message that usually informs the user that the program needs hardware acceleration to function, but it looks as though they currently have the technology disabled.
Intel’s VT-X hardware acceleration technology can indeed be enabled and disabled at will, and all a user needs to do in order to enable or disable it is access to their computer’s BIOS or UEFI settings. This is true in the case of all of the iterations of Windows that are currently supported by Microsoft, including Windows 10 – the latest and greatest in a long line of Windows Operating Systems.
The process you need to go through in order to enable VT-X hardware acceleration on a computer varies slightly depending on whether the computer in question has a BIOS or is a UEFI computer. Computers that came with a version of Windows older than Windows 8 out of the box will almost always have a BIOS, whereas computers that came with Windows 8 or later out of the box are likely to have UEFI settings instead. The industry’s standard for computers is gradually but surely moving towards UEFI, so the newer a computer is, the likelier it is to have UEFI settings. To enable VT-X on a Windows 10 computer, you need to follow the steps mentioned below.
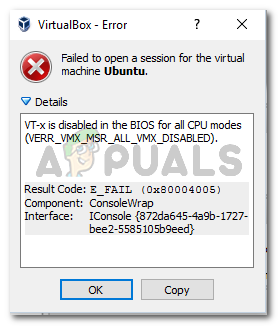
VT-x is disabled in the BIOS for all CPU modes (VERR_VMX_MSR_ALL_VMX_DISABLED
What is causing the VT-X is Disabled in the Bios for All CPU Modes (Verr_Vmx_Msr_All_Vmx_Disabled)?
We investigated this particular error message by looking at various user report and the solution that they used to fix the issue. This problem is not easy to fix since it occurs on both Windows and Linux. However, we managed to spot a few common scenarios that are known to trigger this particular error message:
Virtualization Technology (VT-X) is disabled from BIOS – Most of the time, this particular issue occurs because VT-X is disabled from the BIOS level on the machine. A 64-bit host needs to have Virtualization Technology (VTx) enabled in the BIOS. On some machines, you’ll also need to enable Virtualization Technology Directed I/O (VTd).
Your CPU doesn’t support VT-X / AMD-V – Another possible scenario is that your CPU is simply not equipped to support virtualization. This can occur with old setups that use an old CPU.
PAE and NX are disabled on the host CPU – Several users have reported that the issue was resolved after they made sure that the virtualized CPU is configured to run with Physical Adress Extension (PAE) and NX.
Allocated RAM is insufficient or exceeding the system’ capabilities – Changing the default Base Memory value has helped a lot of users encountering the same issue to resolve it entirely.
3rd-party security solution is interfering with VT-X Vt-D – There are several 3rd party AV clients that are known to cause interference with VirtualBox. Establishing a rule o uninstalling the Av client completely will resolve the conflict.
If you’re currently struggling to resolve this particular issue, this article will provide you with a list of quality troubleshooting steps. Below you have a collection of methods that other users in a similar situation have followed to get the issue resolved.
For the best results, follow the methods below in the order that they are presented until you encounter a fix that resolves the problem in your particular scenario.
Method 1: Verify whether your CPU supports VT-X/ AMD-V
Before you try anything else, let’s make sure that the system that you’re encountering the issue on is designed to accommodate VT-X (Intel) or AMD-V (AMD). If your CPU is old enough, it’s possible that it was simply not designed to support virtualization.
There are several methods that you can follow to verify if your CPU supports virtualization, but we’re going to take the easy route. SecurAble is a freeware that will help us determine your processor features and tell us whether virtualization is achievable.
Here’s a quick guide on downloading and using SecurAble to see whether your CPU supports virtualization:
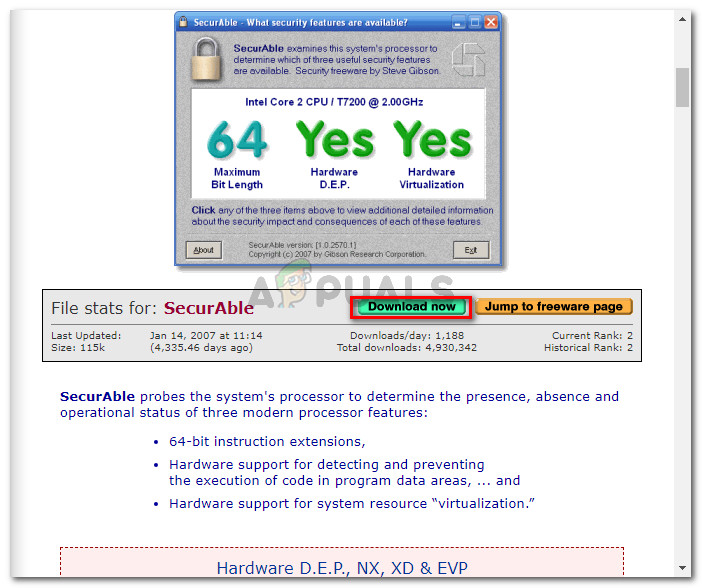
Visit this link (here), scroll down to the download section and click on Download now. Downloading SecurAble
Once the utility is downloaded, simply open the executable and you’re good to go. Click Yes at the UAC (User Account Prompt) and wait until your CPU is analyzed.
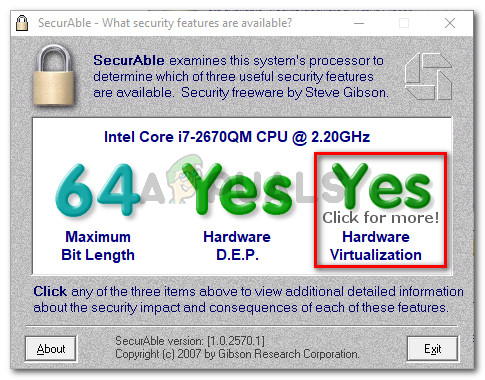
Once the results show up, check to see if you have an Yes directly above Hardware Virtualization. Hardware Virtualization is supported in this example
If you confirm that hardware virtualization is supported, you can follow the methods below in order knowing that one of them will resolve the VT-X is Disabled in the Bios for All CPU Modes (Verr_Vmx_Msr_All_Vmx_Disabled) error.
In the event that the test showed that your machine does not support hardware virtualization, you will not be able to resolve the issue using the methods below.
Method 2: Enable Virtualization Technology (VTX) from BIOS
If you’re encountering the issue on a 64-bit host, keep in mind that you’ll likely need to enable Virtualization Technology (VTx) from your BIOS settings. On some motherboards, you will also need to enable Virtualization Technology Directed I/O (VTd)
Some motherboards come with this option enabled by default, but manual user intervention or 3rd party interference might disable it.
Note: Windows Hyper V can also be responsible from disabling VT-x on your computer.
Keep in mind that the exact menu options that involve the enabling VT-X or AMD-V will be different according to your motherboard. But in general, the steps are roughly the same. Here’s a quick guide on making sure that VT-X or AMD-V is enabled in your BIOS settings:
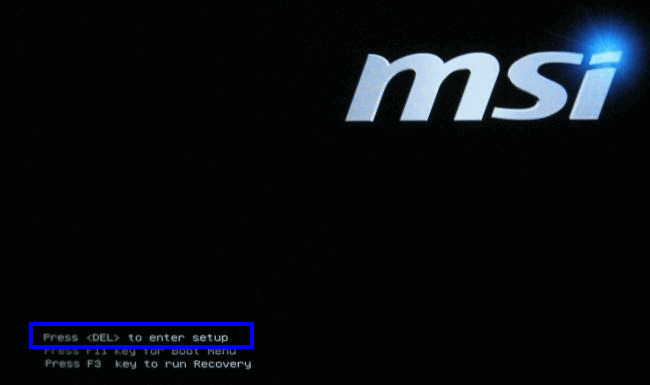
Start your machine and press the Setup key repeatedly until you enter your BIOS. The Setup key will typically be displayed on-screen immediately after you power up your computer. If you don’t see it, try repeatedly pressing the F keys (F2, F4, F8, F10, F12) or the Del key (Dell computers) until you get it right. Press [key] to enter setupNote: You can do an online search with your “*motherboard version* BIOS key ” to save yourself from experimenting with different combinations.
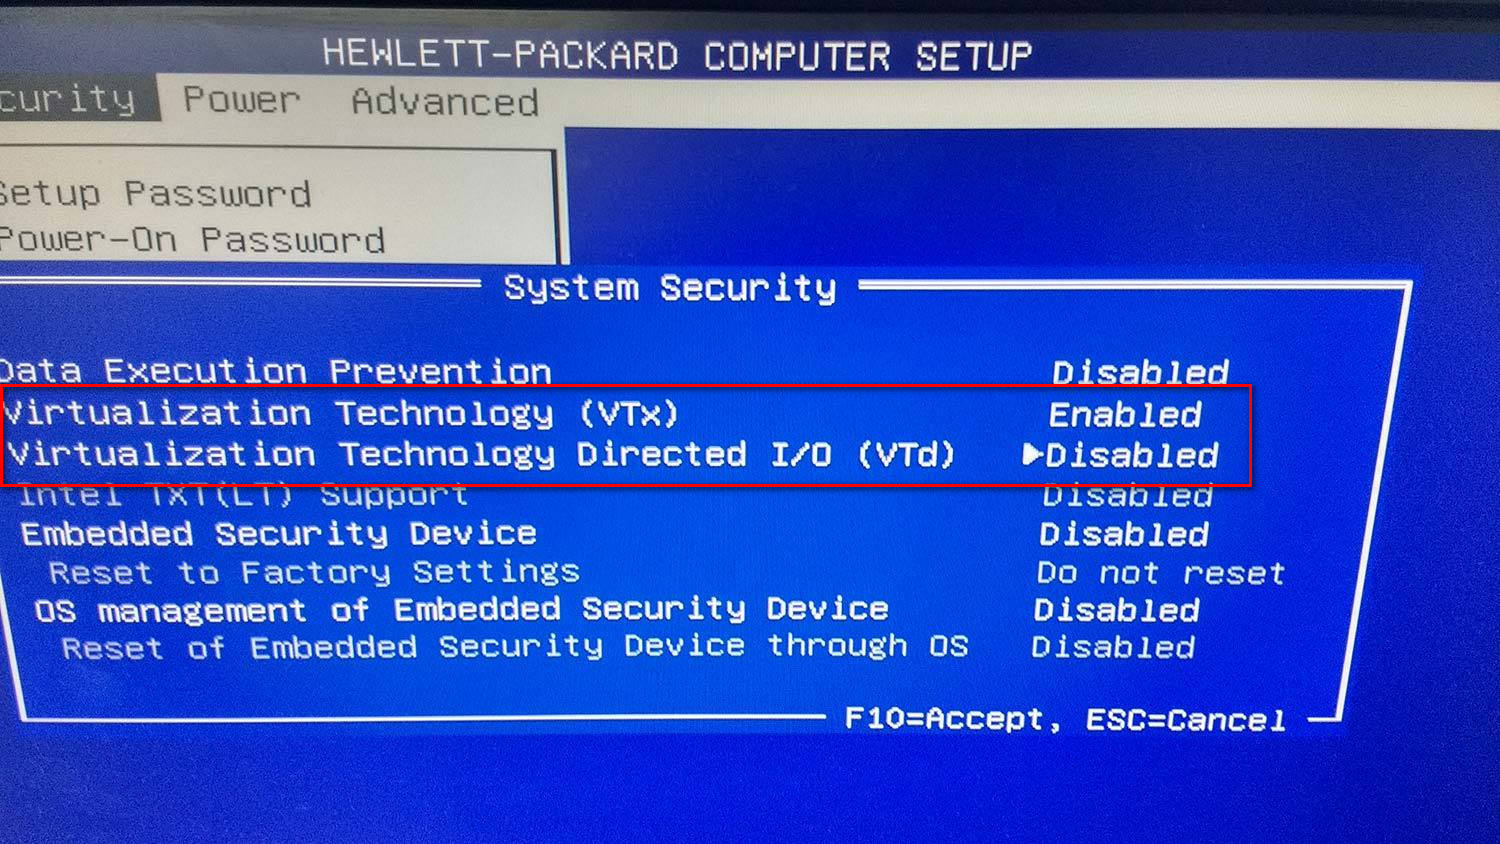
Once you enter your BIOS settings, go to Security > System Security and enable Virtualization Technology (VTx) and/or Virtualization Technology DIrected I/O (VTd).
Enabling virtualization on an HP-based BIOS
Note: Keep in mind that the names or location will be different depending on your motherboard. On some BIOS versions, you’ll need to enable Virtualization Technology from Advanced BIOS Features. On Intel-based motherboards, you can enable virtualization from Advanced > Intel(R) Virtualization Technology.
Once virtualization technology has been enabled on the machine, save your current BIOS configuration and exit your BIOS settings to allow your machine to restart.
At the next startup, see if the issue has been resolved by attempting to open the same virtual machine (the one that was previously showing the error message)
On a Computer with UEFI
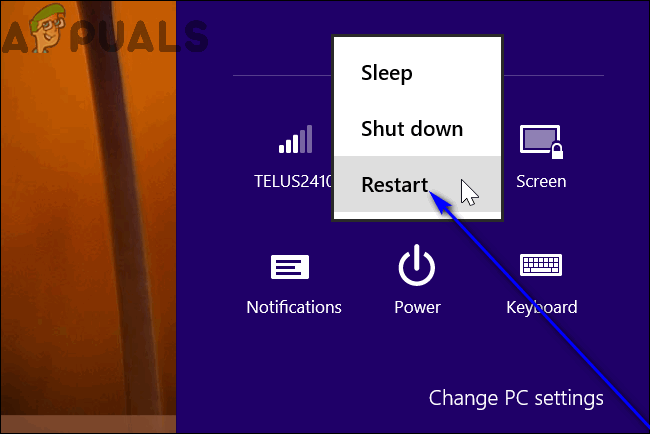
Navigate to the Power options menu in the Settings charm (if you’re using Windows 8 or 8.1) or in the Start Menu (if you’re using Windows 10).
Press and hold the Shift key on your keyboard.
With the Shift key held, click on Restart. Doing so will get the computer to display the Boot Options menu when it boots up. Restarting with Advanced Boot options
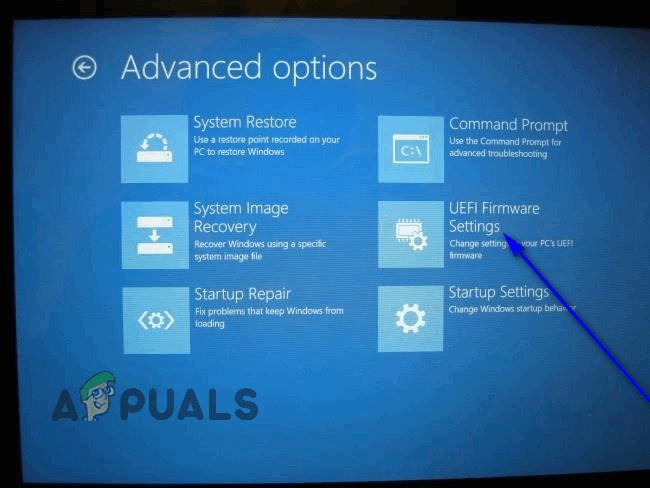
When you see the Boot Options menu, click on Troubleshoot.
Click on Advanced Options and then on UEFI Firmware Settings. UEFI Firmware Settings – Advanced options
Once you are inside your computer’s UEFI settings or BIOS, you can actually get to work on locating the option for VT-X hardware acceleration technology and enabling the feature. Simply look around in all of the BIOS’ or UEFI settings’ tabs and sections for an option for VT-X hardware acceleration – this option will be labeled something along the lines of “Intel VT-X“, “Intel Virtualization Technology“, “Virtualization Extensions” or “Vanderpool“.In most cases, this option is found under a Processor sub-menu of a Chipset, Northbridge, Advanced Chipset Control, or Advanced CPU Configuration main menu or tab.
Once you have located the option for VT-X hardware acceleration within your computer’s BIOS or UEFI settings, simply turn it on and VT-X hardware acceleration will be enabled. Be sure to save your changes and then exit the BIOS or UEFI settings (precise instructions for which you will be able to find inscribed somewhere on the BIOS or UEFI settings screen). When you get out of the BIOS or UEFI settings of your computer, your computer will boot up like it normally does.
Method 3: Enabling or Disabling PAE/NX from VirtualBox Manager
Several users struggling to resolve the same error message have reported that the issue was resolved entirely after they juggled with the Virtual device settings and enabled PAE/NX from the Settings menu. Some of them fixed their issue by Disabling PAE/NX from the Settings menu. You can check to see which one works the best for you.
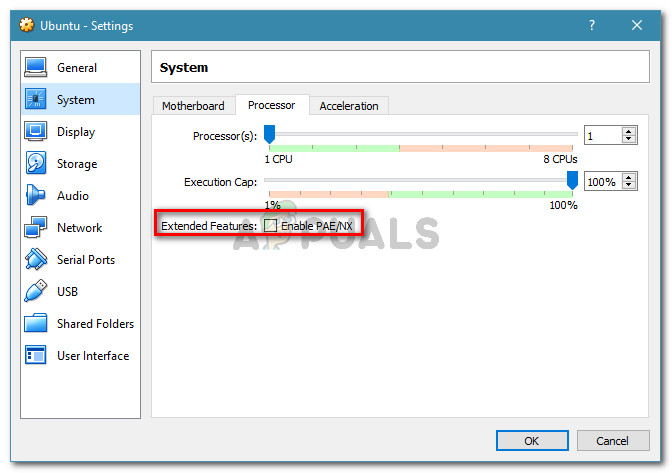
This option determines whether PAE (Physical Adress Extension) and NX capabilities of the host CPU will be exposed to the virtual machine.
Although this is not guaranteed to work, it’s typically reported to resolve the issue on 64-bit computers that are confirmed to support hardware virtualization. Here’s a quick guide on enabling PAE/NX from Oracle VM VirtualBox:
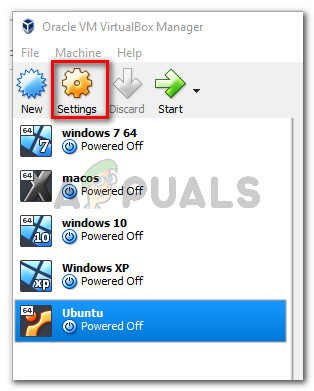
Select the machine that is showing the error message from the left-hand pane and then click on the Settings icon. Accessing the Settings menu of the failing machine
In the Settings window of the virtual machine, go to the System section (using the left pane) and access the Processor tab. Then make sure that the Enable PAE /NX checkbox (associated with Extended Features) is checked.
Save the changes and start the virtual machine again.
If you’re still seeing the VT-X is Disabled in the Bios for All CPU Modes (Verr_Vmx_Msr_All_Vmx_Disabled) error when attempting to start the virtual machine, keep in mind that some people reported they had this option enabled and disabling it fixed the error for them. We highly recommend you to try turning it off if it was already enabled. Now If that doesn’t help you as well, you can move to the next method.
Method 4: Increasing the RAM size
Several users encountering the same issue have reported that the issue was resolved after they increased the allocated RAM size and started the virtual machine again.
Update: Some users have reported that in their case, the fix involved actually reducing the allocated RAM size.
If the methods above have proven to be ineffective, follow the steps below to either increase or decrease the RAM size:
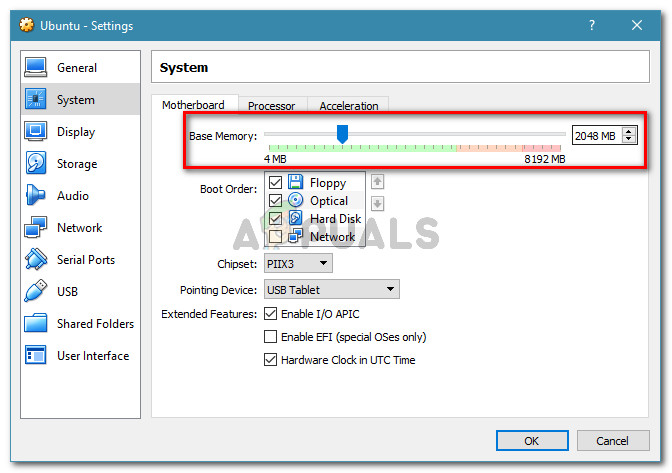
Select the virtual machine that is giving you trouble and click the Settings icon. Accessing the Settings menu of the failing machine
In the Settings window, go to System and access the Motherboard tab. Once you get there, increase the allocated memory (Base Memory) by adjusting the slider, then click Ok to save the changes. Enlarging the Base Memory
Run the virtual machine and see if the issue has been resolved. If you’re still seeing the same error, return to the Motherboard tab using step 2 to and bring the Base Memory lower than what it was initially. Shrinking the Base Memory
Run the machine again and see if the issue has been resolved.
Method 5: Preventing 3rd party antivirus from interfering with hardware virtualization
An unlikely culprit but one that has been identified to cause the issue times and times again is the 3rd party antivirus solution. Several users encountering the same issue have reported that in their case, Avast (or another 3rd party AV client) was triggering the error message.
As it turns out, several 3rd party security solutions are running something in the background to create a “sandbox” feature. This ends up locking up the virtualization features from being used by VirtualBox or a similar client.
If you’re using a 3rd party security client, disabling the real-time protection from it will not help you to resolve the issue. The same security rules will remain firmly in place whether your AV is actively running or not.
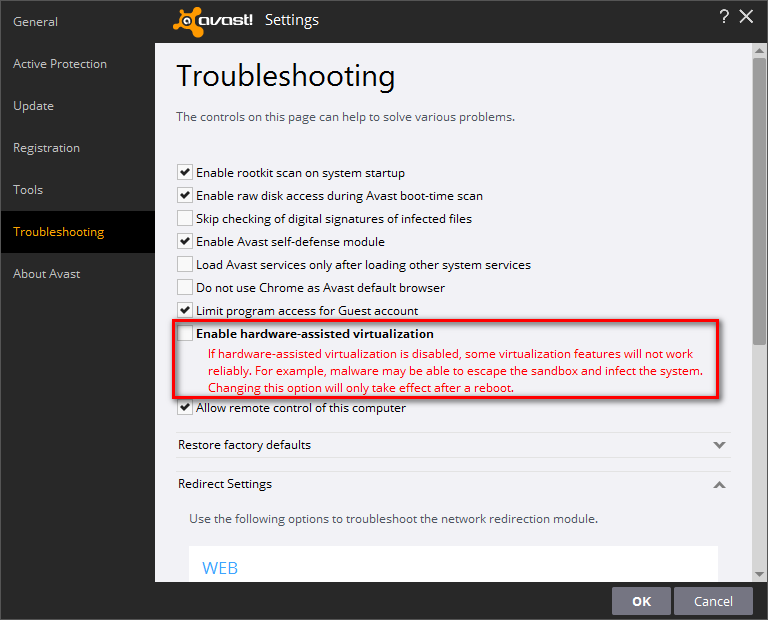
If you’re using Avast, you can prevent the security client from interfering with VirtualBox by going to Settings > Troubleshooting and unchecking the box associated with Enable hardware-assisted virtualization. Restart your system once you’ve made this change.
Disabling Avast’s hardware virtualization
If you’re using a different client, search online for the equivalent setting. But keep in mind that some 3rd party AV clients will not allow you to disable the sandboxing feature.
If that’s the case, the only solution is to uninstall your third-party AV completely from your system. You can do this easily by following this guide (here).
Kevin Arrows is a highly experienced and knowledgeable technology specialist with over a decade of industry experience. He holds a Microsoft Certified Technology Specialist (MCTS) certification and has a deep passion for staying up-to-date on the latest tech developments. Kevin has written extensively on a wide range of tech-related topics, showcasing his expertise and knowledge in areas such as software development, cybersecurity, and cloud computing. His contributions to the tech field have been widely recognized and respected by his peers, and he is highly regarded for his ability to explain complex technical concepts in a clear and concise manner.


Finally I’ve fixed it. ¡Gracias, Kevin!