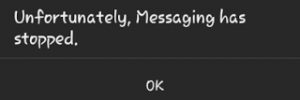
Fix: Unfortunately, Messaging has stopped
Nothing hurts more than spending close to a 1000$ on a new flagship only to find out that you are unable to send text messages. The “Unfortunately, messaging has stopped error” doesn’t discriminate between devices. You can see this error message on any manufacturer from Samsung to HTC and Huawei.
The problem with this error is that the exact cause is tricky to pinpoint. Usually, users will get this error when trying to send an SMS or view an incoming text. But some Android owners have reported that this error message appears randomly when the messaging app is quietly running in the background. There are also cases where the messaging app simply closes itself without displaying an error message.
Before we get to the fixing part, let’s take a look at the most common culprits that will trigger this error:
- Cache accumulation of the Messaging app
- A software conflict with another SMS managing app
- Firmware glitch
- Badly executed OS update
If you’re suffering from this issue, you’ve come to the right place. Below you have a collection of methods that managed to make the “Unfortunately, Messaging has stopped” error go away for a lot of users. I suggest you start with the first method and work your way down until you find a fix that works for you. Let’s begin!
1. Performing a simulated battery removal
Simulated battery removal is the equivalent of physically taking out the battery from your phone. This feature is designed for phones that have a non-removable battery but works just as well on phones with traditional batteries. If you can remove your battery do it, it’s the same thing.
Some Samsung users have reported that after performing a simulated battery removal the “Unfortunately, Messaging has stopped” stopped appearing. Depending on your manufacturer the steps might be different. On most phones, you can trigger a simulated battery removal by holding the power button for more than 10 seconds (or until the screen goes black). If that doesn’t work, try holding the power button + volume down button and see if that does the trick.
Once you manage to reboot your phone with this method, power it on again and see if the issue repeats.
2. Deleting the message folder (older Android versions)
If you text a lot, chances are you’re suffering from an overload of messages that are causing the Messaging app to crash. But keep in mind that SMS takes very little space, so most likely it’s not actually a storage problem, but more like a software glitch. The following fix has only been proven to be successful on devices running on Android Kit Kat or lower. But even if you’re on a newer version, it’s still worth a shot.
I am aware that some of you won’t be able to perform this trick. If the error message appears immediately after you open the Messaging app, skip to Method 3. If you can get inside the messaging app, here’s what you need to do:
- Open your Messaging App.
- Tap and hold on an SMS (don’t open it).
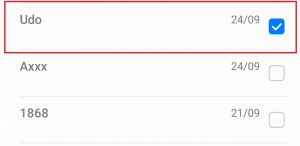
- Once the selection menu appears, tap on Select All. On some Android versions, Select all will be hidden inside the action menu (three-dot icon).
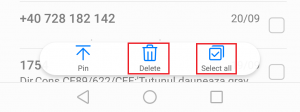
- Tap on Delete.
- Restart your device and see if the error message reappears.
3. Force Closing the Messaging app
Before we delete any app data, let’s start by force closing the Messaging app and see if the app manages to instantiate itself without the error message. Here’s what you need to do:
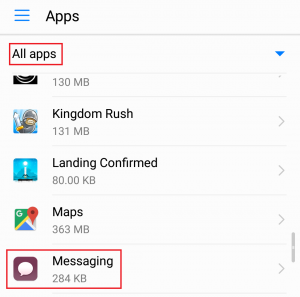
- Go to Settings > Apps (Applications > Application Manager) and select the All Apps filter.
- Scroll down and tap on Messaging.
- Tap on Force Close (Force Stop) and wait until the option becomes greyed out.
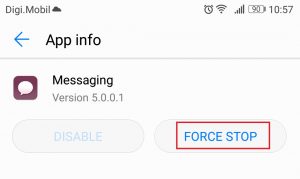
- Open the Messaging app again and see if the issue repeats.
4. Clearing data and cache from the Messaging app
This is one of the methods with the highest rate of success. If the issue originates from the Messaging app, performing the following steps will make the error go away. Don’t worry, this won’t delete your SMS messages, but you can make a backup with them just in case. Here’s what to do:
- Go to Settings > Apps (Applications > Application Manager).
- Select the All Apps filter and scroll down to the Messaging app.
- Select Storage.
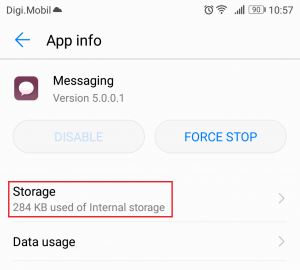
- Tap on Clear Data and wait for the option to become greyed out.
- Tap on Clear Cache and wait until it shows 0.0 KB.

- Restart your device and open the Messaging app again.
5. Using Safe Mode to pinpoint the software conflict
If you start your phone in Safe Mode, all third-party applications will be prevented from running. This will serve the purpose of letting us know if the error message is caused a software you recently installed.
There are known software conflicts between some SMS managing apps and the built-in messaging client. If you won’t encounter the error message while in Safe Mode, you’ll need to do some uninstalling. Here are the exact steps you need to take:
- Press and hold the Power button until the menu appears.
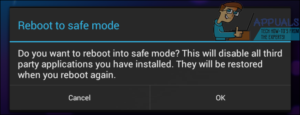
- Press and hold the Power off icon until the hidden pop-up appears.
- When you get the message asking if you want to restart in Safe Mode, tap Ok.
- Wait for your device to restart in Safe Mode. You can confirm this by checking if you have a Safe Mode icon in the bottom right section of the screen.
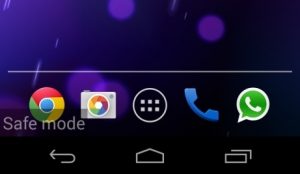
- Once you’re fully booted into Safe Mode, try opening up the Messaging app again. If the message shows up again, skip to Method 6. If it doesn’t appear, continue with the steps below.
- Now go to Settings > Apps (Application > Application Manager) and select the All apps filter.
- Think about the apps you installed around the time the error first started appearing. Uninstall every app that you think might be causing the conflict. If you have an additional SMS managing app, uninstall that also.
- Restart your device. Your Android should boot up back into normal mode.
- Open the Messaging app again and see if the error message is gone.
6. Wiping the cache partition from Recovery Mode
An OS update might have messed with some permissions and facilitated the apparition of the “Unfortunately, Messaging has stopped” error. It’s common for OS software updates to mess up with some app caches after the new firmware is set into place. If the methods above have been unsuccessful, let’s try wiping up the cache partition. Here’s how:
Note: Keep in mind that the steps of entering recovery mode might differ from device to device. If the steps below won’t take you into Recovery Mode, do an online search on “how to enter recovery mode + *YourPhoneModel*”
- Turn off your device completely.
- Press and hold the Volume up button + Home button + Power button. If your device doesn’t have a Home button, try holding just the Power button + Volume Up button.
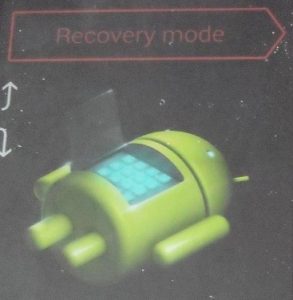
- Immediately after your phone vibrates, release the Power button but keep holding the other button(s).
- After you see the Android System recovery screen, release the remaining buttons.
- Use the volume keys to navigate downwards and highlight wipe cache partition.
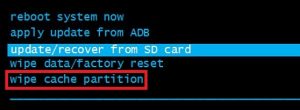
- Press the Power button to select it and confirm.
- Wait for the process to complete. You will be prompted to restart your device at the end of it. Press the power button again to initiate the restart.
- After your device boots up again, open the Messaging app and see if the issue repeats.
7. Using an alternative SMS managing app
If the above methods have been unsuccessful and you’re not keen on using the built-in messaging app, you could go for a third-party solution. If you’re determined to restore the functionality of the default SMS app, skip to the last method.
To help you pick the best possible solution, we created a list of the most proficient SMS managing apps. Some of them have a lot more customization alternatives than the default Android app, so consider it an improvement. Just install one of the following apps and set it as the default messaging app.
Note: If you don’t want to install an additional app for SMS purposes, you can use Facebook Messenger to access your SMS. But make sure you have the latest version of the app.
8. Performing a Factory Reset
If you got all the way down here without a successful fix, your last option is to perform a factory reset. The good news is, this will most likely fix your issue indefinitely. Before you go on with it you should know that a factory reset will delete any personal data that isn’t present on the SD card. All your photos, videos, music, contacts, and SMSs will be lost unless you make a backup. Here’s how to perform a factory reset:
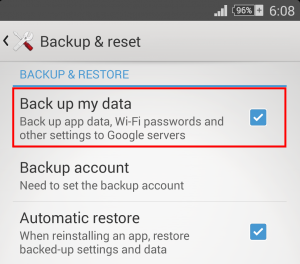
- Go to Settings and scroll down to Backup & reset.
- Tap on Backup & Reset and make sure Back up my data is enabled. If it’s not, enable the checkbox next to the option.
- Scroll down and tap on Factory data reset.
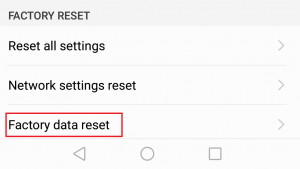
- Confirm your selection by tapping on the Reset Phone (reset the device).
- Once you hit Erase everything, the factory resets process will begin.
- It might take over 10 minutes to complete and your device will restart at the end of it.
- Wait for your system to reinitialize the preloaded apps and try opening up the Messaging app again.